Page 10 of 187

Contents
Overview
Controls and features
Cockpit16
Instrument cluster18
Indicator and warning lamps20
Hazard warning flashers24
Warning triangle24
First-aid kit24
Refueling25
Fuel specifications26
Tire inflation pressure26
Opening and closing:
Keys30
Electronic vehicle
immobilizer31
Central locking system32
Opening and closing from the
outside32
With the key32
With the remote control33
Opening and closing from the
inside36
Luggage compartment lid36
Electric power windows38
Sunroof, coupe39
Convertible top40
Adjustments:
Seats49
Mirrors50
Safety systems:
Safety belts52
Airbags54
Transporting children safely56
Driving:
Ignition lock58
Starting the engine59
Switching off the engine60
Parking brake60
Manual transmission61
Automatic transmission with
Steptronic62Turn signals/High beams64
Washer/Wiper system65
Rear window defroster66
Cruise Control67
Everything under control:
Odometer68
Tachometer68
Fuel gauge68
Coolant temperature gauge69
Service Interval Display69
Clock70
Computer70
Technology for safety and
convenience:
Automatic Stability Control
plus Traction (ASC+T)73
Dynamic Stability Control
(DSC)74
Lamps:
Parking lamps/Low beams76
Fog lamps76
Interior lamps77
Reading lamps78
Controlling the climate
for pleasant driving:
Heating and ventilation80
Heating and ventilation/
Air conditioner84
Seat heating89
Contents
Page 20 of 187

20n
Indicator and warning lamps
Technology that monitors itself
Indicator and warning lamps that are
identified by "
l
" are tested for proper
functioning whenever the ignition key is
turned. They each light up once for
different periods of time.
If a fault should occur in one of these
systems, the corresponding lamp does
not go out after the engine is started or
it lights up while the vehicle is moving.
You will see how to react to this in the
following section.
Red: stop immediately
Battery charge current
l
The battery is no longer being
charged. The alternator drive
belt is defective or there is a malfunc-
tion in the charging circuit of the alter-
nator. Please contact the nearest BMW
center.
If the drive belt is defective, stop
and switch off the engine immedi-
ately to prevent overheating and
serious engine damage. If the drive belt
is defective, increased steering effort is
also required.
<
Engine oil pressure
l
Stop the vehicle immediately
and switch off the engine.
Check the engine oil level and top off as
required. If the oil level is correct,
please contact the nearest BMW
center.
Do not continue driving, as the
engine could sustain serious
damage from inadequate lubrication.
<
Brake hydraulic system
l
The brake fluid level is too low.
Before driving further, be sure to
read the notes on pages 104 and 126.
Brake hydraulic system warning
lamp for Canadian models.
Page 29 of 187
Overview
Controls and features
Operation, maintenance
Owner service procedures
Technical data
Index Advanced technology
29n
IndexDataTechnologyRepairsMaintenanceControlsOverview
Turn signals/High beams64
Washer/Wiper system65
Rear window defroster66
Cruise control67
Everything under control:
Odometer68
Tachometer68
Fuel gauge68
Coolant temperature gauge69
Service Interval Display69
Clock70
Computer70
Technology for safety
and convenience:
Automatic Stability Control
plus Traction (ASC+T)73
Dynamic Stability Control
(DSC)74
Lamps:
Parking lamps/Low beams76
Fog lamps76
Interior lamps77
Reading lamps78
Controlling the climate
for pleasant driving:
Heating and ventilation80
Heating and ventilation/
Air conditioner84
Seat heating89Cabin convenience:
Glove compartment90
Storage compartments90
Storage boxes90
Beverage holder91
Ashtray91
Cigarette lighter92
Loading and transporting
cargo:
coupe:
Roll-up cover93
Partition net93
Cargo loading94
Roof-mounted luggage
rack95
Page 37 of 187

37n
IndexDataTechnologyRepairsMaintenanceControlsOverview
Luggage compartment lidTo lock separatelyTurn the master key to the right past the
pressure point and then pull it out in the
horizontal position
This locks the luggage compartment
and disengages it from the central
locking system. If you then surrender
only the door and ignition key (refer to
page 30), access to the vehicle through
the luggage compartment is not
possible. This is recommended for valet
parking, for instance.Manual operation(in the event of electrical malfunction)
Turn the master key in the lock of the
luggage compartment lid to the left to
the stop Ð the luggage compartment lid
opens slightly.
The luggage compartment is locked
again as soon as it is closed.
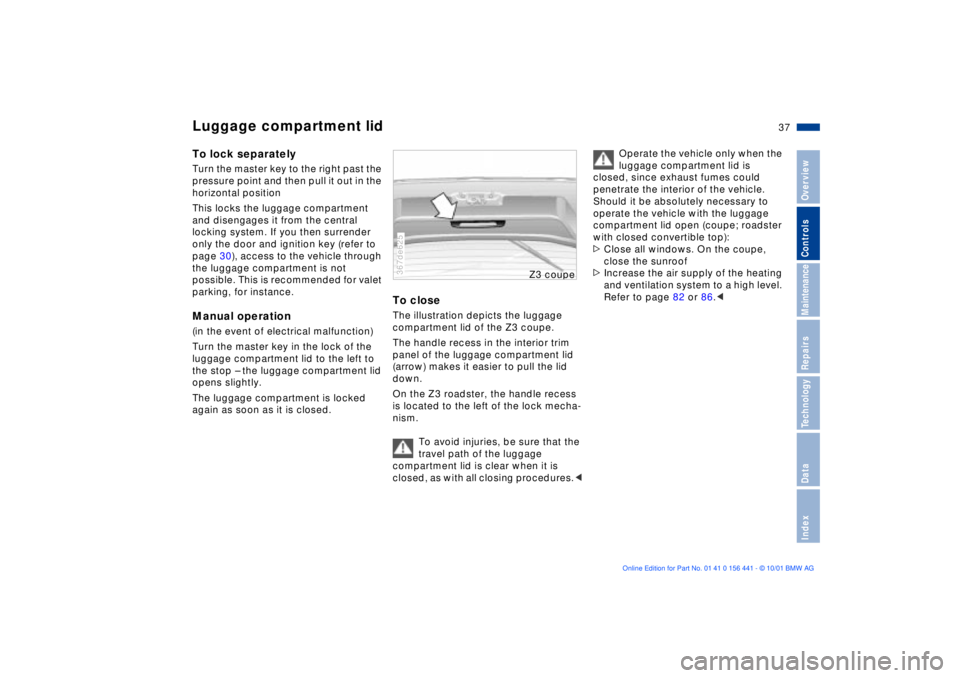
To closeThe illustration depicts the luggage
compartment lid of the Z3 coupe.
The handle recess in the interior trim
panel of the luggage compartment lid
(arrow) makes it easier to pull the lid
down.
On the Z3 roadster, the handle recess
is located to the left of the lock mecha-
nism.
To avoid injuries, be sure that the
travel path of the luggage
compartment lid is clear when it is
closed, as with all closing procedures.< 367de625
Z3 cou
pe
Operate the vehicle only when the
luggage compartment lid is
closed, since exhaust fumes could
penetrate the interior of the vehicle.
Should it be absolutely necessary to
operate the vehicle with the luggage
compartment lid open (coupe; roadster
with closed convertible top):
>Close all windows. On the coupe,
close the sunroof
>Increase the air supply of the heating
and ventilation system to a high level.
Refer to page 82 or 86.<
Page 80 of 187
80n
367de715
Heating and ventilation
Page 81 of 187
81n
IndexDataTechnologyRepairsMaintenanceControlsOverview
Heating and ventilation 1 Airflow toward the windshield and
side windows
2 Airflow toward upper body
The rotary dials allow infinitely-vari-
able regulation of the air supply. You
can change the airflow direction with
the lever in the center of the vent or
by rotating the vent grille82
3 Front footwell ventilation
4 Air distribution onto the
>windows
>upper body
>footwell
All intermediate settings are
possible82
5 Temperature82
6 Air supply
The heating and ventilation are oper-
ational beginning with position 182
Page 82 of 187

82n
Heating and ventilationAir distribution
You can direct the airflow onto
the windows , toward the
upper body and into the foot-
well . All intermediate settings are
possible. In this position , a small
volume of air is directed onto the
windows in order to keep them free of
condensation.
A "6 o'clock" position is recommended
as the normal operating setting.
Temperature
In order to increase the temper-
ature of the passenger compart-
ment, turn to the right (red). For
rapid heating, turn completely to the
right. Then select an interior tempera-
ture which is pleasant for you.
Air supply
You can select blower speeds
from 1 to 4. Both heating and
ventilation become more effec-
tive as the air supply rate is increased.
In position 0, the blower and the heater
are switched off.
Draft-free ventilationYou can adjust the air outlets for the
upper body area completely for your
personal comfort:
Use the rotary dial 2 to open and close
the vent throughout an infinitely-vari-
able range. With the levers 1, you can
direct the airflow to the side. Adjust the
airflow up or down by rotating the vent
grill.
Set the outlets so that the air flows past
you and is not directed straight at you.367de224
Rapid ventilation1. Set the blower speed control for the
air supply rate to position 4
2. Turn the rotary temperature control
completely to the left (blue). Then
select an interior temperature which
is pleasant for you
3. Rotary control for air distribution in
position
4. Open the outlets for the upper body
area.367de705
Page 83 of 187

83n
IndexDataTechnologyRepairsMaintenanceControlsOverview
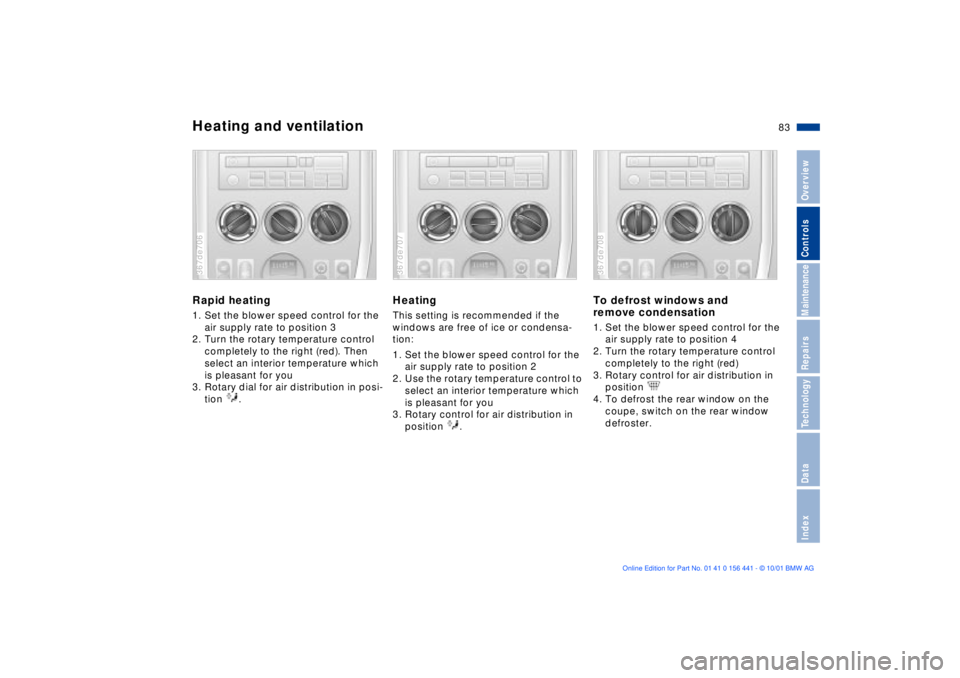
Heating and ventilationRapid heating1. Set the blower speed control for the
air supply rate to position 3
2. Turn the rotary temperature control
completely to the right (red). Then
select an interior temperature which
is pleasant for you
3. Rotary dial for air distribution in posi-
tion .367de706
HeatingThis setting is recommended if the
windows are free of ice or condensa-
tion:
1. Set the blower speed control for the
air supply rate to position 2
2. Use the rotary temperature control to
select an interior temperature which
is pleasant for you
3. Rotary control for air distribution in
position .367de707
To defrost windows and
remove condensation 1. Set the blower speed control for the
air supply rate to position 4
2. Turn the rotary temperature control
completely to the right (red)
3. Rotary control for air distribution in
position
4. To defrost the rear window on the
coupe, switch on the rear window
defroster.367de708