2002 BMW Z3 clock
[x] Cancel search: clockPage 10 of 187

Contents
Overview
Controls and features
Cockpit16
Instrument cluster18
Indicator and warning lamps20
Hazard warning flashers24
Warning triangle24
First-aid kit24
Refueling25
Fuel specifications26
Tire inflation pressure26
Opening and closing:
Keys30
Electronic vehicle
immobilizer31
Central locking system32
Opening and closing from the
outside32
With the key32
With the remote control33
Opening and closing from the
inside36
Luggage compartment lid36
Electric power windows38
Sunroof, coupe39
Convertible top40
Adjustments:
Seats49
Mirrors50
Safety systems:
Safety belts52
Airbags54
Transporting children safely56
Driving:
Ignition lock58
Starting the engine59
Switching off the engine60
Parking brake60
Manual transmission61
Automatic transmission with
Steptronic62Turn signals/High beams64
Washer/Wiper system65
Rear window defroster66
Cruise Control67
Everything under control:
Odometer68
Tachometer68
Fuel gauge68
Coolant temperature gauge69
Service Interval Display69
Clock70
Computer70
Technology for safety and
convenience:
Automatic Stability Control
plus Traction (ASC+T)73
Dynamic Stability Control
(DSC)74
Lamps:
Parking lamps/Low beams76
Fog lamps76
Interior lamps77
Reading lamps78
Controlling the climate
for pleasant driving:
Heating and ventilation80
Heating and ventilation/
Air conditioner84
Seat heating89
Contents
Page 25 of 187

25n
IndexDataTechnologyRepairsMaintenanceControlsOverview
Refueling
Before filling the tank, switch off
the engine, as otherwise fuel
cannot flow into the tank and the
"Service Engine Soon" warning lamp
may come on, refer to page 22.<
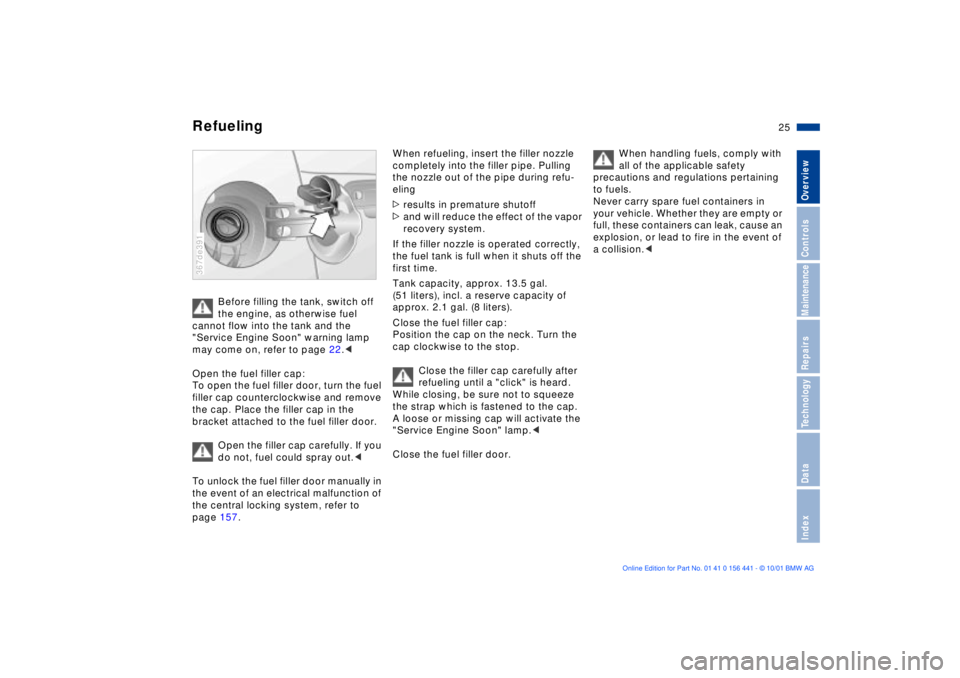
Open the fuel filler cap:
To open the fuel filler door, turn the fuel
filler cap counterclockwise and remove
the cap. Place the filler cap in the
bracket attached to the fuel filler door.
Open the filler cap carefully. If you
do not, fuel could spray out.<
To unlock the fuel filler door manually in
the event of an electrical malfunction of
the central locking system, refer to
page 157.
367de391
When refueling, insert the filler nozzle
completely into the filler pipe. Pulling
the nozzle out of the pipe during refu-
eling
>results in premature shutoff
>and will reduce the effect of the vapor
recovery system.
If the filler nozzle is operated correctly,
the fuel tank is full when it shuts off the
first time.
Tank capacity, approx. 13.5 gal.
(51 liters), incl. a reserve capacity of
approx. 2.1 gal. (8 liters).
Close the fuel filler cap:
Position the cap on the neck. Turn the
cap clockwise to the stop.
Close the filler cap carefully after
refueling until a "click" is heard.
While closing, be sure not to squeeze
the strap which is fastened to the cap.
A loose or missing cap will activate the
"Service Engine Soon" lamp.<
Close the fuel filler door.
When handling fuels, comply with
all of the applicable safety
precautions and regulations pertaining
to fuels.
Never carry spare fuel containers in
your vehicle. Whether they are empty or
full, these containers can leak, cause an
explosion, or lead to fire in the event of
a collision.<
Page 29 of 187

Overview
Controls and features
Operation, maintenance
Owner service procedures
Technical data
Index Advanced technology
29n
IndexDataTechnologyRepairsMaintenanceControlsOverview
Turn signals/High beams64
Washer/Wiper system65
Rear window defroster66
Cruise control67
Everything under control:
Odometer68
Tachometer68
Fuel gauge68
Coolant temperature gauge69
Service Interval Display69
Clock70
Computer70
Technology for safety
and convenience:
Automatic Stability Control
plus Traction (ASC+T)73
Dynamic Stability Control
(DSC)74
Lamps:
Parking lamps/Low beams76
Fog lamps76
Interior lamps77
Reading lamps78
Controlling the climate
for pleasant driving:
Heating and ventilation80
Heating and ventilation/
Air conditioner84
Seat heating89Cabin convenience:
Glove compartment90
Storage compartments90
Storage boxes90
Beverage holder91
Ashtray91
Cigarette lighter92
Loading and transporting
cargo:
coupe:
Roll-up cover93
Partition net93
Cargo loading94
Roof-mounted luggage
rack95
Page 55 of 187

55n
IndexDataTechnologyRepairsMaintenanceControlsOverview
AirbagsSitting correctly with airbags
For your safety, comply with the
following instructions for the
airbags. If you do not, the airbags may
not be able to provide their maximum
protection. All passengers in the vehicle
should be aware of and comply with this
information:
The airbags are supplemental restraint
devices designed to provide extra
protection; they are not a substitute for
safety belts. Wear your safety belt at
all times.
Adjust your seat to a position that is
comfortable for you, allowing unre-
stricted vehicle operation, and is not
closer to the steering wheel than neces-
sary.
Always grasp the steering wheel by the
steering wheel rim, keeping your hands
at the "9-o'clock" and "3-o'clock" posi-
tions in order to minimize any risk of
injury to hands or arms if the airbag does
deploy.
There should not be any other persons,
animals or objects between the airbag
and the passenger in that seat.
Do not use the cover panel for the front
airbag on the passenger side as a
storage area.
Do not apply adhesive materials to the
cover panels of the airbags, cover them
or modify them in any other way.
If you use a child-restraint system, read
carefully and comply with the instruc-
tions on page 56.
Be sure that child-restraint systems are
installed correctly and with the greatest
possible distance from the airbag in the
side trim panel. Do not allow children to
lean out of the child-restraint system in
the direction of the side trim panel.
Otherwise, serious injuries could occur
if the airbag is triggered.<
Even when you have complied with all
of these guidelines, there is still a small
residual risk of minor facial, hand and
arm injuries from airbag deployment
occurring in isolated instances.
The ignition and inflation noise may
cause a mild temporary hearing loss in
extremely sensitive individuals.
Corresponding airbag safety precau-
tions are provided on both sun visors
and the instrument panel (US models).
For additional information concerning
the airbag system, refer to pages 130
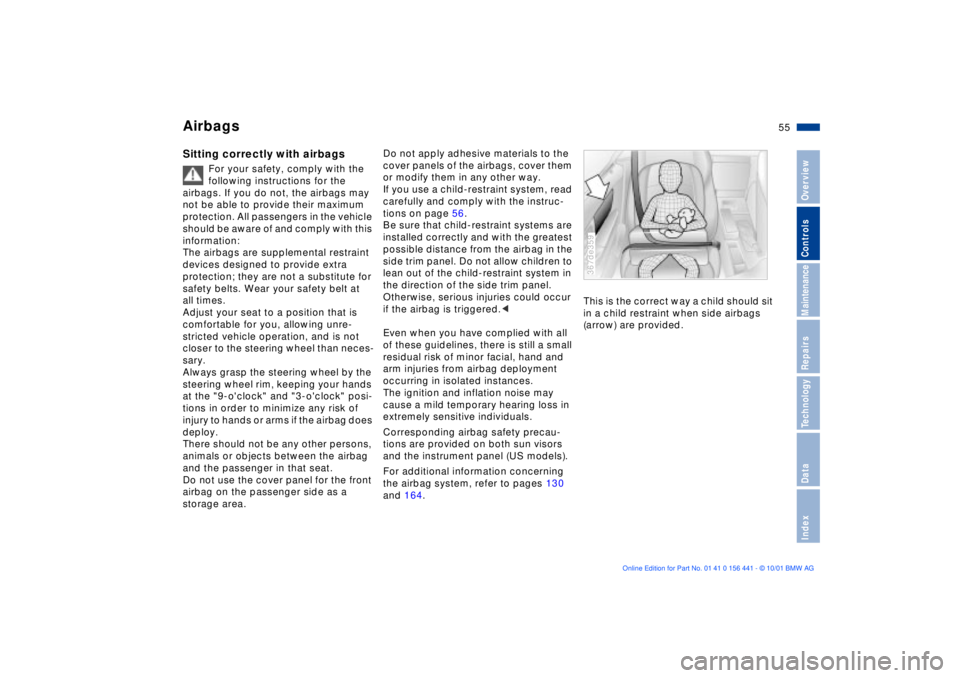
and 164.This is the correct way a child should sit
in a child restraint when side airbags
(arrow) are provided.
367de359
Page 70 of 187

70n
Clock Computer
*
You can correct the time by pressing
the buttons (arrows) with a sharp object
such as a ball-point pen.
Set the clock forward by pressing the
right button; set the clock back by
pressing the left button.367de728
Mode selectionYou can call up the computer data in
the display from ignition switch posi-
tion 1 with the turn indicator lever.
Press the button briefly to select the
next display mode.
In addition, you can display the time by
pressing the button.
With the button, the calculations
for average fuel consumption and
speed are reset and begin again.367us041
TimeThe display is provided at ignition key
position 1 or higher. In ignition key
position 0, the time is displayed for
approx. 8 seconds by pressing the
button.
Following a power loss, the clock auto-
matically switches to the setting mode:
the colon flashes. Two dashes are
displayed for entering the hour.367de716
Page 82 of 187

82n
Heating and ventilationAir distribution
You can direct the airflow onto
the windows , toward the
upper body and into the foot-
well . All intermediate settings are
possible. In this position , a small
volume of air is directed onto the
windows in order to keep them free of
condensation.
A "6 o'clock" position is recommended
as the normal operating setting.
Temperature
In order to increase the temper-
ature of the passenger compart-
ment, turn to the right (red). For
rapid heating, turn completely to the
right. Then select an interior tempera-
ture which is pleasant for you.
Air supply
You can select blower speeds
from 1 to 4. Both heating and
ventilation become more effec-
tive as the air supply rate is increased.
In position 0, the blower and the heater
are switched off.
Draft-free ventilationYou can adjust the air outlets for the
upper body area completely for your
personal comfort:
Use the rotary dial 2 to open and close
the vent throughout an infinitely-vari-
able range. With the levers 1, you can
direct the airflow to the side. Adjust the
airflow up or down by rotating the vent
grill.
Set the outlets so that the air flows past
you and is not directed straight at you.367de224
Rapid ventilation1. Set the blower speed control for the
air supply rate to position 4
2. Turn the rotary temperature control
completely to the left (blue). Then
select an interior temperature which
is pleasant for you
3. Rotary control for air distribution in
position
4. Open the outlets for the upper body
area.367de705
Page 86 of 187

86n
Heating and ventilation/Air conditioner
*
Air distribution
You can direct the flow of air
onto the windows , toward
the upper body and into the
footwell . All intermediate settings
are possible. In position , a small
volume of air is directed onto the
windows in order to keep them free of
condensation.
A "6 o'clock" position is recommended
as the normal operating setting.
Temperature
In order to increase the temper-
ature of the passenger compart-
ment, turn to the right (red). For
rapid heating, turn completely to the
right. Then select an interior tempera-
ture which is pleasant for you.
Air supply
You can select blower speeds
from 1 to 4. Both heating and
ventilation become more effec-
tive as the air supply rate is increased.
In position 0, the blower and the heater
are switched off.
Air conditioner
The air is cooled and dehumidi-
fied and Ð depending on the
temperature setting Ð warmed
again when the air conditioner system
is switched on. Depending on the
weather, the windshield may fog over
briefly when the engine is started.
Use the button to switch the air condi-
tioner off at outside temperatures
below approx. 41 7(+5 6). This will
help to prevent condensation from
forming on the windows.
If the windows fog over after switching
the air conditioner off, switch it back
on.
Condensation forms in the air
conditioner system during opera-
tion, which then exits under the vehicle.
Traces of condensed water of this kind
are thus normal.<
Recirculated-air mode
If there are unpleasant odors in
the outside air, you can tempo-
rarily block the supply of the
incoming air. The system then recircu-
lates the air currently within the vehicle.
If the windows fog over in the
recirculated-air mode, switch this
mode off and increase the air supply as
required.<
Page 126 of 187

126n
Coolant Brake fluid To add coolantWait until the engine cools before
removing the cap from the expansion
tank. The needle of the coolant gauge
in the instrument cluster must be
located in the blue field; otherwise,
there is a danger of scalding.
1. Turn the cap slightly counterclock-
wise in order to allow accumulated
pressure to escape, then open
2. If the coolant is low, slowly add
coolant until the correct level is
reached Ð do not overfill.
The coolant is a mixture of water and
extended-duty antifreeze with corrosion
inhibitor. Always maintain the
prescribed all-season 50 : 50 mixture
ratio for year-round protection against
internal corrosion. No other additives
are required.
Replace the coolant regularly. Refer to
the Service and Warranty Information
Booklet (US models) or the Warranty
and Service Guide Booklet (Canadian
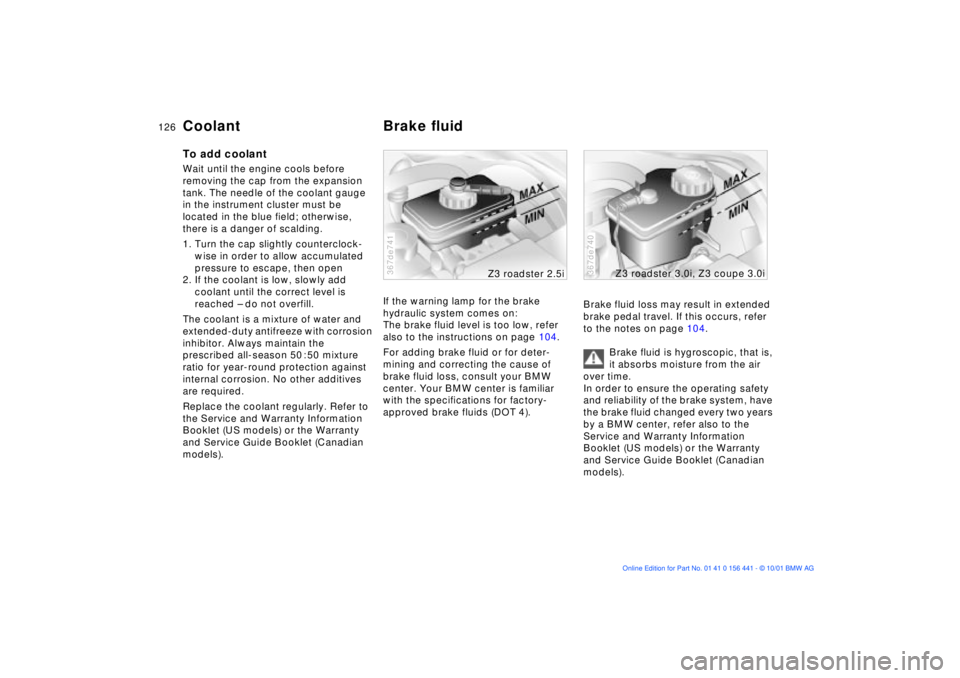
models).If the warning lamp for the brake
hydraulic system comes on:
The brake fluid level is too low, refer
also to the instructions on page 104.
For adding brake fluid or for deter-
mining and correcting the cause of
brake fluid loss, consult your BMW
center. Your BMW center is familiar
with the specifications for factory-
approved brake fluids (DOT 4).
367de741
Z3 roadster 2.5i
Brake fluid loss may result in extended
brake pedal travel. If this occurs, refer
to the notes on page 104.
Brake fluid is hygroscopic, that is,
it absorbs moisture from the air
over time.
In order to ensure the operating safety
and reliability of the brake system, have
the brake fluid changed every two years
by a BMW center, refer also to the
Service and Warranty Information
Booklet (US models) or the Warranty
and Service Guide Booklet (Canadian
models).367de740
Z3 roadster 3.0i, Z3 coupe 3.0i