2002 BMW Z3 door
[x] Cancel search: doorPage 56 of 187
56n
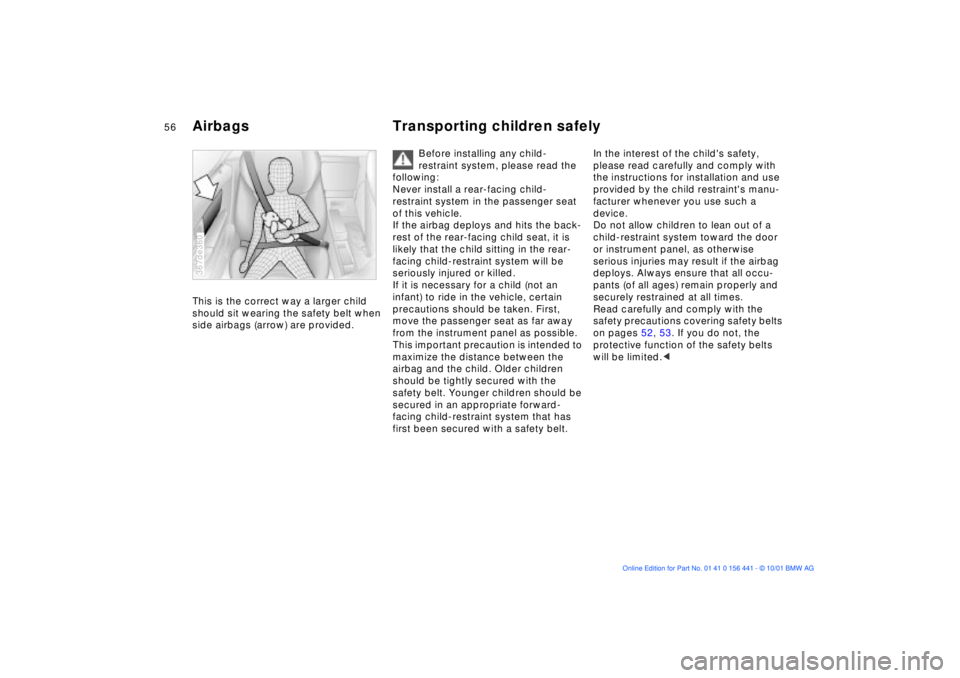
Airbags Transporting children safely This is the correct way a larger child
should sit wearing the safety belt when
side airbags (arrow) are provided.367de360
Before installing any child-
restraint system, please read the
following:
Never install a rear-facing child-
restraint system in the passenger seat
of this vehicle.
If the airbag deploys and hits the back-
rest of the rear-facing child seat, it is
likely that the child sitting in the rear-
facing child-restraint system will be
seriously injured or killed.
If it is necessary for a child (not an
infant) to ride in the vehicle, certain
precautions should be taken. First,
move the passenger seat as far away
from the instrument panel as possible.
This important precaution is intended to
maximize the distance between the
airbag and the child. Older children
should be tightly secured with the
safety belt. Younger children should be
secured in an appropriate forward-
facing child-restraint system that has
first been secured with a safety belt.
In the interest of the child's safety,
please read carefully and comply with
the instructions for installation and use
provided by the child restraint's manu-
facturer whenever you use such a
device.
Do not allow children to lean out of a
child-restraint system toward the door
or instrument panel, as otherwise
serious injuries may result if the airbag
deploys. Always ensure that all occu-
pants (of all ages) remain properly and
securely restrained at all times.
Read carefully and comply with the
safety precautions covering safety belts
on pages 52, 53. If you do not, the
protective function of the safety belts
will be limited.<
Page 58 of 187
58n
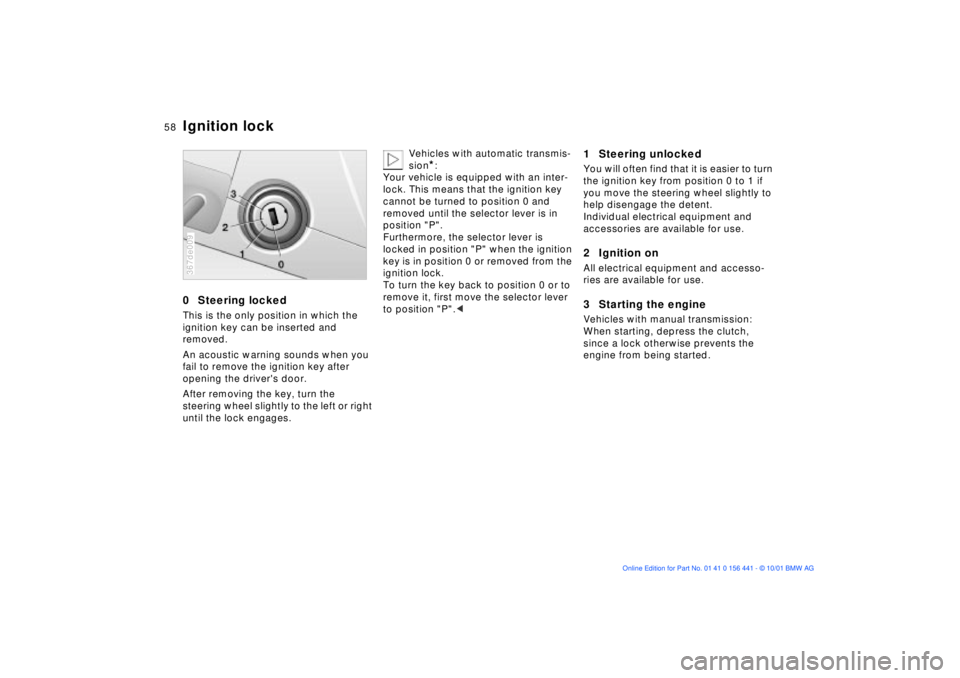
0 Steering lockedThis is the only position in which the
ignition key can be inserted and
removed.
An acoustic warning sounds when you
fail to remove the ignition key after
opening the driver's door.
After removing the key, turn the
steering wheel slightly to the left or right
until the lock engages.367de009
Vehicles with automatic transmis-
sion
*:
Your vehicle is equipped with an inter-
lock. This means that the ignition key
cannot be turned to position 0 and
removed until the selector lever is in
position "P".
Furthermore, the selector lever is
locked in position "P" when the ignition
key is in position 0 or removed from the
ignition lock.
To turn the key back to position 0 or to
remove it, first move the selector lever
to position "P".<
1 Steering unlockedYou will often find that it is easier to turn
the ignition key from position 0 to 1 if
you move the steering wheel slightly to
help disengage the detent.
Individual electrical equipment and
accessories are available for use.2 Ignition onAll electrical equipment and accesso-
ries are available for use.3 Starting the engineVehicles with manual transmission:
When starting, depress the clutch,
since a lock otherwise prevents the
engine from being started.
Ignition lock
Page 76 of 187

76n
Parking lamps/Low beams Fog lampsParking lamps (position lamps/
side marker lamps)
Position 1
With the switch in this position,
vehicle lighting on both sides is
on.
Low beams
Position 2
When you switch the ignition off
while the low beams are still on,
only the parking lamps (position lamps/
side marker lamps) remain on.
Instrument panel lightingIn order to adjust the illumination
intensity, turn the pulled switch. 367us021
LIGHTS ON warningWhen you open the driver's door after
turning the ignition key to position 0,
a warning signal sounds for a few
seconds to remind you if the headlamps
have not been switched off.Daytime driving lamps
*
The headlamps are automatically
switched on for daylight driving at
ignition key position 2.
Front fog lamps
*
A green indicator lamp comes
on in the instrument cluster to
indicate that the front fog lamps
are on.
It is not possible to switch on the front
fog lamps together with the high
beams.
367us023
Page 90 of 187
90n
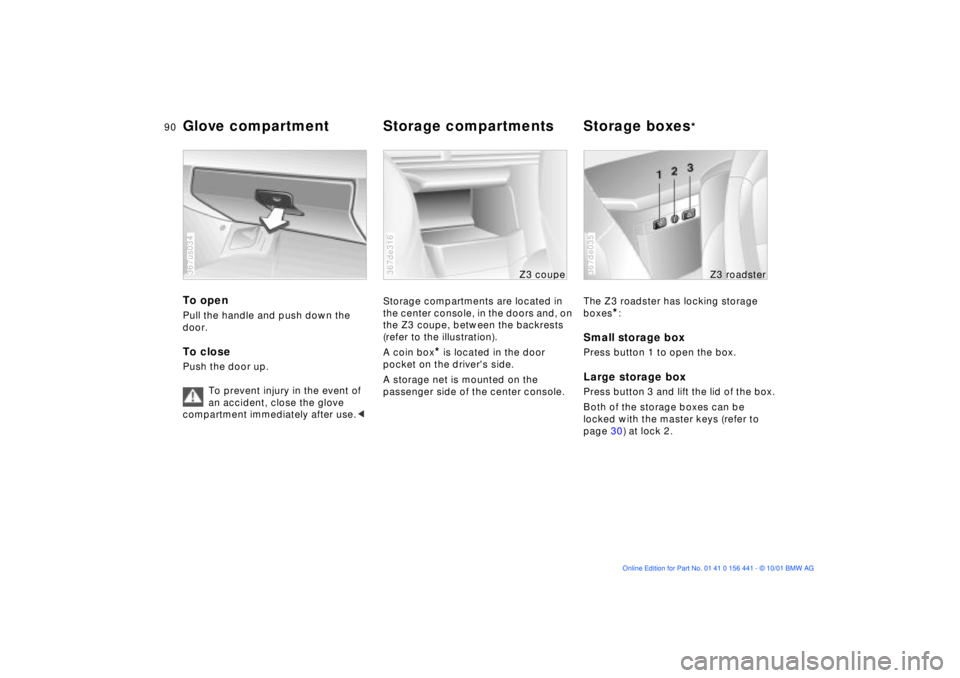
To open Pull the handle and push down the
door.To closePush the door up.
To prevent injury in the event of
an accident, close the glove
compartment immediately after use.< 367us034
Storage compartments are located in
the center console, in the doors and, on
the Z3 coupe, between the backrests
(refer to the illustration).
A coin box
* is located in the door
pocket on the driver's side.
A storage net is mounted on the
passenger side of the center console.
367de316
Z3 cou
pe
The Z3 roadster has locking storage
boxes
*:
Small storage boxPress button 1 to open the box.Large storage boxPress button 3 and lift the lid of the box.
Both of the storage boxes can be
locked with the master keys (refer to
page 30) at lock 2.367de035
Z3 roadster
Glove compartment Storage compartments Storage boxes
*
Page 105 of 187
105n
IndexDataTechnologyRepairsMaintenanceControlsOverview
Winter operationThe onset of winter is often accompa-
nied by rapid changes in weather.
Adaptations in driving style should be
accompanied by preparations on the
vehicle itself to ensure that your vehicle
operation through the winter remains
safe and trouble-free.CoolantEnsure that the coolant contains the
year-round 50 : 50 ratio of water and
antifreeze with corrosion inhibitor. This
mixture provides protection against
freezing down to approx. Ð 34 7
(Ð 37 6). Replace the coolant every
three years.LocksBMW door lock deicer can be used to
free the doors if they are frozen. This
deicer also contains lubricant.
After using deicer, treatment with BMW
lock cylinder grease is recommended.
Rubber seals and components In order to prevent freezing, apply BMW
rubber treatment to weather-stripping
on the doors, hood, luggage compart-
ment and to convertible top seals.
A full range of car-care products is
available from your BMW center.< Snow chainsBMW snow chains
* can be mounted on
both summer and winter tires. Mount
them in pairs on the rear wheels only.
Comply with the manufacturer's safety
precautions. Do not exceed a speed
limit of 30 mph (50 km/h) when driving
with chains. As an exception in this
situation, we recommend that you
switch off the ASC+T/DSC
* system
when snow chains are mounted. Refer
to pages 73, 74.
Starting offWhen starting from a full stop or
"rocking" free in deep snow, we recom-
mend that you switch off the ASC+T/
DSC
* system, refer to pages 73, 74.
Driving on low-traction road
surfacesUse smooth, gentle pressure to control
the accelerator pedal. Avoid excessive
engine speeds and shift to the next
higher gear at an early point. Shift down
into the next lowest gear when
approaching uphill or downhill grades.
Maintain an adequate distance between
yourself and the vehicle ahead.Brakes Winter road conditions substantially
reduce the traction available between
the tires and the road surface.
Remember that Ð in every situation Ð
braking distances will be significantly
longer as a result of this.
ABS is intended to prevent the wheels
from locking during brake applications,
thus helping to maintain vehicle stability
and steering response.
Page 112 of 187

112n
Tire replacementTractionThe traction grades, from highest to
lowest, are AA, A, B and C.
Those grades represent the tire's ability
to stop on wet pavement as measured
under controlled conditions on speci-
fied government test surfaces of
asphalt and concrete. A tire marked C
may have poor traction performance.
The traction grade assigned to
this tire is based on straight-
ahead braking traction tests, and does
not include acceleration, cornering,
hydroplaning, or peak traction charac-
teristics.<
TemperatureThe temperature grades are A (the
highest), B and C, representing the
tire's resistance to the generation of
heat and its ability to dissipate heat
when tested under controlled condi-
tions on a specified indoor laboratory
test wheel.
Sustained high temperature can cause
the material of the tire to degenerate
and reduce tire life, and excessive
temperature can lead to sudden tire
failure. The grade C corresponds to a
level of performance which all
passenger vehicle tires must meet
under the Federal Motor Vehicle Safety
Standard No. 109. Grades B and A
represent higher levels of performance
on the laboratory test wheel than the
minimum required by law.
The temperature grade for this tire
is established for a tire that is
properly inflated and not overloaded.
Excessive speed, under-inflation, or
excessive loading, either separately or
in combination, can cause heat buildup
and possible tire failure.<
Uniform Tire Quality GradingQuality grades can be found where
applicable on the tire sidewall between
tread shoulder and maximum section
width. For example:
Tread wear 200
Traction AA
Temperature A
Do not use retreaded tires as this
could negatively affect driving
safety. This is due to the possible varia-
tions in casing structures and, in some
cases, to their extreme age, factors
which can lead to a decrease in their
durability.<
Page 130 of 187
130n
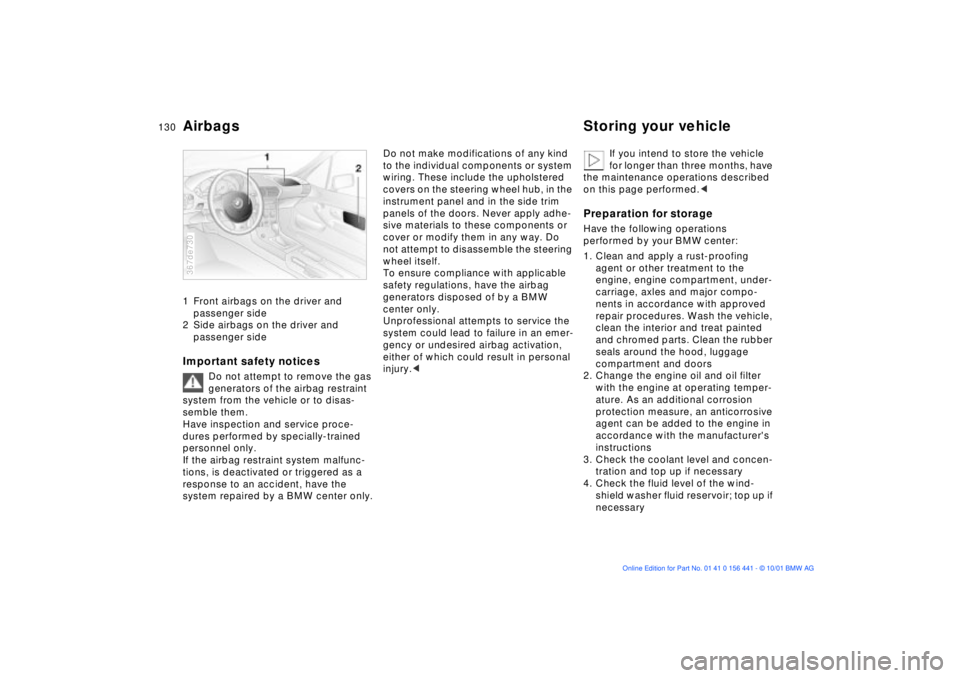
Airbags Storing your vehicle1 Front airbags on the driver and
passenger side
2 Side airbags on the driver and
passenger sideImportant safety notices
Do not attempt to remove the gas
generators of the airbag restraint
system from the vehicle or to disas-
semble them.
Have inspection and service proce-
dures performed by specially-trained
personnel only.
If the airbag restraint system malfunc-
tions, is deactivated or triggered as a
response to an accident, have the
system repaired by a BMW center only.
367de730
Do not make modifications of any kind
to the individual components or system
wiring. These include the upholstered
covers on the steering wheel hub, in the
instrument panel and in the side trim
panels of the doors. Never apply adhe-
sive materials to these components or
cover or modify them in any way. Do
not attempt to disassemble the steering
wheel itself.
To ensure compliance with applicable
safety regulations, have the airbag
generators disposed of by a BMW
center only.
Unprofessional attempts to service the
system could lead to failure in an emer-
gency or undesired airbag activation,
either of which could result in personal
injury.< If you intend to store the vehicle
for longer than three months, have
the maintenance operations described
on this page performed.<
Preparation for storageHave the following operations
performed by your BMW center:
1. Clean and apply a rust-proofing
agent or other treatment to the
engine, engine compartment, under-
carriage, axles and major compo-
nents in accordance with approved
repair procedures. Wash the vehicle,
clean the interior and treat painted
and chromed parts. Clean the rubber
seals around the hood, luggage
compartment and doors
2. Change the engine oil and oil filter
with the engine at operating temper-
ature. As an additional corrosion
protection measure, an anticorrosive
agent can be added to the engine in
accordance with the manufacturer's
instructions
3. Check the coolant level and concen-
tration and top up if necessary
4. Check the fluid level of the wind-
shield washer fluid reservoir; top up if
necessary
Page 135 of 187

Overview
Controls and features
Operation, maintenance
Owner service procedures
Technical data
Index Advanced technology
135n
IndexDataTechnologyRepairsMaintenanceControlsOverview
Replacement procedures:
Onboard tool kit136
Windshield wiper blades136
Lamps and bulbs137
Master key with battery
lamp143
Remote control144
Wheel change146
Battery153
Fuses156
In case of electrical
malfunction:
Power convertible top157
Fuel filler door157
Assistance, giving and
receiving:
Jump-starting158
Towing the vehicle159
Repairs