Page 143 of 187
143n
IndexDataTechnologyRepairsMaintenanceControlsOverview
Master key with battery lampIf light intensity drops, renew the
battery to safeguard against acid
escaping.Battery change1. Remove the cover on the back of the
key with a screwdriver
2. Insert a new battery (refer to the illus-
tration) of the same type (CR 2025)
so that it touches the contacts
3. Snap the cover into place and apply
uniform pressure to seat it.365de132
Return used batteries to a
recycling point or to your BMW
center.<
Page 145 of 187

145n
IndexDataTechnologyRepairsMaintenanceControlsOverview
Remote control4. Press and hold down button 1 (see
illustration). Maintain pressure on
button 1 while rapidly pressing
button 2 three times in succession
within a period of 10 seconds
5. Release button 1. LED 3 flashes
slowly for a maximum of 10 seconds
6. The central locking system engages
and releases all lock mechanisms in
rapid succession to indicate that the
initialization procedure has been
successfully completed.
If the LED does not flash or if the
central locking system fails to respond,
the initialization procedure will have to
be repeated.
All additional master keys with remote
control for your vehicle (up to a
maximum of four units) must now be
initialized. Make sure that no more than
30 seconds is allowed to elapse
between the individual initialization
procedures. Repeat steps 4 and 5. The
central locking system will respond to
each initialization procedure as
descriped in step 6.
In the event of a system malfunction,
please contact your BMW center, who
can also provide you with replacement
keys.Turn each new master key into
ignition position 2 (ignition
switched on) and back again to allow
the electronic vehicle immobilizer (refer
to page 31) to recognize the new key.
To prevent unauthorized use of the
master key, surrender only the door and
ignition key 3 or the spare key 2 (refer
to page 30) for valet parking, for
instance.<
Page 147 of 187
147n
IndexDataTechnologyRepairsMaintenanceControlsOverview
Wheel change>Wedge (wheel chock)
Next to the jack
>Lug wrench, centering pin, spark-
plug wrench and lifting handle
In the luggage compartment under
the floor mat
>Spare wheel
Stored under the luggage compart-
ment on the vehicle floor and
protected with a storage tray.
Remove the spare wheelZ3 coupe:
Remove the floor of the storage
compartment (arrow) at the right in the
luggage compartment.
Release the Velcro
¨ fastener and
remove the warning triangle.
367de317
Z3 cou
pe
Z3 roadster:
Loosen the screw connection on the
floor of the storage tray (arrow) at the
right in the luggage compartment and
remove the compartment.367de318
Z3 roadster
Page 149 of 187

149n
IndexDataTechnologyRepairsMaintenanceControlsOverview
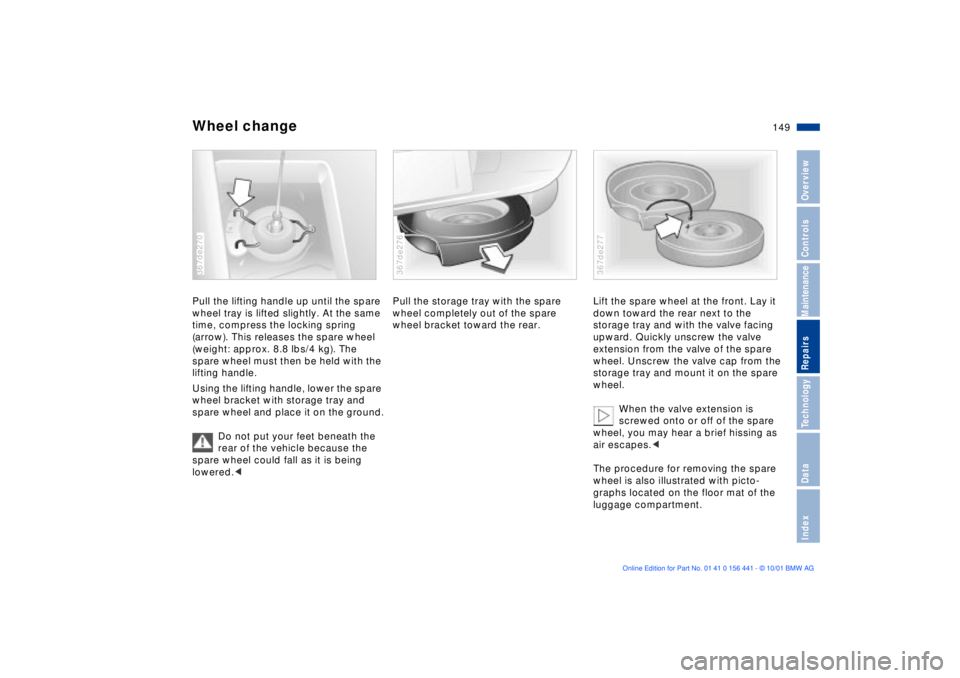
Wheel changePull the lifting handle up until the spare
wheel tray is lifted slightly. At the same
time, compress the locking spring
(arrow). This releases the spare wheel
(weight: approx. 8.8 lbs/4 kg). The
spare wheel must then be held with the
lifting handle.
Using the lifting handle, lower the spare
wheel bracket with storage tray and
spare wheel and place it on the ground.
Do not put your feet beneath the
rear of the vehicle because the
spare wheel could fall as it is being
lowered.< 367de270
Pull the storage tray with the spare
wheel completely out of the spare
wheel bracket toward the rear.367de276
Lift the spare wheel at the front. Lay it
down toward the rear next to the
storage tray and with the valve facing
upward. Quickly unscrew the valve
extension from the valve of the spare
wheel. Unscrew the valve cap from the
storage tray and mount it on the spare
wheel.
When the valve extension is
screwed onto or off of the spare
wheel, you may hear a brief hissing as
air escapes.<
The procedure for removing the spare
wheel is also illustrated with picto-
graphs located on the floor mat of the
luggage compartment.367de277
Page 151 of 187

151n
IndexDataTechnologyRepairsMaintenanceControlsOverview
Wheel change5. Position the jack on the vehicle:
>Plastic elements are mounted on
the vehicle floorpan for positioning
the jack. These positions (refer to
the arrows) are located approx.
16 in (40 cm) from the front wheel
opening and
10 in (25 cm) from the rear wheel
opening
>If necessary, remove snow, ice or
mud from the plastic elements
>Screw the jack arm up until the
jack just fits under the vehicle367de382
>Position the jack at the jacking
point closest to the flat tire so that
the jack base is vertically below
the jacking point and the entire
surface of the head of the jack will
move squarely into the recess of
the plastic element when the jack
is cranked
>Crank the jack until the wheel you
are changing is off of the ground.
6. Unscrew the lug bolts and remove
the wheel
7. Remove accumulations of mud or
dirt from the mounting surfaces of
the wheel and hub. Clean the lug
bolts367de065
8. Take the centering pin from the
vehicle tool kit. Insert the centering
pin together with the plastic cap
into one of the bolt sockets
9. Position the spare wheel and screw
at least two lug bolts into opposite
bolt sockets. Remove the centering
pin
10. Screw in the remaining lug bolts.
Tighten all the bolts down correctly
11. Lower the jack and remove it from
beneath the vehicle
12. Tighten the lug bolts in a diagonal
pattern367de066
Page 153 of 187

153n
IndexDataTechnologyRepairsMaintenanceControlsOverview
Battery
Battery posts, terminals and
related accessories contain lead
and lead compounds. Wash hands after
handling.<
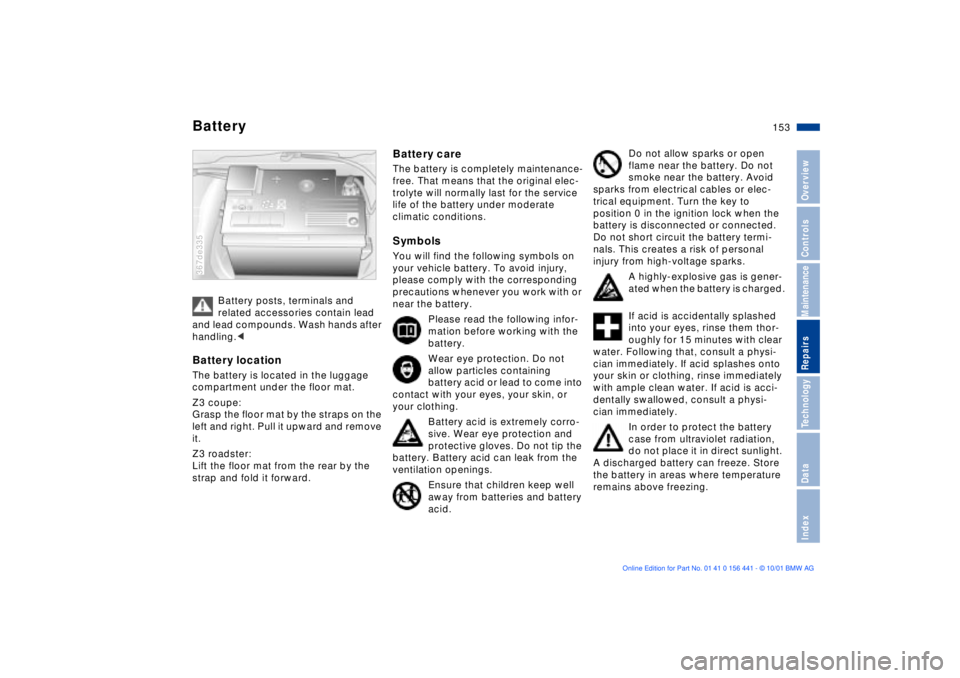
Battery locationThe battery is located in the luggage
compartment under the floor mat.
Z3 coupe:
Grasp the floor mat by the straps on the
left and right. Pull it upward and remove
it.
Z3 roadster:
Lift the floor mat from the rear by the
strap and fold it forward.367de335
Z3 d Z3
Battery careThe battery is completely maintenance-
free. That means that the original elec-
trolyte will normally last for the service
life of the battery under moderate
climatic conditions.SymbolsYou will find the following symbols on
your vehicle battery. To avoid injury,
please comply with the corresponding
precautions whenever you work with or
near the battery.
Please read the following infor-
mation before working with the
battery.
Wear eye protection. Do not
allow particles containing
battery acid or lead to come into
contact with your eyes, your skin, or
your clothing.
Battery acid is extremely corro-
sive. Wear eye protection and
protective gloves. Do not tip the
battery. Battery acid can leak from the
ventilation openings.
Ensure that children keep well
away from batteries and battery
acid.
Do not allow sparks or open
flame near the battery. Do not
smoke near the battery. Avoid
sparks from electrical cables or elec-
trical equipment. Turn the key to
position 0 in the ignition lock when the
battery is disconnected or connected.
Do not short circuit the battery termi-
nals. This creates a risk of personal
injury from high-voltage sparks.
A highly-explosive gas is gener-
ated when the battery is charged.
If acid is accidentally splashed
into your eyes, rinse them thor-
oughly for 15 minutes with clear
water. Following that, consult a physi-
cian immediately. If acid splashes onto
your skin or clothing, rinse immediately
with ample clean water. If acid is acci-
dentally swallowed, consult a physi-
cian immediately.
In order to protect the battery
case from ultraviolet radiation,
do not place it in direct sunlight.
A discharged battery can freeze. Store
the battery in areas where temperature
remains above freezing.
Page 155 of 187

155n
IndexDataTechnologyRepairsMaintenanceControlsOverview
BatteryRemoval and installation
Do not disconnect the battery
cables when the engine is running.
Disconnecting the battery cables when
the engine is running will cause a
voltage surge which will damage the
vehicle's onboard electronics.
Do not make any modifications in the
wires leading to the positive terminal. If
you do so, the battery safety terminal's
safety function will no longer be guaran-
teed. Repair and disposal must be
performed by trained technicians only.<
When removing the battery, disconnect
the negative terminal first, then the
positive terminal.
Unscrew the battery retaining clamp.
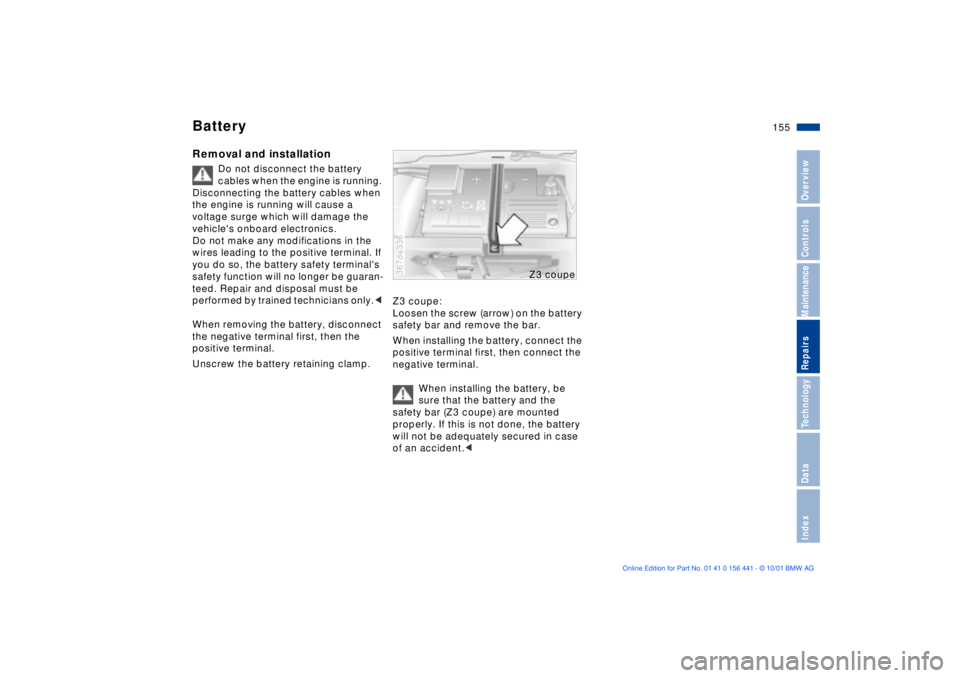
Z3 coupe:
Loosen the screw (arrow) on the battery
safety bar and remove the bar.
When installing the battery, connect the
positive terminal first, then connect the
negative terminal.
When installing the battery, be
sure that the battery and the
safety bar (Z3 coupe) are mounted
properly. If this is not done, the battery
will not be adequately secured in case
of an accident.< 367de336
Z3 cou
pe
Page 157 of 187
157n
IndexDataTechnologyRepairsMaintenanceControlsOverview
Power convertible top
*
Fuel filler door
Closing manually For roadsters with electrical power
convertible top
*, the convertible top
drive unit is located in the luggage
compartment behind the left side trim
panel.
Turn the clip at the top of the trim panel
to the left or right and swing the trim
panel to the side.
Turn the T-pin a half turn to the left
(refer to the illustration).
The convertible top drive unit is disen-
gaged and the convertible top can be
operated manually, refer to page 40.
Please have your BMW center eliminate
the defect and reengage the drive.
367de285
Z3 roadster
Releasing manuallyThe illustration shows the example
of the Z3 roadster.
Operation and function for the
Z3 coupe is the same as for the
Z3 roadster.
Pull the button at the right in the
luggage compartment sharply (arrow).
Please consult your BMW center to
have the defect corrected.367de372
Z3 roadster