2002 BMW M6 CONVERTIBLE key
[x] Cancel search: keyPage 101 of 186

101n
OverviewControlsMaintenanceRepairsDataIndex
Parking lamps (side marker
lamps)
With the switch in this position,
the front, rear and side vehicle
lighting is switched on.
For lighting on one side for parking as
an additional feature, refer to page 102.
Low beams
When the ignition is switched off
while the low beams are on, the
headlamps go out and only the
parking lamps (side marker lamps)
remain on.
390de732
"Follow me home":
When you activate the headlamp
flasher after parking the vehicle and
switching off the lights, the low beams
will come on for a brief period. You may
also have this function deactivated if
you wish.<
"LIGHTS ON" warningWhen the driver's door is opened with
the ignition key at position 0 a chime
will sound for several seconds to
remind you that you have forgotten to
switch off the lights
.
Vehicles with alphanumeric Check
Control
*:
The reminder is provided by the Check
Control, refer to page 85.
Daytime driving lamps
*
The headlamps are automatically
switched on for daytime driving at
ignition key position 2.
Automatic headlamp control
*
When the switch is set to this
position the system automati-
cally activates and cancels the
low beams in response to changes in
ambient light ( in tunnels, at dusk, etc.)
as well as rain and snow.
The vehicle's external lights
remain on constantly when you
switch on the front fog lamps after the
headlamps have come on automati-
cally.<
Automatic headlamp control
cannot serve as a substitute for
the driver's judgement in determining
when the vehicle lights should be
switched on. For example, the sensors
are not able to detect fog. To avoid
safety risks, you should respond to
these kinds of low-visibility situations
by switching the headlamps on manu-
ally.<
You can have the sensitivity of
your vehicle's automatic head-
lamp control adjusted.<
Parking lamps/Low beams
Page 102 of 186

102n
Instrument lighting
High beams/Standing lamps
Fog lamps
Turn the rotary dial to adjust the illumi-
nation intensity.390de733
1 High beams
(blue indicator lamp)
2 Headlamp flasher
(blue indicator lamp)
3 Standing lampsStanding lamps, left or rightAs an additional feature, you can
illuminate your vehicle on either side
for parking, if you wish to do so:
With the ignition key in position 0, push
the lever in the appropriate direction.
The lever engages in the turn signal
position.390de722
Front fog lamps
The green indicator lamp in the
instrument cluster lights up to
indicate that the front fog lamps
are on.
If the high beams are switched on, the
fog lamps go out.
If the automatic headlight control
is on, the low beams will come on
automatically whenever you activate
the fog lamps.<
390us735
Page 103 of 186
103n
OverviewControlsMaintenanceRepairsDataIndex
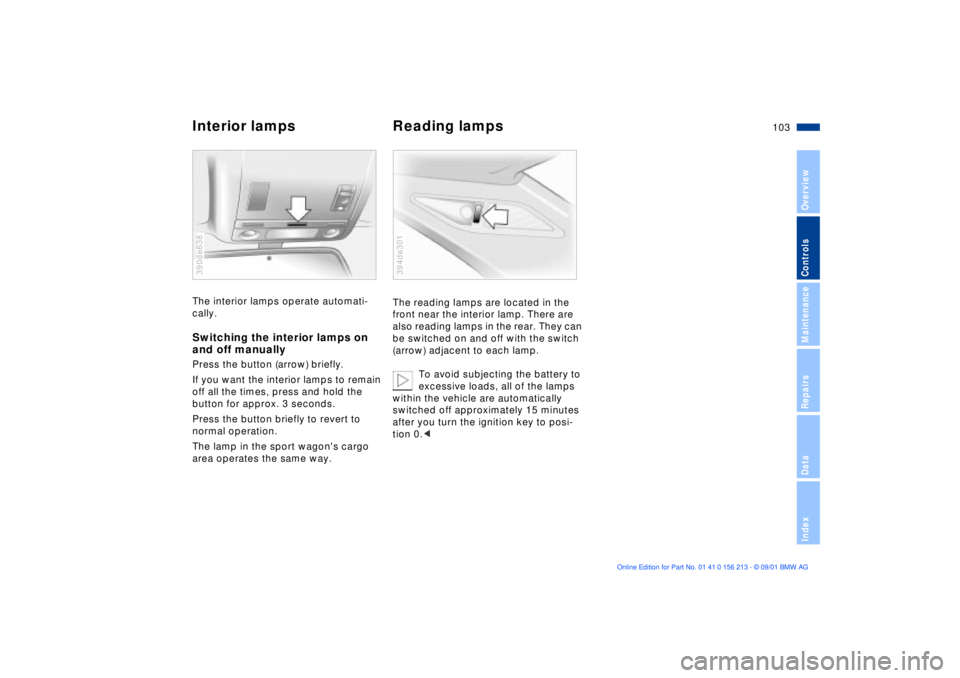
Interior lamps Reading lampsThe interior lamps operate automati-
cally.Switching the interior lamps on
and off manuallyPress the button (arrow) briefly.
If you want the interior lamps to remain
off all the times, press and hold the
button for approx. 3 seconds.
Press the button briefly to revert to
normal operation.
The lamp in the sport wagon's cargo
area operates the same way.390de638
The reading lamps are located in the
front near the interior lamp. There are
also reading lamps in the rear. They can
be switched on and off with the switch
(arrow) adjacent to each lamp.
To avoid subjecting the battery to
excessive loads, all of the lamps
within the vehicle are automatically
switched off approximately 15 minutes
after you turn the ignition key to posi-
tion 0.< 394de301
Page 109 of 186
109n
OverviewControlsMaintenanceRepairsDataIndex
Automatic climate control
*
Tips for pleasant drivingUse the automatic system, that is,
press AUTO button 6. Select an interior
temperature that you find comfortable.
Detailed setting options are described
for you in the following section.
You can make the settings of your
vehicle in such a manner that,
when you unlock the vehicle with the
remote control of your personal key,
your own personalized setting for the
automatic climate control is initiated.< Automatic air distribution
The AUTO program
assumes the adjustment of
the air distribution and the air supply for
you and also adapts the temperature to
external influences (summer, winter) to
meet preferences you can specify.
Individual air distribution
You can cancel the AUTO
program by selecting
specific distribution patterns
to suit your own individual
requirements. While the
AUTO program is then deactivated, the
automatic airflow control remains in
operation. The system directs air to the
windows , the upper body and
into the footwells . You can reacti-
vate the automatic air distribution mode
by selecting the AUTO button.
Temperature
You can make individual
temperature settings on the
driver's side or the front
passenger side. Your selection appears
in display panel 7. The numbers that
appear in the panel are reference
figures for interior temperature. We
recommend a setting of 72 7 (22 6)
for a congenial interior climate, even
when the air conditioner is in operation.
When you start the vehicle, the system
ensures that the selected temperature
is achieved as quickly as possible. It
then maintains this temperature,
regardless of the season.
Air supply
AUTO appears in display
panel 9, while the AUTO
program automatically controls the flow
of incoming air, refer to overview on
page 107. You can use "+" and "Ð" to
vary the airflow. When your setting is
displayed by bars, the automatic airflow
is switched off. Automatic air distribu-
tion maintains its setting. You can reac-
tivate the automatic airflow by pressing
the AUTO button.
When you press "Ð " during operation at
minimum blower speed all displays are
canceled: the blower, heating and air
conditioner are switched off. The
outside air supply is deactivated. By
pressing any button of the automatic
climate control (except the MAX
button 16), you can switch the system
back on.
To defrost windshield and
windows
This program quickly
removes ice and conden-
sation from the windshield and the side
windows.
Page 111 of 186
111n
OverviewControlsMaintenanceRepairsDataIndex
Automatic climate control
*
Residual heating mode
The heat which is stored in
the engine is utilized for
heating the interior when the engine
has been switched off (while waiting at
a railroad crossing, for instance).
In ignition key position 1, you can alter
the settings of the automatic climate
control. In ignition key position 0, the
system automatically directs heated air
to the windshield, side windows and
footwells.
This function is available for oper-
ation when the outside tempera-
ture is below approximately 59 7
(15 6), with the engine warm from
recent operation and an adequate
charge in the battery. The LED on the
button will light up when all conditions
have been met.<
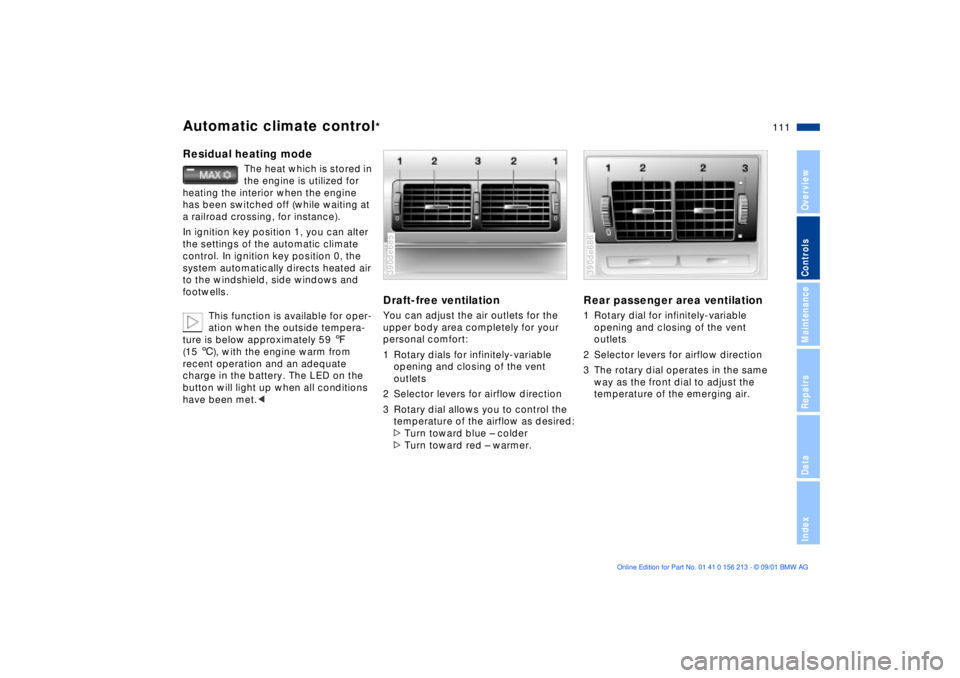
Draft-free ventilationYou can adjust the air outlets for the
upper body area completely for your
personal comfort:
1 Rotary dials for infinitely-variable
opening and closing of the vent
outlets
2 Selector levers for airflow direction
3 Rotary dial allows you to control the
temperature of the airflow as desired:
>Turn toward blue Ð colder
>Turn toward red Ð warmer.390de685
Rear passenger area ventilation1 Rotary dial for infinitely-variable
opening and closing of the vent
outlets
2 Selector levers for airflow direction
3 The rotary dial operates in the same
way as the front dial to adjust the
temperature of the emerging air.390de686
Page 112 of 186
112n
Automatic climate control
*
Roller sun blind
*
Parked-car ventilation
*
Microfilter, activated-charcoal
filterThe microfilter removes dust and pollen
from the incoming air. The activated-
charcoal filter provides additional
protection by filtering gaseous pollut-
ants from the outside air. Your BMW
center replaces this combined filter as a
standard part of your scheduled main-
tenance. A substantial reduction in
airflow indicates that the filter must be
replaced before scheduled mainte-
nance.
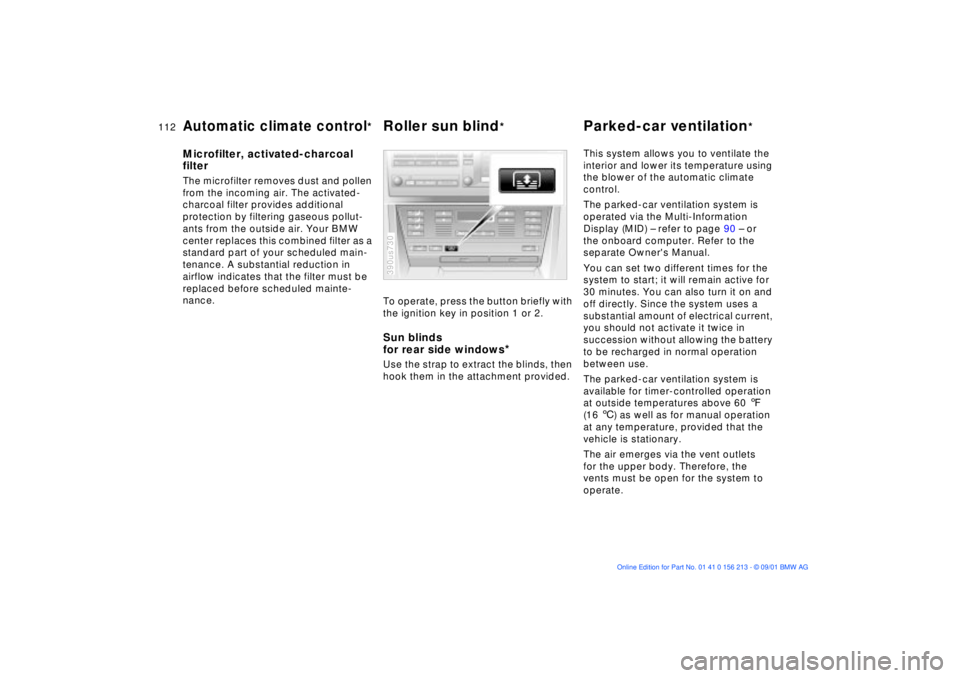
To operate, press the button briefly with
the ignition key in position 1 or 2.
Sun blinds
for rear side windows
*
Use the strap to extract the blinds, then
hook them in the attachment provided.390us730
This system allows you to ventilate the
interior and lower its temperature using
the blower of the automatic climate
control.
The parked-car ventilation system is
operated via the Multi-Information
Display (MID) Ð refer to page 90 Ð or
the onboard computer. Refer to the
separate Owner's Manual.
You can set two different times for the
system to start; it will remain active for
30 minutes. You can also turn it on and
off directly. Since the system uses a
substantial amount of electrical current,
you should not activate it twice in
succession without allowing the battery
to be recharged in normal operation
between use.
The parked-car ventilation system is
available for timer-controlled operation
at outside temperatures above 60 7
(16 6) as well as for manual operation
at any temperature, provided that the
vehicle is stationary.
The air emerges via the vent outlets
for the upper body. Therefore, the
vents must be open for the system to
operate.
Page 114 of 186
114n
BMW Universal Transmitter
*
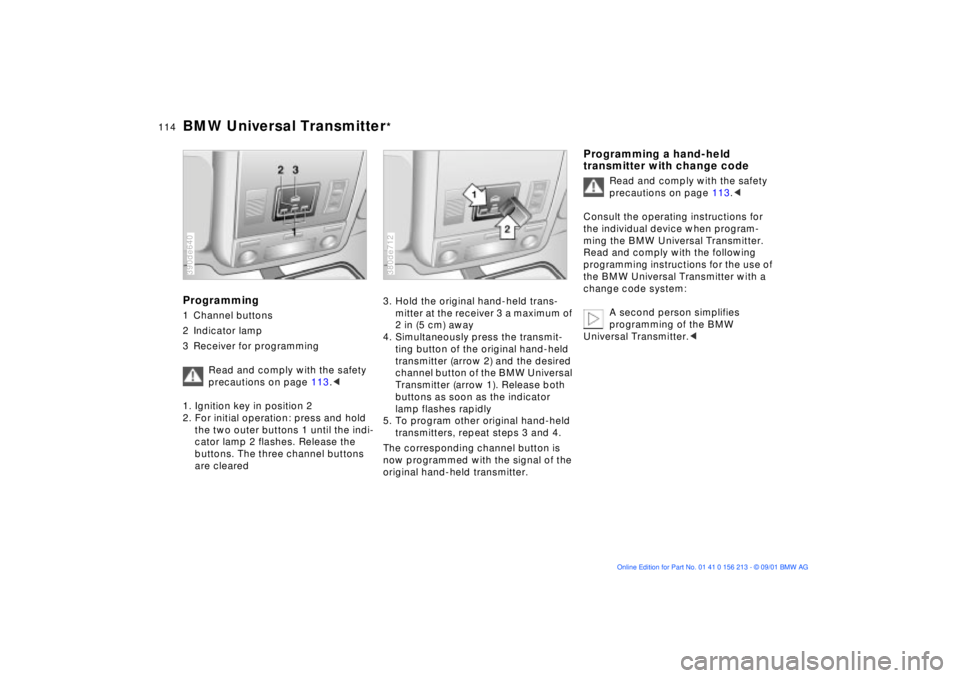
Programming1 Channel buttons
2 Indicator lamp
3 Receiver for programming
Read and comply with the safety
precautions on page 113.<
1. Ignition key in position 2
2. For initial operation: press and hold
the two outer buttons 1 until the indi-
cator lamp 2 flashes. Release the
buttons. The three channel buttons
are cleared390de640
3. Hold the original hand-held trans-
mitter at the receiver 3 a maximum of
2 in (5 cm) away
4. Simultaneously press the transmit-
ting button of the original hand-held
transmitter (arrow 2) and the desired
channel button of the BMW Universal
Transmitter (arrow 1). Release both
buttons as soon as the indicator
lamp flashes rapidly
5. To program other original hand-held
transmitters, repeat steps 3 and 4.
The corresponding channel button is
now programmed with the signal of the
original hand-held transmitter.380de712
Programming a hand-held
transmitter with change code
Read and comply with the safety
precautions on page 113.<
Consult the operating instructions for
the individual device when program-
ming the BMW Universal Transmitter.
Read and comply with the following
programming instructions for the use of
the BMW Universal Transmitter with a
change code system:
A second person simplifies
programming of the BMW
Universal Transmitter.<
Page 116 of 186
116n
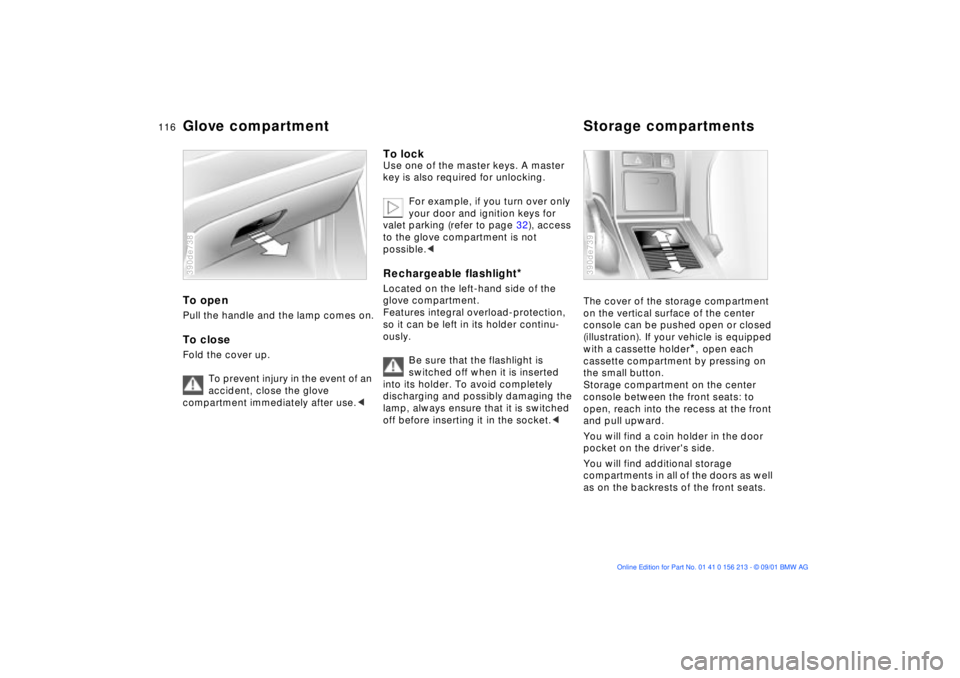
Glove compartment Storage compartmentsTo openPull the handle and the lamp comes on.To closeFold the cover up.
To prevent injury in the event of an
accident, close the glove
compartment immediately after use.< 390de738
To lockUse one of the master keys. A master
key is also required for unlocking.
For example, if you turn over only
your door and ignition keys for
valet parking (refer to page 32), access
to the glove compartment is not
possible.< Rechargeable flashlight
*
Located on the left-hand side of the
glove compartment.
Features integral overload-protection,
so it can be left in its holder continu-
ously.
Be sure that the flashlight is
switched off when it is inserted
into its holder. To avoid completely
discharging and possibly damaging the
lamp, always ensure that it is switched
off before inserting it in the socket.<
The cover of the storage compartment
on the vertical surface of the center
console can be pushed open or closed
(illustration). If your vehicle is equipped
with a cassette holder
*, open each
cassette compartment by pressing on
the small button.
Storage compartment on the center
console between the front seats: to
open, reach into the recess at the front
and pull upward.
You will find a coin holder in the door
pocket on the driver's side.
You will find additional storage
compartments in all of the doors as well
as on the backrests of the front seats.
390de739