2002 BMW M6 CONVERTIBLE fuel
[x] Cancel search: fuelPage 25 of 186

25n
OverviewControlsMaintenanceRepairsDataIndex
Refueling Fuel specificationsAs long as the filler nozzle is used prop-
erly, the fuel tank is full whenever the
nozzle shuts off the first time.
Refill early to avoid damaging the
catalytic converter; never attempt
to drive to the last drop of fuel in the
tank.<
Tank capacity: approximately 18.5 gal.
(70 liters), with a reserve capacity of
>BMW 525i, 530i: 2.0 gal. (8 liters)
>BMW 540i: 2.5 gal. (10 liters).
After refueling, close the filler cap
carefully, continuing until you hear
the detent engage. While closing, be
sure not to squeeze the strap which is
fastened to the cap. A loose or missing
cap will activate the message "CHECK
FILLER CAP" in the Check Control
* or
the Check Filler Cap lamp
*.<
The engine uses lead-free gasoline
only.
Required fuel:
>Premium Unleaded Gasoline,
min. 91 AKI
AKI = Anti Knock Index
Never use leaded fuel, as it would
cause permanent and irreversible
damage to the oxygen sensor and the
catalytic converter.<
Page 32 of 186

32n
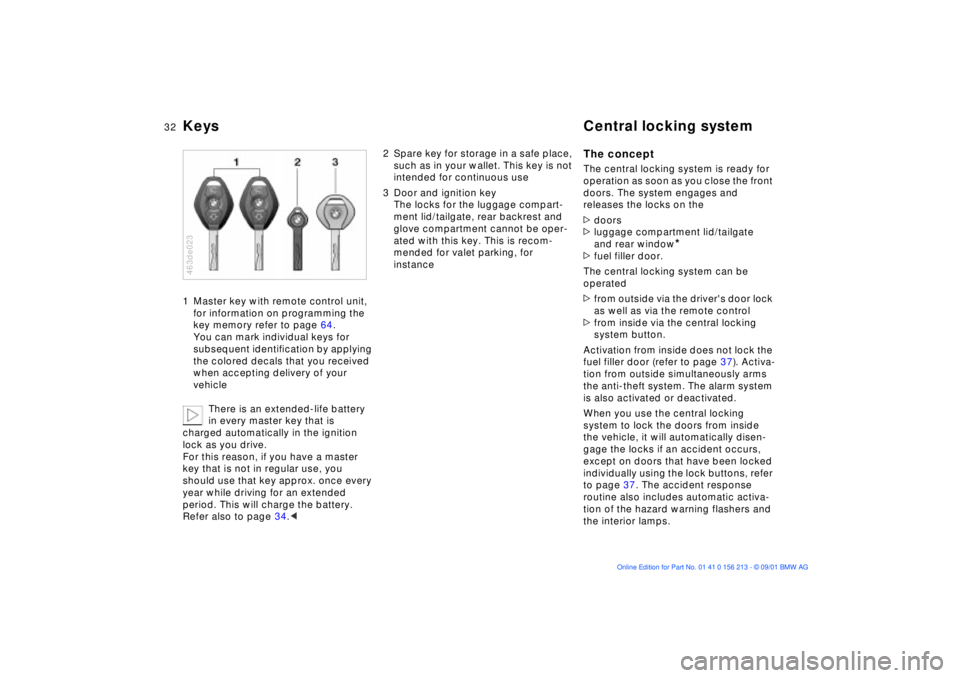
Keys Central locking system1 Master key with remote control unit,
for information on programming the
key memory refer to page 64.
You can mark individual keys for
subsequent identification by applying
the colored decals that you received
when accepting delivery of your
vehicle
There is an extended-life battery
in every master key that is
charged automatically in the ignition
lock as you drive.
For this reason, if you have a master
key that is not in regular use, you
should use that key approx. once every
year while driving for an extended
period. This will charge the battery.
Refer also to page 34.< 463de023
2 Spare key for storage in a safe place,
such as in your wallet. This key is not
intended for continuous use
3 Door and ignition key
The locks for the luggage compart-
ment lid/tailgate, rear backrest and
glove compartment cannot be oper-
ated with this key. This is recom-
mended for valet parking, for
instance
The conceptThe central locking system is ready for
operation as soon as you close the front
doors. The system engages and
releases the locks on the
>doors
>luggage compartment lid/tailgate
and rear window
*
>fuel filler door.
The central locking system can be
operated
>from outside via the driver's door lock
as well as via the remote control
>from inside via the central locking
system button.
Activation from inside does not lock the
fuel filler door (refer to page 37). Activa-
tion from outside simultaneously arms
the anti-theft system. The alarm system
is also activated or deactivated.
When you use the central locking
system to lock the doors from inside
the vehicle, it will automatically disen-
gage the locks if an accident occurs,
except on doors that have been locked
individually using the lock buttons, refer
to page 37. The accident response
routine also includes automatic activa-
tion of the hazard warning flashers and
the interior lamps.
Page 33 of 186

33n
OverviewControlsMaintenanceRepairsDataIndex
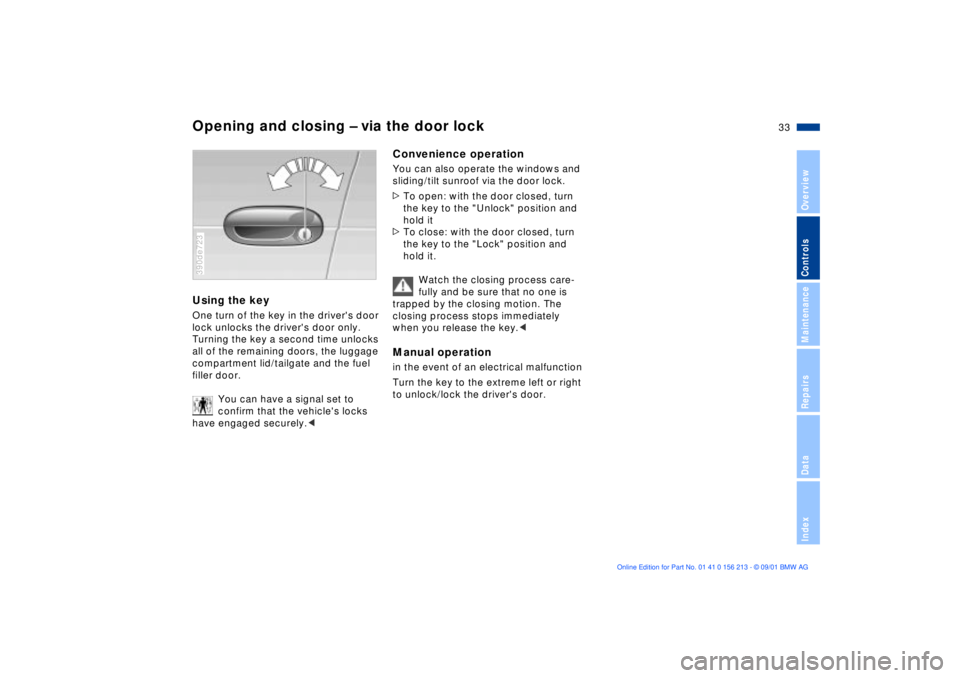
Opening and closing Ð via the door lockUsing the keyOne turn of the key in the driver's door
lock unlocks the driver's door only.
Turning the key a second time unlocks
all of the remaining doors, the luggage
compartment lid/tailgate and the fuel
filler door.
You can have a signal set to
confirm that the vehicle's locks
have engaged securely.< 390de723
Convenience operationYou can also operate the windows and
sliding/tilt sunroof via the door lock.
>To open: with the door closed, turn
the key to the "Unlock" position and
hold it
>To close: with the door closed, turn
the key to the "Lock" position and
hold it.
Watch the closing process care-
fully and be sure that no one is
trapped by the closing motion. The
closing process stops immediately
when you release the key.< Manual operationin the event of an electrical malfunction
Turn the key to the extreme left or right
to unlock/lock the driver's door.
Page 35 of 186

35n
OverviewControlsMaintenanceRepairsDataIndex
Opening and closing Ð via the remote controlTo unlockPress button.
Press the button once to unlock the
driver's door only; press a second time
to unlock all remaining doors as well as
the luggage compartment lid/tailgate
and fuel filler door.Convenience opening modePress and hold button to open the elec-
tric power windows and sliding/tilt
sunroof.
To lock and securePress button.
Vehicles without armored glass:
do not lock the vehicle if anyone
will be remaining inside, as it would
then be impossible for the occupant(s)
to disengage the locks from the
inside.< To deactivate the tilt alarm sensor
and interior motion sensorPress button a second time immedi-
ately after locking.
For additional information, refer to
page 43.To switch on the interior lampsWith the vehicle locked, press button.
To open the luggage
compartment lid/tailgatePress button.
The luggage compartment lid/tailgate
will open slightly, regardless of whether
it was previously locked or unlocked.
Before and after a trip, be sure
that the luggage compartment lid/
tailgate has not been opened uninten-
tionally.< Panic modeProvided that the alarm system is
armed, you can respond to imminent
danger by holding down the button for
between two and five seconds.
To cancel alarm
Press button.
Page 37 of 186

37n
OverviewControlsMaintenanceRepairsDataIndex
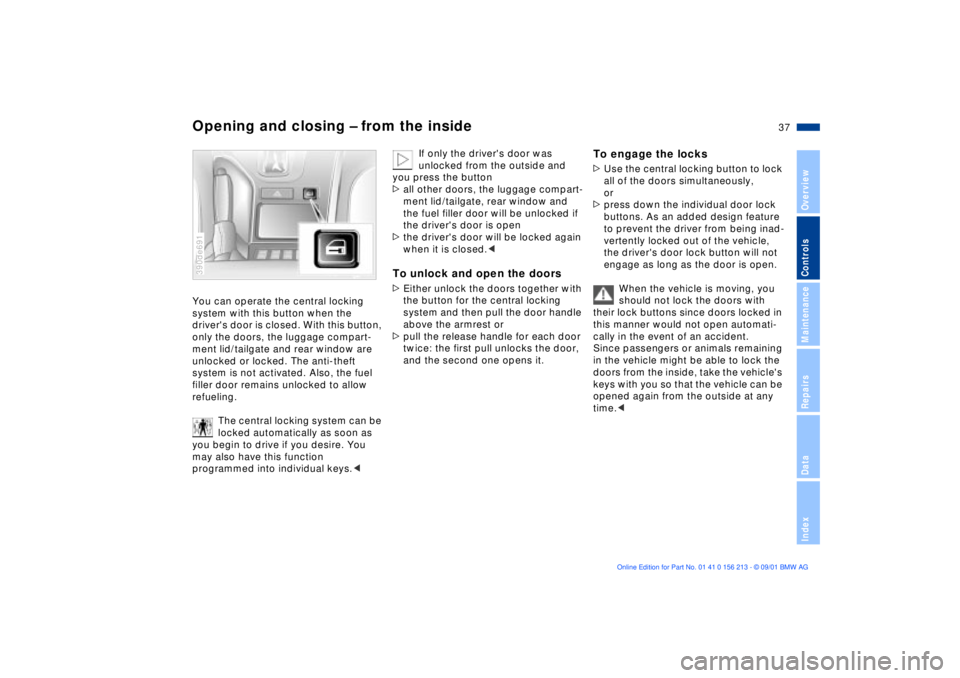
Opening and closing Ð from the insideYou can operate the central locking
system with this button when the
driver's door is closed. With this button,
only the doors, the luggage compart-
ment lid/tailgate and rear window are
unlocked or locked. The anti-theft
system is not activated. Also, the fuel
filler door remains unlocked to allow
refueling.
The central locking system can be
locked automatically as soon as
you begin to drive if you desire. You
may also have this function
programmed into individual keys.< 390de691
If only the driver's door was
unlocked from the outside and
you press the button
>all other doors, the luggage compart-
ment lid/tailgate, rear window and
the fuel filler door will be unlocked if
the driver's door is open
>the driver's door will be locked again
when it is closed.<
To unlock and open the doors>Either unlock the doors together with
the button for the central locking
system and then pull the door handle
above the armrest or
>pull the release handle for each door
twice: the first pull unlocks the door,
and the second one opens it.
To engage the locks>Use the central locking button to lock
all of the doors simultaneously,
or
>press down the individual door lock
buttons. As an added design feature
to prevent the driver from being inad-
vertently locked out of the vehicle,
the driver's door lock button will not
engage as long as the door is open.
When the vehicle is moving, you
should not lock the doors with
their lock buttons since doors locked in
this manner would not open automati-
cally in the event of an accident.
Since passengers or animals remaining
in the vehicle might be able to lock the
doors from the inside, take the vehicle's
keys with you so that the vehicle can be
opened again from the outside at any
time.<
Page 81 of 186

81n
OverviewControlsMaintenanceRepairsDataIndex
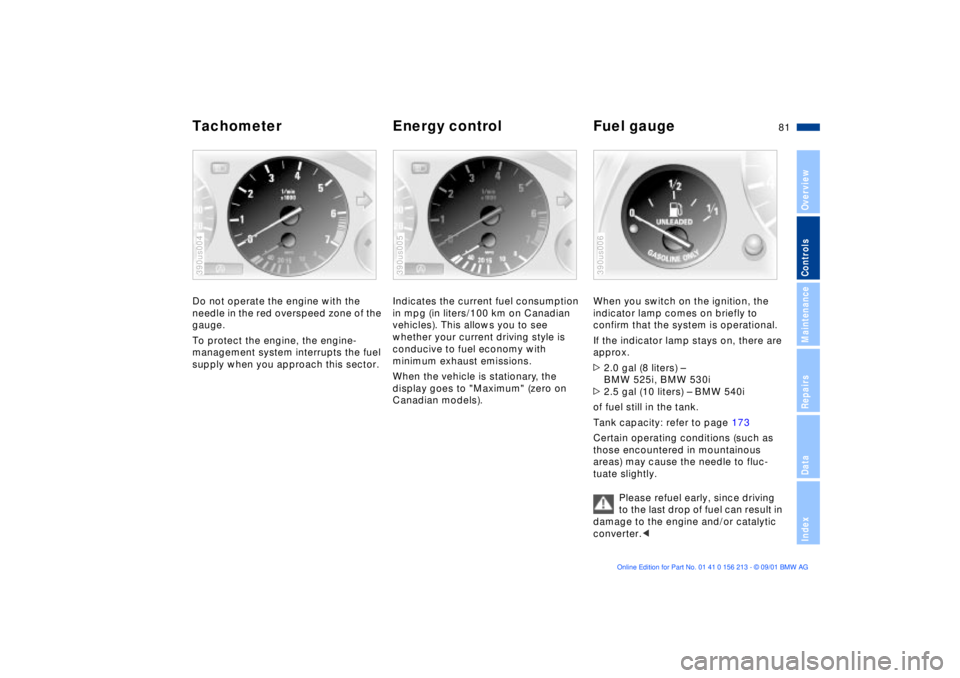
Tachometer Energy control Fuel gaugeDo not operate the engine with the
needle in the red overspeed zone of the
gauge.
To protect the engine, the engine-
management system interrupts the fuel
supply when you approach this sector.390us004
Indicates the current fuel consumption
in mpg (in liters/100 km on Canadian
vehicles). This allows you to see
whether your current driving style is
conducive to fuel economy with
minimum exhaust emissions.
When the vehicle is stationary, the
display goes to "Maximum" (zero on
Canadian models).390us005
When you switch on the ignition, the
indicator lamp comes on briefly to
confirm that the system is operational.
If the indicator lamp stays on, there are
approx.
>2.0 gal (8 liters) Ð
BMW 525i, BMW 530i
>2.5 gal (10 liters) Ð BMW 540i
of fuel still in the tank.
Tank capacity: refer to page 173
Certain operating conditions (such as
those encountered in mountainous
areas) may cause the needle to fluc-
tuate slightly.
Please refuel early, since driving
to the last drop of fuel can result in
damage to the engine and/or catalytic
converter.< 390us006
Page 84 of 186

84n
Check Control>"RELEASE PARKINGBRAKE"
>"COOLANT TEMPERATURE"
The coolant is overheated. Stop the
vehicle immediately and switch off
the engine. Refer to pages 82
and 142
>"STOP! ENGINE OILPRESS"
The oil pressure is too low. Stop the
vehicle immediately and switch off
the engine. Refer to pages 19, 140
>"CHECK BRAKE FLUID"
Indicates that brake fluid is down to
roughly minimum level. Have the
reservoir topped up at the earliest
opportunity, refer to page 143. Have
the source of the brake fluid loss
repaired at your BMW center
>"TIRE DEFECT"
*
Reduce vehicle speed immediately
and stop the vehicle. Avoid hard
brake applications. Do not oversteer.
Refer to page 100
>"SELFLEVEL SUSP.INACT"
Please consult the nearest BMW
center. Refer to page 99
>"SPEED LIMIT"
*
Display if the programmed speed
limit has been exceeded, refer to
page 91Priority 2
These displays appear for 20 seconds
when the ignition key is turned to posi-
tion 2. The warning symbols remain
after the message disappears. You can
display the messages again by pressing
the CHECK button 3:
>"TRUNKLID OPEN"
Message appears only when the
vehicle is initially set in motion
>"DOOR OPEN"
This message appears after a defined
road speed has been exceeded
>"FASTEN SEAT BELTS"
*
In addition to this message, a
warning lamp with the safety belt icon
appears and an acoustic signal
sounds
>"WASHER FLUID LOW"
Too low; top up fluid at the next
opportunity. Refer to page 139
>"CHECK ENGINE OIL LEV"
The engine oil level is at the absolute
minimum. You should respond by
topping up the oil as soon as
possible, refer to page 140. Do not
continue for more than approximately
30 miles (50 km) before adding oil>"CHECK FILLER CAP"
Inspect the cap to make sure that it is
closed properly, refer to page 24. If
the cap is not closed securely it will
trigger the "Service Engine Soon"
lamp
>"OUTSIDE TEMP. +20 7 (Ð5 6)"
This display is only an example. The
current temperature is displayed at
outside temperatures of +37.5 7
(+3 6) and below. Refer also to
page 80
>"SET TIRE PRESSURE"
*
The RDC has imported the current
inflation pressure in the tires as the
target values which the system will
monitor.
Refer to page 99
>"CHECK TIRE PRESSURE"
*
Check and correct the tire inflation
pressure to specifications at the
earliest opportunity (next stop for
fuel).
Refer to page 99
>"TIRECONTROL INACTIVE"
*
A temporary interference of the RDC
or a system fault. Refer to page 100
>"CHECK BRAKE LIGHTS"
A lamp has failed or the electrical
circuit has a fault. Refer to pages 154
and 160 or consult a BMW center
Page 85 of 186

85n
OverviewControlsMaintenanceRepairsDataIndex
Check Control>"CHECK LOWBEAM LIGHTS"
"CHECK SIDE LIGHTS"
"CHECK REAR LIGHTS"
"CHECK FRONT FOGLAMPS"
"CHECK LICPLATE LIGHT"
"CHECK HIGHBEAM LIGHT"
"CHECK BACK UP LIGHTS"
Defective bulb or circuit. Refer to
pages 151 and following, page 160
or consult your BMW center.
>"TRANS. FAILSAFE PROG"
Please consult the nearest BMW
center. Refer to pages 72 and 75
>"CHECK BRAKE LININGS"
Have the brake pads inspected by
your BMW center. Refer to page 132
>"CHECK COOLANT LEVEL"
Coolant too low, top up at the next
opportunity. Refer to page 142
>"ENGINE FAILSAFE PROG"
*
Indicates a malfunction in the elec-
tronic engine-management system,
which then reverts to an emergency
default program allowing continued
operation at reduced power and
lower engine speeds.
Please have the system inspected at
your BMW center.
Displays after completion of tripAll of the malfunctions registered during
the trip appear consecutively when the
ignition key is turned to position 0.
The following displays will appear when
appropriate:
>"LIGHTS ON"
>"KEY IN IGNITION LOCK"
>"CHECK ENGINE OIL LEV"
Add engine oil at the next opportunity
(next stop for fuel). Refer to
page 140.
This display appears when you open
the driver's door after parking the
vehicle. A supplementary gong is also
heard.
Status reports remain available for a
period of approx. three minutes after
the display goes out and the key is
removed from the ignition. Press the
CHECK button 3. If there were multiple
reports, press the CHECK button
repeatedly to view them all in
sequence.
To check the Check ControlPress the CHECK button 3 with the
ignition key in position 2:
CHECK CONTROL OK appears in the
display.
No malfunctions are present in the
monitored systems.ComputerYou can find a description of the
computer on pages 86 and 91 as well
as in the "Owner's Manual for Onboard
Computer."
You can select the language in
which the Check Control displays
and the status reports from the
computer will appear.<