2002 BMW 540I SEDAN child lock
[x] Cancel search: child lockPage 4 of 186

Contents
© 2001 Bayerische Motoren Werke
Aktiengesellschaft
Munich, Germany
Reprinting, including excerpts, only with the
written consent of BMW AG, Munich.
Order No. 01 41 0 156 213
US English VIII/2001
Printed in Germany
Printed on environmentally friendly paper
(bleached without chlorine, suitable for recycling).
Overview
Controls and features
Cockpit14
Instrument cluster15
Indicator and warning lamps19
Steering wheel with multifunction
buttons22
Warning triangle23
First-aid kit23
Refueling24
Fuel specifications25
Tire inflation pressure26
Locks and security systems:
Keys32
Central locking system32
Opening and closing Ð via the
door lock33
Opening and closing Ð via the
remote control34
Opening and closing Ð from the
inside37
Luggage compartment lid/
Tailgate38
Rear window40
Luggage compartment42
Alarm system42
Electric power windows44
Sliding/tilt sunroof46
Adjustments:
Correct sitting posture48
Seats48
Manually-adjusted seat49
Electric power seats50
Head restraints52
BMW actice seat52
Safety belts53
Seat, mirror and steering wheel
memory54
Seat heating55
Adjusting steering wheel56
Heated steering wheel56
Mirrors57
Passenger safety systems:
Airbags58
Transporting children safely61
Vehicle Memory, Key
Memory64
Driving:
Steering/Ignition lock66
Starting the engine66
Switching off the engine68
Parking brake68
Manual transmission69
Automatic transmission70
Automatic transmission with
Steptronic73
Indicator/Headlamp flasher76
Washer/Wiper system/Rain
sensor76
Cruise control78
Everything under control:
Odometer, outside temperature
display80
Tachometer81
Energy control81
Fuel gauge81
Coolant temperature gauge82
Service Interval Display82
Check Control83
Computer86
Multi-Information Display
(MID)87
Digital clock in the MID89
Computer in the MID91
Contents
Page 44 of 186
44n
Alarm system Electric power windowsInterior motion sensorIn order for the interior motion sensor to
function properly, the windows and
sliding/tilt sunroof must be completely
closed.
Nevertheless, you should deactivate
the interior motion sensor (refer to
"Avoiding unintentional alarms") if you
>leave children or animals in the
vehicle
>intend to leave the windows or
sliding/tilt sunroof open.
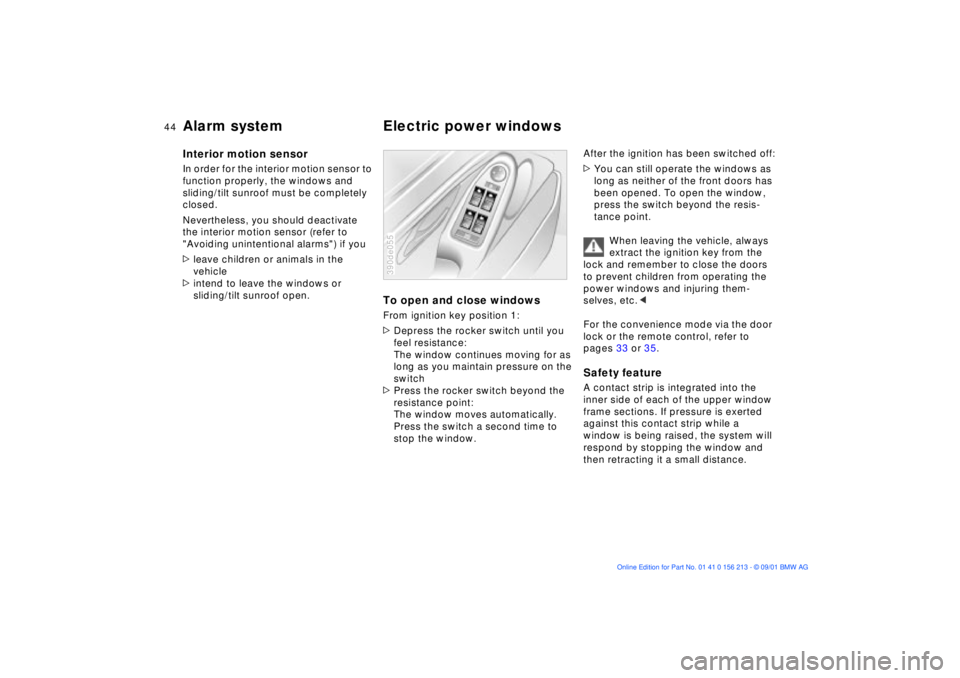
To open and close windowsFrom ignition key position 1:
>Depress the rocker switch until you
feel resistance:
The window continues moving for as
long as you maintain pressure on the
switch
>Press the rocker switch beyond the
resistance point:
The window moves automatically.
Press the switch a second time to
stop the window.390de055
After the ignition has been switched off:
>You can still operate the windows as
long as neither of the front doors has
been opened. To open the window,
press the switch beyond the resis-
tance point.
When leaving the vehicle, always
extract the ignition key from the
lock and remember to close the doors
to prevent children from operating the
power windows and injuring them-
selves, etc.<
For the convenience mode via the door
lock or the remote control, refer to
pages 33 or 35.Safety featureA contact strip is integrated into the
inner side of each of the upper window
frame sections. If pressure is exerted
against this contact strip while a
window is being raised, the system will
respond by stopping the window and
then retracting it a small distance.
Page 46 of 186
46n
Sliding/tilt sunroof
*
To prevent injuries, exercise care
when closing the sliding/tilt
sunroof and keep it in your field of
vision until it is shut.
Before leaving the vehicle, switch off
the electric sunroof mechanism by
taking out the ignition key. Do not leave
children unattended in the vehicle with
access to vehicle keys. The key could
be used to start the engine and operate
vehicle systems such as the power
sunroof, etc. Unsupervised use of these
systems can result in serious personal
injury.<
For the convenience mode via the door
lock or the remote control, refer to
page 33 or 35.
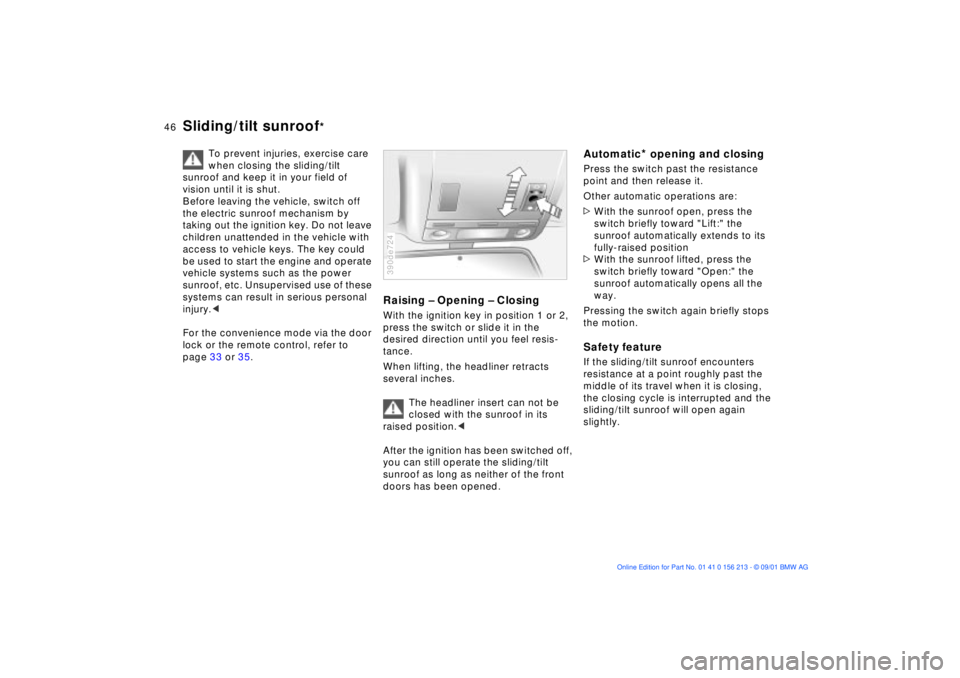
Raising Ð Opening Ð ClosingWith the ignition key in position 1 or 2,
press the switch or slide it in the
desired direction until you feel resis-
tance.
When lifting, the headliner retracts
several inches.
The headliner insert can not be
closed with the sunroof in its
raised position.<
After the ignition has been switched off,
you can still operate the sliding/tilt
sunroof as long as neither of the front
doors has been opened.390de724
Automatic
* opening and closing
Press the switch past the resistance
point and then release it.
Other automatic operations are:
>With the sunroof open, press the
switch briefly toward "Lift:" the
sunroof automatically extends to its
fully-raised position
>With the sunroof lifted, press the
switch briefly toward "Open:" the
sunroof automatically opens all the
way.
Pressing the switch again briefly stops
the motion.Safety featureIf the sliding/tilt sunroof encounters
resistance at a point roughly past the
middle of its travel when it is closing,
the closing cycle is interrupted and the
sliding/tilt sunroof will open again
slightly.
Page 62 of 186
62n
Transporting children safelyOlder children should be tightly secured
with a safety belt. Younger children
should be secured in an appropriate
forward-facing child-restraint system
that has first been properly secured
with a safety belt. Never install a rear-
facing child-restraint system in the front
passenger seat.
We strongly urge you to carefully read
and comply with the instructions for
installation and use provided by the
child-restraint's manufacturer whenever
you use such a device.
Be sure that all occupants (of all ages)
remain properly and securely restrained
at all times.<
All rear seating positions in your
vehicle meet the recommendations
of SAE J1819, an industry-recom-
mended practice for securing child-
restraint systems in motor vehicles.
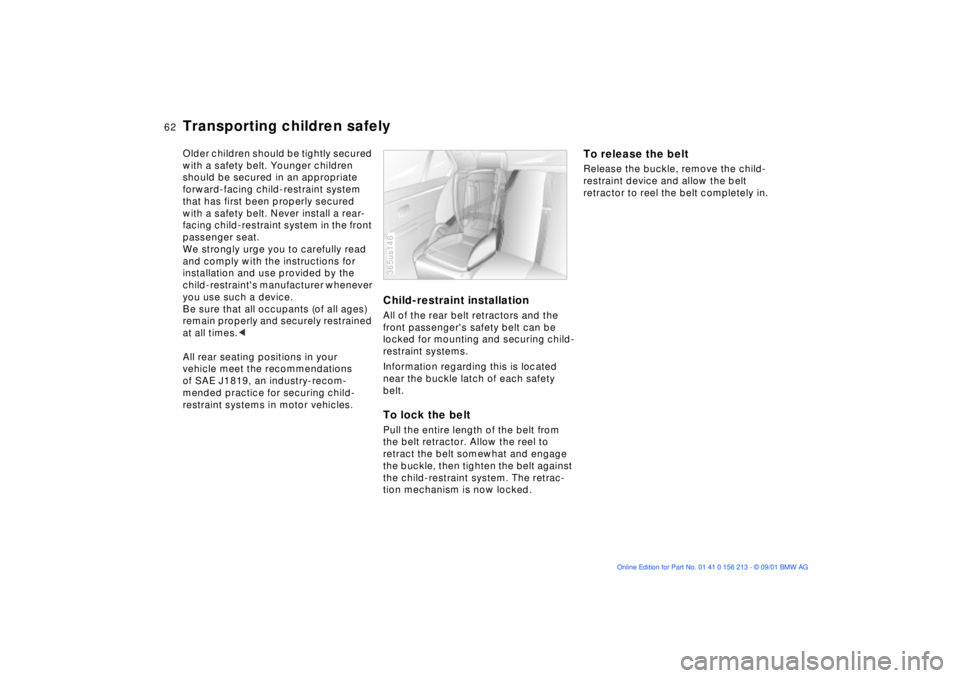
Child-restraint installationAll of the rear belt retractors and the
front passenger's safety belt can be
locked for mounting and securing child-
restraint systems.
Information regarding this is located
near the buckle latch of each safety
belt.To lock the beltPull the entire length of the belt from
the belt retractor. Allow the reel to
retract the belt somewhat and engage
the buckle, then tighten the belt against
the child-restraint system. The retrac-
tion mechanism is now locked.365us146
To release the beltRelease the buckle, remove the child-
restraint device and allow the belt
retractor to reel the belt completely in.
Page 63 of 186
63n
OverviewControlsMaintenanceRepairsDataIndex
Transporting children safelyLATCH child-restraint anchorage
points
* Ð sedan
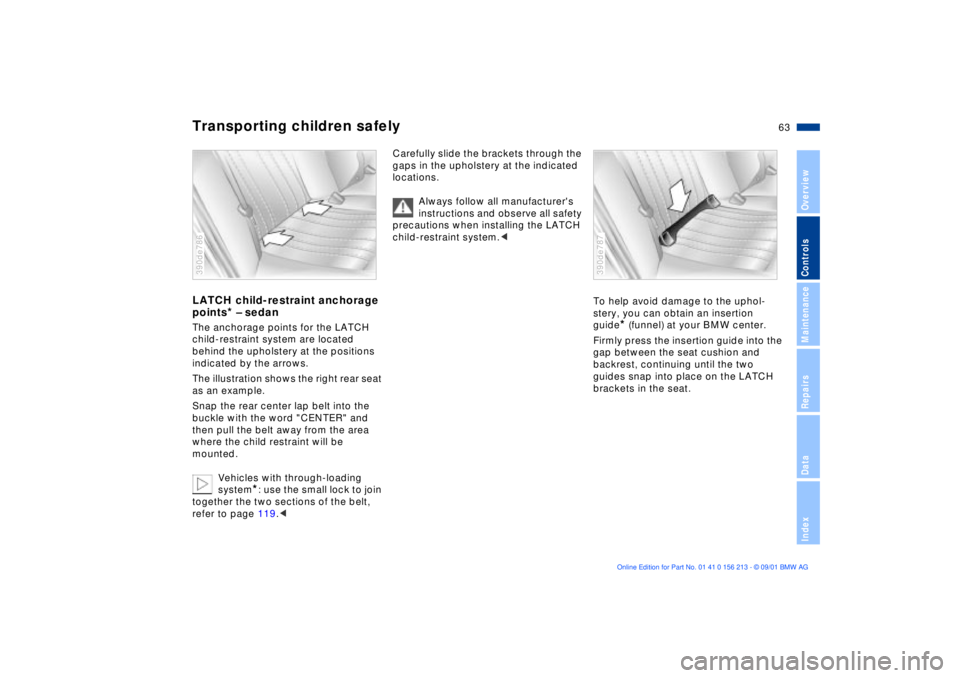
The anchorage points for the LATCH
child-restraint system are located
behind the upholstery at the positions
indicated by the arrows.
The illustration shows the right rear seat
as an example.
Snap the rear center lap belt into the
buckle with the word "CENTER" and
then pull the belt away from the area
where the child restraint will be
mounted.
Vehicles with through-loading
system
*: use the small lock to join
together the two sections of the belt,
refer to page 119.<
390de786
Carefully slide the brackets through the
gaps in the upholstery at the indicated
locations.
Always follow all manufacturer's
instructions and observe all safety
precautions when installing the LATCH
child-restraint system.<
To help avoid damage to the uphol-
stery, you can obtain an insertion
guide
* (funnel) at your BMW center.
Firmly press the insertion guide into the
gap between the seat cushion and
backrest, continuing until the two
guides snap into place on the LATCH
brackets in the seat.
390de787
Page 64 of 186
64n
Transporting children safely
Vehicle Memory, Key Memory
LATCH child-restraint anchorage
points
* Ð sport wagon
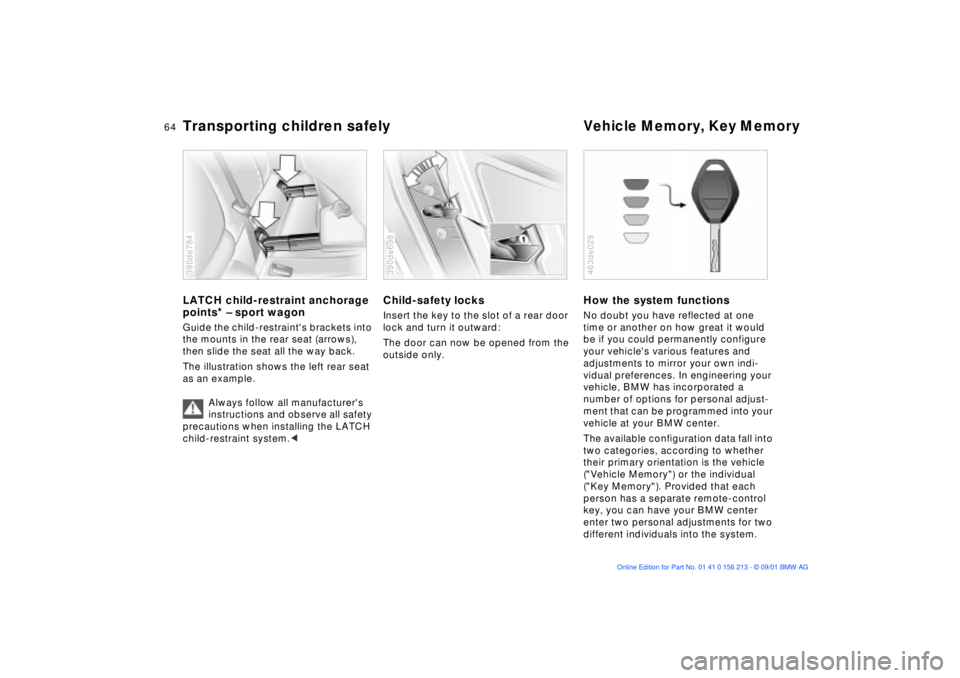
Guide the child-restraint's brackets into
the mounts in the rear seat (arrows),
then slide the seat all the way back.
The illustration shows the left rear seat
as an example.
Always follow all manufacturer's
instructions and observe all safety
precautions when installing the LATCH
child-restraint system.<390de784
Child-safety locksInsert the key to the slot of a rear door
lock and turn it outward:
The door can now be opened from the
outside only.390de698
How the system functionsNo doubt you have reflected at one
time or another on how great it would
be if you could permanently configure
your vehicle's various features and
adjustments to mirror your own indi-
vidual preferences. In engineering your
vehicle, BMW has incorporated a
number of options for personal adjust-
ment that can be programmed into your
vehicle at your BMW center.
The available configuration data fall into
two categories, according to whether
their primary orientation is the vehicle
("Vehicle Memory") or the individual
("Key Memory"). Provided that each
person has a separate remote-control
key, you can have your BMW center
enter two personal adjustments for two
different individuals into the system.463de029
Page 142 of 186
142n
Coolant
Do not add coolant to the cooling
system when the engine is hot. If
you attempt to do so, escaping coolant
can cause burns.
To avoid the possibility of damage later
on, never use anything other than
factory-approved, nitrite and amino-
free extended-duty antifreeze with
corrosion inhibitor. Your BMW center is
familiar with the factory specifications.
Antifreeze and anti-corrosion agents
are hazardous to health. You should
always store it in its original container
and in a location which is out of reach
of children.
Extended-duty antifreeze with corro-
sion inhibitor contains the flammable
substance ethyleneÐglycol. For this
reason, do not spill antifreeze with
corrosion inhibitor on hot engine parts.
It could catch fire and cause burns.<
Checking coolant level and
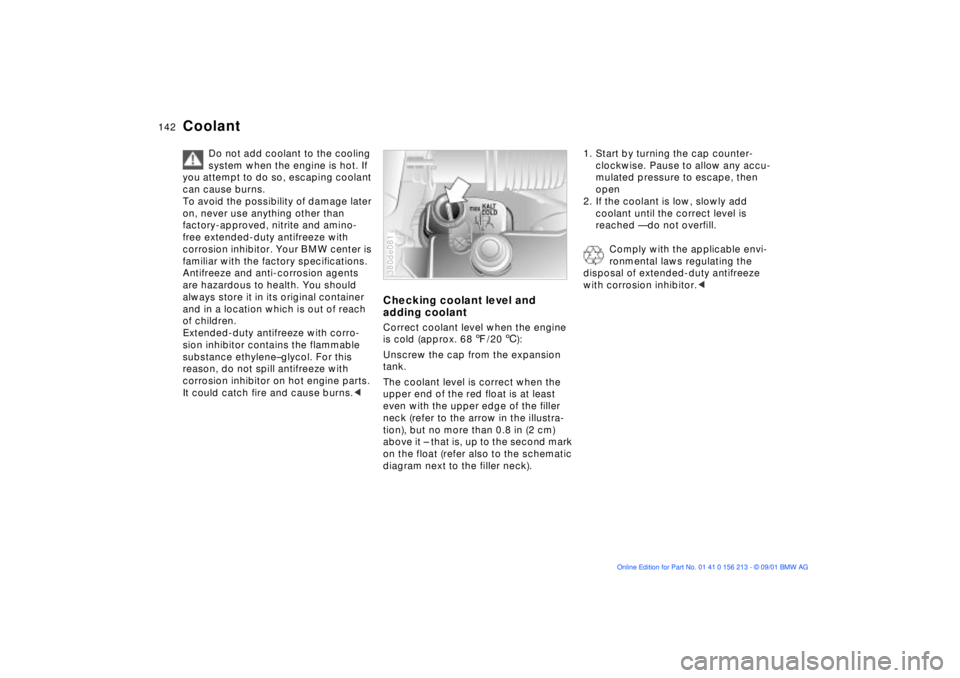
adding coolantCorrect coolant level when the engine
is cold (approx. 687/206):
Unscrew the cap from the expansion
tank.
The coolant level is correct when the
upper end of the red float is at least
even with the upper edge of the filler
neck (refer to the arrow in the illustra-
tion), but no more than 0.8 in (2 cm)
above it Ð that is, up to the second mark
on the float (refer also to the schematic
diagram next to the filler neck).380de081
1. Start by turning the cap counter-
clockwise. Pause to allow any accu-
mulated pressure to escape, then
open
2. If the coolant is low, slowly add
coolant until the correct level is
reached Ñ do not overfill.
Comply with the applicable envi-
ronmental laws regulating the
disposal of extended-duty antifreeze
with corrosion inhibitor.<
Page 177 of 186
Everything from A to Z
177n
OverviewControlsMaintenanceRepairsDataIndex
Brake system132
brake fluid level132
brake pads20, 132
disc brakes132
malfunctions132
Break-in procedures130
Bulbs and lamps151t C
California Proposition
65 Warning145
Capacities173
Car care, refer to the "Caring
for your vehicle" manual
Car wash systems, refer to
the "Caring for your
vehicle" manual
Care of paintwork, refer to
the "Caring for your
vehicle" manual
Care of upholstery materials,
refer to the "Caring for your
vehicle" manual
Cargo area
lamps103
opening from the
inside40
Cargo loading126
Cellular phone117 Center (high-mount) brake
lamp155
Central locking
system32, 37
Changing a wheel/
tire157t
Charge indicator lamp19
CHECK button83
Check Control83t
Check engine oil
level140t
Child seat safety62
Child seats61
Child-restraint systems61
Child-safety locks64
Cigarette lighter118
Clean rear window77
Cleaning windshield77
Climate control, refer to
Automatic climate
control107
Clock88
for additional information
refer to the "Owner's
Manual for Onboard
Computer"
Cockpit14
Code, refer to immoblizer
function94
Cold start67
Combination switch76 Comfort seat51
Compartments116
Computer86
for additional information
refer to the "Owner's
Manual for Onboard
Computer"
remote control95
Computer in the MID91
Configuring personal
adjustments, Vehicle and
Key Memory64
Consumption display81
Consumption, fuel86, 93
Convenience operation of
windows and sliding/tilt
sunroof33
Convenience starting
feature67
Coolant142
Coolant temperature
gauge82
Copyright4
Cover, sun blinds112
Cruising range86, 93
Cup holder117
Cup holder, refer to
beverage holder117
Curb monitor55
D
Data link connector for
Onboard Diagnostics146
Date
calling up88
changing88
Daytime driving lamps101
DBC (Dynamic Brake
Control)20
Deactivating95
alarm system tilt
sensor43
interior motion sensor43
Deep water131
Defrost windows106, 109
Defroster mode106, 109
Digital clock in the MID88
Dimensions169
Dipstick, engine oil140t
Displacement168
Display lighting102
Displays16, 17
Disposal
antifreeze with corrosion
inhibitor142t
used batteries160t
used oils141t