2002 BMW 330Ci COUPE pressure
[x] Cancel search: pressurePage 118 of 147
118n
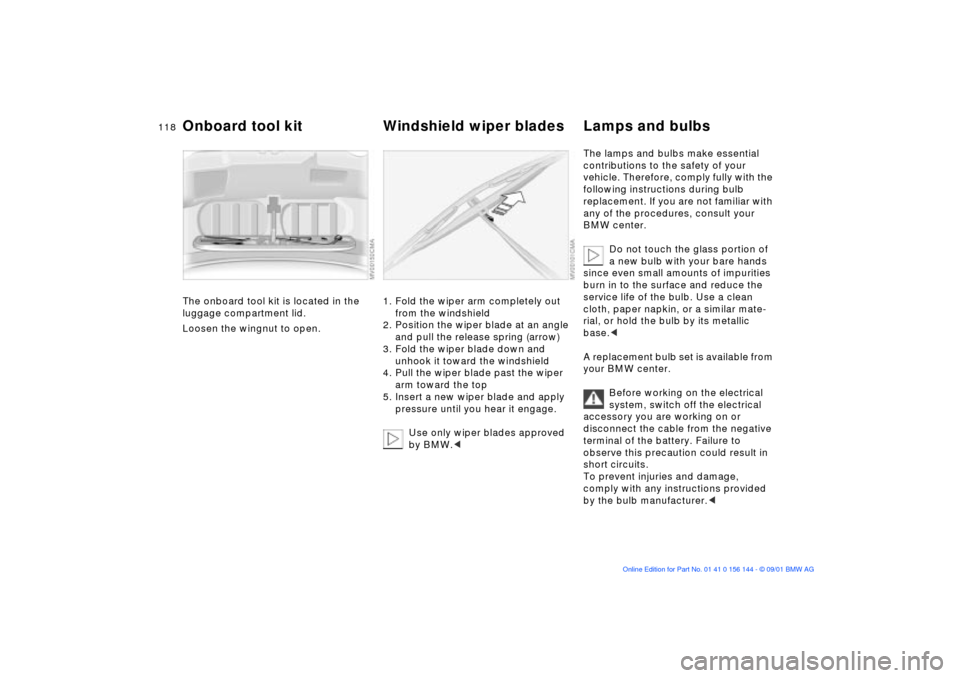
The onboard tool kit is located in the
luggage compartment lid.
Loosen the wingnut to open.
1. Fold the wiper arm completely out
from the windshield
2. Position the wiper blade at an angle
and pull the release spring (arrow)
3. Fold the wiper blade down and
unhook it toward the windshield
4. Pull the wiper blade past the wiper
arm toward the top
5. Insert a new wiper blade and apply
pressure until you hear it engage.
Use only wiper blades approved
by BMW.<
The lamps and bulbs make essential
contributions to the safety of your
vehicle. Therefore, comply fully with the
following instructions during bulb
replacement. If you are not familiar with
any of the procedures, consult your
BMW center.
Do not touch the glass portion of
a new bulb with your bare hands
since even small amounts of impurities
burn in to the surface and reduce the
service life of the bulb. Use a clean
cloth, paper napkin, or a similar mate-
rial, or hold the bulb by its metallic
base.<
A replacement bulb set is available from
your BMW center.
Before working on the electrical
system, switch off the electrical
accessory you are working on or
disconnect the cable from the negative
terminal of the battery. Failure to
observe this precaution could result in
short circuits.
To prevent injuries and damage,
comply with any instructions provided
by the bulb manufacturer.<
Onboard tool kit Windshield wiper blades Lamps and bulbs
Page 120 of 147
120n
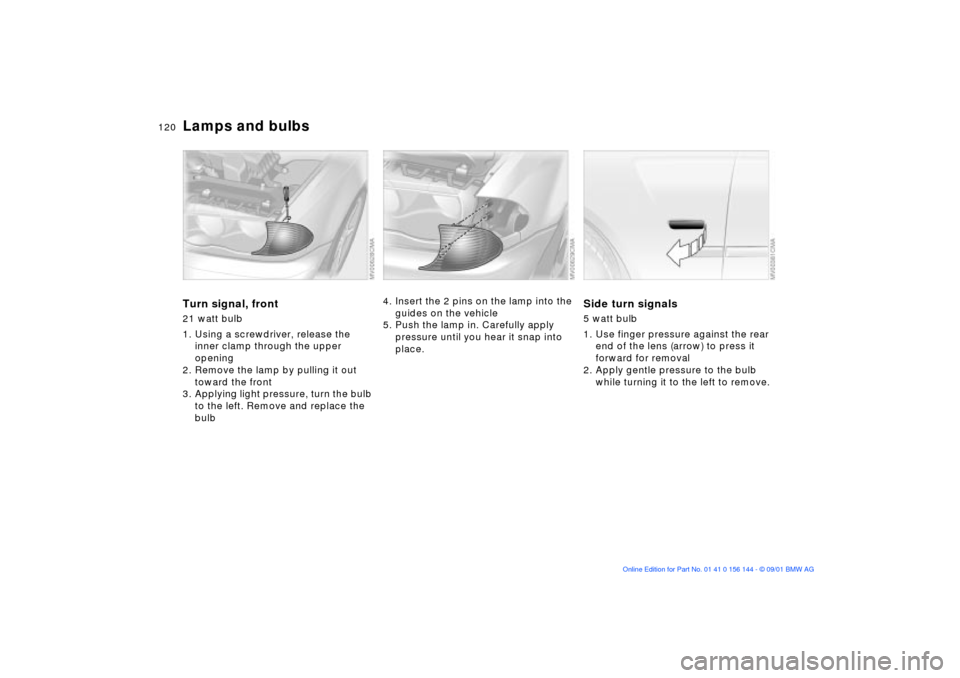
Lamps and bulbsTurn signal, front21 watt bulb
1. Using a screwdriver, release the
inner clamp through the upper
opening
2. Remove the lamp by pulling it out
toward the front
3. Applying light pressure, turn the bulb
to the left. Remove and replace the
bulb
4. Insert the 2 pins on the lamp into the
guides on the vehicle
5. Push the lamp in. Carefully apply
pressure until you hear it snap into
place.
Side turn signals5 watt bulb
1. Use finger pressure against the rear
end of the lens (arrow) to press it
forward for removal
2. Apply gentle pressure to the bulb
while turning it to the left to remove.
Page 121 of 147
121n
OverviewControlsMaintenanceRepairsDataIndex
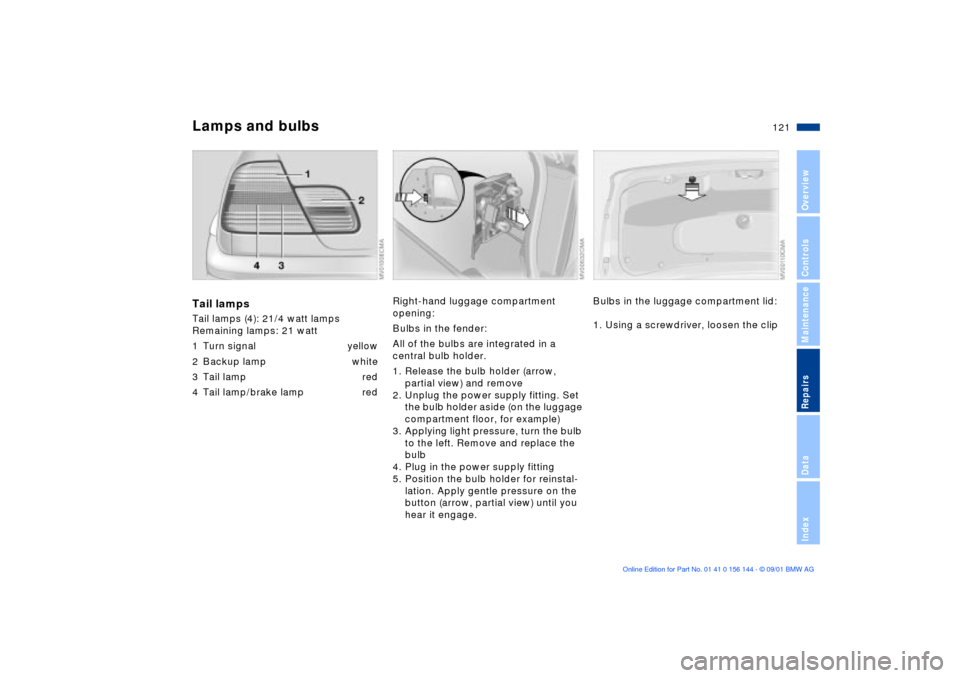
Lamps and bulbsTail lampsTail lamps (4): 21/4 watt lamps
Remaining lamps: 21 watt
1 Turn signal yellow
2 Backup lamp white
3 Tail lamp red
4 Tail lamp/brake lamp red
Right-hand luggage compartment
opening:
Bulbs in the fender:
All of the bulbs are integrated in a
central bulb holder.
1. Release the bulb holder (arrow,
partial view) and remove
2. Unplug the power supply fitting. Set
the bulb holder aside (on the luggage
compartment floor, for example)
3. Applying light pressure, turn the bulb
to the left. Remove and replace the
bulb
4. Plug in the power supply fitting
5. Position the bulb holder for reinstal-
lation. Apply gentle pressure on the
button (arrow, partial view) until you
hear it engage.
Bulbs in the luggage compartment lid:
1. Using a screwdriver, loosen the clip
Page 122 of 147
122n
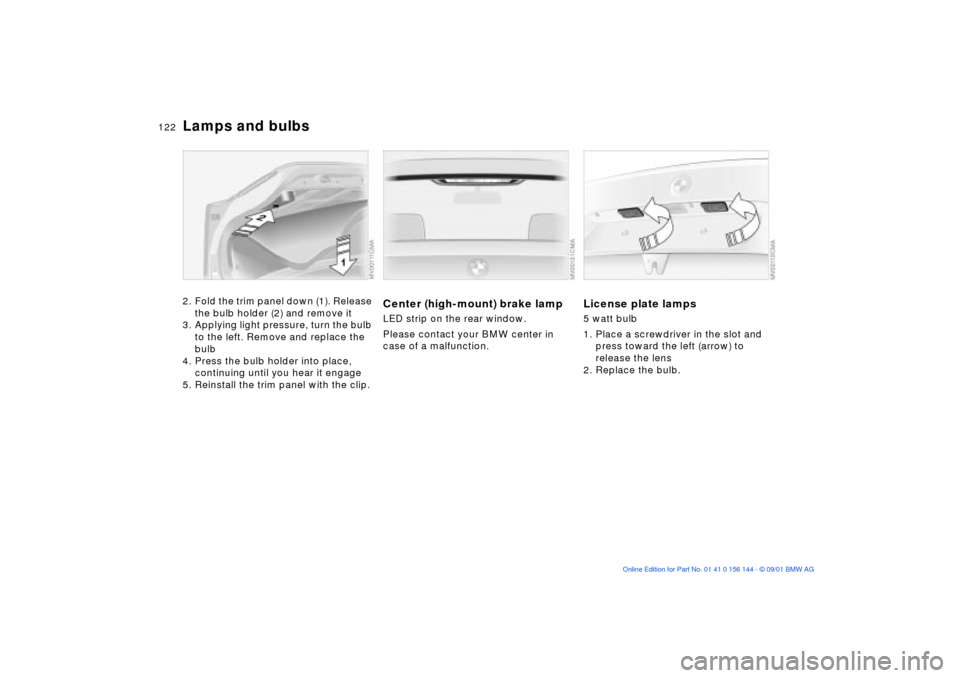
Lamps and bulbs2. Fold the trim panel down (1). Release
the bulb holder (2) and remove it
3. Applying light pressure, turn the bulb
to the left. Remove and replace the
bulb
4. Press the bulb holder into place,
continuing until you hear it engage
5. Reinstall the trim panel with the clip.
Center (high-mount) brake lampLED strip on the rear window.
Please contact your BMW center in
case of a malfunction.
License plate lamps5 watt bulb
1. Place a screwdriver in the slot and
press toward the left (arrow) to
release the lens
2. Replace the bulb.
Page 125 of 147

125n
OverviewControlsMaintenanceRepairsDataIndex
Changing a wheel8. Remove accumulations of mud or
dirt from the mounting surfaces of
the wheel and hub. Clean the lug
bolts
9. Position the new wheel or the
space-saver spare tire on the hub
and screw at least two lug bolts
finger-tight into opposite bolt holes
10. Screw in the remaining lug bolts.
Screw in all the bolts in diagonal
pattern
11. Lower the jack and remove it from
beneath the vehicle
12. Tighten the lug bolts securely in a
diagonal pattern
13. Wheels with full wheel covers
*:
Place the wheel cover with the
valve opening (arrow) over the
valve. Use both hands to press the
cover securely onto the rim
14. Check and correct the tire inflation
pressure at the earliest opportunity.
Vehicles with Tire Pressure Monitor
(RDC)/Flat Tire Monitor:
After mounting the spare tire or
correcting the tire inflation pres-
sure, reactivate the system, refer to
pages 73, 75.
Protect valve stems and valves from dirt
using screw-on valve stem caps. Dirty
valve stems frequently lead to slow
pressure loss.
Only use original BMW full wheel
covers, otherwise, the trim piece
may not fit securely. The full wheel
cover may not be installed on the
space-saver spare tire, since this could
damage the cover.<
The vehicle jack is designed for
changing wheels only. Do not
attempt to raise another vehicle model
with it or to raise any load of any kind.
To do so could cause accidents and
personal injury.
To ensure continued safety, have the
tightness of the torque bolts checked
with a calibrated lug wrench [torque
specification: 72 lb ft (100 Nm)] at the
earliest opportunity.<
When storing a wheel in the spare tire
recess take care to avoid bending the
threaded rod.
If the original BMW light-alloy wheels
have been replaced with other light-
alloy wheels, different lug bolts may be
required.
Replace the defective tire as soon as
possible and have the new wheel/tire
balanced.
Page 126 of 147

126n
Changing a wheelAlways use BMW-approved balance
weights on black-finished aluminum-
alloy wheels. Never allow anyone to
attempt to balance these wheels using
conventional rim-clip balance weights.Driving with the space-saver
spare tireDrive cautiously. Do not exceed a
speed of 50 mph (80 km/h).
You can anticipate changes in vehicle
handling such as delayed braking
response, longer braking distances and
sacrifices in roadholding.
The changes in handling characteristics
will be even more pronounced if winter
tires are mounted.
Only one space-saver spare tire
may be mounted at a time. Rein-
stall wheels and tires of the same size
and specification as soon as possible.
Maintain correct tire pressures. Refer to
page 25.<
Safety tires
*
Safety tires consists of self-contained
tires and special rims. The tire rein-
forcement ensures that the tire retains
some residual safety in the event of
pressure drop and driving remains
possible to a restricted degree. The
vehicle is equipped with Tire Pressure
Monitor (RDC) or Flat Tire Monitor,
which indicate a flat tire.Flat tireIf there is a tire failure, the red warning
lamp symbol lights up. A supplemen-
tary gong is also heard.
For additional information on Tire Pres-
sure Monitor (RDC) or Flat Tire Monitor
refer to pages 73 bzw. 75.
Reduce vehicle speed carefully to
under 50 mph (80 km/h), avoiding hard
brake applications and steering maneu-
vers.
With the safety tires, you can drive
another approx. 155 miles (250 km) to
reach a safe parking location, a service
station or the nearest BMW center.
With a low vehicle load, this can also be
considerably more than 155 miles
(250 km).Safety tires are only possible in
conjunction with Tire Pressure
Monitor (RDC) or Flat Tire Monitor.<
If the defective wheel can not be seen
as such immediately from the outside,
check the tire inflation pressure at all
four wheels.
Have the tires changed by your
BMW center. For safety reasons,
do not have a safety tire repaired. Your
BMW center has the information
needed for working with safety tires
and is equipped with the necessary
special tools.<
If appropriate, please consult your
BMW center to reequip your
vehicle from summer to winter tires Ð or
vice versa.<
Page 139 of 147

Everything from A to Z
139n
OverviewControlsMaintenancRepairsDataIndex
C
California Proposition
65 Warning114
Canned beverage holder88
Capacities135
Car care, refer to the "Caring
for your vehicle" manual
Car keys28
Car wash systems, refer to
the "Caring for your
vehicle" manual
Care of upholstery materials,
refer to the "Caring for your
vehicle" manual
Cargo loading93
CBC (Cornering Brake
Control)18, 71
Cellular phone89
refer also to the separate
"Owner's Manual"
Center (high-mount) brake
lamp122
Center 3-point belt in the
rear91
Center armrest87
Central locking system28
button32 Changing a wheel123
Check Control66
Check engine oil level109
Checking tire inflation
pressure24
Child restraint
installation52
Child-restraint anchorage
points51
Clean the headlamps61
Cleaning windshield61
Clock66
refer also to the "Radio
Owner's Manual" or to the
"Onboard Computer
Owner's Manual"
Clothes hooks90
Cockpit14
Coin box88
Compartments87
Compression132
Computer refer also to the "Onboard
Computer Owner's
Manual"
Configuring individual
settings with Vehicle and
Key Memory53
Consumption68
display65
Convenience operation via
the door lock
sliding/tilt sunroof31
windows31
Coolant111
Coolant temperature
gauge65
Cooling system,
capacity135
Copyright4
Cornering Brake Control
(CBC)18, 71
Correct sitting posture40
Cover, sun blinds86
Cruise control62
Cruising range68
Cup holder, refer to
beverage holder88
Curb weight134 Current check indicator17
D
Dash lighting78
Dashboard14
Data
dimensions133
engine132
technical132
weights134
Daytime driving lamp77
DBC (Dynamic Brake
Control)19, 72
Deep water99
Defrost setting82, 84
Defrost windows82, 84
Defrostable rear
window81, 85
Digital clock66
Dimensions133
Dipstick, engine oil109
Displacement132
Display lighting78
Displays15
Distance warning69
Page 140 of 147
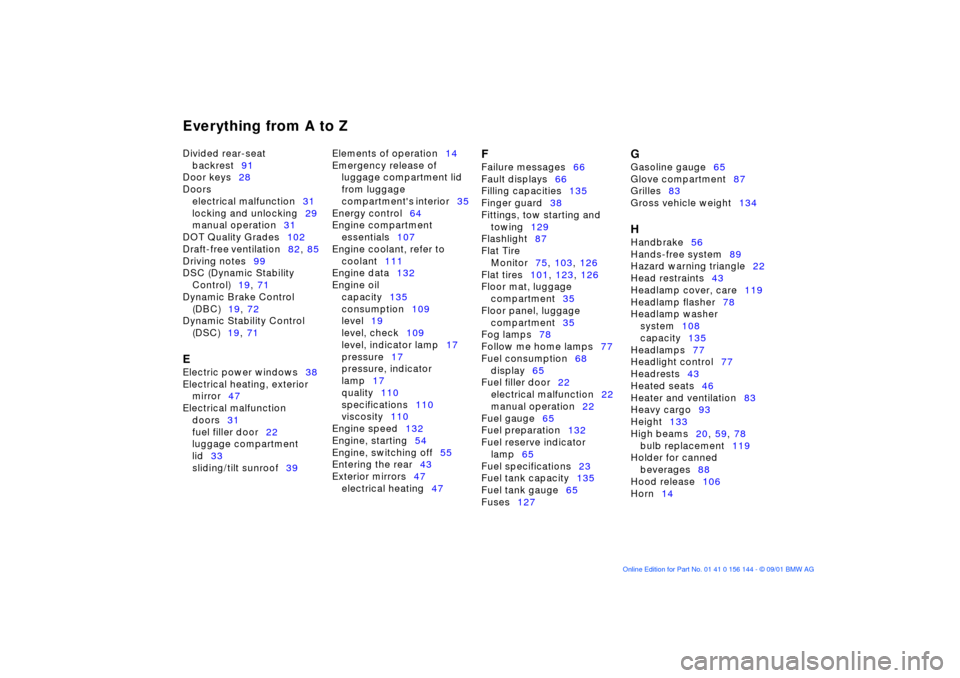
Everything from A to ZDivided rear-seat
backrest91
Door keys28
Doors
electrical malfunction31
locking and unlocking29
manual operation31
DOT Quality Grades102
Draft-free ventilation82, 85
Driving notes99
DSC (Dynamic Stability
Control)19, 71
Dynamic Brake Control
(DBC)19, 72
Dynamic Stability Control
(DSC)19, 71 E
Electric power windows38
Electrical heating, exterior
mirror47
Electrical malfunction
doors31
fuel filler door22
luggage compartment
lid33
sliding/tilt sunroof39 Elements of operation14
Emergency release of
luggage compartment lid
from luggage
compartment's interior35
Energy control64
Engine compartment
essentials107
Engine coolant, refer to
coolant111
Engine data132
Engine oil
capacity135
consumption109
level19
level, check109
level, indicator lamp17
pressure17
pressure, indicator
lamp17
quality110
specifications110
viscosity110
Engine speed132
Engine, starting54
Engine, switching off55
Entering the rear43
Exterior mirrors47
electrical heating47
F
Failure messages66
Fault displays66
Filling capacities135
Finger guard38
Fittings, tow starting and
towing129
Flashlight87
Flat Tire
Monitor75, 103, 126
Flat tires101, 123, 126
Floor mat, luggage
compartment35
Floor panel, luggage
compartment35
Fog lamps78
Follow me home lamps77
Fuel consumption68
display65
Fuel filler door22
electrical malfunction22
manual operation22
Fuel gauge65
Fuel preparation132
Fuel reserve indicator
lamp65
Fuel specifications23
Fuel tank capacity135
Fuel tank gauge65
Fuses127
G
Gasoline gauge65
Glove compartment87
Grilles83
Gross vehicle weight134 H
Handbrake56
Hands-free system89
Hazard warning triangle22
Head restraints43
Headlamp cover, care119
Headlamp flasher78
Headlamp washer
system108
capacity135
Headlamps77
Headlight control77
Headrests43
Heated seats46
Heater and ventilation83
Heavy cargo93
Height133
High beams20, 59, 78
bulb replacement119
Holder for canned
beverages88
Hood release106
Horn14