2002 BMW 330Ci COUPE tow
[x] Cancel search: towPage 93 of 147
93n
OverviewControlsMaintenanceRepairsDataIndex
Cargo loadingStowing cargoIf you are transporting a load in your
BMW:
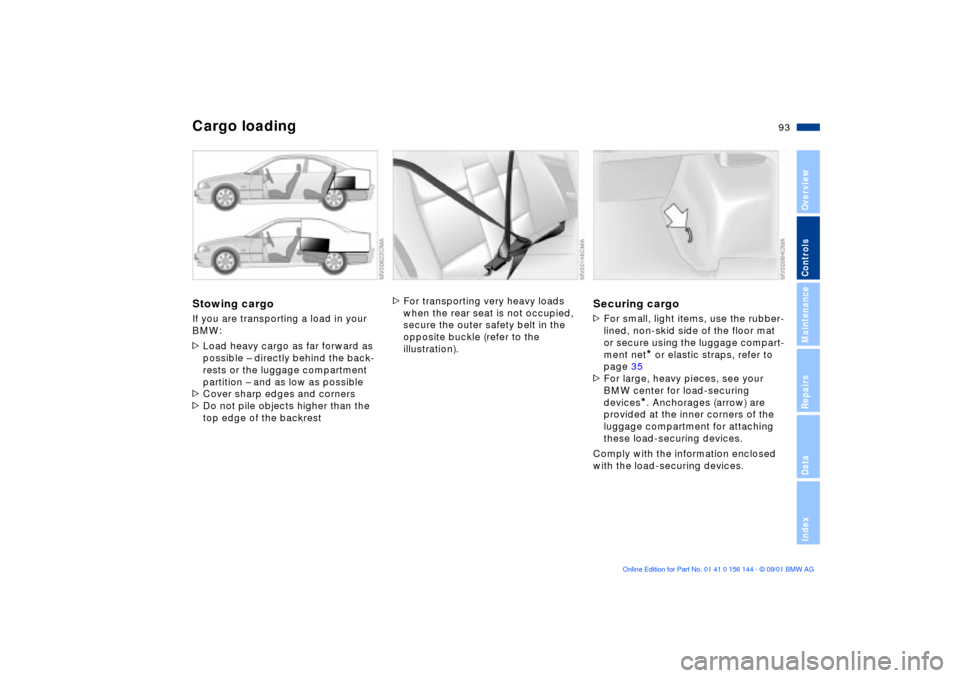
>Load heavy cargo as far forward as
possible Ð directly behind the back-
rests or the luggage compartment
partition Ð and as low as possible
>Cover sharp edges and corners
>Do not pile objects higher than the
top edge of the backrest
>For transporting very heavy loads
when the rear seat is not occupied,
secure the outer safety belt in the
opposite buckle (refer to the
illustration).
Securing cargo>For small, light items, use the rubber-
lined, non-skid side of the floor mat
or secure using the luggage compart-
ment net
* or elastic straps, refer to
page 35
>For large, heavy pieces, see your
BMW center for load-securing
devices*. Anchorages (arrow) are
provided at the inner corners of the
luggage compartment for attaching
these load-securing devices.
Comply with the information enclosed
with the load-securing devices.
Page 94 of 147

94n
Cargo loading Roof-mounted luggage rack
*
Always position and secure the
load correctly. If you do not, it can
endanger the passengers during
braking or evasive maneuvers.
Do not exceed the approved gross
weight or the approved maximum axle
loads, refer to page 134, otherwise the
vehicle's operating safety is no longer
assured and you are in violation of the
law.
Do not stow heavy or hard objects in
the passenger compartment without
securing them. Otherwise they would
be thrown around during braking and
evasive maneuvers and endanger the
passengers.<
A special roof-rack system is available
as an optional extra for your BMW.
Please observe the precautions
included with the installation instruc-
tions.AnchoragesAccess to the anchorages:
To fold up the cover (arrow), please use
the tool provided with the roof-rack
system.Loading and driving notesRoof-mounted luggage racks raise the
center of gravity of the vehicle when
they are loaded. For this reason, they
have a major effect on the vehicle's
handling and steering response.
You should therefore always remember
not to exceed the approved roof load
capacity, the approved gross vehicle
weight or the axle loads when loading
the rack. These weights are listed under
Technical Data on page 134.
Make sure that the load is not too bulky,
and attempt to distribute it evenly.
Always load the heaviest pieces first (on
the bottom). Be sure that adequate
clearance is maintained for raising the
sliding/tilt sunroof, and that objects do
not project into the opening path of the
luggage compartment lid.
Secure the roof luggage correctly and
securely to prevent it from shifting or
being lost during driving (danger to
following traffic).
Drive smoothly and avoid sudden
acceleration and braking. Do not corner
at high speeds.
The luggage rack and the roof load
increase aerodynamic resistance:
increased fuel consumption and addi-
tional stress on the vehicle's body are
the result.
Page 98 of 147
98n
To ensure that your vehicle provides
maximum economy throughout a long
service life, we request that you comply
with the following information.
Engine and differentialUp to 1,200 miles (2,000 km):
Constantly vary both engine and vehicle
speed, remembering not to exceed
4,500 rpm or 100 mph (160 km/h)
during this period.
Always obey all official speed limits.
Do not use full throttle, and avoid
pressing the accelerator beyond the
kickdown point during these initial
miles.
You can then proceed to increase both
engine and vehicle speed once the
initial 1,200 miles (2,000 km) have
elapsed.
You should also observe the same
break-in procedures if the engine or
differential is replaced later in the
course of the vehicle's life.
TiresDue to technical factors associated
with their manufacture, tires do not
achieve their full traction potential until
after an initial break-in period. We thus
ask you to drive with extra care during
the first 200 miles (300 km).
Always obey all official speed limits.
When the vehicle is operated on
wet or slushy roads, a wedge of
water may form between the tire and
the road surface. This phenomenon is
referred to as aquaplaning, or hydro-
planing, and can lead to partial or
complete loss of traction, vehicle
control and braking effectiveness.
Reduce your speed on wet roads.
rotors achieve the optimal pad-surface
and wear patterns required for trouble-
free operation and an extended service
life later on.
To break-in the separate parking brake
drums, apply the parking brake lightly
when coasting to a standstill (at a traffic
signal, for instance), provided that
traffic conditions allow you to do so.
To avoid corrosion, repeat this proce-
dure from time to time.
The brake lamps do not come on
when the parking brake is set.
Vacuum for the brake system servo unit
on your BMW is available only when the
engine is running. When you move the
vehicle with the engine off Ð when
towing, for example Ð substantially
higher levels of pedal force will be
required to brake the vehicle.
operate at optimum efficiency.
Remember to engage the clutch care-
fully during this initial period.
Break-in procedures
Page 101 of 147
101n
OverviewControlsMaintenanceRepairsDataIndex
Information for your safetyThe factory-approved radial tires are
matched to the vehicle and have been
selected to provide optimum safety and
driving comfort.
It is not merely the tire's service life, but
also driving comfort and Ð above all else
Ð driving safety that depend on the
condition of the tires and the mainte-
nance of the specified tire inflation
pressure.
Incorrect tire inflation pressure is
a frequent cause of tire damage. It
also significantly influences the road-
holding ability of your BMW.
Be sure to check the tire inflation pres-
sure, including the space-saver spare
tire or the spare tire, on a regular basis,
at least twice a month and before every
extended journey, refer to page 24. If
this is not done, incorrect tire pressures
can cause driving instability and tire
damage, ultimately resulting in acci-
dents.<
Tire tread Ð tire damageInspect your tires frequently for tread
wear, signs of damage and for foreign
objects lodged in the tread. Check the
tread depth.
Tread depth should not be allowed to
go below 0.12 in (3 mm), even though
the legally specified minimum tread
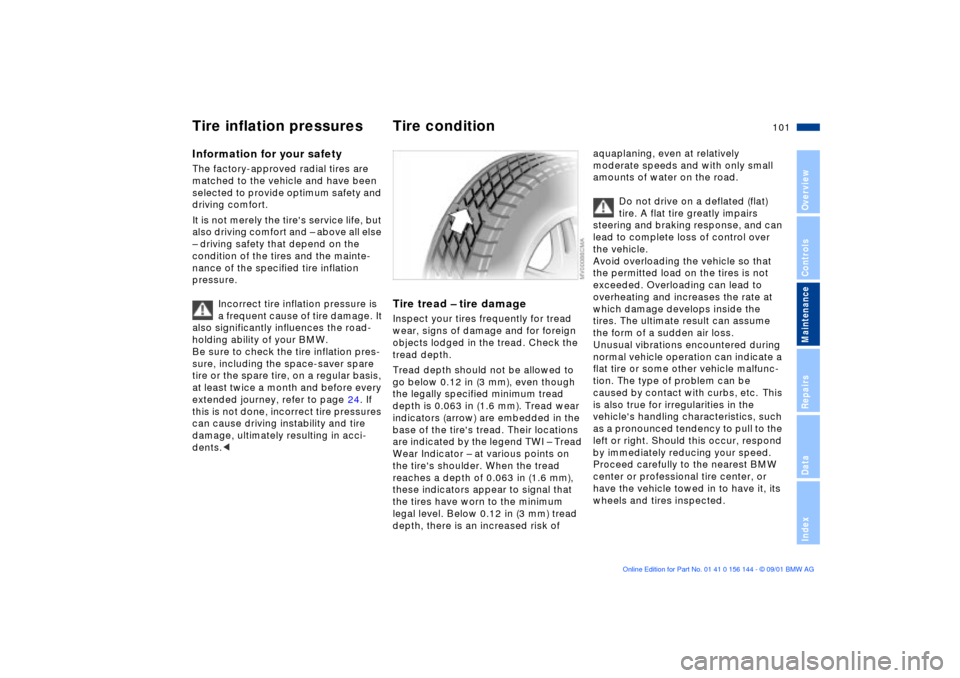
depth is 0.063 in (1.6 mm). Tread wear
indicators (arrow) are embedded in the
base of the tire's tread. Their locations
are indicated by the legend TWI Ð Tread
Wear Indicator Ð at various points on
the tire's shoulder. When the tread
reaches a depth of 0.063 in (1.6 mm),
these indicators appear to signal that
the tires have worn to the minimum
legal level. Below 0.12 in (3 mm) tread
depth, there is an increased risk of
aquaplaning, even at relatively
moderate speeds and with only small
amounts of water on the road.
Do not drive on a deflated (flat)
tire. A flat tire greatly impairs
steering and braking response, and can
lead to complete loss of control over
the vehicle.
Avoid overloading the vehicle so that
the permitted load on the tires is not
exceeded. Overloading can lead to
overheating and increases the rate at
which damage develops inside the
tires. The ultimate result can assume
the form of a sudden air loss.
Unusual vibrations encountered during
normal vehicle operation can indicate a
flat tire or some other vehicle malfunc-
tion. The type of problem can be
caused by contact with curbs, etc. This
is also true for irregularities in the
vehicle's handling characteristics, such
as a pronounced tendency to pull to the
left or right. Should this occur, respond
by immediately reducing your speed.
Proceed carefully to the nearest BMW
center or professional tire center, or
have the vehicle towed in to have it, its
wheels and tires inspected.
Tire inflation pressures
Tire condition
Page 109 of 147
109n
OverviewControlsMaintenanceRepairsDataIndex
Engine oilChecking oil level1. Park the vehicle on a level surface
2. Switch the engine off after it has
reached normal operating tempera-
ture
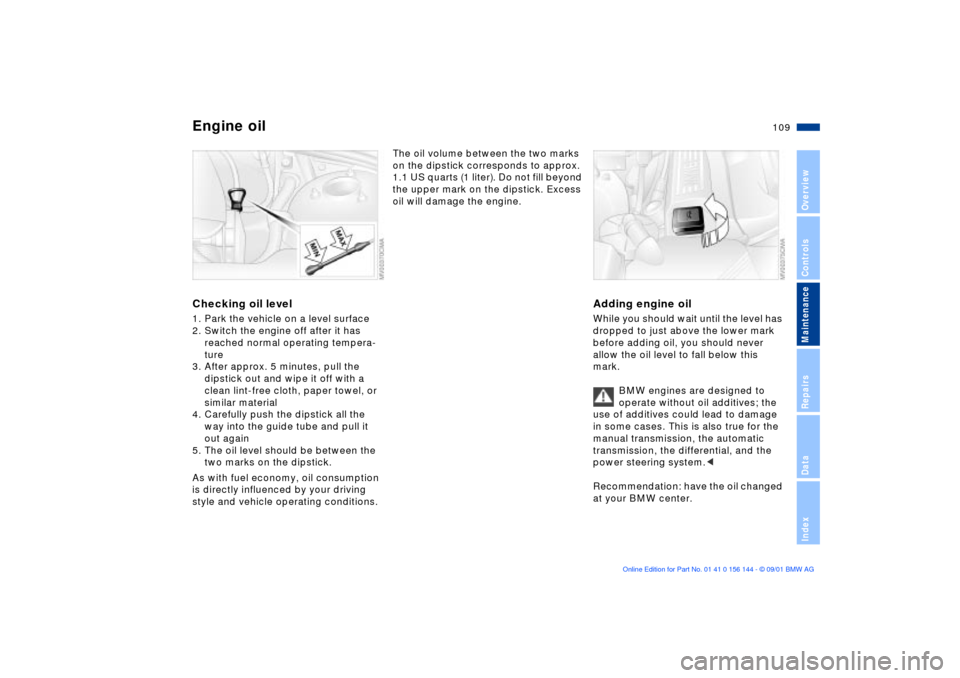
3. After approx. 5 minutes, pull the
dipstick out and wipe it off with a
clean lint-free cloth, paper towel, or
similar material
4. Carefully push the dipstick all the
way into the guide tube and pull it
out again
5. The oil level should be between the
two marks on the dipstick.
As with fuel economy, oil consumption
is directly influenced by your driving
style and vehicle operating conditions.
The oil volume between the two marks
on the dipstick corresponds to approx.
1.1 US quarts (1 liter). Do not fill beyond
the upper mark on the dipstick. Excess
oil will damage the engine.
Adding engine oilWhile you should wait until the level has
dropped to just above the lower mark
before adding oil, you should never
allow the oil level to fall below this
mark.
BMW engines are designed to
operate without oil additives; the
use of additives could lead to damage
in some cases. This is also true for the
manual transmission, the automatic
transmission, the differential, and the
power steering system.<
Recommendation: have the oil changed
at your BMW center.
Page 118 of 147
118n
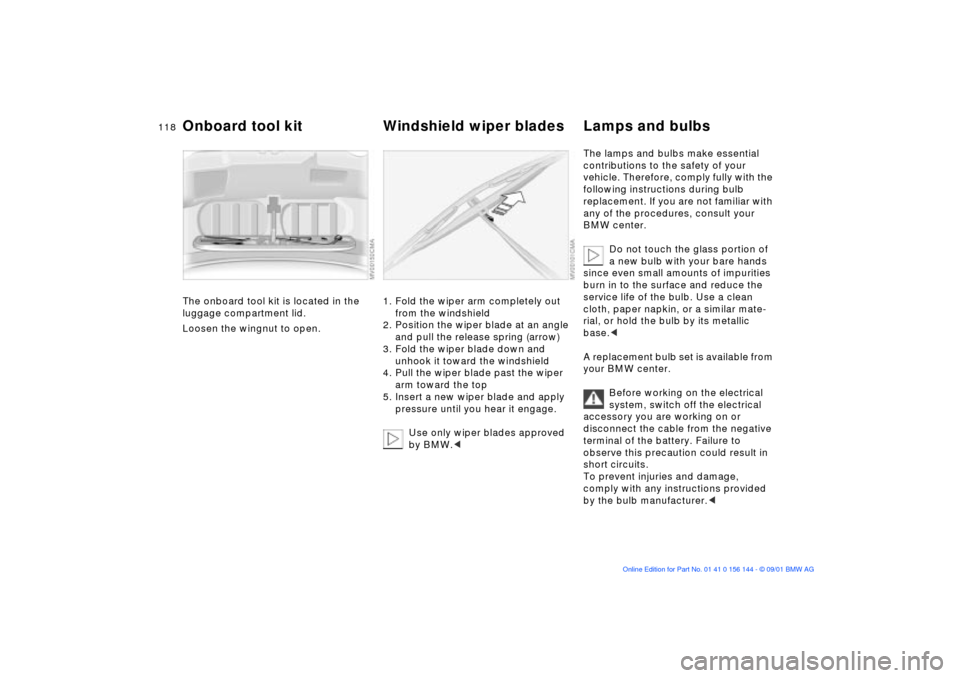
The onboard tool kit is located in the
luggage compartment lid.
Loosen the wingnut to open.
1. Fold the wiper arm completely out
from the windshield
2. Position the wiper blade at an angle
and pull the release spring (arrow)
3. Fold the wiper blade down and
unhook it toward the windshield
4. Pull the wiper blade past the wiper
arm toward the top
5. Insert a new wiper blade and apply
pressure until you hear it engage.
Use only wiper blades approved
by BMW.<
The lamps and bulbs make essential
contributions to the safety of your
vehicle. Therefore, comply fully with the
following instructions during bulb
replacement. If you are not familiar with
any of the procedures, consult your
BMW center.
Do not touch the glass portion of
a new bulb with your bare hands
since even small amounts of impurities
burn in to the surface and reduce the
service life of the bulb. Use a clean
cloth, paper napkin, or a similar mate-
rial, or hold the bulb by its metallic
base.<
A replacement bulb set is available from
your BMW center.
Before working on the electrical
system, switch off the electrical
accessory you are working on or
disconnect the cable from the negative
terminal of the battery. Failure to
observe this precaution could result in
short circuits.
To prevent injuries and damage,
comply with any instructions provided
by the bulb manufacturer.<
Onboard tool kit Windshield wiper blades Lamps and bulbs
Page 120 of 147
120n
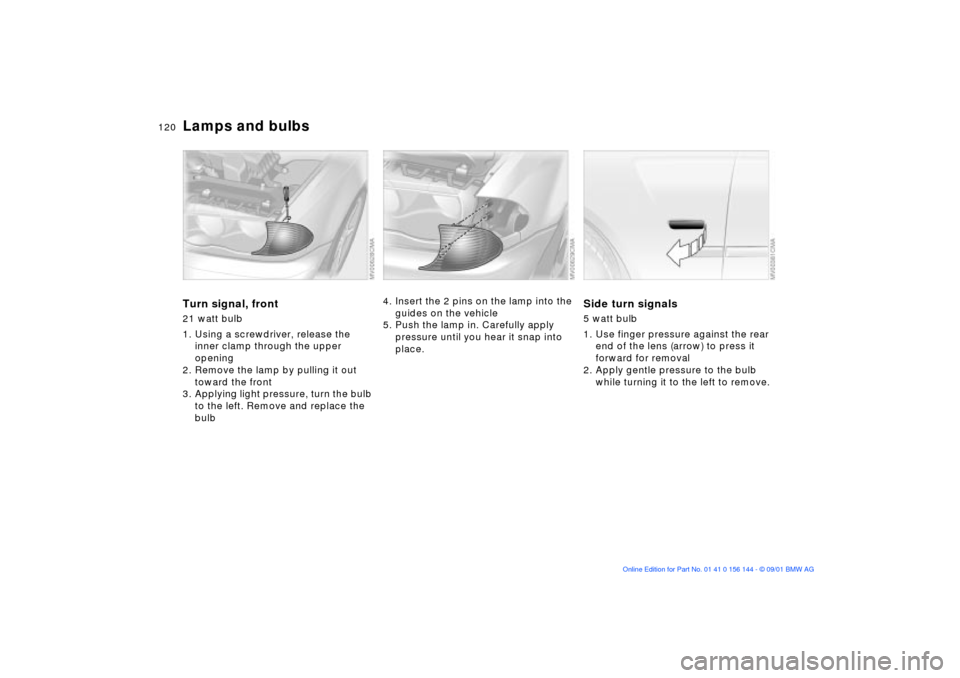
Lamps and bulbsTurn signal, front21 watt bulb
1. Using a screwdriver, release the
inner clamp through the upper
opening
2. Remove the lamp by pulling it out
toward the front
3. Applying light pressure, turn the bulb
to the left. Remove and replace the
bulb
4. Insert the 2 pins on the lamp into the
guides on the vehicle
5. Push the lamp in. Carefully apply
pressure until you hear it snap into
place.
Side turn signals5 watt bulb
1. Use finger pressure against the rear
end of the lens (arrow) to press it
forward for removal
2. Apply gentle pressure to the bulb
while turning it to the left to remove.
Page 122 of 147
122n
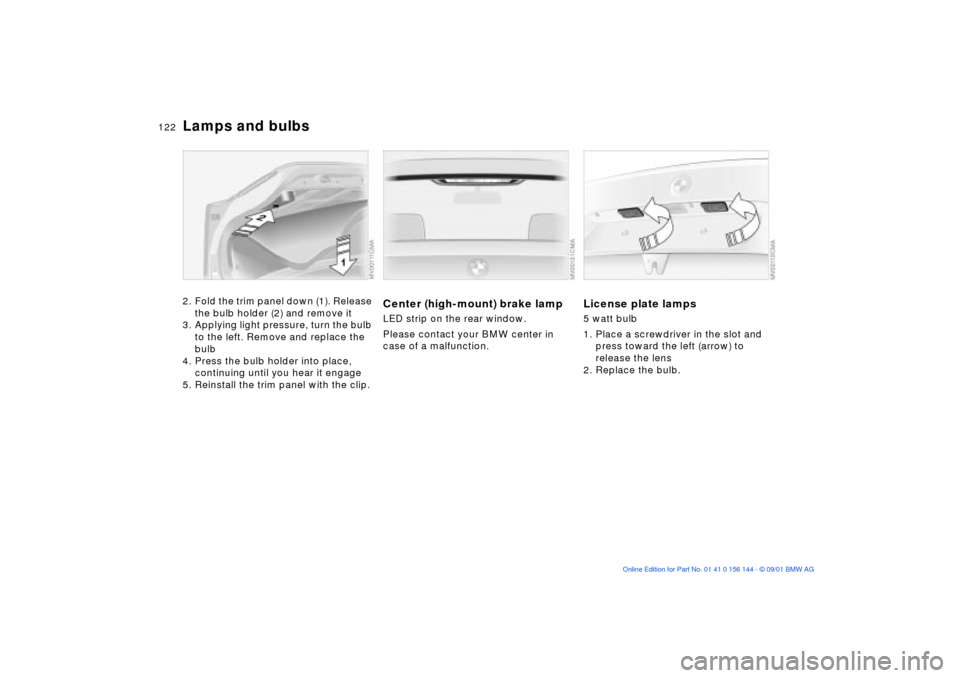
Lamps and bulbs2. Fold the trim panel down (1). Release
the bulb holder (2) and remove it
3. Applying light pressure, turn the bulb
to the left. Remove and replace the
bulb
4. Press the bulb holder into place,
continuing until you hear it engage
5. Reinstall the trim panel with the clip.
Center (high-mount) brake lampLED strip on the rear window.
Please contact your BMW center in
case of a malfunction.
License plate lamps5 watt bulb
1. Place a screwdriver in the slot and
press toward the left (arrow) to
release the lens
2. Replace the bulb.