2002 BMW 330Ci CONVERTIBLE instrument panel
[x] Cancel search: instrument panelPage 57 of 159

57n
OverviewControlsMaintenanceRepairsDataIndex
Airbags
The airbags do not deploy in
response to minor collisions, rear
impacts and certain kinds of vehicle
rollover.<
For your safety, comply with the
following instructions for the
airbags. If you do not, the airbags may
not be able to provide their maximum
protection. All passengers in the vehicle
should be aware of and comply with
these directions:
The airbags are supplemental restraint
devices designed to provide extra
protection; they are not a substitute for
safety belts. Wear your safety belt at all
times. The airbags will not be triggered
in the event of a minor accident, a
vehicle rollover, or collisions from the
rear. In these instances, the safety belt
provides optimal protection.
Airbags are located under cover panels
in the steering wheel, in the instrument
panel, in the side trim panels in the
front and rear
*, in the roof panels, and
in the sides of the inside roof lining.
Adjust your seat to a position that
provides maximum distance between
you and the steering wheel, the instru-
ment panel and the door while still
allowing comfortable and safe access
to all vehicle controls.
To avoid sustaining hand and arm inju-
ries, always grasp the steering wheel
on the rim with the hands at the 9 and
3 o'clock positions. Do not place your
hands on the center pad.
Never allow any objects to obstruct the
area between the airbag and an occu-
pant.
Do not use the cover panel above the
passenger-side airbag as a storage
area.
Do not apply adhesive materials to the
cover panels of the airbags, cover them
or modify them in any other way.
Do not install a rear-facing child-
restraint system in the front passenger
seat of this vehicle.
Children under 13 years of age and less
than 5 ft (150 cm) tall should ride only in
the rear seat.
Infants or small children should never
be held on the lap of a passenger.
If your vehicle is equipped with side
airbags in the rear passenger area
*, be
sure that child restraints are mounted
correctly with the greatest-possible
distance between them and the airbags
in the side trim panels. Do not allow
children to lean out of the child's seat in
the direction of the side trim panels. If
they do so, serious injuries can occur if
the airbag is triggered.
(infants and small children in appro-
priate child-restraint systems; larger
children and adults using the safety
belts). Never let an occupant's head
rest near or on a side airbag, as the
inflating airbag could cause a serious or
fatal injury. Please note that the word
Airbag imprinted on the door trim panel
indicates the airbag's location.
Accident research shows that the
safest place for children in an auto-
mobile is in the rear seat. However, a
child sitting in the rear seat and not
properly restrained may place his or her
head on or near the airbag, if so
equipped. For example, a child Ñ even
though belted Ñ may fall asleep with his
or her head against the side airbag. It
may be difficult for a driver to ensure
that children in the rear seat will remain
properly positioned at all times and not
place their heads on or near the side
airbag.
Therefore, we recommend that the
rear-seat side airbags, if installed in the
vehicle, be deactivated if children will
travel in the rear seat.
The rear-seat side airbags may already
have been deactivated, either at the
time of manufacture or by a BMW
Page 60 of 159

60n
Transporting children safelyIf the selected seating position is
equipped with a head restraint, lift the
head restraint and pass the tether strap
between the head restraint and the
backrest.
Adjust the tether strap according to the
child restraint manufacturer's
instructions.
Before installing any child-restraint
device or child seat, please read
the following:
Never install a rear-facing child-restraint
system in the front passenger seat of
this vehicle.
Your vehicle is equipped with an airbag
supplemental restraint system for the
front passenger. Because the backrest
on any rear-facing child-restraint system
(of the kind designed for infants under 1
year and 20 lbs/9 kg) would be within
the airbag's deployment range, you
should never mount such a device in the
front passenger seat, as the impact of
the airbag against the child restraint's
backrest could lead to serious or fatal
injuries.
If it is necessary for a child (not an infant)
to ride in the front seat, certain precau-
tions should be taken. First, move the
passenger seat as a far away from the
instrument panel as possible. This
important precaution is intended to
maximize the distance between the
airbag and the child. Older children
should be tightly secured with the safety
belt. Younger children should be
secured in an appropriate forward-
facing child-restraint system that has
first been properly installed with a safety
belt. Never install a rear-facing child-
restraint system in the front passenger
seat.
We strongly urge you to carefully read
and observe the instructions for installa-
tion and use provided by the child
restraint's manufacturer whenever you
use such a device.
Always ensure that all occupants (of all
ages) remain properly and securely
restrained at all times.<
All rear seating positions in your vehicle
meet the recommendations of
SAE J1819, an industry recommended
standard for securing child-restraint
systems in motor vehicles.
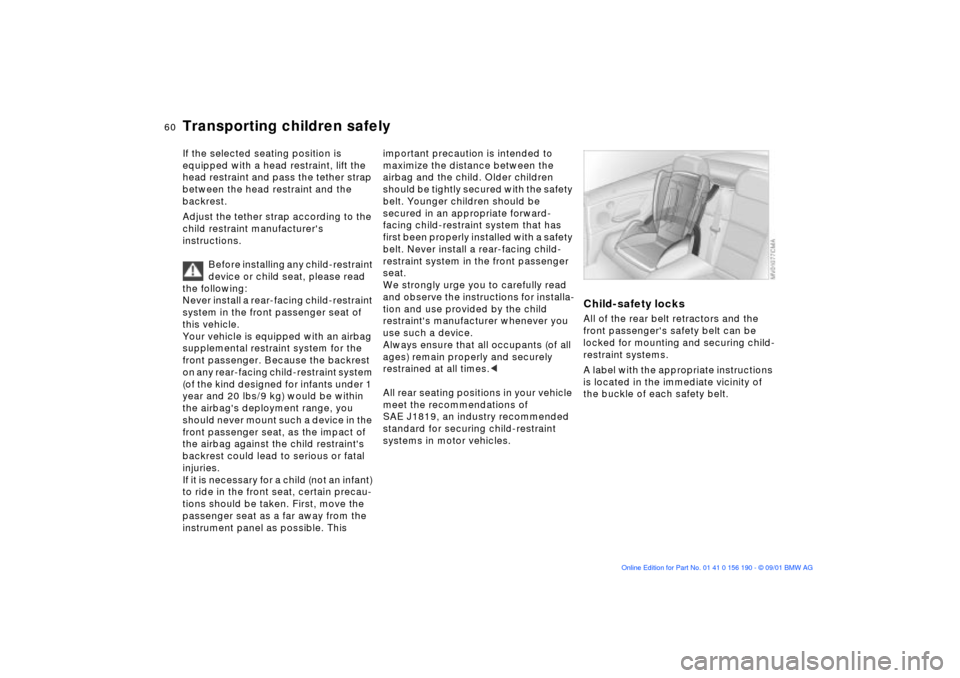
Child-safety locksAll of the rear belt retractors and the
front passenger's safety belt can be
locked for mounting and securing child-
restraint systems.
A label with the appropriate instructions
is located in the immediate vicinity of
the buckle of each safety belt.
Page 68 of 159

68n
Automatic transmission with Steptronic
*
N NeutralSelect only when stopping for an
extended period.D Drive (automatic shift program)This position is designed for driving
under all normal operating conditions.
All forward gears are available.Kickdown modeIn the kickdown mode, you achieve
maximum acceleration and in
position D top speed.
Depress the accelerator pedal past the
increased resistance point at the full-
throttle position.
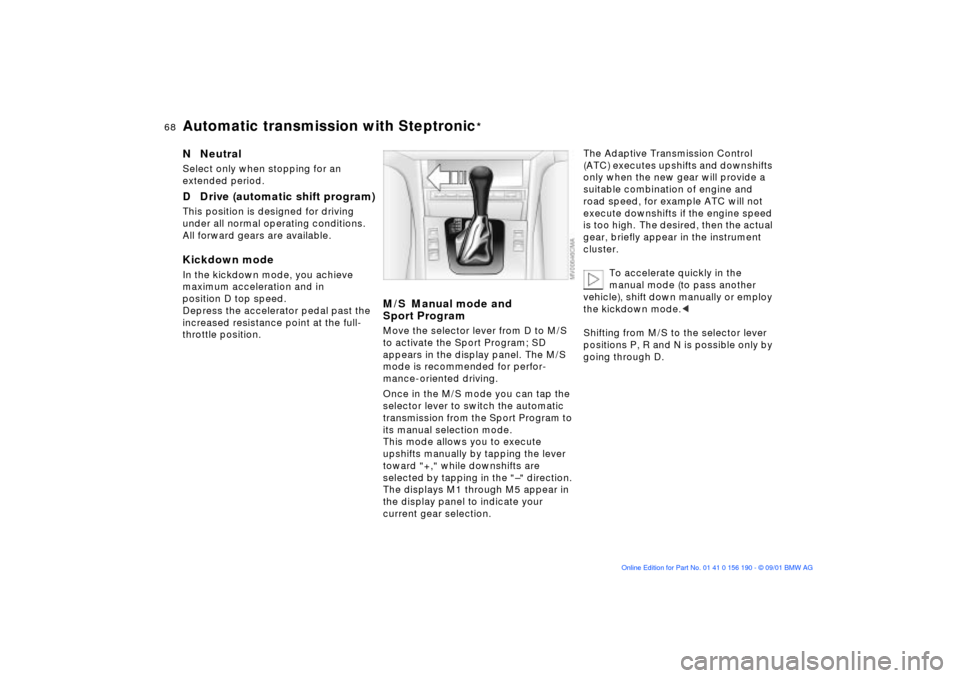
M/S Manual mode and
Sport ProgramMove the selector lever from D to M/S
to activate the Sport Program; SD
appears in the display panel. The M/S
mode is recommended for perfor-
mance-oriented driving.
Once in the M/S mode you can tap the
selector lever to switch the automatic
transmission from the Sport Program to
its manual selection mode.
This mode allows you to execute
upshifts manually by tapping the lever
toward "+," while downshifts are
selected by tapping in the "Ð" direction.
The displays M1 through M5 appear in
the display panel to indicate your
current gear selection.
The Adaptive Transmission Control
(ATC) executes upshifts and downshifts
only when the new gear will provide a
suitable combination of engine and
road speed, for example ATC will not
execute downshifts if the engine speed
is too high. The desired, then the actual
gear, briefly appear in the instrument
cluster.
To accelerate quickly in the
manual mode (to pass another
vehicle), shift down manually or employ
the kickdown mode.<
Shifting from M/S to the selector lever
positions P, R and N is possible only by
going through D.
Page 76 of 159

76n
Check Control ComputerWhen you turn the ignition key to posi-
tion 2, any of the following symbols may
appear to call your attention to problem
areas; the symbols remain in the
display panel until the problem is
corrected:
1 Check the low and high beams as
well as the parking lamps
2 Door open
3 Luggage compartment lid open
4 Check tail or brake lamps
When you open the driver's door after
completing a journey, an acoustic
warning signal will sound if the head-
lamps are still on.
Mode selectionFrom ignition key position 1, you can
call up information from the computer
using the button in the turn signal lever.
The information is displayed in the
instrument cluster. By pressing the
button briefly toward the steering
column, you can call up a new function
for display.
The displays appear in the following
order:
Time of day, outside temperature,
average fuel consumption, cruising
range, average vehicle speed.
When the ignition key is turned to posi-
tion 1 or higher the last active setting is
displayed.
ClockIf you wish to have a permanent time
display, you can make this setting in the
radio display (refer to the Radio
Owner's Manual).
You can set the clock and the time
display in the car radio as follows.
Page 118 of 159

118n
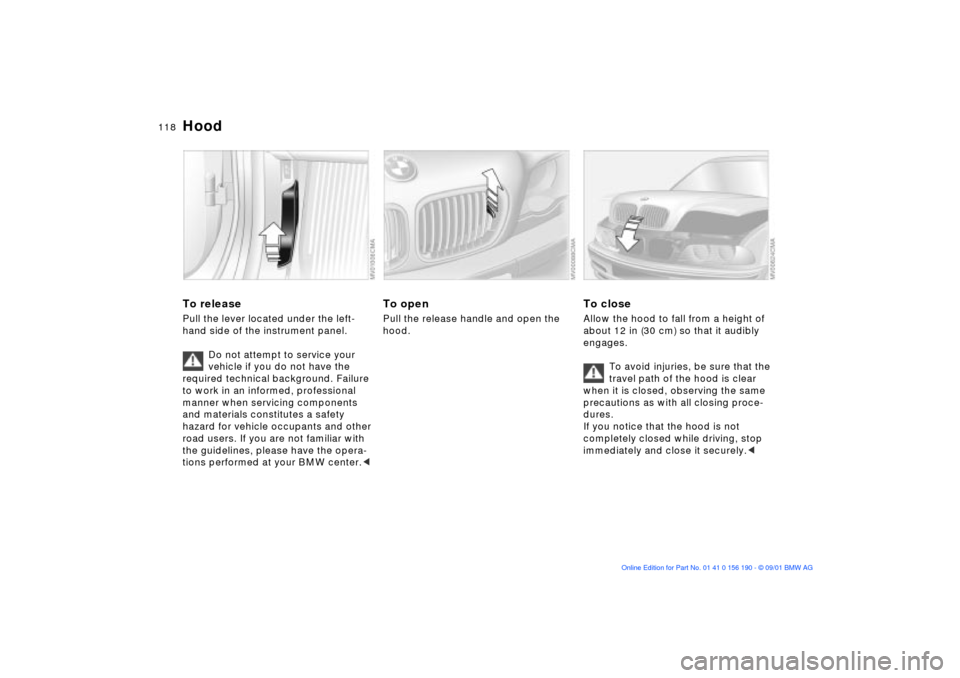
To releasePull the lever located under the left-
hand side of the instrument panel.
Do not attempt to service your
vehicle if you do not have the
required technical background. Failure
to work in an informed, professional
manner when servicing components
and materials constitutes a safety
hazard for vehicle occupants and other
road users. If you are not familiar with
the guidelines, please have the opera-
tions performed at your BMW center.<
To openPull the release handle and open the
hood.
To closeAllow the hood to fall from a height of
about 12 in (30 cm) so that it audibly
engages.
To avoid injuries, be sure that the
travel path of the hood is clear
when it is closed, observing the same
precautions as with all closing proce-
dures.
If you notice that the hood is not
completely closed while driving, stop
immediately and close it securely.<
Hood
Page 127 of 159

127n
OverviewControlsMaintenanceRepairsDataIndex
OBD interface socketThe interface socket for onboard diag-
nostics is located on the left-hand side
of the driver's side, behind a specially
marked cover located beneath the
instrument panel. The cover has the
letters OBD on it.
This interface makes it possible to
access data on emissions-related
components using special equipment.
An illuminated indicator informs
you of the need for service, not
that you need to stop the
vehicle. However, the systems should
be checked by your BMW center at the
next opportunity.
If the indicator blinks or flashes, this
indicates a high level of engine misfire.
Reduce speed and contact the nearest
BMW center immediately. Severe
engine misfiring over even a short
period of time can seriously damage
emission control system components,
especially the catalytic converter.
SERVICE ENGINE SOON
warning lamp for Canadian
models.
If the fuel filler cap is not on tight
enough, the OBD system can
detect leaking vapor and the indicator
will light up. If the fuel filler cap is then
tightened, the indicator will usually go
out after a short period of time.<
Page 153 of 159

Everything from A to Z
153n
OverviewControlsMaintenanceRepairsDataIndex
G
Garage-door opener97
Gasoline gauge75
Glove compartment97
Gross vehicle weight146 H
Handbrake66
Hands-free system100
microphone100
Hardtop110
Hazard warning triangle22
Head restraints50
Headlamp cover, care131
Headlamp flasher88
Headlamp washer
system120
capacity147
Headlight control87
Heated seats54
Heavy cargo103
Height145
High beams20, 69, 88
bulb replacement131
High Performance Synthetic
Oil122
Holder for canned
beverages100
Hood118
Horn14
I
Ice warning77
Icy roads77
Ignition keys28
Ignition lock64
Imprint4
Indicator lamps17
Inflation pressures,
tires24, 113
INSPECTION75
Instrument cluster15
Instrument lighting88
Instrument panel15
Interface socket for onboard
diagnostics (OBD)127
Interior lamps30, 89
remote control30
Interior motion sensor36
operating via remote
control30
switching off37
Interior rearview mirror55
with automatic
dimming56
Interlock64
J
Jack135
Jump-starting140 K
Key Memory63
Key set28
Keys28 L
Lamps and bulbs,
replacement131
Lashing eyes104
LATCH child-restraint
system59
Length145
License plate lamps, bulb
replacement134
LIGHTS ON warning87
Load-securing devices104
Lock buttons32
Low beams87
bulb replacement131
Lug wrench135
Luggage compartment35
capacity146
enlarging35
floor panel35
secure separately33 Luggage compartment lid
electrical malfunction33
manual operation33
operate via remote
control30
Luggage compartment
lighting33
Luggage compartment's
interior, emergency
release34
Luggage rack105
Lumbar support50
M
M+S tires117
Maintenance125
Malfunction displays76
Manual closing
fully-automatic convertible
top44
Manual convertible top39
close41
open39
Manual operation
doors31
fuel filler door22
luggage compartment
lid33