2002 BMW 325I window
[x] Cancel search: windowPage 88 of 155
88n
Automatic climate control
*
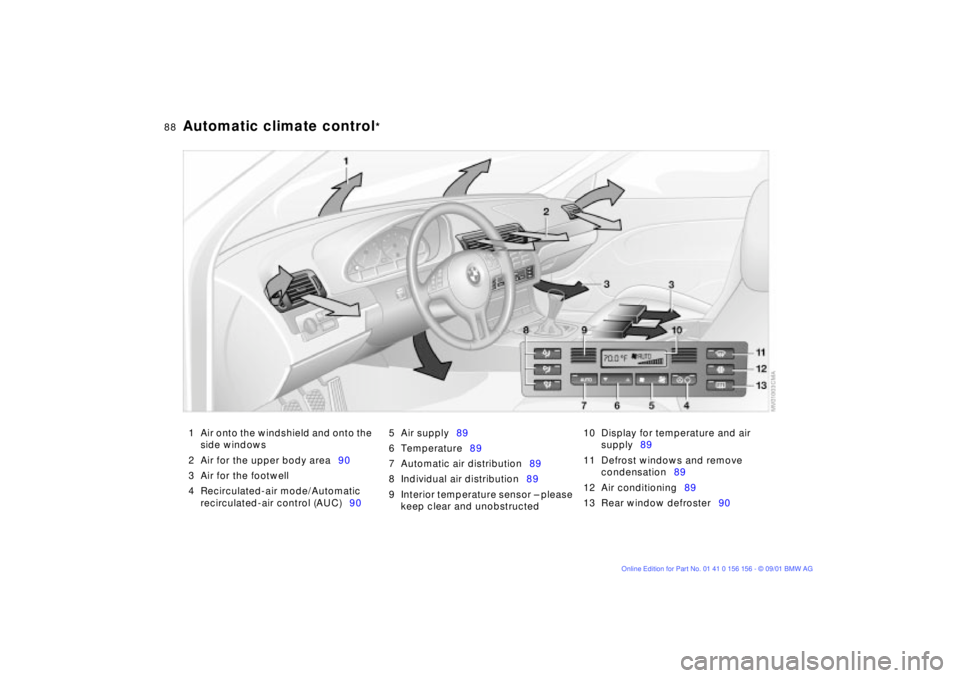
1 Air onto the windshield and onto the
side windows
2 Air for the upper body area90
3 Air for the footwell
4 Recirculated-air mode/Automatic
recirculated-air control (AUC)905 Air supply89
6 Temperature89
7 Automatic air distribution89
8 Individual air distribution89
9 Interior temperature sensor Ð please
keep clear and unobstructed10 Display for temperature and air
supply89
11 Defrost windows and remove
condensation89
12 Air conditioning89
13 Rear window defroster90
Page 89 of 155
89n
OverviewControlsMaintenanceRepairsDataIndex
Automatic climate control
*
Tips for pleasant drivingUse the automatic system Ð switch on
with AUTO button 7. Select the desired
interior temperature.
Detailed setting options are described
for you in the following section.Automatic air distribution
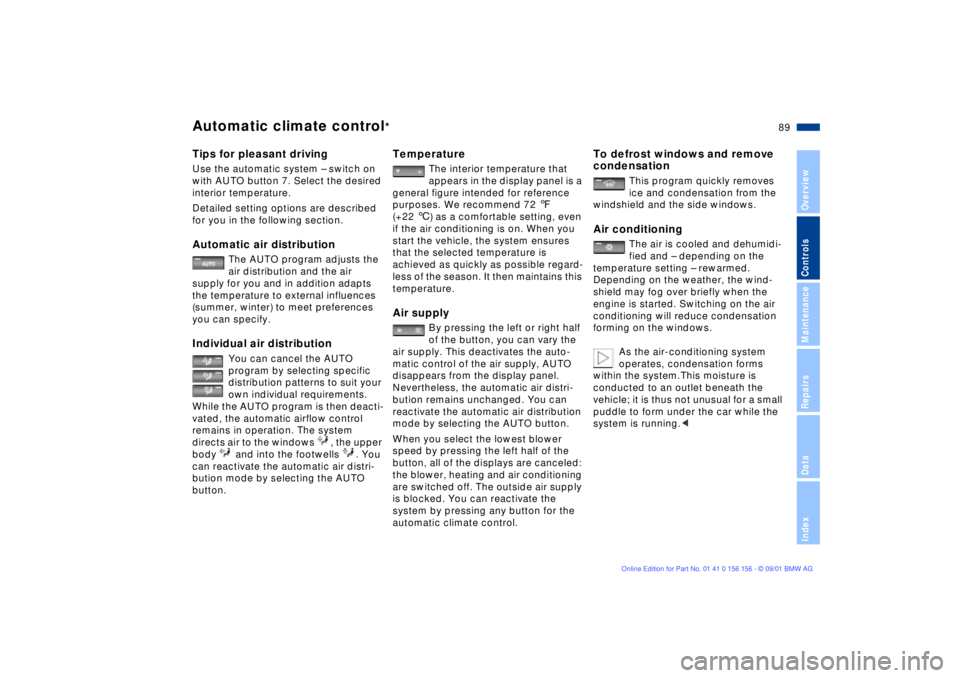
The AUTO program adjusts the
air distribution and the air
supply for you and in addition adapts
the temperature to external influences
(summer, winter) to meet preferences
you can specify.
Individual air distribution
You can cancel the AUTO
program by selecting specific
distribution patterns to suit your
own individual requirements.
While the AUTO program is then deacti-
vated, the automatic airflow control
remains in operation. The system
directs air to the windows , the upper
body and into the footwells . You
can reactivate the automatic air distri-
bution mode by selecting the AUTO
button.
Temperature
The interior temperature that
appears in the display panel is a
general figure intended for reference
purposes. We recommend 72 7
(+22 6) as a comfortable setting, even
if the air conditioning is on. When you
start the vehicle, the system ensures
that the selected temperature is
achieved as quickly as possible regard-
less of the season. It then maintains this
temperature.
Air supply
By pressing the left or right half
of the button, you can vary the
air supply. This deactivates the auto-
matic control of the air supply, AUTO
disappears from the display panel.
Nevertheless, the automatic air distri-
bution remains unchanged. You can
reactivate the automatic air distribution
mode by selecting the AUTO button.
When you select the lowest blower
speed by pressing the left half of the
button, all of the displays are canceled:
the blower, heating and air conditioning
are switched off. The outside air supply
is blocked. You can reactivate the
system by pressing any button for the
automatic climate control.
To defrost windows and remove
condensation
This program quickly removes
ice and condensation from the
windshield and the side windows.
Air conditioning
The air is cooled and dehumidi-
fied and Ð depending on the
temperature setting Ð rewarmed.
Depending on the weather, the wind-
shield may fog over briefly when the
engine is started. Switching on the air
conditioning will reduce condensation
forming on the windows.
As the air-conditioning system
operates, condensation forms
within the system.This moisture is
conducted to an outlet beneath the
vehicle; it is thus not unusual for a small
puddle to form under the car while the
system is running.<
Page 90 of 155

90n
Automatic climate control
*
Automatic recirculated-air control
(AUC)
You can respond to unpleasant
external odors or pollutants by
temporarily stopping the flow of outside
air. The system then recirculates the air
currently within the vehicle.
Press the button repeatedly to select
one of three different operating modes.
>Indicator lamps off: outside air supply
is on
>Left indicator lamp on Ð AUC mode:
the system recognizes pollutants in
the outside air and blocks the flow of
air when necessary. The system then
recirculates the air currently within
the vehicle.
Depending on the air quality, the
automatic system then switches back
and forth between outside air supply
and recirculation of the air within the
vehicle
>Right indicator lamp on: the flow of
external air into the vehicle is perma-
nently blocked. The system then
recirculates the air currently within
the vehicle.
If the windows fog over in the
recirculated-air mode, switch the
recirculated-air mode off and increase
the air supply as required.<
Rear window defroster
When the rear window defroster
is activated, the indicator lamp
comes on. The rear window defroster
switches off automatically.
At outside temperatures colder
than approx. 39 7 (+4 6) the
rear window defroster automatically
assumes operation within 5 minutes
after the engine is started.<
Draft-free ventilationYou can adjust the blower controls for
the upper body area to obtain the
optimum airflow rates and directions for
your personal requirements:
1 Rotary dials for infinitely-variable
opening and closing of the vent
outlets
2 Selector levers for airflow direction
3 Rotary dial 3 allows you to control the
temperature of the airflow from these
outlets as desired
Page 114 of 155
114n
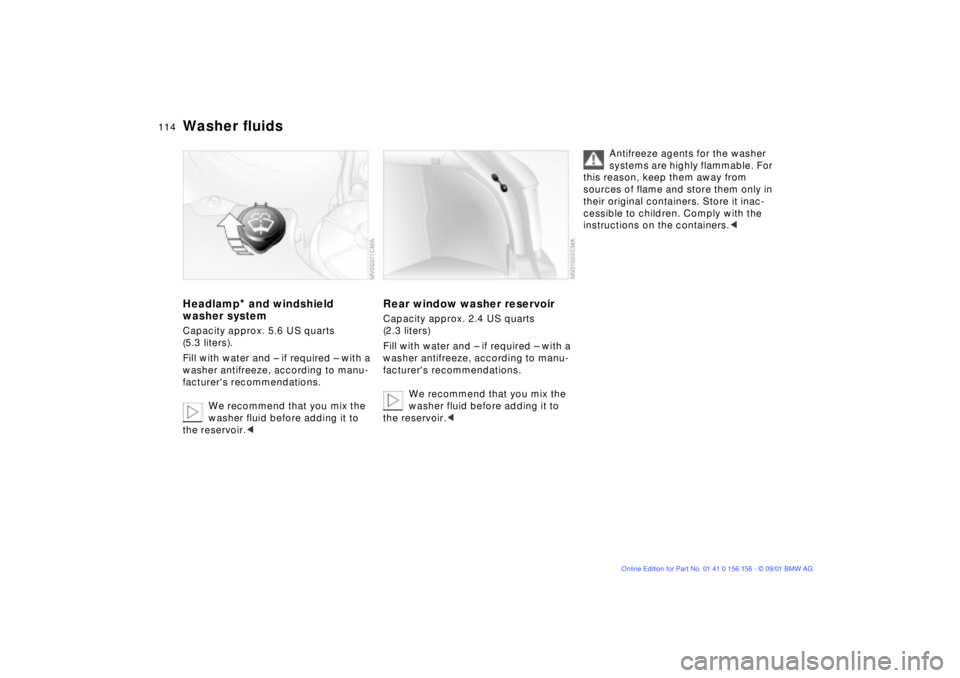
Washer fluidsHeadlamp
* and windshield
washer system
Capacity approx. 5.6 US quarts
(5.3 liters).
Fill with water and Ð if required Ð with a
washer antifreeze, according to manu-
facturer's recommendations.
We recommend that you mix the
washer fluid before adding it to
the reservoir.<
Rear window washer reservoirCapacity approx. 2.4 US quarts
(2.3 liters)
Fill with water and Ð if required Ð with a
washer antifreeze, according to manu-
facturer's recommendations.
We recommend that you mix the
washer fluid before adding it to
the reservoir.<
Antifreeze agents for the washer
systems are highly flammable. For
this reason, keep them away from
sources of flame and store them only in
their original containers. Store it inac-
cessible to children. Comply with the
instructions on the containers.<
Page 124 of 155
124n
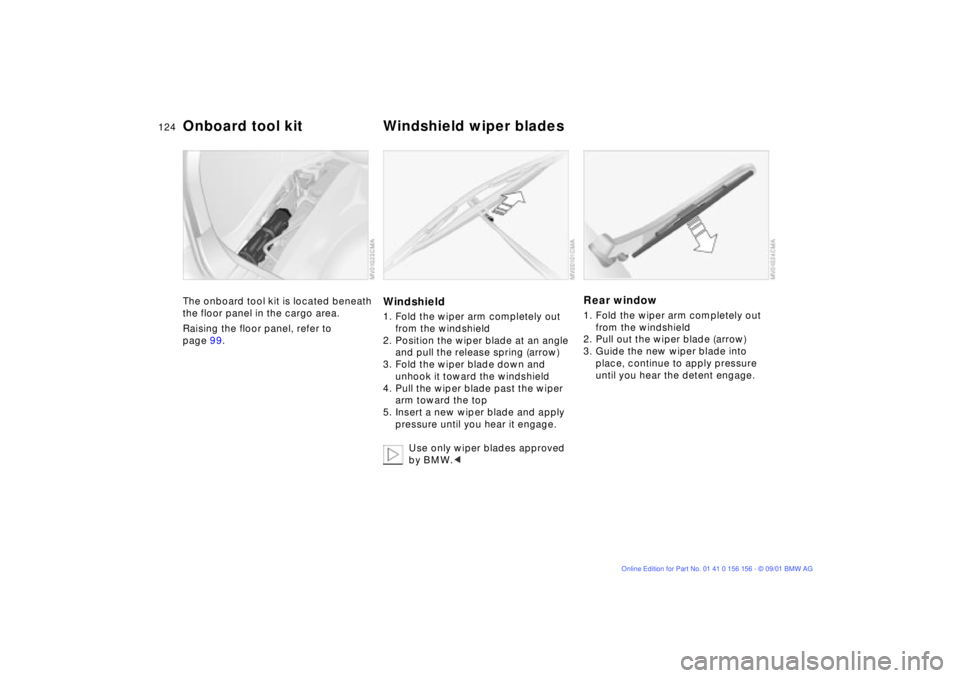
The onboard tool kit is located beneath
the floor panel in the cargo area.
Raising the floor panel, refer to
page 99.
Windshield1. Fold the wiper arm completely out
from the windshield
2. Position the wiper blade at an angle
and pull the release spring (arrow)
3. Fold the wiper blade down and
unhook it toward the windshield
4. Pull the wiper blade past the wiper
arm toward the top
5. Insert a new wiper blade and apply
pressure until you hear it engage.
Use only wiper blades approved
by BMW.<
Rear window1. Fold the wiper arm completely out
from the windshield
2. Pull out the wiper blade (arrow)
3. Guide the new wiper blade into
place, continue to apply pressure
until you hear the detent engage.
Onboard tool kit Windshield wiper blades
Page 128 of 155
128n
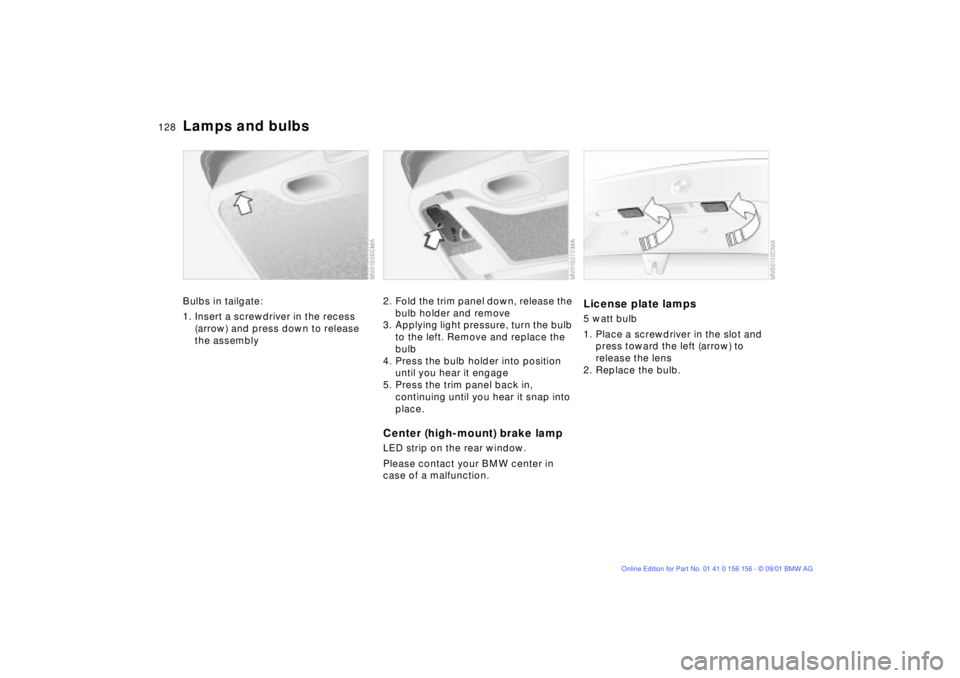
Lamps and bulbsBulbs in tailgate:
1. Insert a screwdriver in the recess
(arrow) and press down to release
the assembly
2. Fold the trim panel down, release the
bulb holder and remove
3. Applying light pressure, turn the bulb
to the left. Remove and replace the
bulb
4. Press the bulb holder into position
until you hear it engage
5. Press the trim panel back in,
continuing until you hear it snap into
place.Center (high-mount) brake lampLED strip on the rear window.
Please contact your BMW center in
case of a malfunction.
License plate lamps5 watt bulb
1. Place a screwdriver in the slot and
press toward the left (arrow) to
release the lens
2. Replace the bulb.
Page 147 of 155
Everything from A to Z
147n
OverviewControlsMaintenanceRepairsDataIndex
Break-in procedures104
Bulbs and lamps
replacement125 C
California Proposition
65 Warning120
Can holder, refer to
beverage holder93
Capacities143
Car care, refer to the "Caring
for your vehicle" manual
Car phone94
Car wash systems, refer to
the "Caring for your
vehicle" manual
Care of upholstery materials,
refer to the "Caring for your
vehicle" manual
Cargo area35, 97
capacity142
Cargo area cover97
Cargo area lighting33
Cargo loading99 CBC (Cornering Brake
Control)18, 73
Cellular phone94
refer also to the separate
"Owner's Manual"94
Center (high-mount) brake
lamp128
Center armrest92
Central locking system28
control button32
Changing a wheel129
Check Control67
Checking engine oil
level115
Checking tire pressures24
Child-restraint systems51
Cigarette lighter94
Cigarette lighter socket94
Clean rear window62
Clean the headlamps62
Cleaning windshield62
Clock67
refer also to the "Radio
Owner's Manual" Clothes hooks105
Clutch104
Cockpit14
Coin box93
Compartments92
Compression ratio140
Computer68
refer also to the "Owner's
Manual Onboard
Computer"
Configuring individual
settings via Vehicle and
Key Memory54
Convenience operation via
the door lock
power windows31
sliding/tilt sunroof31
Coolant117, 143
Coolant temperature
gauge66
Cooling system including
heating circuit,
capacity143
Copyright4
Cornering Brake Control
(CBC)18, 73 Correct sitting posture40
Cruise control63
Cruising range69
Curb weight142
D
Data
dimensions141
technical140
weights142
Daytime driving lamps82
DBC (Dynamic Brake
Control)74
Deep water105
Defrost windows87, 89
Defroster, rear
window86, 90
Digital clock67
Dimming rearview mirror48
Dipstick, engine oil115
Displacement140
Display lighting83
Displays15
Disposal
antifreeze and anti-
corrosion agents117
battery133
brake fluid118
engine oil116
Page 148 of 155
Everything from A to ZDistance warning70
Door keys28
Doors
electrical malfunction31
locking and unlocking29
manual operatiom31
DOT Quality Grades,
tires108
Draft-free ventilation87, 90
Drawbar weight142
Drink holder, refer to
beverage holder93
Drive belts17
Driving notes105
DSC (Dynamic Stability
Control)19, 73
Dynamic Brake Control
(DBC)74
Dynamic Stability Control
(DSC)19, 73 E
Electric power windows37
Electrical malfunction
doors31
fuel filler door22
sliding/tilt sunroof39
tailgate33 Electrical power socket95
Elements of operation14
Energy Control65
Engine compartment
essentials113
Engine coolant143
Engine data140
Engine oil
capacity143
consumption115
disposal116
quality116
specifications116
viscosity116
Engine oil level115
checking115
indicator lamp19
Engine specifications140
Engine speed140
F
Fault displays67
Filling capacities143
Fittings, tow starting and
towing135
Flashlight92
Flat Tire
Monitor80, 109, 132 Flat tires107, 129, 132
Fog lamps83
Follow me home lamps82
Front fog lamps83
Front seat adjustment40
Fuel consumption69
display66
Fuel filler door22
electrical malfunction22
manual operation22
Fuel gauge66
Fuel injection system140
Fuel reserve indicator
lamp66
Fuel tank capacity143
Fuel tank gauge66
Fuses133
G
Gasoline gauge66
Glove compartment92
Gross vehicle weight142 H
Handbrake57
Hands-free system94
microphone94 Harman Kardon premium
sound system91
Hazard warning triangle22
HDC (Hill Descent
Control)77
Head restraints43
Headlamp cover, care125
Headlamp flasher83
Headlamp washer
system114
capacity143
Headlight control82
Heated seats46
High beams20, 60, 83
bulb replacement125
High Performance Synthetic
Oil116
Hill Descent Control
(HDC)77
Holder for beverage
cans93
Hood release112
Horn14