2002 BMW 325I window
[x] Cancel search: windowPage 35 of 155

35n
OverviewControlsMaintenanceRepairsDataIndex
Cargo area Alarm system
*
Luggage strapsUse the retaining straps on the cargo
area floor to secure smaller items of
luggage.
Movement is reduced when objects are
placed on the straps.
To secure your luggage, use the
luggage nets
* or flexible straps that you
can attach to the fittings at the inner
corners of the cargo area.
Refer also to Cargo loading on page 99.
For additional details in the cargo area
and for the cargo area cover, please
refer to Cargo area beginning on
page 97.
The conceptThe vehicle alarm system responds:
>When a door, the hood, the tailgate
or the rear window is opened
>To movement inside the vehicle (inte-
rior motion sensor)
>To variations in the vehicle's tilt angle
such as those occurring during
attempts to steal the wheels or tow
the vehicle
>To interruption of battery voltage.
The system responds to unauthorized
vehicle entry and attempted theft by
simultaneously activating the following:
>Sounding an acoustic alarm for
30 seconds
>The hazard warning flashers are acti-
vated for approx. five minutes
>Flashing the high beams on and off
in rhythm with the hazard warning
flashers.
To arm and disarm the alarm
systemWhen the vehicle is locked or unlocked
via the driver's door lock or with the
remote control, the alarm system is also
simultaneously armed or disarmed.
You can have different acknowl-
edgment signals set to confirm
arming and disarming.<
You can use the button on the remote
control to open the rear window even
when the alarm is armed, refer to
page 30. The alarm will start monitoring
the window again as soon as it is
reclosed.
Page 36 of 155

36n
Alarm system
*
Indicator lamp displays>The indicator lamp below the interior
rearview mirror flashes continuously:
the system is armed
>The indicator lamp flashes while the
system is armed: the door(s), the
hood, the tailgate or rear window are
not completely closed. Even if you do
not close the alerted area(s), the
remaining areas are secured, and the
indicator lamp will flash continuously
after 10 seconds. However, the inte-
rior motion sensor is not activated.
>The indicator lamp goes out when the
system is disarmed: no manipulation
or attempted intrusions have been
detected in the period since the
system was armed.
>The indicator lamp flashes for
10 seconds when the system is
disarmed: an attempted entry has
been detected in the period since the
system was armed.
Following triggering of an alarm, the
indicator lamp will flash continuously.Avoiding unintentional alarmsThe tilt alarm sensor and interior motion
sensor may be switched off at the same
time. You can do this to prevent a false
alarm from being triggered in garages
with elevator ramps, for instance, or
when the vehicle is transported by
trailer or train:
Lock the vehicle twice (= arm the
system). Press the button on the
remote control twice in succession or
lock the vehicle twice with the key.
The indicator lamp lights up briefly and
then flashes continuously. The tilt alarm
sensor and the interior motion sensor
are deactivated as long as the system is
armed.
Interior motion sensorIn order for the interior motion sensor to
function properly, the windows and
sliding/tilt sunroof must be completely
closed.
Nevertheless, you should switch off the
interior motion sensor (refer to previous
column) if
>children or animals are left in the
vehicle
>the windows or the sliding/tilt sunroof
are being left open.
The system deactivates the tilt-
alarm sensor and the interior
motion sensor if closing is interrupted in
the first 10 seconds and then restarted
when the convenience closing feature
is used to close the sunroof and
windows. The alarm must then be
disarmed and reactivated before it will
resume operation.<
Page 37 of 155
37n
OverviewControlsMaintenanceRepairsDataIndex
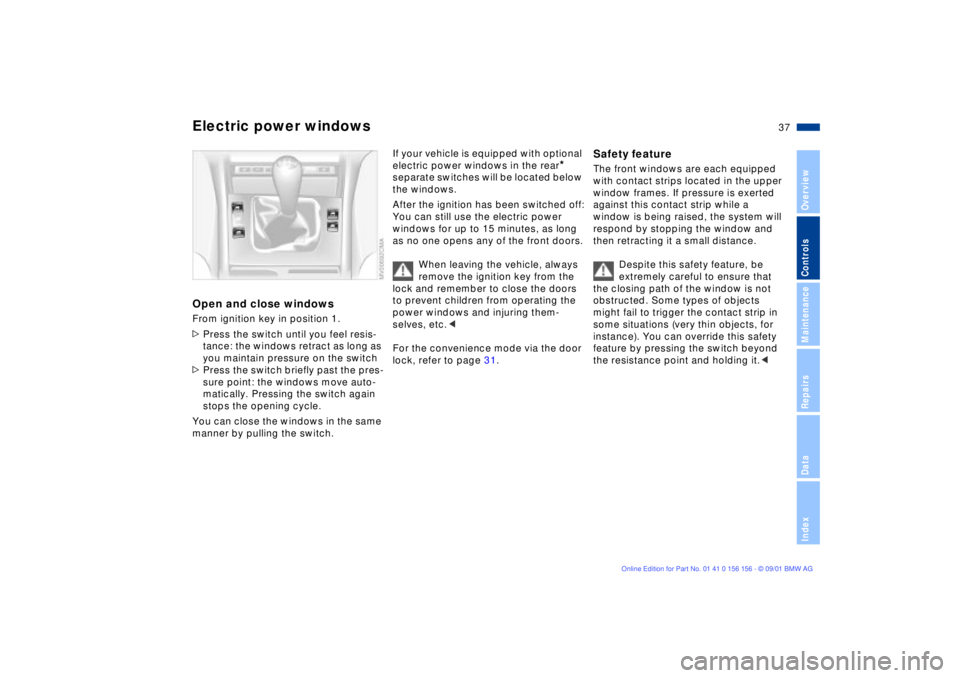
Electric power windowsOpen and close windowsFrom ignition key in position 1.
>Press the switch until you feel resis-
tance: the windows retract as long as
you maintain pressure on the switch
>Press the switch briefly past the pres-
sure point: the windows move auto-
matically. Pressing the switch again
stops the opening cycle.
You can close the windows in the same
manner by pulling the switch.
If your vehicle is equipped with optional
electric power windows in the rear
*
separate switches will be located below
the windows.
After the ignition has been switched off:
You can still use the electric power
windows for up to 15 minutes, as long
as no one opens any of the front doors.
When leaving the vehicle, always
remove the ignition key from the
lock and remember to close the doors
to prevent children from operating the
power windows and injuring them-
selves, etc.<
For the convenience mode via the door
lock, refer to page 31.
Safety feature The front windows are each equipped
with contact strips located in the upper
window frames. If pressure is exerted
against this contact strip while a
window is being raised, the system will
respond by stopping the window and
then retracting it a small distance.
Despite this safety feature, be
extremely careful to ensure that
the closing path of the window is not
obstructed. Some types of objects
might fail to trigger the contact strip in
some situations (very thin objects, for
instance). You can override this safety
feature by pressing the switch beyond
the resistance point and holding it.<
Page 38 of 155
38n
Electric power windows Sliding/tilt sunroof
*
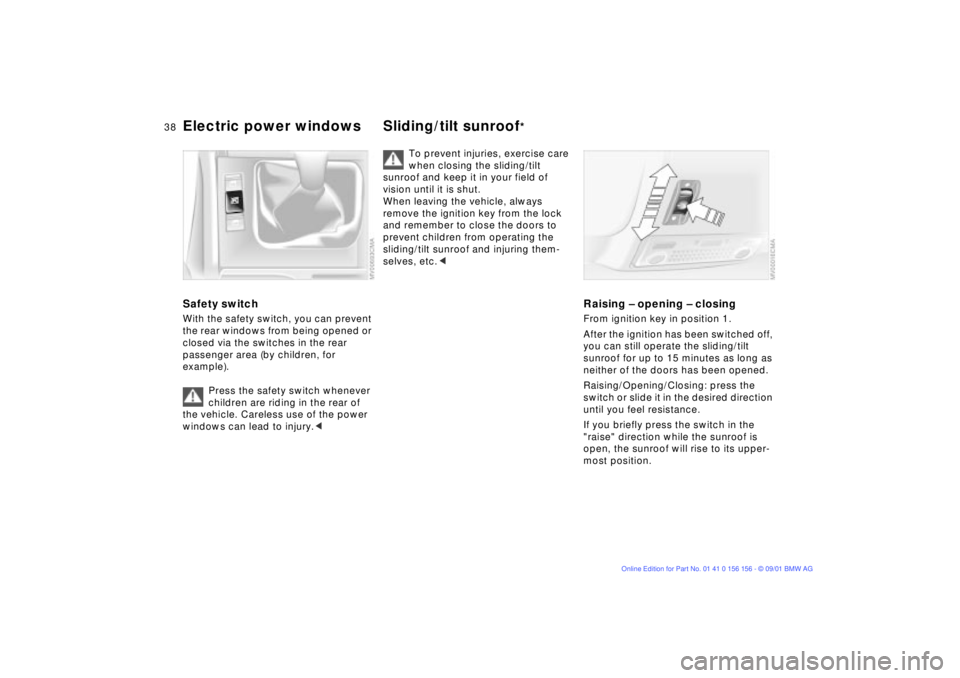
Safety switch With the safety switch, you can prevent
the rear windows from being opened or
closed via the switches in the rear
passenger area (by children, for
example).
Press the safety switch whenever
children are riding in the rear of
the vehicle. Careless use of the power
windows can lead to injury.<
To prevent injuries, exercise care
when closing the sliding/tilt
sunroof and keep it in your field of
vision until it is shut.
When leaving the vehicle, always
remove the ignition key from the lock
and remember to close the doors to
prevent children from operating the
sliding/tilt sunroof and injuring them-
selves, etc.<
Raising Ð opening Ð closingFrom ignition key in position 1.
After the ignition has been switched off,
you can still operate the sliding/tilt
sunroof for up to 15 minutes as long as
neither of the doors has been opened.
Raising/Opening/Closing: press the
switch or slide it in the desired direction
until you feel resistance.
If you briefly press the switch in the
"raise" direction while the sunroof is
open, the sunroof will rise to its upper-
most position.
Page 62 of 155

62n
Washer/Wiper system0 Wipers retracted
1 Clean the windshield
2 Rear window wiper intermittent mode
3 Clean the rear windowClean the windshield
Do not use the washers if there is
any danger that the fluid will
freeze on the windshield, as your vision
could be obscured. Always use a wind-
shield washer antifreeze, refer to
page 114.
Do not use the washers when the reser-
voir is empty. This could cause damage
to the washer pump.<
The system sprays washer fluid against
the windshield and activates the wipers
for a brief period.Rear window wiperRear window wiper in intermittent
mode. When reverse gear is engaged,
continuous operation is switched on
automatically.
You can also program the interval:
>Briefly move the wiper lever from
position 0 to position 2
>The period that elapses until the
wipers again start to move (from
position 0 to 2) is the programmed
interval for intermittent operation
(max. 30 seconds).Clean the rear windowThe system sprays washer fluid onto
the rear window.
To change the wiper blades refer to
page 124.
Cleaning headlamps
*
When the vehicle's lighting system is
switched on, the headlamps will also be
cleaned every fifth time the automatic
windshield washer is activated.Windshield washer nozzlesThe windshield washer nozzles are
heated automatically
* when the ignition
key is in position 2.
Page 85 of 155
85n
OverviewControlsMaintenanceRepairsDataIndex
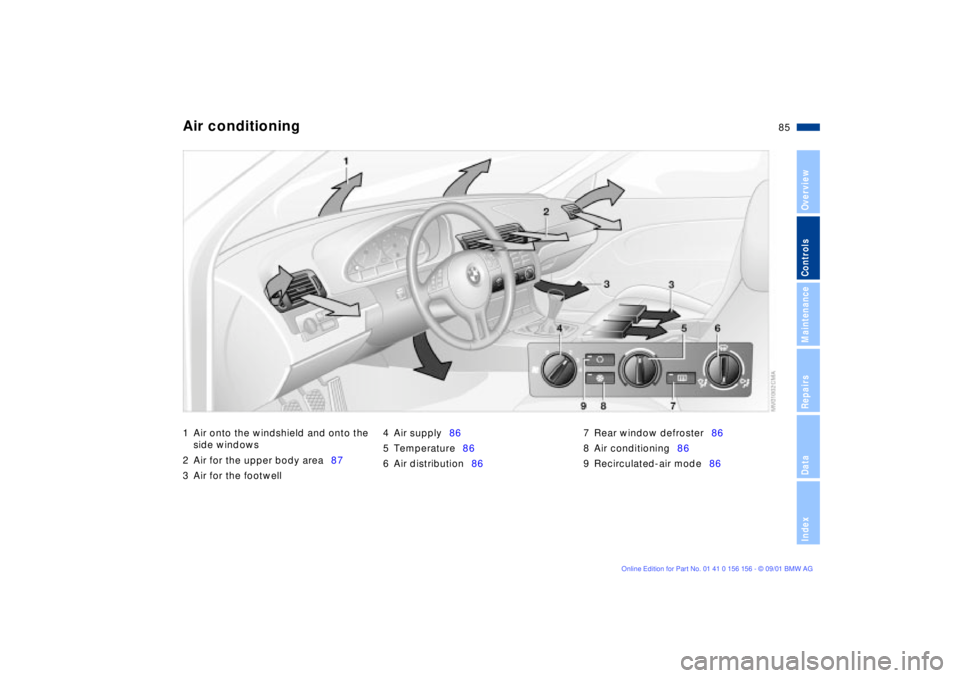
Air conditioning 1 Air onto the windshield and onto the
side windows
2 Air for the upper body area87
3 Air for the footwell4 Air supply86
5 Temperature86
6 Air distribution867 Rear window defroster86
8 Air conditioning86
9 Recirculated-air mode86
Page 86 of 155
86n
Air conditioningAir supply
You can select blower speeds
from 1 to 4. The heating and
ventilation become more and
more effective as the air
supply settings are increased. In
position 0, the blower and the heater
are switched off. The outside air supply
is blocked in position 0.
Temperature
In order to increase the
temperature of the passenger
compartment, turn it to the
right (red). The temperature of
the incoming air is kept constant.
Air distribution
You can direct air to flow onto
the windows , toward the
upper body and into the
footwell . All intermediate
settings are possible. In the setting,
there is a low flow of air onto the
windows to keep them free of conden-
sation.
Rear window defroster
When the rear window defroster
is activated, the indicator lamp
comes on. The rear window defroster
switches off automatically.
At outside temperatures colder
than approx. 39 7 (+4 6) the
rear window defroster automatically
assumes operation within 5 minutes
after the engine is started.<
Air conditioning
The air is cooled and dehumidi-
fied and Ð depending on the
temperature setting Ð rewarmed when
the air conditioning is switched on.
Depending on the weather, the wind-
shield may fog over briefly when the
engine is started. Switching on the air
conditioning will reduce condensation
forming on the windows.
As the air-conditioning system
operates, condensation forms
within the system. This moisture is
conducted to an outlet beneath the
vehicle; it is thus not unusual for a small
puddle to form under the car while the
system is running.<
Recirculated-air mode
You can respond to unpleasant
external odors by temporarily
excluding the supply of outside air. The
system then recirculates the air
currently within the vehicle.
If the windows fog over in the
recirculated-air mode, switch it off
and increase the air supply as
required.<
Page 87 of 155
87n
OverviewControlsMaintenanceRepairsDataIndex
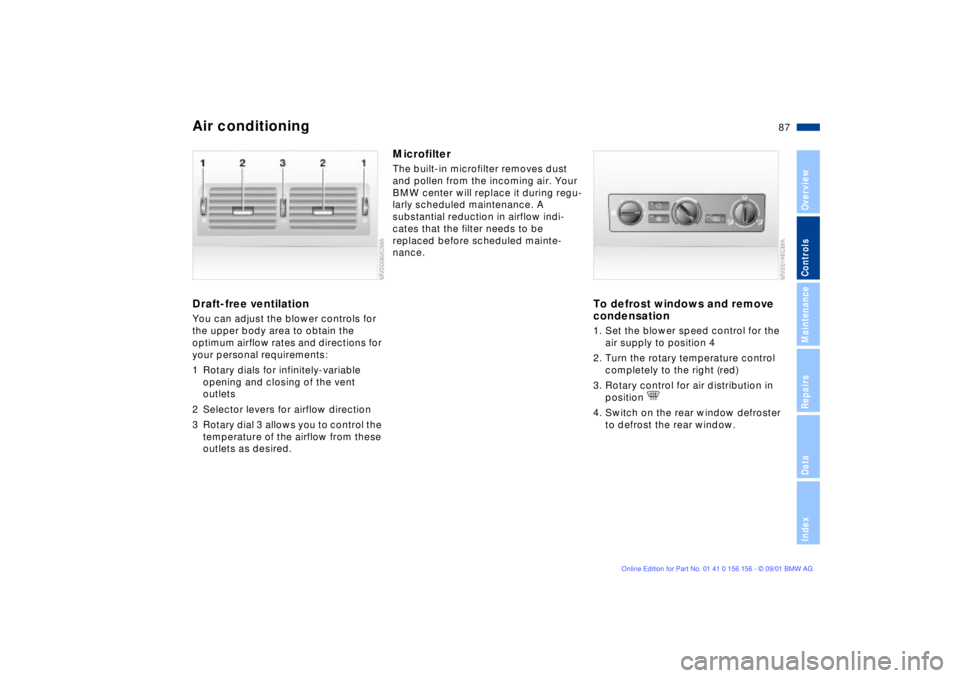
Air conditioningDraft-free ventilationYou can adjust the blower controls for
the upper body area to obtain the
optimum airflow rates and directions for
your personal requirements:
1 Rotary dials for infinitely-variable
opening and closing of the vent
outlets
2 Selector levers for airflow direction
3 Rotary dial 3 allows you to control the
temperature of the airflow from these
outlets as desired.
MicrofilterThe built-in microfilter removes dust
and pollen from the incoming air. Your
BMW center will replace it during regu-
larly scheduled maintenance. A
substantial reduction in airflow indi-
cates that the filter needs to be
replaced before scheduled mainte-
nance.
To defrost windows and remove
condensation1. Set the blower speed control for the
air supply to position 4
2. Turn the rotary temperature control
completely to the right (red)
3. Rotary control for air distribution in
position
4. Switch on the rear window defroster
to defrost the rear window.