2002 BMW 325Ci COUPE ESP
[x] Cancel search: ESPPage 39 of 147
39n
OverviewControlsMaintenanceRepairsDataIndex
Sliding/tilt sunroof
*
The headliner insert slides back some-
what when you raise the sunroof. When
the sunroof is opened the headliner
retracts with it.
Do not use force to close the
headliner insert with the sunroof in
its raised position, as damage to the
mechanism could result.<
To use the convenience mode via the
remote control or the door lock, refer to
page 30 or 31.Automatic opening and closingPress the switch briefly past the resis-
tance point: the sunroof travels to either
the fully-closed or fully-open position.
Pressing the switch again stops the
motion immediately.
Safety featureIf the sliding/tilt sunroof encounters
resistance
>when it is closing from the raised
position
>when it is closing from a point
roughly past the middle of its travel
the closing cycle is interrupted and the
sliding/tilt sunroof will open again
slightly.
Despite this safety feature, be
extremely careful that the travel
path of the sunroof is not obstructed
whenever it is closed. Remember that
the safety mechanism may not be able
to detect obstructions under all circum-
stances (with very thin objects, for
instance).
You can disable this safety feature by
pressing the switch beyond the pres-
sure point and holding it.<
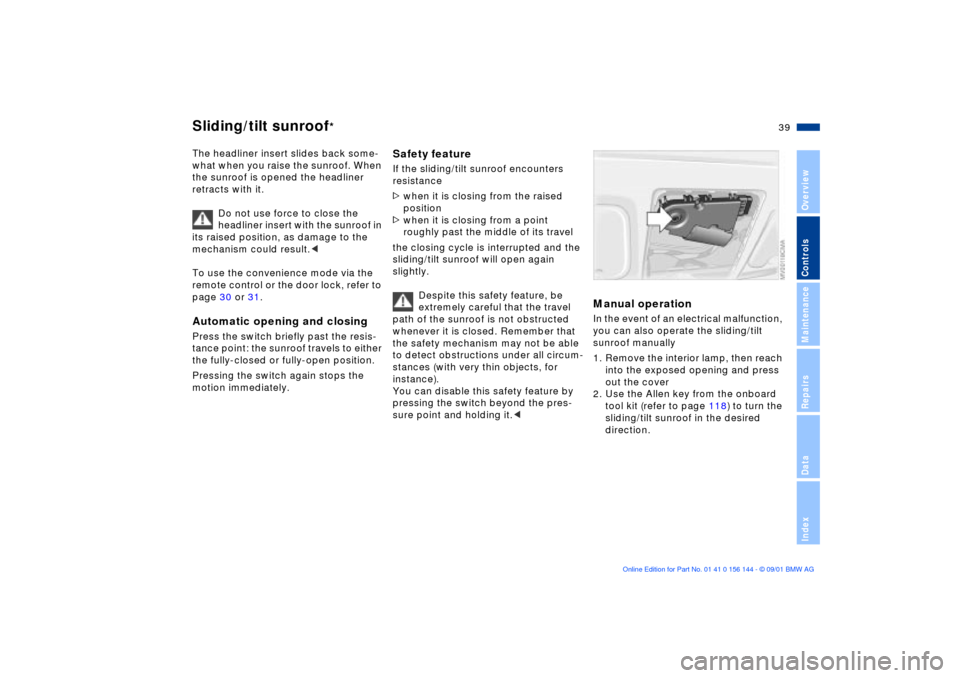
Manual operationIn the event of an electrical malfunction,
you can also operate the sliding/tilt
sunroof manually
1. Remove the interior lamp, then reach
into the exposed opening and press
out the cover
2. Use the Allen key from the onboard
tool kit (refer to page 118) to turn the
sliding/tilt sunroof in the desired
direction.
Page 40 of 147
40n
Correct sitting posture SeatsFor relaxed and fatigue-free driving you
should select a sitting position that
reflects your personal requirements.
Correct posture combines with safety
belts and airbags to enhance occupant
safety in the event of an accident. To
ensure that the vehicle's safety systems
provide you with optimal protection, we
request that you direct your careful
attention to the following section.
For supplementary information on
transporting children, refer to page 51. Sitting correctly with airbags
Always maintain an adequate
distance between yourself and the
airbags. Always hold the steering wheel
by the rim to keep any chance of injury
to hands or arms to an absolute
minimum should the airbag be
deployed. Never allow any objects,
individuals or animals to obstruct the
areas between passengers and airbags.
Never use the front airbag's cover as a
storage tray or support for objects of
any kind. Never allow front passengers
to rest their feet or legs on the airbag
cover.<
For airbag locations and additional
information on airbags, refer to
page 48.
Safe with safety belts
Never allow more than one person
to wear a single safety belt. Never
allow infants or small children to ride in
a passenger's lap. Avoid twisting the
belt while routing it firmly across the
pelvis and shoulder, wear it as snugly
against your body as possible. Do not
allow the belt to rest against hard or
fragile objects in your pockets. Do not
route the belt across your neck, or run it
across sharp edges. Be sure that the
belt does not become caught or
jammed. Avoid wearing bulky clothing
and pull on the lap belt periodically to
retension it over your shoulders. In the
event of a frontal impact, a loose lap
belt could slide over the hips, leading to
abdominal injury. In addition, the safety
belt's restraint effectiveness is reduced
if it is worn loosely. Expectant mothers
should always wear their safety belts,
taking care to position the lap belt
against the lower hips, where it will not
exert pressure against the abdominal
area.<
For information on using the safety
belts, refer to page 44.
When adjusting your seat, always
observe the following precautions
Never try to adjust your seat while
operating the vehicle. The seat
could respond with an unexpected
movement, and the ensuing loss of
vehicle control could lead to an acci-
dent. Never ride with the backrest
reclined to an extreme horizontal angle
(important for front passengers to
remember). Keep the backrest relatively
upright to minimize the risk of sliding
under the safety belt and sustaining
injury in an accident.<
Seat adjustment>Manual seat adjustment, refer to
page 41
>Power seat adjustment, refer to
page 42
>Head restraint, refer to page 43
>Entering the rear, refer to page 43
Page 48 of 147
48n
Mirrors AirbagsInterior rearview mirror with
automatic dimming feature
*
This mirror automatically responds to
ambient light and headlamp glare from
following vehicles by dimming through
an infinitely-variable range and auto-
matically reverts to its clear, undimmed
setting whenever you select reverse.
To ensure that the mirror continues to
operate efficiently, ensure that the
photocells remain clear and unob-
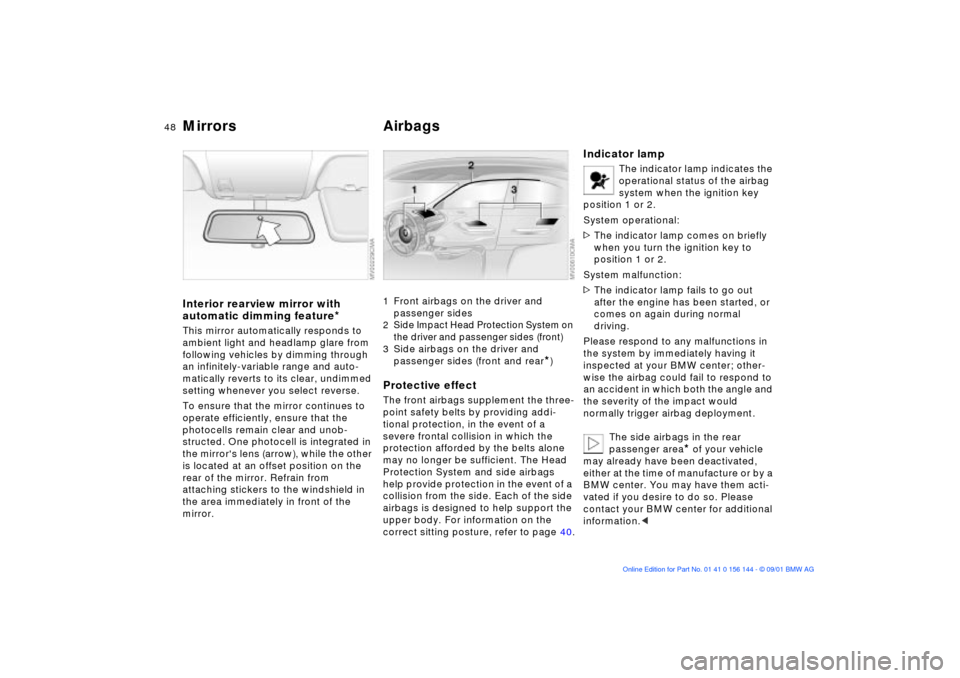
structed. One photocell is integrated in
the mirror's lens (arrow), while the other
is located at an offset position on the
rear of the mirror. Refrain from
attaching stickers to the windshield in
the area immediately in front of the
mirror.
1 Front airbags on the driver and
passenger sides2 Side Impact Head Protection System on
the driver and passenger sides (front)3 Side airbags on the driver and
passenger sides (front and rear
*)
Protective effectThe front airbags supplement the three-
point safety belts by providing addi-
tional protection, in the event of a
severe frontal collision in which the
protection afforded by the belts alone
may no longer be sufficient. The Head
Protection System and side airbags
help provide protection in the event of a
collision from the side. Each of the side
airbags is designed to help support the
upper body. For information on the
correct sitting posture, refer to page 40.
Indicator lamp
The indicator lamp indicates the
operational status of the airbag
system when the ignition key
position 1 or 2.
System operational:
>The indicator lamp comes on briefly
when you turn the ignition key to
position 1 or 2.
System malfunction:
>The indicator lamp fails to go out
after the engine has been started, or
comes on again during normal
driving.
Please respond to any malfunctions in
the system by immediately having it
inspected at your BMW center; other-
wise the airbag could fail to respond to
an accident in which both the angle and
the severity of the impact would
normally trigger airbag deployment.
The side airbags in the rear
passenger area
* of your vehicle
may already have been deactivated,
either at the time of manufacture or by a
BMW center. You may have them acti-
vated if you desire to do so. Please
contact your BMW center for additional
information.<
Page 49 of 147
49n
OverviewControlsMaintenanceRepairsDataIndex
Airbags
The airbags do not deploy in
response to minor collisions, rear
impacts and certain kinds of vehicle
rollover.<
For your safety, comply with the
following instructions for the
airbags. If you do not, the airbags may
not be able to provide their maximum
protection. All passengers in the vehicle
should be aware of and comply with
these directions:
The airbags are supplemental restraint
devices designed to provide extra
protection; they are not a substitute for
safety belts. Wear your safety belt at all
times. The airbags will not be triggered
in the event of a minor accident, a
vehicle rollover, or collisions from the
rear. In these instances, the safety belt
provides optimal protection.
Airbags are located under cover panels
in the steering wheel, in the instrument
panel, in the side trim panels in the
front and rear
*, in the roof panels, and
in the sides of the inside roof lining.
Adjust your seat to a position that
provides maximum distance between
you and the steering wheel, the instru-
ment panel and the door while still
allowing comfortable and safe access
to all vehicle controls.
To avoid sustaining hand and arm inju-
ries, always grasp the steering wheel
on the rim with the hands at the 9 and
3 o'clock positions. Do not place your
hands on the center pad.
Never allow any objects to obstruct the
area between the airbag and an occu-
pant.
Do not use the cover panel above the
passenger-side airbag as a storage
area.
Do not apply adhesive materials to the
cover panels of the airbags, cover them
or modify them in any other way.
Do not install a rear-facing child-
restraint system in the front passenger
seat of this vehicle.
Children under 13 years of age and less
than 5 ft (150 cm) tall should ride only in
the rear seat. Infants or small children
should never be held on the lap of a
passenger.
If your vehicle is equipped with side
airbags in the rear passenger area
*, be
sure that child restraints are mounted
correctly, with the greatest-possible
distance between the airbags in the
side trim panels. Do not allow children
to lean out of the child's seat in the
direction of the side trim panels. If they
do so, serious injuries can occur if the
airbag is triggered.
restrained (infants and small children in
appropriate child-restraint systems;
larger children and adults using the
safety belts). Never let an occupant's
head rest near or on a side airbag: in
the event of deployment the airbag
could cause a serious or fatal injury.
Please note that the word Airbag
embossed on the door trim panel indi-
cates the airbag's location.
Accident research shows that the
safest place for children in an automo-
bile is in the rear seat. However, a child
sitting in the rear seat and not properly
restrained may place his or her head on
or near the airbag, if one is installed.
For example, a child Ñ even though
belted Ñ may fall asleep with his or her
head against the side airbag. It may be
difficult for a driver to ensure that chil-
dren in the rear seat will remain prop-
erly positioned at all times and do not
place their heads on or near the side
airbag.
Therefore, we recommend that the
rear-seat side airbags, if installed, be
deactivated if children will be riding in
the rear seat.
The rear-seat side airbags may already
have been deactivated, either at the
Page 69 of 147

69n
OverviewControlsMaintenanceRepairsDataIndex
Park Distance Control (PDC)
*
The conceptPDC provides extra safety and conve-
nience during parking maneuvers by
providing an acoustic signal to indicate
the distance between your front and
rear bumpers and the nearest object.
The monitoring range for the front and
two rear sensors extends outward
roughly 2 ft (60 cm), while the rear
bumper's two centrally located sensors
detect objects at distances of up to
approx. 4.9 ft (1.50 meters).
The system starts to operate automati-
cally approx. one second after you
select reverse or move the selector
lever into the "R" position with the igni-
tion key in position 2. PDC is deacti-
vated when you shift back out of
reverse.
Acoustic signalsThe distance to the nearest object is
indicated by a tone sounding at various
intervals. As the distance between
vehicle and object decreases, the inter-
vals between the tones become
shorter. A continuous tone indicates the
presence of an object less than 1 ft
(30 cm) away.
The warning signal is canceled after
approx. three seconds if the distance to
the obstacle remains constant during
this time (if you are moving parallel to
a wall, for instance).
System malfunctions will be indicated
by a continuous high-pitched tone
when the system is activated the first
time. Please refer the problem to your
BMW center.The PDC does not remove the
driver's personal responsibility
for evaluating the distance between the
vehicle and any obstacles. Even when
sensors are involved, there is a blind
spot in which objects cannot be
detected. This applies especially in
those cases where the system
approaches the physical limits of ultra-
sonic measurement, as occurs with tow
bars and trailer couplings, and in the
vicinity of thin or wedge-shaped
objects.
Certain sources of sound, such as a
loud radio, could drown the PDC signal
tone.<
Keep the sensors clean and free
of ice or snow in order to ensure
that they will continue to operate effec-
tively.
Do not apply high pressure spray to the
sensors for a prolonged period of time.
Always maintain a distance of more
than 4 in (10 cm).<
Page 70 of 147
70n
Automatic Stability Control plus Traction (ASC+T)
The conceptThis system optimizes vehicle stability
and traction, especially when just
starting off, when accelerating or when
going through curves.
ASC+T recognizes the danger present
in traction loss and will increase driving
stability and traction by reducing the
engine's output, and if necessary, by
applying the brakes to the rear wheels.
ASC+T is ready each time you start the
engine.
Indicator lamp
The indicator lamp in the instru-
ment cluster goes out shortly
after you switch on the ignition,
refer to pages 18, 19.
The indicator lamp flashes:
ASC+T controls the drive and braking
forces.
The indicator lamp fails to go out
after the engine is started, or it
comes on during normal driving and
stays on:
There is a system malfunction or the
system was deactivated with the
button. Consequently, interventions to
increase driving stability (as described
in the preceding column) are no longer
available. You can still drive the vehicle
perfectly well without ASC+T.
In the event of a fault, please consult
your BMW center, refer to
pages 18, 19.<
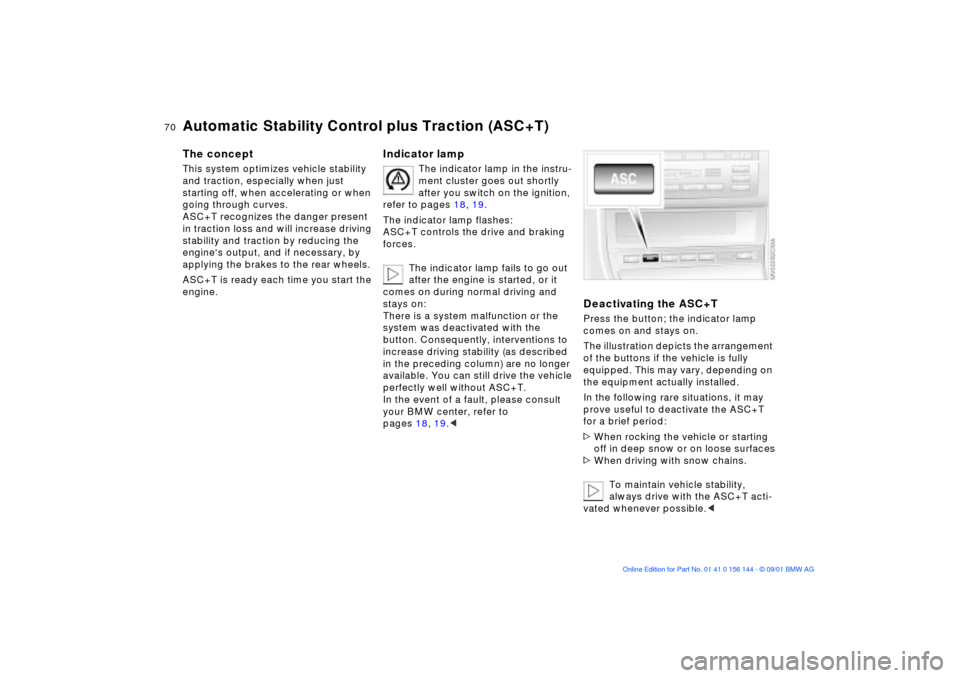
Deactivating the ASC+TPress the button; the indicator lamp
comes on and stays on.
The illustration depicts the arrangement
of the buttons if the vehicle is fully
equipped. This may vary, depending on
the equipment actually installed.
In the following rare situations, it may
prove useful to deactivate the ASC+T
for a brief period:
>When rocking the vehicle or starting
off in deep snow or on loose surfaces
>When driving with snow chains.
To maintain vehicle stability,
always drive with the ASC+T acti-
vated whenever possible.<
Page 71 of 147
71n
OverviewControlsMaintenanceRepairsDataIndex
ASC+T Dynamic Stability Control (DSC)
*
Reactivating the ASC+TPress the button again; the indicator
lamp goes out.
The laws of physics cannot be
repealed, even with ASC+T. It will
always be the driver's responsibility to
drive in a manner that matches road
conditions. This is why you should not
use the additional safety margin the
system provides as an excuse to take
risks.<
The conceptDSC maintains vehicle stability, even in
critical driving situations.
The system optimizes vehicle stability
during acceleration and when starting
from a full stop, as well as optimizing
traction. In addition, it recognizes
unstable vehicle conditions, such as
under- or oversteering, and, within
physically feasible limits, helps keeping
the vehicle on a steady course by
reducing the engine speed and brake
applications to the individual wheels.
The DSC is operational every time you
start the engine. DSC incorporates the
ADB and CBC (Cornering Brake
Control) functions.
The Automatic Differential Brake (ADB)
relies on selective braking applications
at the drive wheels to furnish the func-
tionality of a conventional limited-slip
differential for enhanced traction in crit-
ical driving conditions such as those
encountered on snow-covered road
surfaces, etc.
The ADB is operational when DSC is
switched off.
Indicator lamp
The indicator lamp on the instru-
ment cluster will go out shortly
after the ignition has been
switched on, refer to pages 18, 19.
The indicator lamp flashes:
DSC controls the drive and braking
forces.
The indicator lamp stays lit:
DSC has been switched off with the
button; ADB is operational.
ADB control intervention is not indi-
cated.
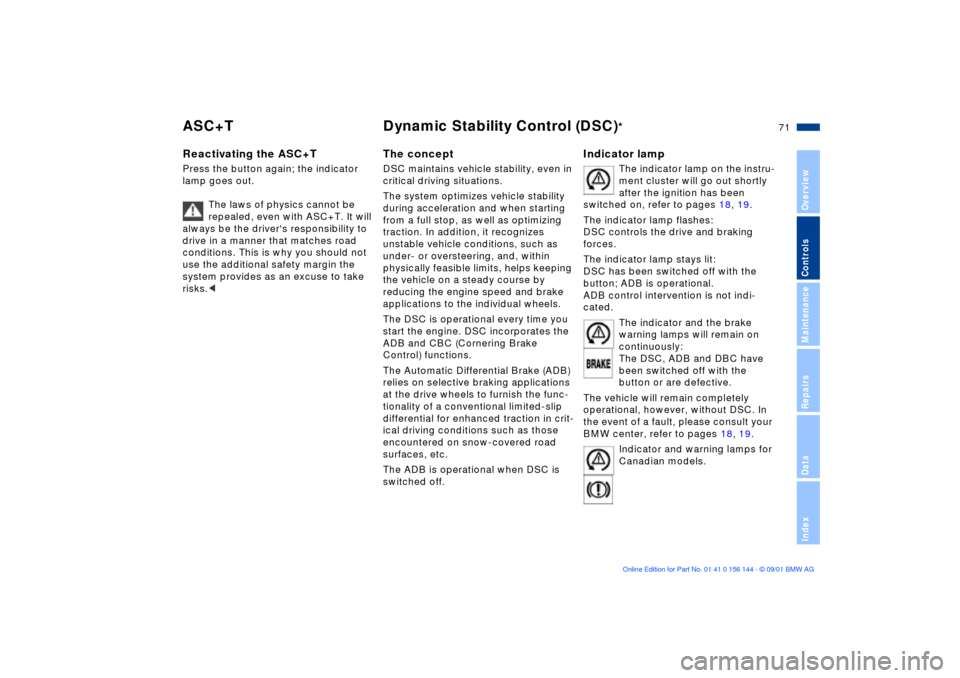
The indicator and the brake
warning lamps will remain on
continuously:
The DSC, ADB and DBC have
been switched off with the
button or are defective.
The vehicle will remain completely
operational, however, without DSC. In
the event of a fault, please consult your
BMW center, refer to pages 18, 19.
Indicator and warning lamps for
Canadian models.
Page 72 of 147
72n
Dynamic Stability Control (DSC)
*
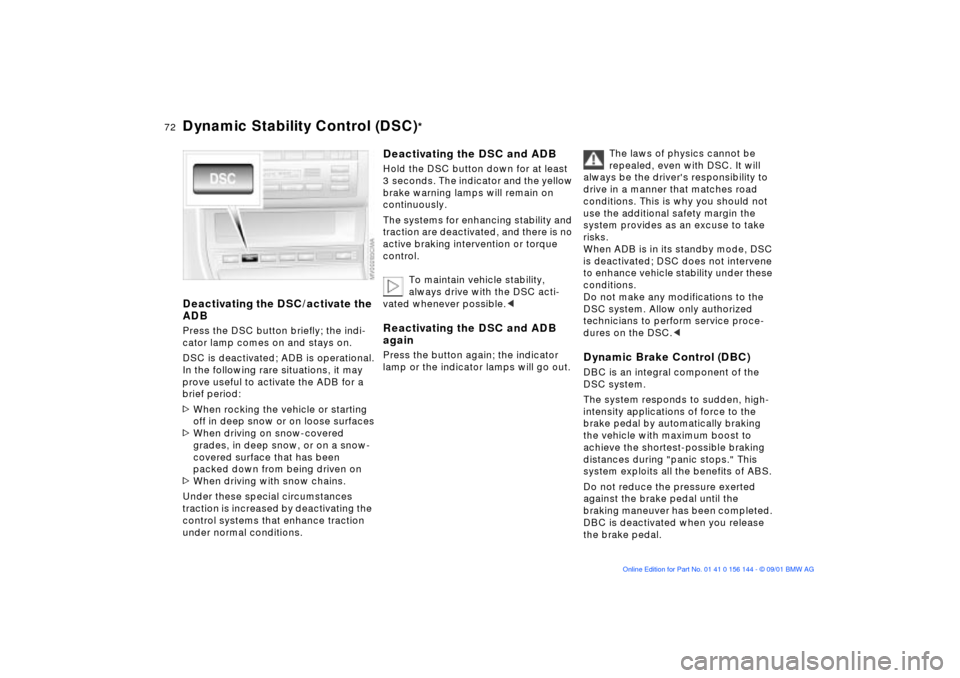
Deactivating the DSC/activate the
ADBPress the DSC button briefly; the indi-
cator lamp comes on and stays on.
DSC is deactivated; ADB is operational.
In the following rare situations, it may
prove useful to activate the ADB for a
brief period:
>When rocking the vehicle or starting
off in deep snow or on loose surfaces
>When driving on snow-covered
grades, in deep snow, or on a snow-
covered surface that has been
packed down from being driven on
>When driving with snow chains.
Under these special circumstances
traction is increased by deactivating the
control systems that enhance traction
under normal conditions.
Deactivating the DSC and ADB Hold the DSC button down for at least
3 seconds. The indicator and the yellow
brake warning lamps will remain on
continuously.
The systems for enhancing stability and
traction are deactivated, and there is no
active braking intervention or torque
control.
To maintain vehicle stability,
always drive with the DSC acti-
vated whenever possible.
lamp or the indicator lamps will go out.
The laws of physics cannot be
repealed, even with DSC. It will
always be the driver's responsibility to
drive in a manner that matches road
conditions. This is why you should not
use the additional safety margin the
system provides as an excuse to take
risks.
When ADB is in its standby mode, DSC
is deactivated; DSC does not intervene
to enhance vehicle stability under these
conditions.
Do not make any modifications to the
DSC system. Allow only authorized
technicians to perform service proce-
dures on the DSC.<
Dynamic Brake Control (DBC)DBC is an integral component of the
DSC system.
The system responds to sudden, high-
intensity applications of force to the
brake pedal by automatically braking
the vehicle with maximum boost to
achieve the shortest-possible braking
distances during "panic stops." This
system exploits all the benefits of ABS.
Do not reduce the pressure exerted
against the brake pedal until the
braking maneuver has been completed.
DBC is deactivated when you release
the brake pedal.