2002 BMW 325Ci CONVERTIBLE wheel
[x] Cancel search: wheelPage 48 of 159

48n
Correct sitting posture SeatsFor relaxed and fatigue-free driving you
should select a sitting position that
reflects your personal requirements.
Correct posture combines with safety
belts and airbags to enhance occupant
safety in the event of an accident. To
ensure that the vehicle's safety systems
provide you with optimal protection, we
request that you direct your careful
attention to the following section.
For supplementary information on
transporting children refer to page 59. Sitting correctly with airbags
Always maintain an adequate
distance between yourself and the
airbags. Always hold the steering wheel
by the rim to keep any chance of injury
to hands or arms to an absolute
minimum should the airbag be
deployed. Never allow any objects,
individuals or animals to obstruct the
areas between passengers and airbags.
Never use the front airbag's cover as a
storage tray or support for objects of
any kind. Never allow front passengers
to rest their feet or legs on the airbag
cover.<
For airbag locations and additional
information on airbags refer to page 56.
Safe with safety belts
Never allow more than one person
to wear a single safety belt. Never
allow infants or small children to ride in
a passenger's lap. Avoid twisting the
belt while routing it firmly across the
hips and shoulder, wear it as snugly
against your body as possible. Do not
allow the belt to rest against hard or
fragile objects. Do not route the belt
across your neck, or run it across sharp
edges. Be sure that the belt does not
become caught or jammed. Avoid
wearing bulky clothing and pull on the
lap belt periodically to retension it over
your shoulders. In the event of a frontal
impact, a loose lap belt could slide over
your hips, leading to abdominal injury.
In addition, the safety belt's restraint
effectiveness is reduced if it is worn
loosely. Expectant mothers should
always wear their safety belts, taking
care to position the lap belt against the
lower hips, where it will not exert pres-
sure against the abdominal area.<
For information on using the safety
belts refer to page 52.
When adjusting your seat, always
observe the following precautions
Never try to adjust your seat while
operating the vehicle. The seat
could respond with unexpected move-
ment, and the ensuing loss of vehicle
control could lead to an accident. Never
ride with the backrest reclined to an
extreme horizontal angle (important for
front passengers to remember). Keep
the backrest relatively upright to mini-
mize the risk of sliding under the safety
belt and sustaining injury in an acci-
dent.<
Seat adjustment>Power seat, refer to page 49
>Head restraint, refer to page 50
>Entering the rear, refer to page 51
Page 54 of 159

54n
Seat and mirror memory
*
Seat heating
**Steering wheel
Passenger-side exterior mirror tilt
function(Automatic curb monitor
*)
1. Move the mirror selector switch 1 to
the "driver's mirror" position
2. When the selector lever is placed in
"Reverse," the passenger-side mirror
tilts downward. This allows the driver
to see the area directly adjacent to
the vehicle during parking (curbs,
etc.).
You can deactivate this automatic
feature by setting the mirror selection
switch to the "passenger side" position.
The seat cushion and backrest can be
heated with the ignition key in
position 2.
You can select different heating modes
by repeatedly pressing the buttons.
You can also switch the higher heating
modes off directly:
Press the button and hold it slightly
longer.
Adjustment1. Push the locking lever downward
2. Adjust the steering column's rake
and reach to suit your seat position
3. Pull the lever back in.
Never adjust the steering wheel
while the vehicle is moving, other-
wise you run the risk of an accident due
to unexpected movement.<
Page 57 of 159

57n
OverviewControlsMaintenanceRepairsDataIndex
Airbags
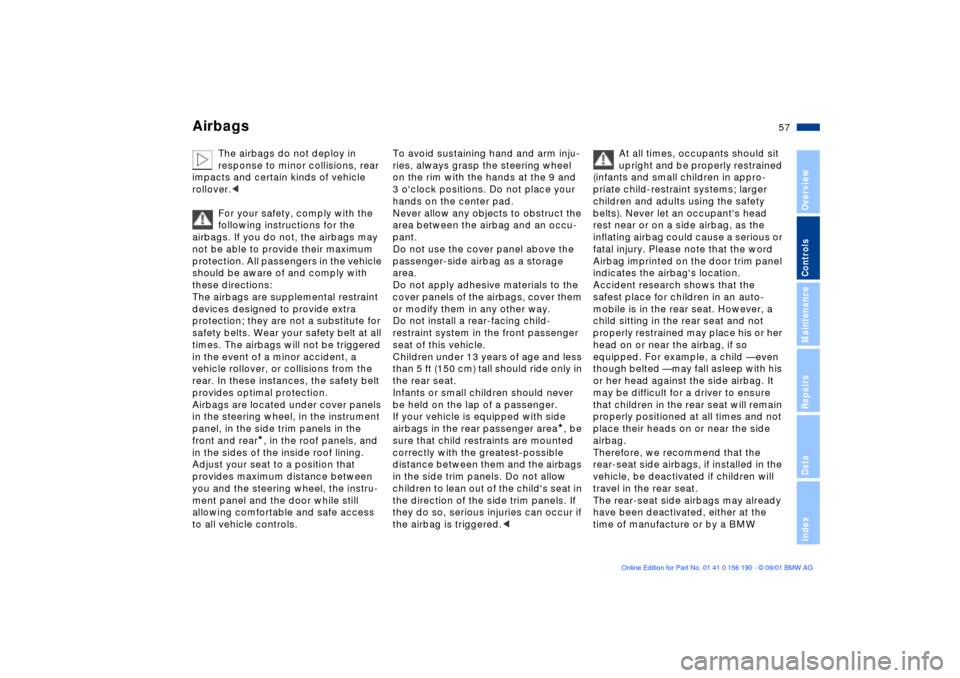
The airbags do not deploy in
response to minor collisions, rear
impacts and certain kinds of vehicle
rollover.<
For your safety, comply with the
following instructions for the
airbags. If you do not, the airbags may
not be able to provide their maximum
protection. All passengers in the vehicle
should be aware of and comply with
these directions:
The airbags are supplemental restraint
devices designed to provide extra
protection; they are not a substitute for
safety belts. Wear your safety belt at all
times. The airbags will not be triggered
in the event of a minor accident, a
vehicle rollover, or collisions from the
rear. In these instances, the safety belt
provides optimal protection.
Airbags are located under cover panels
in the steering wheel, in the instrument
panel, in the side trim panels in the
front and rear
*, in the roof panels, and
in the sides of the inside roof lining.
Adjust your seat to a position that
provides maximum distance between
you and the steering wheel, the instru-
ment panel and the door while still
allowing comfortable and safe access
to all vehicle controls.
To avoid sustaining hand and arm inju-
ries, always grasp the steering wheel
on the rim with the hands at the 9 and
3 o'clock positions. Do not place your
hands on the center pad.
Never allow any objects to obstruct the
area between the airbag and an occu-
pant.
Do not use the cover panel above the
passenger-side airbag as a storage
area.
Do not apply adhesive materials to the
cover panels of the airbags, cover them
or modify them in any other way.
Do not install a rear-facing child-
restraint system in the front passenger
seat of this vehicle.
Children under 13 years of age and less
than 5 ft (150 cm) tall should ride only in
the rear seat.
Infants or small children should never
be held on the lap of a passenger.
If your vehicle is equipped with side
airbags in the rear passenger area
*, be
sure that child restraints are mounted
correctly with the greatest-possible
distance between them and the airbags
in the side trim panels. Do not allow
children to lean out of the child's seat in
the direction of the side trim panels. If
they do so, serious injuries can occur if
the airbag is triggered.
(infants and small children in appro-
priate child-restraint systems; larger
children and adults using the safety
belts). Never let an occupant's head
rest near or on a side airbag, as the
inflating airbag could cause a serious or
fatal injury. Please note that the word
Airbag imprinted on the door trim panel
indicates the airbag's location.
Accident research shows that the
safest place for children in an auto-
mobile is in the rear seat. However, a
child sitting in the rear seat and not
properly restrained may place his or her
head on or near the airbag, if so
equipped. For example, a child Ñ even
though belted Ñ may fall asleep with his
or her head against the side airbag. It
may be difficult for a driver to ensure
that children in the rear seat will remain
properly positioned at all times and not
place their heads on or near the side
airbag.
Therefore, we recommend that the
rear-seat side airbags, if installed in the
vehicle, be deactivated if children will
travel in the rear seat.
The rear-seat side airbags may already
have been deactivated, either at the
time of manufacture or by a BMW
Page 64 of 159

64n
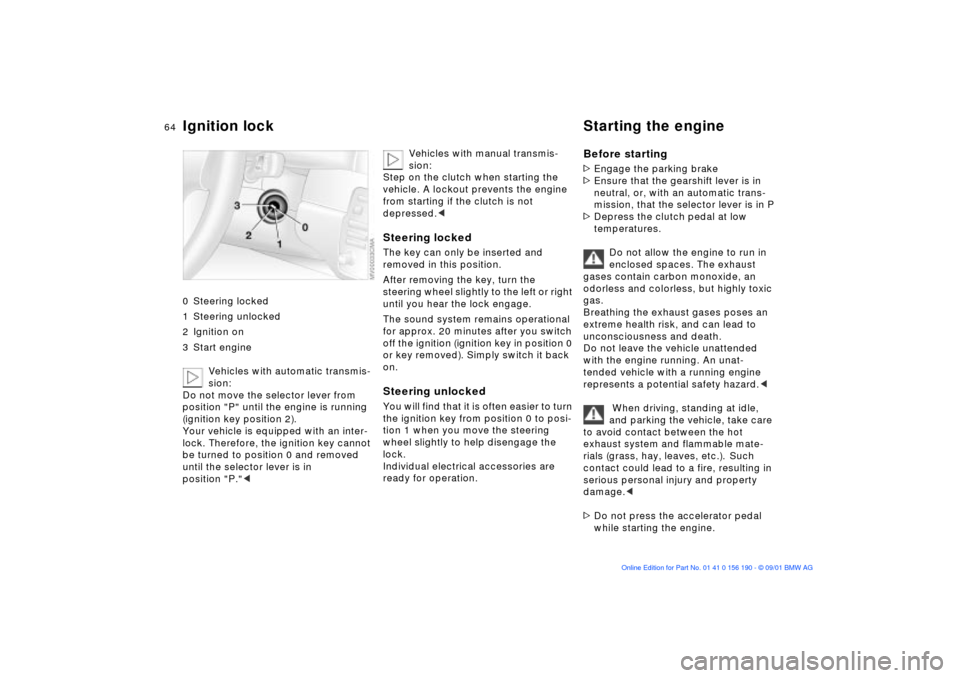
Ignition lock Starting the engine 0 Steering locked
1 Steering unlocked
2 Ignition on
3 Start engine
Vehicles with automatic transmis-
sion:
Do not move the selector lever from
position "P" until the engine is running
(ignition key position 2).
Your vehicle is equipped with an inter-
lock. Therefore, the ignition key cannot
be turned to position 0 and removed
until the selector lever is in
position "P."<
Vehicles with manual transmis-
sion:
Step on the clutch when starting the
vehicle. A lockout prevents the engine
from starting if the clutch is not
depressed.<
Steering lockedThe key can only be inserted and
removed in this position.
After removing the key, turn the
steering wheel slightly to the left or right
until you hear the lock engage.
The sound system remains operational
for approx. 20 minutes after you switch
off the ignition (ignition key in position 0
or key removed). Simply switch it back
on.Steering unlocked You will find that it is often easier to turn
the ignition key from position 0 to posi-
tion 1 when you move the steering
wheel slightly to help disengage the
lock.
Individual electrical accessories are
ready for operation.
Before starting>Engage the parking brake
>Ensure that the gearshift lever is in
neutral, or, with an automatic trans-
mission, that the selector lever is in P
>Depress the clutch pedal at low
temperatures.
Do not allow the engine to run in
enclosed spaces. The exhaust
gases contain carbon monoxide, an
odorless and colorless, but highly toxic
gas.
Breathing the exhaust gases poses an
extreme health risk, and can lead to
unconsciousness and death.
Do not leave the vehicle unattended
with the engine running. An unat-
tended vehicle with a running engine
represents a potential safety hazard.<
When driving, standing at idle,
and parking the vehicle, take care
to avoid contact between the hot
exhaust system and flammable mate-
rials (grass, hay, leaves, etc.). Such
contact could lead to a fire, resulting in
serious personal injury and property
damage.<
>Do not press the accelerator pedal
while starting the engine.
Page 66 of 159

66n
Parking brake Manual transmission The parking brake is primarily designed
to prevent the vehicle from rolling while
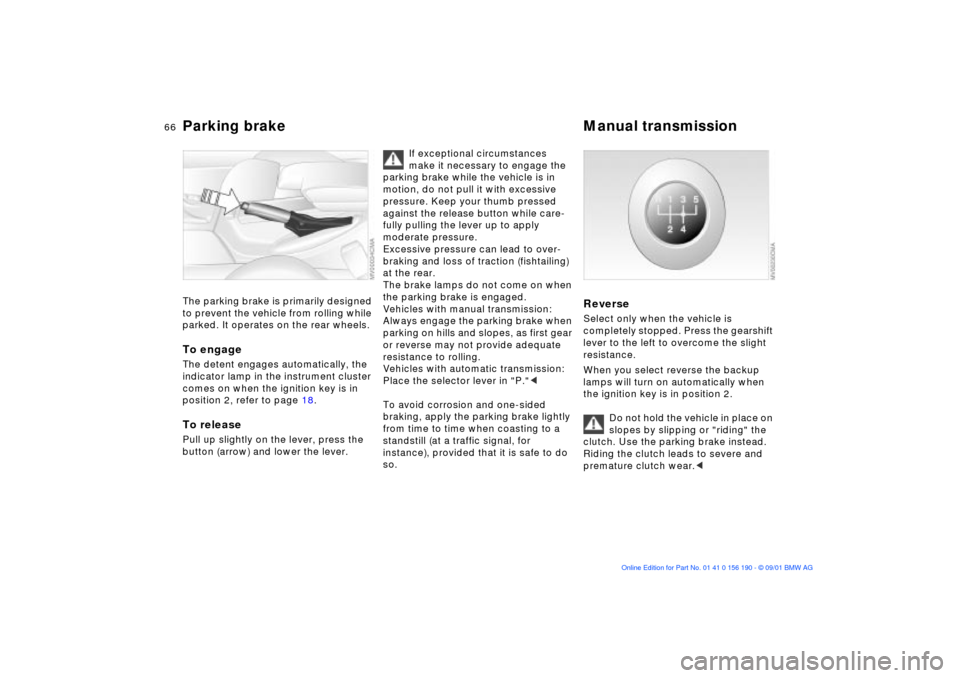
parked. It operates on the rear wheels.To engageThe detent engages automatically, the
indicator lamp in the instrument cluster
comes on when the ignition key is in
position 2, refer to page 18.To releasePull up slightly on the lever, press the
button (arrow) and lower the lever.
If exceptional circumstances
make it necessary to engage the
parking brake while the vehicle is in
motion, do not pull it with excessive
pressure. Keep your thumb pressed
against the release button while care-
fully pulling the lever up to apply
moderate pressure.
Excessive pressure can lead to over-
braking and loss of traction (fishtailing)
at the rear.
The brake lamps do not come on when
the parking brake is engaged.
Vehicles with manual transmission:
Always engage the parking brake when
parking on hills and slopes, as first gear
or reverse may not provide adequate
resistance to rolling.
Vehicles with automatic transmission:
Place the selector lever in "P."<
To avoid corrosion and one-sided
braking, apply the parking brake lightly
from time to time when coasting to a
standstill (at a traffic signal, for
instance), provided that it is safe to do
so.
Reverse Select only when the vehicle is
completely stopped. Press the gearshift
lever to the left to overcome the slight
resistance.
When you select reverse the backup
lamps will turn on automatically when
the ignition key is in position 2.
Do not hold the vehicle in place on
slopes by slipping or "riding" the
clutch. Use the parking brake instead.
Riding the clutch leads to severe and
premature clutch wear.<
Page 67 of 159

67n
OverviewControlsMaintenanceRepairsDataIndex
Automatic transmission with Steptronic
*
You can drive as with a normal auto-
matic transmission. In addition, you can
also shift manually.
When you move the selector lever from
the "D" position to the left into the M/S
range, the performance-oriented shift
programs of the automatic transmission
are engaged. Steptronic enters the
manual selection mode and executes
the desired shift whenever you tap the
selector lever in the direction indicated
by "+" or "Ð." When you wish to use the
automatic transmission mode again,
move the selector lever to the right into
the "D" position.
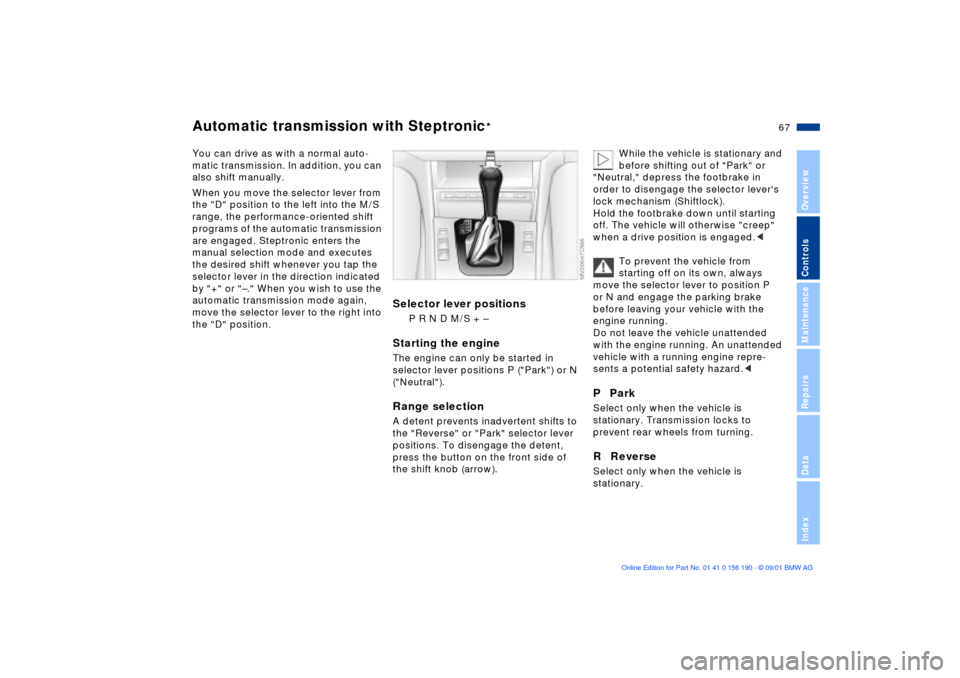
Selector lever positions
P R N D M/S + Ð
Starting the engineThe engine can only be started in
selector lever positions P ("Park") or N
("Neutral").Range selectionA detent prevents inadvertent shifts to
the "Reverse" or "Park" selector lever
positions. To disengage the detent,
press the button on the front side of
the shift knob (arrow).
While the vehicle is stationary and
before shifting out of "Park" or
"Neutral," depress the footbrake in
order to disengage the selector lever's
lock mechanism (Shiftlock).
Hold the footbrake down until starting
off. The vehicle will otherwise "creep"
when a drive position is engaged.<
To prevent the vehicle from
starting off on its own, always
move the selector lever to position P
or N and engage the parking brake
before leaving your vehicle with the
engine running.
Do not leave the vehicle unattended
with the engine running. An unattended
vehicle with a running engine repre-
sents a potential safety hazard.<
P ParkSelect only when the vehicle is
stationary. Transmission locks to
prevent rear wheels from turning.R ReverseSelect only when the vehicle is
stationary.
Page 80 of 159

80n
Automatic Stability Control plus Traction (ASC+T)
The conceptThis system optimizes vehicle stability
and traction, especially when you are
starting off, accelerating or when going
through curves.
ASC+T recognizes the danger present
in traction loss and will increase driving
stability and traction by reducing the
engine's output, and if necessary, by
applying the brakes to the rear wheels.
ASC+T is ready each time you start the
engine.
Indicator lamp
The indicator lamp in the instru-
ment cluster goes out shortly
after you switch on the ignition,
refer to pages 18, 19.
The indicator lamp flashes:
ASC+T is actively controlling drive
torque and braking intervention.
The indicator lamp fails to go out after
the engine is started, or it comes on
during normal driving and stays on:
There is a system malfunction or the
system was deactivated with the
button. Consequently, interventions to
increase driving stability (as described
in the preceding column) are no longer
available. You can still drive the vehicle
perfectly well without ASC+T
In the event of a fault, please contact
your BMW center, refer to
pages 18, 19.
Switch off the ASC+TPress the button; the indicator lamp
comes on and stays on.
The illustration depicts the arrangement
of the buttons if the vehicle is fully
equipped. This may vary, depending on
the equipment actually installed.
In the following rare situations, it may
be effective to deactivate the ASC+T
for a brief period:
>When rocking the vehicle or starting
off in deep snow or on loose surfaces
>When driving with snow chains.
To maintain vehicle stability,
always drive with the ASC+T acti-
vated whenever possible.<
Page 81 of 159

81n
OverviewControlsMaintenanceRepairsDataIndex
ASC+T Dynamic Stability Control (DSC)
*
Switch the ASC+T back onPress the button again; the indicator
lamp goes out.
The laws of physics cannot be
repealed, even with ASC+T. An
appropriate driving style always
remains the responsibility of the driver.
We therefore urge you to avoid using
the additional safety margin of the
system as an excuse for taking risks.<
The conceptThe Dynamic Stability Control (DSC)
maintains vehicle stability, even in crit-
ical driving situations.
The system optimizes vehicle stability
during acceleration and when starting
from a full stop, as well as optimizing
traction. In addition, it recognizes
unstable vehicle conditions, such as
under- or oversteering, and, as far as is
possible within the laws of physics,
helps keeping the vehicle on a steady
course by reducing the engine speed
and brake applications to the individual
wheels.
DSC is operational every time you start
the engine. DSC incorporates the func-
tionality of the Automatic Differential
Brake (ADB) and the Cornering Brake
Control (CBC).
The Automatic Differential Brake (ADB)
relies on selective braking applications
at the drive wheels to furnish the func-
tionality of a conventional limited-slip
differential for enhanced traction in crit-
ical driving conditions such as those
encountered on snow-covered road
surfaces, etc.
The ADB is in standby mode when DSC
is deactivated.
Indicator lamp
The indicator lamp in the instru-
ment cluster will go out shortly
after the ignition has been
switched on, refer to pages 18, 19.
The indicator lamp flashes:
DSC is actively controlling drive torque
and braking intervention.
The indicator lamp stays lit:
DSC has been deactivated manually;
ADB is operational.
ADB control intervention is not indi-
cated.
The indicator lamp and the
brake warning lamps will remain
on continuously:
The DSC, ADB and DBC have
been deactivated with the
button or are defective.
The vehicle will remain completely
operational, however, without DSC. In
the event of a fault, please consult your
BMW center, refer to pages 18, 19.
Indicator and warning lamps for
Canadian models.