2002 BMW 320i car key
[x] Cancel search: car keyPage 8 of 155
8n
Notes
Symbols
Your individual vehicle
Notes on the Owner's Manual We have made every effort to ensure
that you are able to find what you need
in this Owner's Manual as quickly as
possible. The fastest way to find
specific topics is by using the detailed
index at the end. If you wish to gain
only an initial overview of your vehicle,
you will find this in the first chapter.
The detailed table of contents is
intended to stimulate your interest and
encourage you to read the remainder of
the manual.
Should you wish to sell your BMW at
some time in the future, please
remember to hand over this Owner's
Manual to the new owner; it is part of
the vehicle.
If you have any additional questions,
your BMW center will be glad to advise
you.
Symbols used
Indicates precautions that must
be followed precisely in order to
avoid the possibility of personal injury
and serious damage to the vehicle.
<
Contains information that will
assist you in gaining the optimum
benefit from your vehicle and enables
you to care more effectively for your
vehicle.
<
Refers to measures that can
be taken to help protect the
environment.
<
<
Marks the end of a specific item of
information.
*
Indicates special equipment, country-
specific equipment and optional extras.
Identifies systems or components,
which can either be activated or
adapted to suit an individual driver's
requirements ("Vehicle Memory", "Key
Memory"), refer to page 55.
<
Remember that activation and adjust-
ments on some of these systems can
only be performed at your BMW
center.
<
Page 38 of 155
38n
Electric power windowsAfter the ignition has been switched off:
You can still use the electric power
windows for up to 15 minutes, as long
as no one opens any of the front doors.
When leaving the vehicle, always
remove the ignition key from the
lock and remember to close the doors
to prevent children from operating the
power windows and injuring them-
selves, etc.<
For the convenience mode via the
remote control or the door lock, refer to
pages 30 or 31.
Safety feature A contact strip is located on the inside
upper frame of each of the front
windows. If pressure is exerted against
this contact strip while a window is
being raised, the system will respond
by stopping the window and then
retracting it a small distance.
Despite this safety feature, be
extremely careful to ensure that
the closing path of the window is not
obstructed. Some types of objects
might fail to trigger the contact strip in
some situations (very thin objects, for
instance).
You can override this safety feature by
pressing the switch beyond the resis-
tance point and holding it.<
Safety switch
*
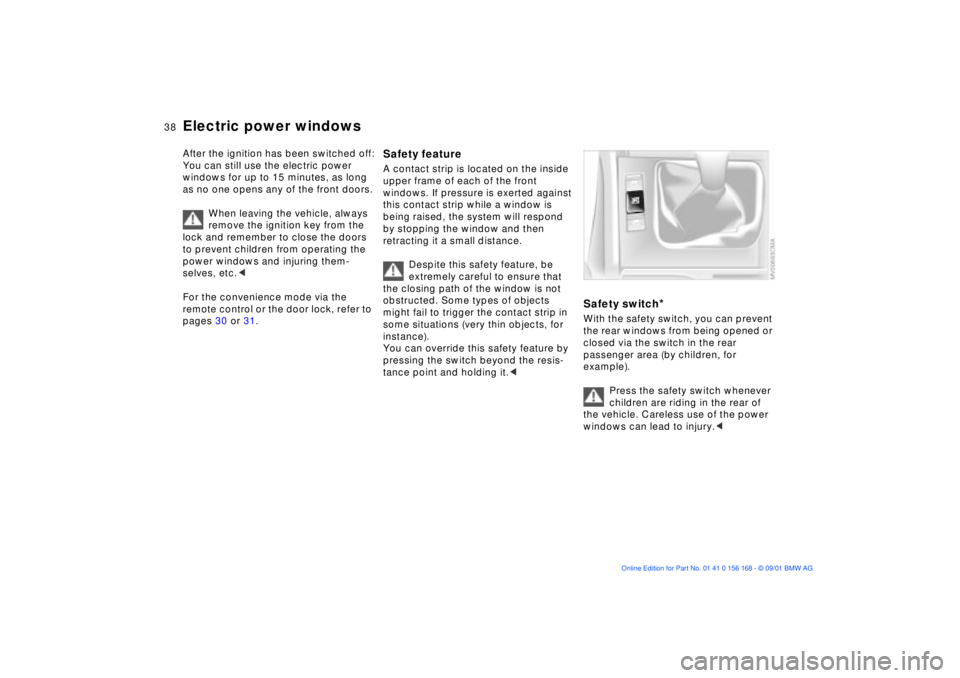
With the safety switch, you can prevent
the rear windows from being opened or
closed via the switch in the rear
passenger area (by children, for
example).
Press the safety switch whenever
children are riding in the rear of
the vehicle. Careless use of the power
windows can lead to injury.<
Page 39 of 155
39n
OverviewControlsMaintenanceRepairsDataIndex
Sliding/tilt sunroof
*
To prevent injuries, exercise care
when closing the sliding/tilt
sunroof and keep it in your field of
vision until it is shut.
When leaving the vehicle, always
extract the ignition key from the lock
and remember to close the doors to
prevent children from operating the
sliding/tilt sunroof and injuring them-
selves, etc.<
Raising Ð opening Ð closingWith ignition key in position 1 or 2.
After the ignition has been switched off,
you can still operate the sliding/tilt
sunroof for up to 15 minutes as long as
neither of the front doors has been
opened.
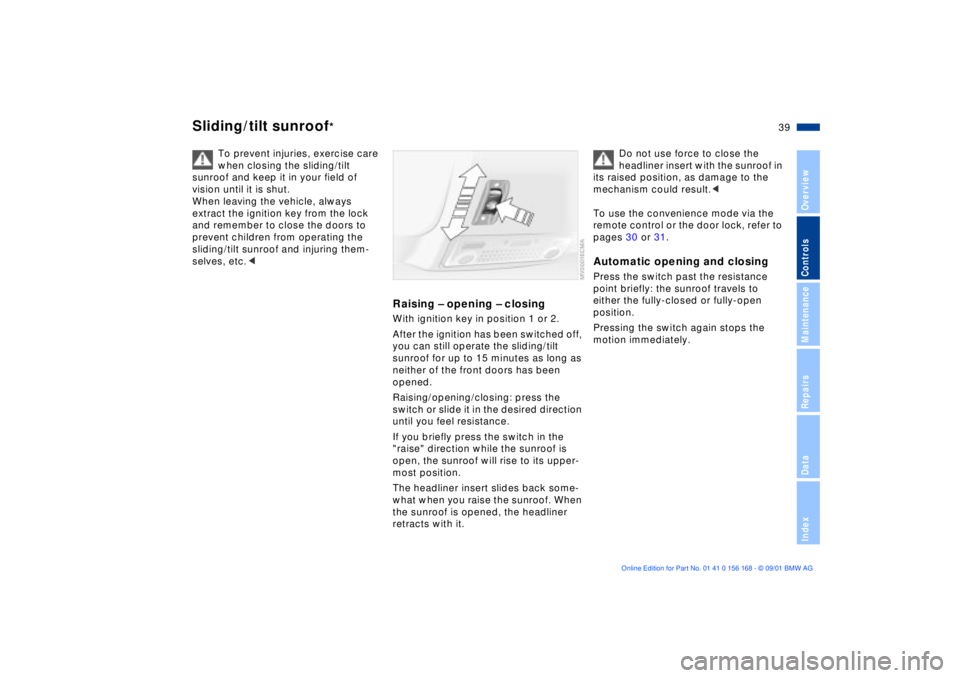
Raising/opening/closing: press the
switch or slide it in the desired direction
until you feel resistance.
If you briefly press the switch in the
"raise" direction while the sunroof is
open, the sunroof will rise to its upper-
most position.
The headliner insert slides back some-
what when you raise the sunroof. When
the sunroof is opened, the headliner
retracts with it.
Do not use force to close the
headliner insert with the sunroof in
its raised position, as damage to the
mechanism could result.<
To use the convenience mode via the
remote control or the door lock, refer to
pages 30 or 31.
Automatic opening and closingPress the switch past the resistance
point briefly: the sunroof travels to
either the fully-closed or fully-open
position.
Pressing the switch again stops the
motion immediately.
Page 40 of 155
40n
Sliding/tilt sunroof
*
Safety featureIf the sliding/tilt sunroof encounters
resistance
>when it is closing from the raised
position
>when it is closing from a point
roughly past the middle of its travel
the closing cycle is interrupted and the
sliding/tilt sunroof will open again
slightly.
Despite this safety feature, be
extremely careful that the travel
path of the sunroof is not obstructed
whenever it is closed. Remember that
the safety mechanism may not be able
to detect obstructions under all circum-
stances (with very thin objects, for
instance).
You can disable this safety feature by
pressing the switch beyond the pres-
sure point and holding it.<
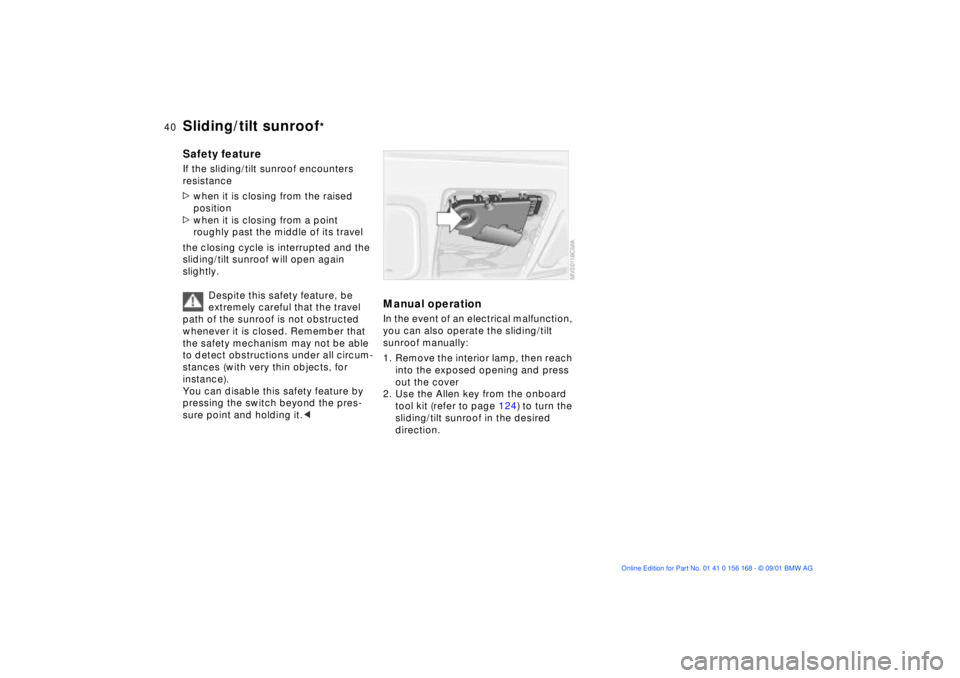
Manual operationIn the event of an electrical malfunction,
you can also operate the sliding/tilt
sunroof manually:
1. Remove the interior lamp, then reach
into the exposed opening and press
out the cover
2. Use the Allen key from the onboard
tool kit (refer to page 124) to turn the
sliding/tilt sunroof in the desired
direction.
Page 56 of 155
56n
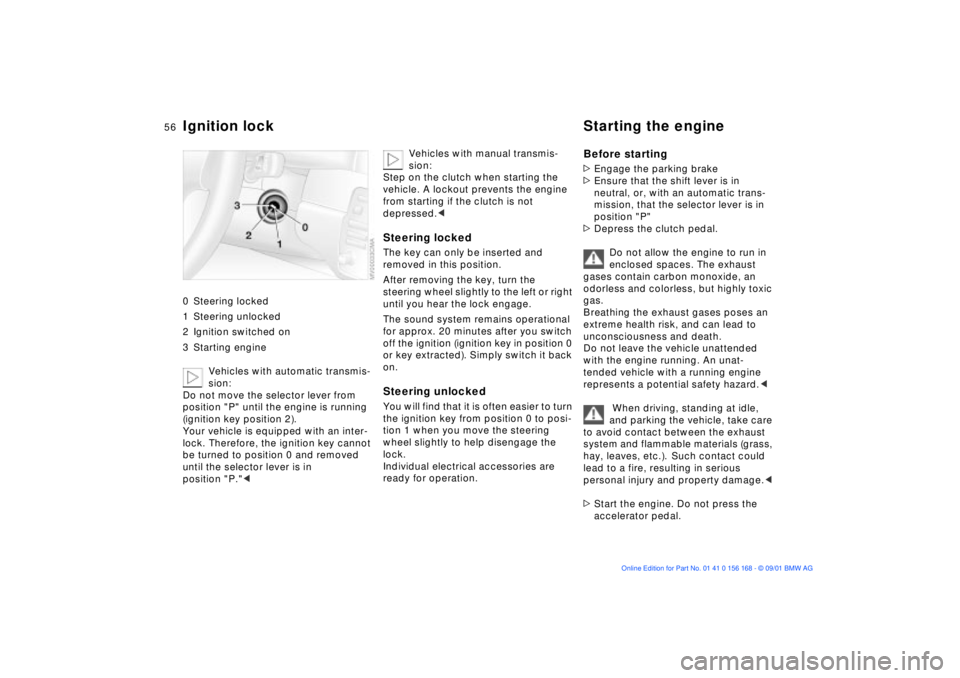
Ignition lock Starting the engine 0 Steering locked
1 Steering unlocked
2 Ignition switched on
3 Starting engine
Vehicles with automatic transmis-
sion:
Do not move the selector lever from
position "P" until the engine is running
(ignition key position 2).
Your vehicle is equipped with an inter-
lock. Therefore, the ignition key cannot
be turned to position 0 and removed
until the selector lever is in
position "P."<
Vehicles with manual transmis-
sion:
Step on the clutch when starting the
vehicle. A lockout prevents the engine
from starting if the clutch is not
depressed.<
Steering lockedThe key can only be inserted and
removed in this position.
After removing the key, turn the
steering wheel slightly to the left or right
until you hear the lock engage.
The sound system remains operational
for approx. 20 minutes after you switch
off the ignition (ignition key in position 0
or key extracted). Simply switch it back
on.Steering unlocked You will find that it is often easier to turn
the ignition key from position 0 to posi-
tion 1 when you move the steering
wheel slightly to help disengage the
lock.
Individual electrical accessories are
ready for operation.
Before starting>Engage the parking brake
>Ensure that the shift lever is in
neutral, or, with an automatic trans-
mission, that the selector lever is in
position "P"
>Depress the clutch pedal.
Do not allow the engine to run in
enclosed spaces. The exhaust
gases contain carbon monoxide, an
odorless and colorless, but highly toxic
gas.
Breathing the exhaust gases poses an
extreme health risk, and can lead to
unconsciousness and death.
Do not leave the vehicle unattended
with the engine running. An unat-
tended vehicle with a running engine
represents a potential safety hazard.<
When driving, standing at idle,
and parking the vehicle, take care
to avoid contact between the exhaust
system and flammable materials (grass,
hay, leaves, etc.). Such contact could
lead to a fire, resulting in serious
personal injury and property damage.<
>Start the engine. Do not press the
accelerator pedal.
Page 58 of 155
58n
Parking brake Manual transmission The parking brake is primarily designed
to prevent the vehicle from rolling while
parked. It operates on the rear wheels.To engageThe detent engages automatically, the
indicator lamp in the instrument cluster
comes on when the ignition key is in
position 2, refer to page 18.To releasePull up slightly on the lever, press the
button (arrow) and lower the lever.
If exceptional circumstances
make it necessary to engage the
parking brake while the vehicle is in
motion, do not pull it with excessive
pressure. Keep your thumb pressed
against the release button while care-
fully pulling the lever up to apply
moderate pressure.
Excessive pressure can lead to over-
braking and loss of traction (fishtailing)
at the rear axle.
The brake lamps do not come on when
the parking brake is engaged.
Vehicles with manual transmission:
Always engage the parking brake when
parking on hills and slopes, as first gear
or reverse may not provide adequate
resistance to rolling.
Vehicles with automatic transmission:
Place the selector lever in "Park."<
To avoid corrosion and one-sided
braking, apply the parking brake lightly
from time to time when coasting to a
standstill (at a traffic signal, for
example), provided that it is safe to do
so.
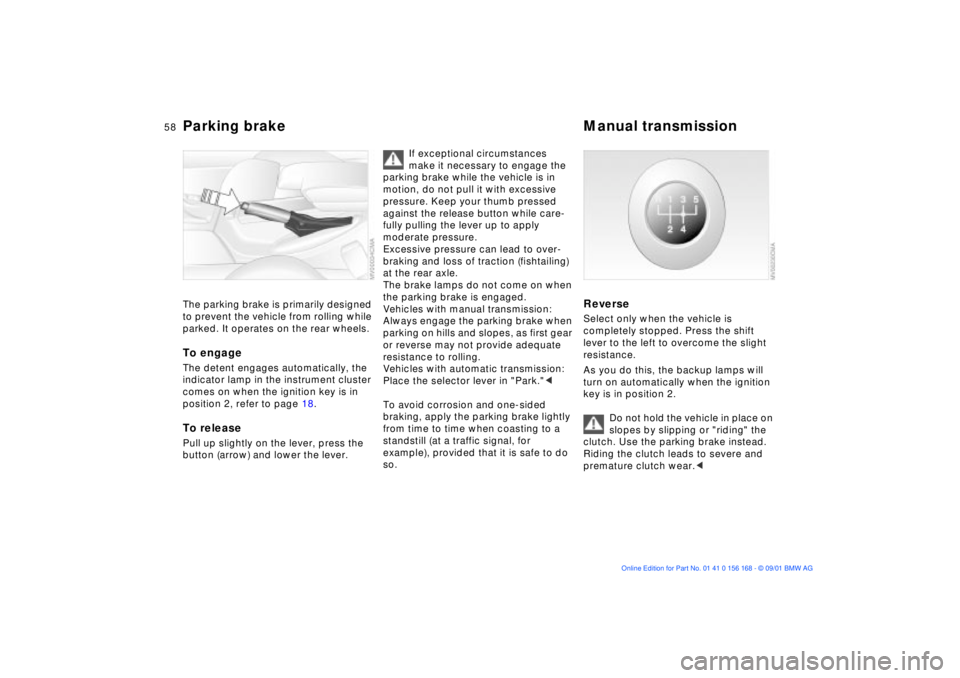
Reverse Select only when the vehicle is
completely stopped. Press the shift
lever to the left to overcome the slight
resistance.
As you do this, the backup lamps will
turn on automatically when the ignition
key is in position 2.
Do not hold the vehicle in place on
slopes by slipping or "riding" the
clutch. Use the parking brake instead.
Riding the clutch leads to severe and
premature clutch wear.<
Page 62 of 155
62n
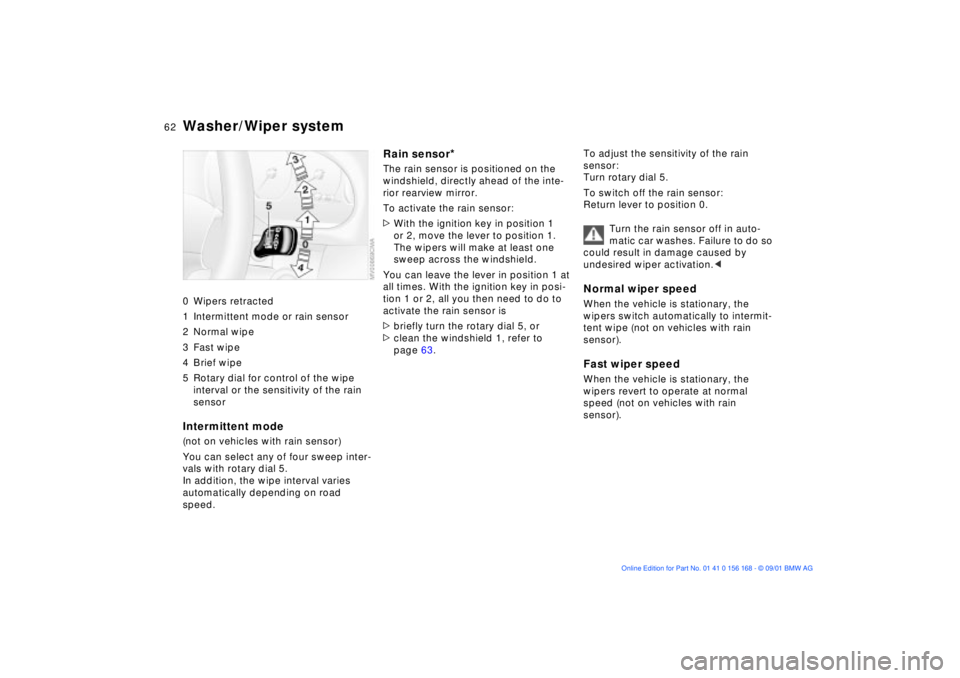
Washer/Wiper system 0 Wipers retracted
1 Intermittent mode or rain sensor
2 Normal wipe
3 Fast wipe
4 Brief wipe
5 Rotary dial for control of the wipe
interval or the sensitivity of the rain
sensorIntermittent mode(not on vehicles with rain sensor)
You can select any of four sweep inter-
vals with rotary dial 5.
In addition, the wipe interval varies
automatically depending on road
speed.
Rain sensor
*
The rain sensor is positioned on the
windshield, directly ahead of the inte-
rior rearview mirror.
To activate the rain sensor:
>With the ignition key in position 1
or 2, move the lever to position 1.
The wipers will make at least one
sweep across the windshield.
You can leave the lever in position 1 at
all times. With the ignition key in posi-
tion 1 or 2, all you then need to do to
activate the rain sensor is
>briefly turn the rotary dial 5, or
>clean the windshield 1, refer to
page 63.To adjust the sensitivity of the rain
sensor:
Turn rotary dial 5.
To switch off the rain sensor:
Return lever to position 0.
Turn the rain sensor off in auto-
matic car washes. Failure to do so
could result in damage caused by
undesired wiper activation.<
Normal wiper speedWhen the vehicle is stationary, the
wipers switch automatically to intermit-
tent wipe (not on vehicles with rain
sensor).Fast wiper speedWhen the vehicle is stationary, the
wipers revert to operate at normal
speed (not on vehicles with rain
sensor).
Page 68 of 155
68n
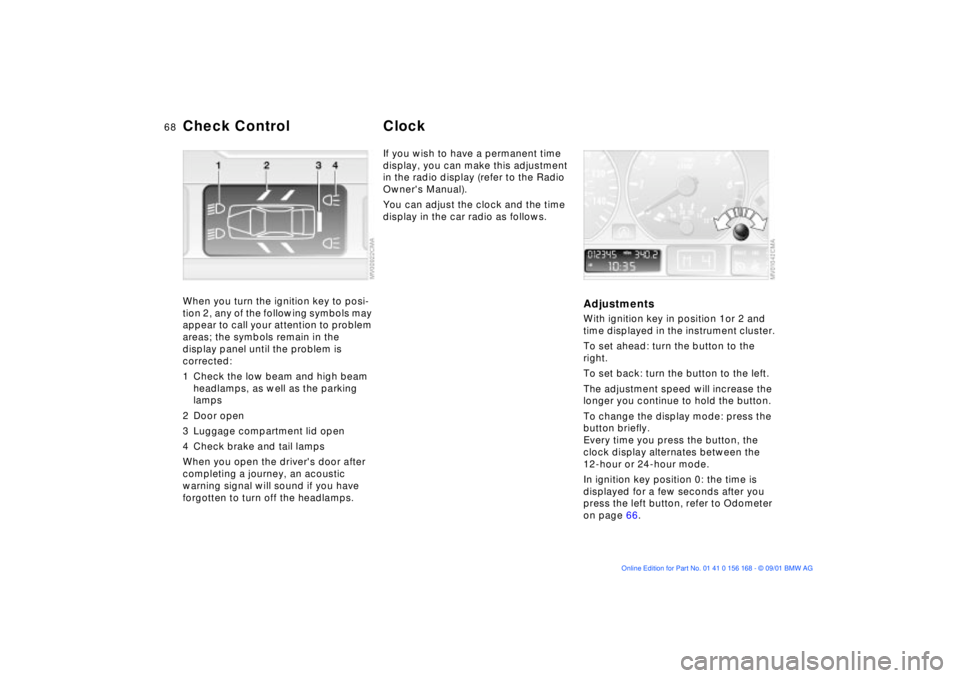
Check Control ClockWhen you turn the ignition key to posi-
tion 2, any of the following symbols may
appear to call your attention to problem
areas; the symbols remain in the
display panel until the problem is
corrected:
1 Check the low beam and high beam
headlamps, as well as the parking
lamps
2 Door open
3 Luggage compartment lid open
4 Check brake and tail lamps
When you open the driver's door after
completing a journey, an acoustic
warning signal will sound if you have
forgotten to turn off the headlamps.
If you wish to have a permanent time
display, you can make this adjustment
in the radio display (refer to the Radio
Owner's Manual).
You can adjust the clock and the time
display in the car radio as follows.
AdjustmentsWith ignition key in position 1or 2 and
time displayed in the instrument cluster.
To set ahead: turn the button to the
right.
To set back: turn the button to the left.
The adjustment speed will increase the
longer you continue to hold the button.
To change the display mode: press the
button briefly.
Every time you press the button, the
clock display alternates between the
12-hour or 24-hour mode.
In ignition key position 0: the time is
displayed for a few seconds after you
press the left button, refer to Odometer
on page 66.