Page 21 of 132

INSTRUMENT AND CONTROL FUNCTIONS
3-6
3 To set the clock:
1. Push both the “SELECT” and
“RESET” buttons for at least two
seconds.
2. When the hour digits start flashing,
push the “RESET” button to set
the hours.
3. Push the “SELECT” button, and
the minute digits will start flashing.
4. Push the “RESET” button to set
the minutes.
5. Push the “SELECT” button to start
the clock.
NOTE:@ After setting the clock, be sure to push
the “SELECT” button before turning the
key to “OFF”, otherwise the clock will
not be set. @
EAU04037
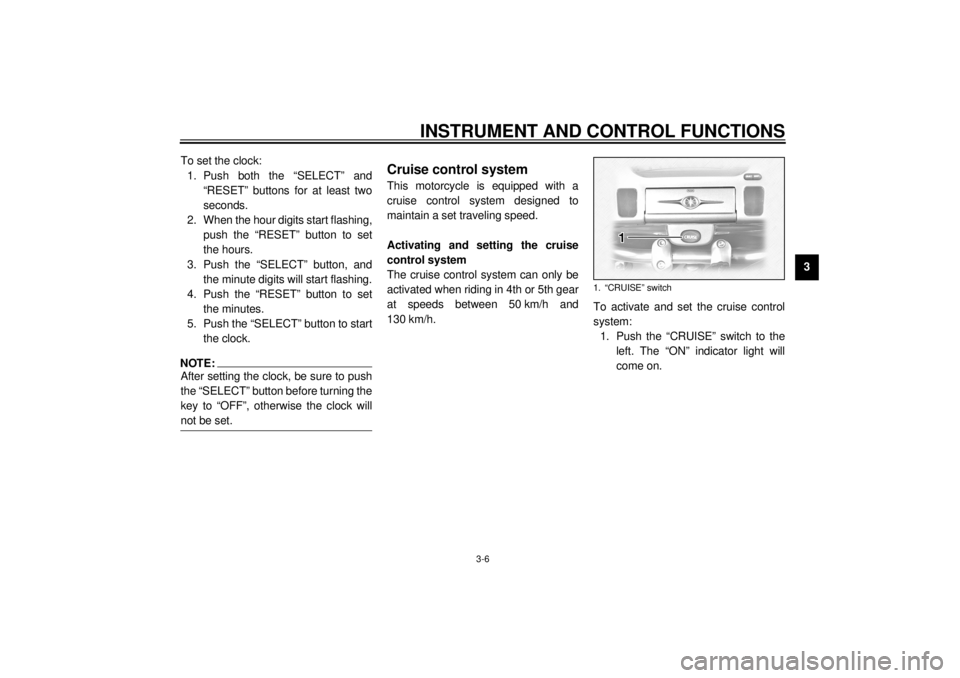
Cruise control systemThis motorcycle is equipped with a
cruise control system designed to
maintain a set traveling speed.
Activating and setting the cruise
control system
The cruise control system can only be
activated when riding in 4th or 5th gear
at speeds between 50 km/h and
130 km/h.To activate and set the cruise control
system:
1. Push the “CRUISE” switch to the
left. The “ON” indicator light will
come on.
1. “CRUISE” switch
E_5jc.book Page 6 Monday, January 22, 2001 12:12 PM
Page 22 of 132

INSTRUMENT AND CONTROL FUNCTIONS
3-7
3
2. Press the “SET/DEC” (set/decel-
erate) side of the cruise control
switch to activate the cruise con-
trol system. The “SET” indicator
light comes on.
3. Set the desired traveling speed as
follows. Press the “RES/ACC” (re-
sume/accelerate) side of the
cruise control switch to increase
the set speed or the “SET/DEC”
side to decrease the speed.
NOTE:_ Pressing the cruise control switch once
will change the speed in increments of
1.6 km/h. Holding the cruise control
switch down will increase or decrease
the speed continuously until the switch
is released. _The traveling speed can be set to a
maximum of 130 km/h and a minimum
of 50 km/h.
When the cruise control system is acti-
vated and the throttle grip is turned to
increase the speed by up to 8 km/h, the
cruise control system will return to theset speed after the throttle grip is re-
leased. However, if the speed is in-
creased by more than 8 km/h, the
cruise control system will be deactivat-
ed until the traveling speed is within
8 km/h of the set speed.
Deactivating the cruise control
system
Applying the front or rear brake or dis-
engaging the clutch will automatically
deactivate the cruise control system.
Push the “CANCEL” switch to manually
deactivate cruise control.
NOTE:_ l
When the cruise control system is
deactivated, the “RES” (resume)
indicator light will come on.
l
Traveling speed decreases as
soon as the cruise control system
is deactivated; unless the throttle
grip is turned.
_
1. Cruise control switch
2. “CANCEL” switch
1. “SET” indicator light
2. “RES” indicator light
3. “ON” indicator light
E_5jc.book Page 7 Monday, January 22, 2001 12:12 PM
Page 23 of 132

INSTRUMENT AND CONTROL FUNCTIONS
3-8
3 Push the “RES/ACC” side of the cruise
control switch to reactivate the system.
The traveling speed will return to the
previously set speed. The “RES” indi-
cator light will flash during this time and
then go off. Once the cruise control
system is reactivated, the “SET” indica-
tor light will come on.
Push the “CRUISE” switch to the right
to turn the cruise control system off
completely.
EWA00019
WARNING
_ If the cruise control system is defec-
tive, the “SET” and “RES” indicator
lights will flash simultaneously. If
this occurs, turn the cruise control
system off and have a Yamaha deal-
er check it. _
EAU01779
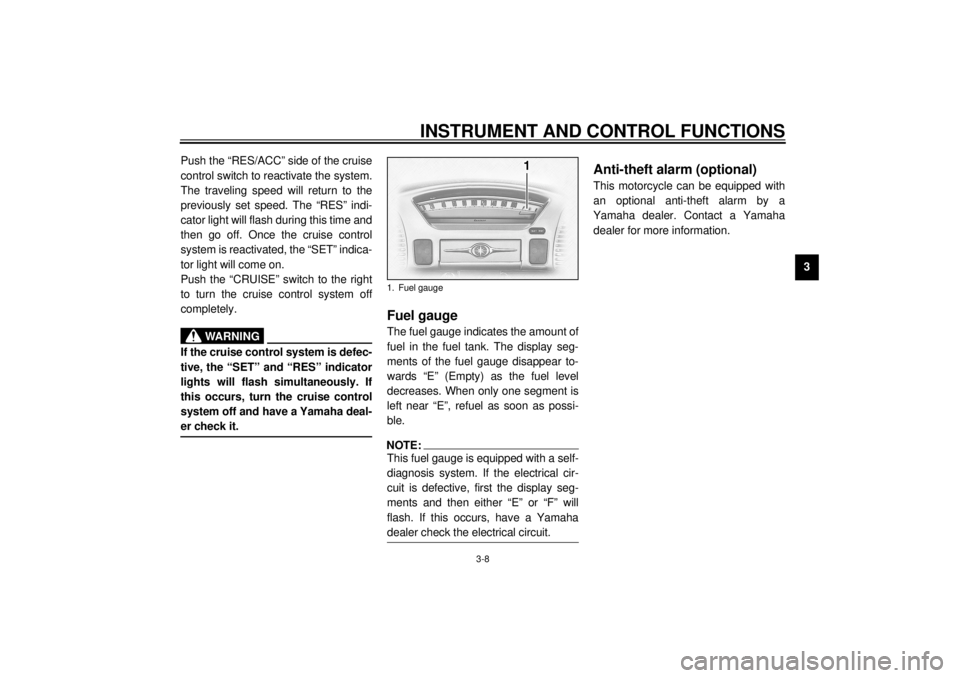
Fuel gauge The fuel gauge indicates the amount of
fuel in the fuel tank. The display seg-
ments of the fuel gauge disappear to-
wards “E” (Empty) as the fuel level
decreases. When only one segment is
left near “E”, refuel as soon as possi-
ble.NOTE:@ This fuel gauge is equipped with a self-
diagnosis system. If the electrical cir-
cuit is defective, first the display seg-
ments and then either “E” or “F” will
flash. If this occurs, have a Yamaha
dealer check the electrical circuit. @
EAU00109
Anti-theft alarm (optional) This motorcycle can be equipped with
an optional anti-theft alarm by a
Yamaha dealer. Contact a Yamaha
dealer for more information.
1. Fuel gauge
E_5jc.book Page 8 Monday, January 22, 2001 12:12 PM
Page 24 of 132

INSTRUMENT AND CONTROL FUNCTIONS
3-9
3
EAU00118
Handlebar switches
EAU00119
1. Pass switch “ ”
Press this switch to flash the headlight.
EAU03888
2. Dimmer switch “ / ”
Set this switch to “ ” for the high
beam and to “ ” for the low beam.
EAU03889
3. Turn signal switch “ / ”
To signal a right-hand turn, push this
switch to “ ”. To signal a left-hand
turn, push this switch to “ ”. When
released, the switch returns to the cen-
ter position. To cancel the turn signal
lights, push the switch in after it has re-
turned to the center position.
EAU00129
4. Horn switch “ ”
Press this switch to sound the horn.
EAU03890
5. Engine stop switch “ / ”
Set this switch to “ ” before starting
the engine. Set this switch to “ ” to
stop the engine in case of an emergen-
cy, such as when the motorcycle over-
turns or when the throttle cable is
stuck.
EAU03966
6. Light switch “ / / ”
Set this switch to “ ” to turn on the
auxiliary light, meter lighting, taillight
and license plate light. Set the switch to
“ ” to turn on the headlight also. Set
the switch to “ ” to turn off all the
lights.
E_5jc.book Page 9 Monday, January 22, 2001 12:12 PM
Page 50 of 132
AUDIO SYSTEM
4-9
4
Cassette deck operation
WARNING
_ l
It is dangerous to operate the
cassette deck while riding. Nev-
er take your hands off the han-
dlebars while riding.
l
Keep the volume at a low
enough level to be aware of traf-
fic conditions and ensure
safety.
_
CAUTION:_ l
Keep the cassette deck lid
closed at all times, except when
inserting or removing a cas-
sette.
l
Do not leave cassette tapes in
direct sunlight for a long period
of time.
l
Do not allow the inside of the
cassette deck to get wet. If this
happens, keep the cassette
deck lid open and dry out the
deck in the shade.
l
To clean the tape head, use a
de-magnetizing cleaning cas-
sette, but be sure to turn the
volume all the way down to
avoid speaker damage.
_
1. Cassette deck compartment
2. Eject (“ ”) button
3. Cassette deck lidE_5jc.book Page 9 Monday, January 22, 2001 12:12 PM
Page 63 of 132

PRE-OPERATION CHECKS
5-2
5
Clutch• Check operation.
• If soft or spongy, have Yamaha dealer bleed hydraulic system.
• Check fluid level in reservoir.
• If necessary, add recommended fluid to specified level.
• Check hydraulic system for leakage.7-25, 7-28
Throttle grip• Make sure that operation is smooth.
• Lubricate throttle grip, housing and cables if necessary.
• Check free play.
• If necessary, have Yamaha dealer make adjustment.7-21
Control cables• Make sure that operation is smooth.
• Lubricate if necessary.—
Wheels and tires• Check for damage.
• Check tire condition and tread depth.
• Check air pressure.
• Correct if necessary.7-21–7-24
Brake and shift pedals• Make sure that operation is smooth.
• Lubricate pedal pivoting points if necessary.7-29
Brake and clutch levers• Make sure that operation is smooth.
• Lubricate lever pivoting points if necessary.7-30
Sidestand• Make sure that operation is smooth.
• Lubricate pivot if necessary.7-30
Chassis fasteners• Make sure that all nuts, bolts and screws are properly tightened.
• Tighten if necessary.—
Instruments, lights, signals
and switches• Check operation.
• Correct if necessary.—
Sidestand switch• Check operation of ignition circuit cut-off system.
• If system is defective, have Yamaha dealer check vehicle.3-21 ITEM CHECKS PAGE
E_5jc.book Page 2 Monday, January 22, 2001 12:12 PM
Page 67 of 132
OPERATION AND IMPORTANT RIDING POINTS
6-2
6 1. Turn the fuel cock lever to “ON”.
2. Turn the key to “ON” and make
sure that the engine stop switch is
set to “ ”.
EC000035
CAUTION:_ If the fuel level warning light comes
on, check the fuel level, and, if nec-
essary, refuel as soon as possible. _3. Shift the transmission into the neu-
tral position.
NOTE:_ When the transmission is in the neutral
position, the neutral indicator light
should be on, otherwise have a
Yamaha dealer check the electrical cir-
cuit. _
4. Turn the starter (choke) on and
completely close the throttle. (See
page 3-14 for starter (choke) oper-
ation.)
5. Start the engine by pushing the
start switch.NOTE:_ If the engine fails to start, release the
start switch, wait a few seconds, and
then try again. Each starting attempt
should be as short as possible to pre-
serve the battery. Do not crank the en-
gine more than 10 seconds on any one
attempt. _
E_5jc.book Page 2 Monday, January 22, 2001 12:12 PM
Page 68 of 132

OPERATION AND IMPORTANT RIDING POINTS
6-3
6
ECA00031
CAUTION:_ The engine trouble warning light
should come on when the start
switch is pushed, and it should go
off when the start switch is released.
If the engine trouble warning does
not come on when pushing the start
switch, or it remains on after start-
ing, have a Yamaha dealer check the
self-diagnosis device. _6. After starting the engine, move the
starter (choke) knob back halfway.
ECA00045
CAUTION:_ For maximum engine life, never ac-
celerate hard when the engine is
cold! _7. When the engine is warm, turn the
starter (choke) off.NOTE:_ The engine is warm when it responds
normally to the throttle with the starter
(choke) turned off. _
EAU01258
Starting a warm engine Follow the same procedure as for start-
ing a cold engine with the exception
that the starter (choke) is not required
when the engine is warm.
EAU00423
Shifting Shifting gears lets you control the
amount of engine power available for
starting off, accelerating, climbing hills,
etc.
The gear positions are shown in the
illustration.NOTE:@ To shift the transmission into the neu-
tral position, press the shift pedal down
repeatedly until it reaches the end of its
travel, and then slightly raise it. @
E_5jc.book Page 3 Monday, January 22, 2001 12:12 PM