Page 45 of 94

1
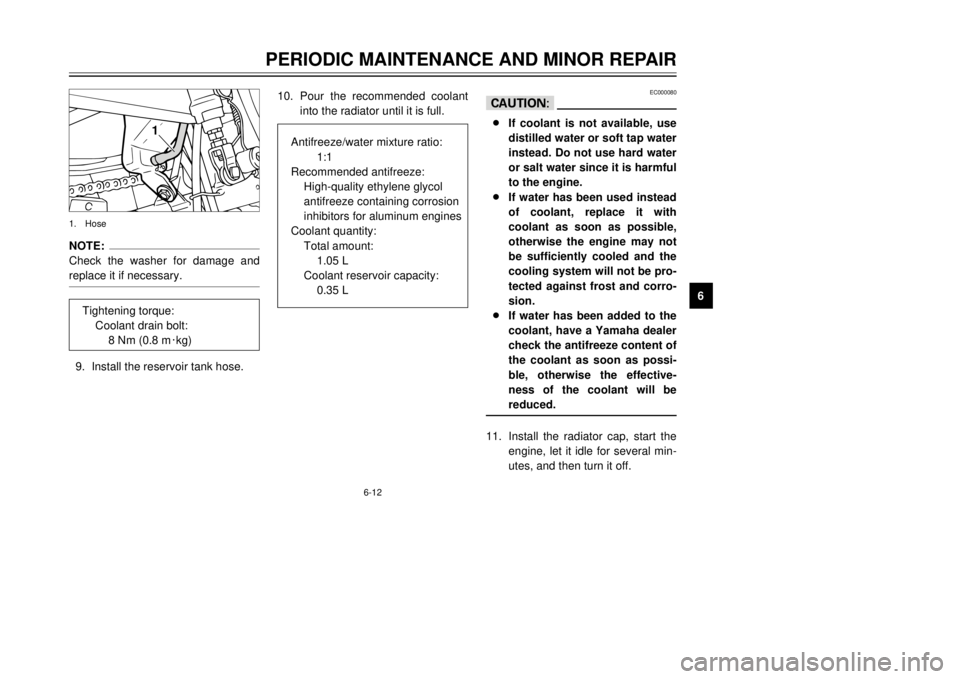
4.Install the transmission oil drain
bolt, and then tighten it to the
specified torque.
5.Add the specified amount of the
recommended transmission oil,
and then install and tighten the
oil filler cap.1.Transmission oil drain bolt
6-9
1
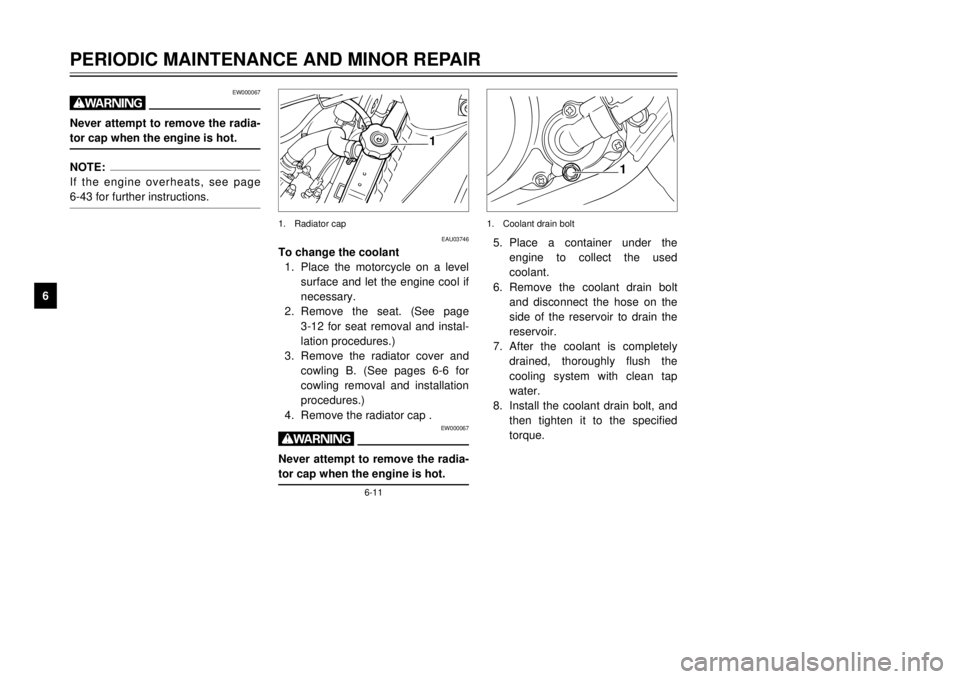
1.Oil filler capTo change the transmission oil
1.Start the engine, warm it up for
several minutes, and then turn it
off.
2.Place an oil pan under the trans-
mission to collect the used oil.
3.Remove the oil filler cap and
drain bolt to drain the oil from the
transmission.
PERIODIC MAINTENANCE AND MINOR REPAIR
1
2
3
4
56
7
8
9Tightening torque:
Transmission oil drain bolt:
15 Nm (1.5 m0kg)
1
2
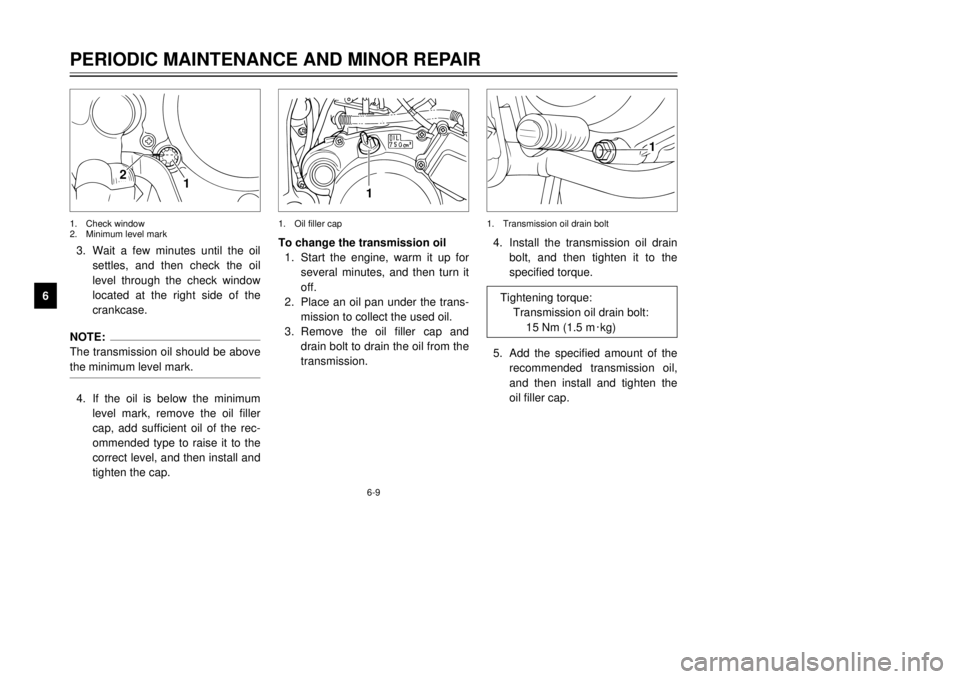
1.Check window
2.Minimum level mark3.Wait a few minutes until the oil
settles, and then check the oil
level through the check window
located at the right side of the
crankcase.NOTE:
The transmission oil should be above
the minimum level mark.4.If the oil is below the minimum
level mark, remove the oil filler
cap, add sufficient oil of the rec-
ommended type to raise it to the
correct level, and then install and
tighten the cap.
5AE-9-E4 (ENG) 8/30/00 5:04 PM Page 44
Page 47 of 94

EW000067
wNever attempt to remove the radia-
tor cap when the engine is hot.NOTE:
If the engine overheats, see page
6-43 for further instructions.
6-11
PERIODIC MAINTENANCE AND MINOR REPAIR
1
2
3
4
56
7
8
9
EAU03746
To change the coolant
1.Place the motorcycle on a level
surface and let the engine cool if
necessary.
2.Remove the seat. (See page
3-12 for seat removal and instal-
lation procedures.)
3.Remove the radiator cover and
cowling B. (See pages 6-6 for
cowling removal and installation
procedures.)
4.Remove the radiator cap .
EW000067
wNever attempt to remove the radia-
tor cap when the engine is hot.
1
1.Radiator cap
1
5.Place a container under the
engine to collect the used
coolant.
6.Remove the coolant drain bolt
and disconnect the hose on the
side of the reservoir to drain the
reservoir.
7.After the coolant is completely
drained, thoroughly flush the
cooling system with clean tap
water.
8.Install the coolant drain bolt, and
then tighten it to the specified
torque.1.Coolant drain bolt
5AE-9-E4 (ENG) 8/30/00 5:04 PM Page 46
Page 48 of 94

6-12
PERIODIC MAINTENANCE AND MINOR REPAIR
1
2
3
4
56
7
8
9
1
NOTE:
Check the washer for damage and
replace it if necessary.9.Install the reservoir tank hose.1.Hose
Tightening torque:
Coolant drain bolt:
8 Nm (0.8 m0kg)
10.Pour the recommended coolant
into the radiator until it is full.
Antifreeze/water mixture ratio:
1:1
Recommended antifreeze:
High-quality ethylene glycol
antifreeze containing corrosion
inhibitors for aluminum engines
Coolant quantity:
Total amount:
1.05 L
Coolant reservoir capacity:
0.35 L
EC000080
cC8If coolant is not available, use
distilled water or soft tap water
instead. Do not use hard water
or salt water since it is harmful
to the engine.
8If water has been used instead
of coolant, replace it with
coolant as soon as possible,
otherwise the engine may not
be sufficiently cooled and the
cooling system will not be pro-
tected against frost and corro-
sion.
8If water has been added to the
coolant, have a Yamaha dealer
check the antifreeze content of
the coolant as soon as possi-
ble, otherwise the effective-
ness of the coolant will be
reduced. 11.Install the radiator cap, start the
engine, let it idle for several min-
utes, and then turn it off.
5AE-9-E4 (ENG) 8/30/00 5:04 PM Page 47
Page 83 of 94

StorageShort-term
Always store your motorcycle in a
cool, dry place and, if necessary, pro-
tect it against dust with a porous
cover.
ECA00014
cC8Storing the motorcycle in a
poorly ventilated room or cov-
ering it with a tarp, while it is
still wet, will allow water and
humidity to seep in and cause
rust.
8To prevent corrosion, avoid
damp cellars, stables (because
of the presence of ammonia)
and areas where strong chemi-
cals are stored.
Long-term
Before storing your motorcycle for
several months:
1.Follow all the instructions in the
ÒCareÓ section of this chapter.
2.For motorcycles equipped with a
fuel cock that has an ÒOFFÓ posi-
tion: Turn the fuel cock lever to
ÒOFFÓ.
3.Drain the carburetor float cham-
ber by loosening the drain bolt;
this will prevent fuel deposits
from building up. Pour the
drained fuel into the fuel tank.
4.Fill up the fuel tank and add fuel
stabilizer (if available) to prevent
the fuel tank from rusting and
the fuel from deteriorating.
5.Perform the following steps to
protect the cylinder, piston rings,
etc. from corrosion.a.Remove the spark plug cap
and spark plug.
b.Pour a teaspoonful of engine
oil into the spark plug bore.
c.Install the spark plug cap onto
the spark plug, and then place
the spark plug on the cylinder
head so that the electrodes
are grounded. (This will limit
sparking during the next step.)
d.Turn the engine over several
times with the starter. (This
will coat the cylinder wall with
oil.)
e.Remove the spark plug cap
from the spark plug, and then
install the spark plug and the
spark plug cap.
EWA00003
wTo prevent damage or injury from
sparking, make sure to ground the
spark plug electrodes while turn-
ing the engine over.
MOTORCYCLE CARE AND STORAGE
7-4
75AE-9-E4 (ENG) 8/30/00 5:04 PM Page 82