Page 52 of 106
6-8
1
1
2
3.Pull the cowling down slightly,
and then pull it outward as
shown.To install the cowling
1.Insert the tabs on the cowling
into the slots as shown, and then
install the screws.
2.Place the floorboard mats in the
original position.
ECA00067
cCTake care not to damage the tabs
on the cowling when removing and
or installing it.
EAU03632
Cowling B
To remove the cowling1.Pull up the right floorboard mats
as shown.
1.Tab (´10)1.Mat A
2.Mat B
PERIODIC MAINTENANCE AND MINOR REPAIR
1
2
3
4
56
7
8
9
5GM-9-E1(No ABS) 9/27/00 2:18 PM Page 51
Page 53 of 106
6-9
2 1
1
1
2.Remove the screws.1.Screw (´4)
2.Cowling B1.Tab (´10)
3.Pull the cowling down slightly,
and then pull it outward as
shown.To install the cowling
1.Insert the tabs on the cowling
into the slots as shown, and then
install the screws.
2.Place the floorboard mats in the
original position.
ECA00067
cCTake care not to damage the tabs
on the cowling when removing and
or installing it.
PERIODIC MAINTENANCE AND MINOR REPAIR
1
2
3
4
56
7
8
95GM-9-E1(No ABS) 9/27/00 2:18 PM Page 52
Page 54 of 106
6-10
1
aa
EAU03617
Cowling C
To remove the cowling1.Remove the screws.2.Push the cowling in lightly, and
then pull it back as shown.
ECA00067
cCTake care not to damage the tabs
on the cowling when removing and
or installing it.
1.Screw (´2)a.Push.
PERIODIC MAINTENANCE AND MINOR REPAIR
1
2
3
4
56
7
8
9
5GM-9-E1(No ABS) 9/27/00 2:18 PM Page 53
Page 57 of 106

1
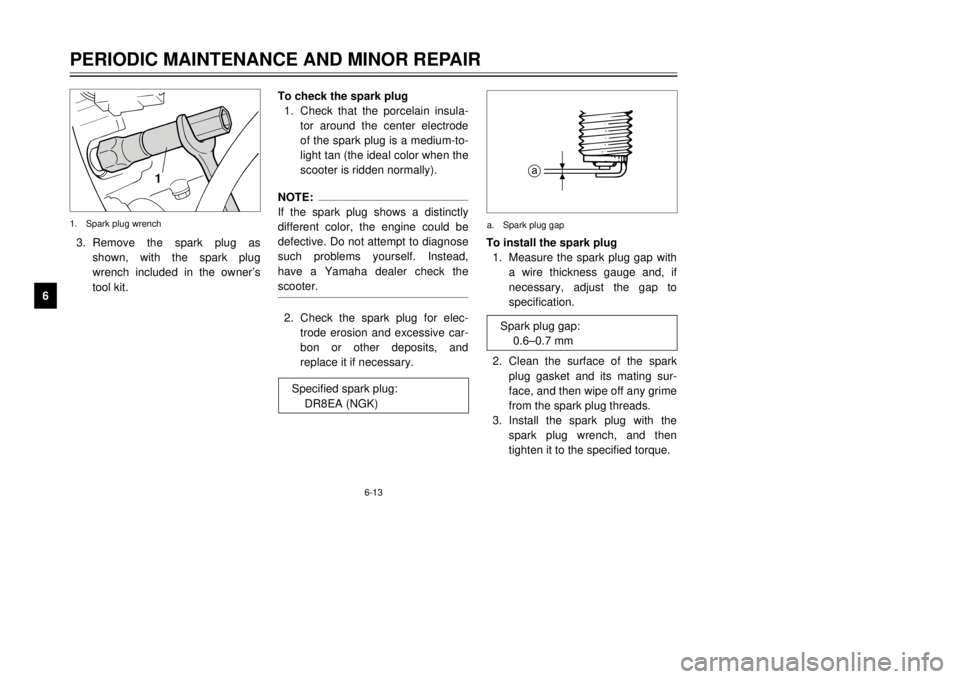
3.Remove the spark plug as
shown, with the spark plug
wrench included in the ownerÕs
tool kit.1.Spark plug wrench
6-13PERIODIC MAINTENANCE AND MINOR REPAIR
1
2
3
4
56
7
8
9To check the spark plug
1.Check that the porcelain insula-
tor around the center electrode
of the spark plug is a medium-to-
light tan (the ideal color when the
scooter is ridden normally).
NOTE:
If the spark plug shows a distinctly
different color, the engine could be
defective. Do not attempt to diagnose
such problems yourself. Instead,
have a Yamaha dealer check the
scooter.2.Check the spark plug for elec-
trode erosion and excessive car-
bon or other deposits, and
replace it if necessary.
a
a.Spark plug gap
Spark plug gap:
0.6Ð0.7 mm
To install the spark plug
1.Measure the spark plug gap with
a wire thickness gauge and, if
necessary, adjust the gap to
specification.
2.Clean the surface of the spark
plug gasket and its mating sur-
face, and then wipe off any grime
from the spark plug threads.
3.Install the spark plug with the
spark plug wrench, and then
tighten it to the specified torque. Specified spark plug:
DR8EA (NGK)
5GM-9-E1(No ABS) 9/27/00 2:18 PM Page 56
Page 58 of 106
6-14
PERIODIC MAINTENANCE AND MINOR REPAIR
1
2
3
4
56
7
8
9
NOTE:
If a torque wrench is not available
when installing a spark plug, a good
estimate of the correct torque is
1/4Ð1/2 turn past finger tight.
However, the spark plug should be
tightened to the specified torque as
soon as possible.4.Install the spark plug cap.
5.Install the cowling. Tightening torque:
Spark plug:
17.5 Nm (1.75 m0kg)
EAU03119
Engine oilThe engine oil level should be
checked before each ride. In addition,
the oil must be changed at the inter-
vals specified in the periodic mainte-
nance and lubrication chart and when
the oil change indicator light comes
on.To check the engine oil level
1.Place the scooter on the center-
stand.
NOTE:
Make sure that the scooter is posi-
tioned straight up when checking the
oil level. A slight tilt to the side can
result in a false reading.2.Start the engine, warm it up for
several minutes, and then turn it
off.
5GM-9-E1(No ABS) 9/27/00 2:18 PM Page 57
Page 60 of 106

6-16
PERIODIC MAINTENANCE AND MINOR REPAIR
1
2
3
4
56
7
8
9
12
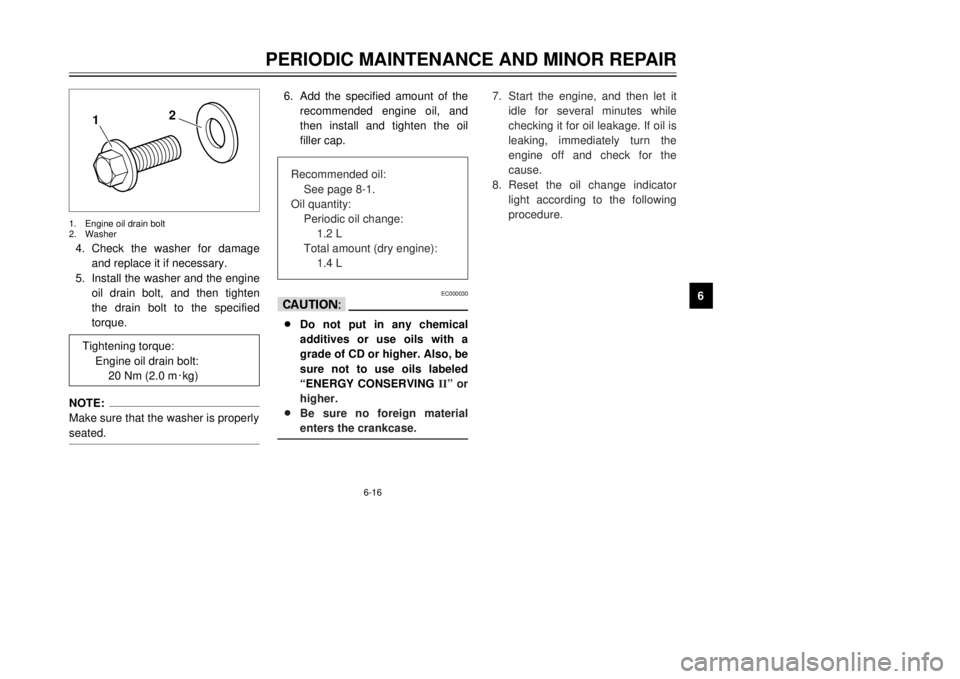
4.Check the washer for damage
and replace it if necessary.
5.Install the washer and the engine
oil drain bolt, and then tighten
the drain bolt to the specified
torque.NOTE:
Make sure that the washer is properly
seated.1.Engine oil drain bolt
2.Washer
Tightening torque:
Engine oil drain bolt:
20 Nm (2.0 m0kg)
6.Add the specified amount of the
recommended engine oil, and
then install and tighten the oil
filler cap.
EC000030
cC8Do not put in any chemical
additives or use oils with a
grade of CD or higher. Also, be
sure not to use oils labeled
ÒENERGY CONSERVING
IIÓ or
higher.
8Be sure no foreign material
enters the crankcase.
Recommended oil:
See page 8-1.
Oil quantity:
Periodic oil change:
1.2 L
Total amount (dry engine):
1.4 L
7.Start the engine, and then let it
idle for several minutes while
checking it for oil leakage. If oil is
leaking, immediately turn the
engine off and check for the
cause.
8.Reset the oil change indicator
light according to the following
procedure.
5GM-9-E1(No ABS) 9/27/00 2:18 PM Page 59
Page 61 of 106

6-17
PERIODIC MAINTENANCE AND MINOR REPAIR
1
2
3
4
56
7
8
9
1
To reset the oil change indicator
light
1.Turn the key to ÒONÓ.
2.Hold the reset button pushed for
two to five seconds.
3.Release the reset button, and
the oil change indicator light will
go off.1.Reset button
NOTE:
If the engine oil is changed before the
oil change indicator light comes on
(i.e. before the periodic oil change
interval has been reached), the indi-
cator light must be reset after the oil
change for the next periodic oil
change to be indicated at the correct
time. To reset the oil change indicator
light before the periodic oil change
interval has been reached, follow the
above procedure, but note that the
indicator light will come on for 1.4
seconds after releasing the reset but-
ton, otherwise repeat the procedure.
EAU03469
Final gear oilThe final gear case must be checked
for oil leakage before each ride. If
any leakage is found, have a
Yamaha dealer check and repair the
scooter. In addition, the final gear oil
must be changed as follows at the
intervals specified in the periodic
maintenance and lubrication chart.
1.Start the engine, warm it up by
riding the scooter for several
minutes, and then stop the
engine.
2.Place the scooter on the center-
stand.NOTE:
Make sure that the scooter is posi-
tioned straight up when checking the
oil level. A slight tilt to the side can
result in a false reading.3.Place an oil pan under the final
gear case to collect the used oil.
5GM-9-E1(No ABS) 9/27/00 2:18 PM Page 60
Page 62 of 106

4.Remove the oil filler cap and
drain bolt to drain the oil from the
final gear case.
5.Install the final gear oil drain bolt,
and then tighten it to the speci-
fied torque.
6.Add the specified amount of the
recommended final gear oil, and
then install and tighten the oil
filler cap.
6-18
PERIODIC MAINTENANCE AND MINOR REPAIR
1
2
3
4
56
7
8
9
1
1.Final gear oil filler cap
Tightening torque:
Final gear oil drain bolt:
22 Nm (2.2 m0kg)
EW000066
w8Make sure that no foreign
material enters the final gear
case.
8Make sure that no oil gets on
the tire or wheel.7.Check the final gear case for oil
leakage. If oil is leaking, check
for the cause.
1
1.Final gear oil drain bolt
Recommended final gear oil:
See page 8-2.
Oil quantity:
0.25 L
EAU01587
CoolantThe coolant reservoir is located
under the battery cover. (See page
6-31 for battery cover removal proce-
dures.)
To check the coolant level
1.Place the scooter on a level sur-
face and hold it in an upright
position.NOTE:
8The coolant level must be
checked on a cold engine since
the level varies with engine tem-
perature.
8Make sure that the scooter is
positioned straight up when
checking the coolant level. A
slight tilt to the side can result in
a false reading.
5GM-9-E1(No ABS) 9/27/00 2:18 PM Page 61