2001 YAMAHA MAJESTY 250 wheel
[x] Cancel search: wheelPage 36 of 106

4-2
PRE-OPERATION CHECKS
1
2
34
5
6
7
8
9
Rear brake¥Check operation.
¥If soft or spongy, have Yamaha dealer bleed hydraulic system.
¥Check fluid level in reservoir.
¥If necessary, add recommended brake fluid to specified level.
¥Check hydraulic system for leakage.3-8, 6-25Ð6-28
Throttle grip¥Make sure that operation is smooth.
¥Lubricate throttle grip, housing and cables if necessary.
¥Check free play.
¥If necessary, have Yamaha dealer make adjustment.Ñ
Wheels and tires¥Check for damage.
¥Check tire condition and tread depth.
¥Check air pressure.
¥Correct if necessary.6-23Ð6-25
Brake levers¥Make sure that operation is smooth.
¥Lubricate lever pivoting points if necessary.3-8, 6-25Ð6-26
Centerstand, sidestand¥Make sure that operation is smooth.
¥Lubricate pivots if necessary.6-29
Chassis fasteners¥Make sure that all nuts, bolts and screws are properly tightened.
¥Tighten if necessary.Ñ
Instruments, lights,
signals and switches¥Check operation.
¥Correct if necessary.3-2Ð3-8, 6-34Ð6-38
Sidestand switch¥Check operation of ignition circuit cut-off system.
¥If system is defective, have Yamaha dealer check vehicle.3-15Ð3-16 ITEMCHECKSPAGE
5GM-9-E1(No ABS) 9/27/00 2:18 PM Page 35
Page 44 of 106

PERIODIC MAINTENANCE AND MINOR REPAIR
OwnerÕs tool kit.......................................................6-1
Periodic maintenance and lubrication chart............6-3
Removing and installing cowlings and panel..........6-6
Checking the spark plug.......................................6-12
Engine oil..............................................................6-14
Final gear oil.........................................................6-17
Coolant..................................................................6-18
Air filter and V-belt case air filter elements...........6-20
Air flow louver.......................................................6-22
Tires......................................................................6-23
Wheels..................................................................6-25
Adjusting the front and rear brake lever
free play..............................................................6-25
Checking the front and rear brake pads................6-26
Checking the brake fluid level...............................6-27
Changing the brake fluid.......................................6-28
Checking and lubricating the cables.....................6-28
Lubricating the front and rear brake levers...........6-28
Checking and lubricating the
centerstand and sidestand..................................6-29
Checking the front fork..........................................6-29
Checking the steering...........................................6-30
Checking the wheel bearings................................6-31
Removing the battery cover..................................6-31Battery...................................................................6-31
Replacing the fuses..............................................6-33
Replacing a headlight bulb....................................6-34
Replacing a front turn signal light bulb..................6-35
Replacing a rear turn signal light bulb...................6-36
Replacing a tail/brake light bulb............................6-37
Replacing the license plate light bulb....................6-37
Troubleshooting....................................................6-38
Troubleshooting charts.........................................6-39
6
5GM-9-E1(No ABS) 9/27/00 2:18 PM Page 43
Page 48 of 106

6-4
PERIODIC MAINTENANCE AND MINOR REPAIR
1
2
3
4
56
7
8
9
9
*Wheels¥Check runout and for damage.ÖÖÖÖ
10*Tires¥Check tread depth and for damage.
¥Replace if necessary.
¥Check air pressure.
¥Correct if necessary.ÖÖÖÖ
11*Wheel bearings¥Check bearing for looseness or damage.ÖÖÖÖ
12*Steering bearings¥Check bearing play and steering for roughness.ÖÖÖÖÖ
¥Lubricate with lithium-soap-based greaseEvery 20,000km
13*Chassis fasteners¥Make sure that all nuts, bolts and screws are properly tightened.ÖÖÖÖÖ
14Sidestand/centerstand¥Check operation.
¥Lubricate.ÖÖÖÖÖ
15*Sidestand switch¥Check operation.ÖÖÖÖÖÖ
16*Front fork¥Check operation and for oil leakage.ÖÖÖÖ
17*Rear shock absorber
assemblies¥Check operation and shock absorbers for oil leakage.ÖÖÖÖ
18*Carburetor¥Check starter (choke) operation.
¥Adjust engine idling speed.ÖÖÖÖÖÖ
19Engine oil¥Change when the oil change indicator light comes on. (See
page 3-2 and 6-17.)ÖEvery 3,000 km
20*Engine oil strainer¥Clean.ÖÖÖ
21*Cooling system¥Check coolant level and vehicle for coolant leakage.ÖÖÖÖÖ
¥Change.Every 3 years NO.ITEMCHECK OR MAINTENANCE JOBODOMETER READING (´1,000 km)
ANNUAL
CHECK
110203040
5GM-9-E1(No ABS) 9/27/00 2:18 PM Page 47
Page 62 of 106

4.Remove the oil filler cap and
drain bolt to drain the oil from the
final gear case.
5.Install the final gear oil drain bolt,
and then tighten it to the speci-
fied torque.
6.Add the specified amount of the
recommended final gear oil, and
then install and tighten the oil
filler cap.
6-18
PERIODIC MAINTENANCE AND MINOR REPAIR
1
2
3
4
56
7
8
9
1
1.Final gear oil filler cap
Tightening torque:
Final gear oil drain bolt:
22 Nm (2.2 m0kg)
EW000066
w8Make sure that no foreign
material enters the final gear
case.
8Make sure that no oil gets on
the tire or wheel.7.Check the final gear case for oil
leakage. If oil is leaking, check
for the cause.
1
1.Final gear oil drain bolt
Recommended final gear oil:
See page 8-2.
Oil quantity:
0.25 L
EAU01587
CoolantThe coolant reservoir is located
under the battery cover. (See page
6-31 for battery cover removal proce-
dures.)
To check the coolant level
1.Place the scooter on a level sur-
face and hold it in an upright
position.NOTE:
8The coolant level must be
checked on a cold engine since
the level varies with engine tem-
perature.
8Make sure that the scooter is
positioned straight up when
checking the coolant level. A
slight tilt to the side can result in
a false reading.
5GM-9-E1(No ABS) 9/27/00 2:18 PM Page 61
Page 68 of 106

6-24
PERIODIC MAINTENANCE AND MINOR REPAIR
1
2
3
4
56
7
8
9 8Check the tire condition and
air pressure before each ride.
1a
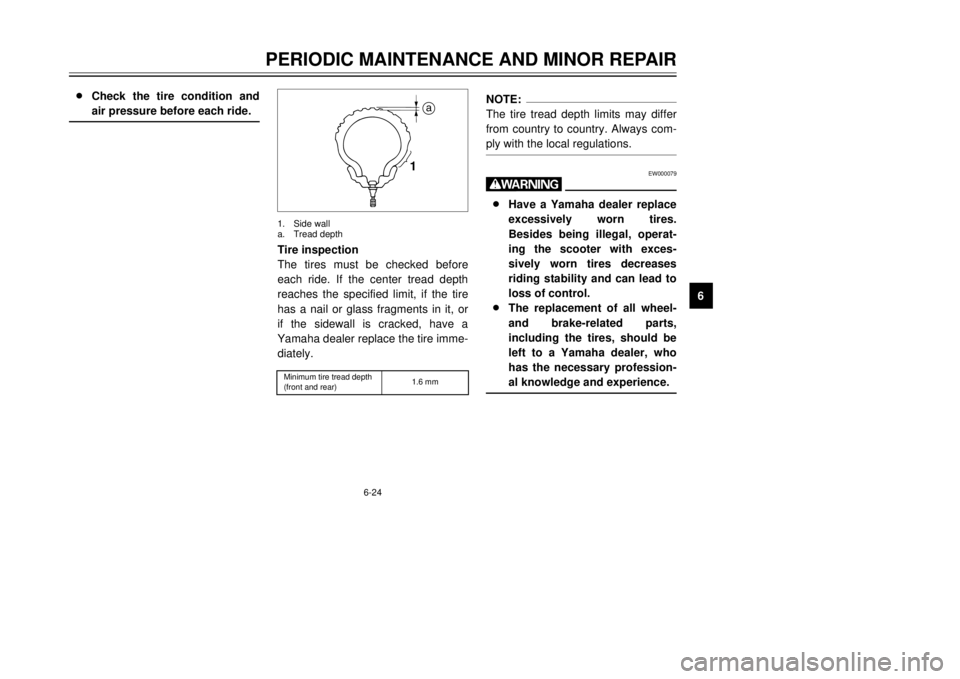
Tire inspection
The tires must be checked before
each ride. If the center tread depth
reaches the specified limit, if the tire
has a nail or glass fragments in it, or
if the sidewall is cracked, have a
Yamaha dealer replace the tire imme-
diately.1.Side wall
a.Tread depth
NOTE:
The tire tread depth limits may differ
from country to country. Always com-
ply with the local regulations.
EW000079
w8Have a Yamaha dealer replace
excessively worn tires.
Besides being illegal, operat-
ing the scooter with exces-
sively worn tires decreases
riding stability and can lead to
loss of control.
8The replacement of all wheel-
and brake-related parts,
including the tires, should be
left to a Yamaha dealer, who
has the necessary profession-
al knowledge and experience.
Minimum tire tread depth
(front and rear)1.6 mm
5GM-9-E1(No ABS) 9/27/00 2:18 PM Page 67
Page 69 of 106

6-25
PERIODIC MAINTENANCE AND MINOR REPAIR
1
2
3
4
56
7
8
9
EAU00687
WheelsTo maximize the performance, dura-
bility, and safe operation of your
scooter, note the following points
regarding the specified wheels.
8The wheel rims should be
checked for cracks, bends or
warpage before each ride. If any
damage is found, have a
Yamaha dealer replace the
wheel. Do not attempt even the
smallest repair to the wheel. A
deformed or cracked wheel must
be replaced.
8The wheel should be balanced
whenever either the tire or wheel
has been changed or replaced.
An unbalanced wheel can result
in poor performance, adverse
handling characteristics, and a
shortened tire life.
8Ride at moderate speeds after
changing a tire since the tire sur-
face must first be Òbroken inÓ for
it to develop its optimal charac-
teristics.
1
2
a
c
b
EAU00703
Adjusting the front and rear
brake lever free playThe front and rear brake lever free
play should measure 2Ð5 mm as
shown. Periodically check the front
and rear brake lever free play and, if
necessary, adjust them as follows.1.Locknut
2.Adjusting bolt
c.Brake lever free play FRONT
Tire information
This scooter is equipped with tube-
less tires.FRONT
ManufacturerSizeType
INOUE110/90-12 64LMB67
MICHELIN110/90-12 64LBOPPER
REAR
ManufacturerSizeType
INOUE130/70-12 62LMB67
MICHELIN130/70-12 62LBOPPER
5GM-9-E1(No ABS) 9/27/00 2:18 PM Page 68
Page 74 of 106

6-30
PERIODIC MAINTENANCE AND MINOR REPAIR
1
2
3
4
56
7
8
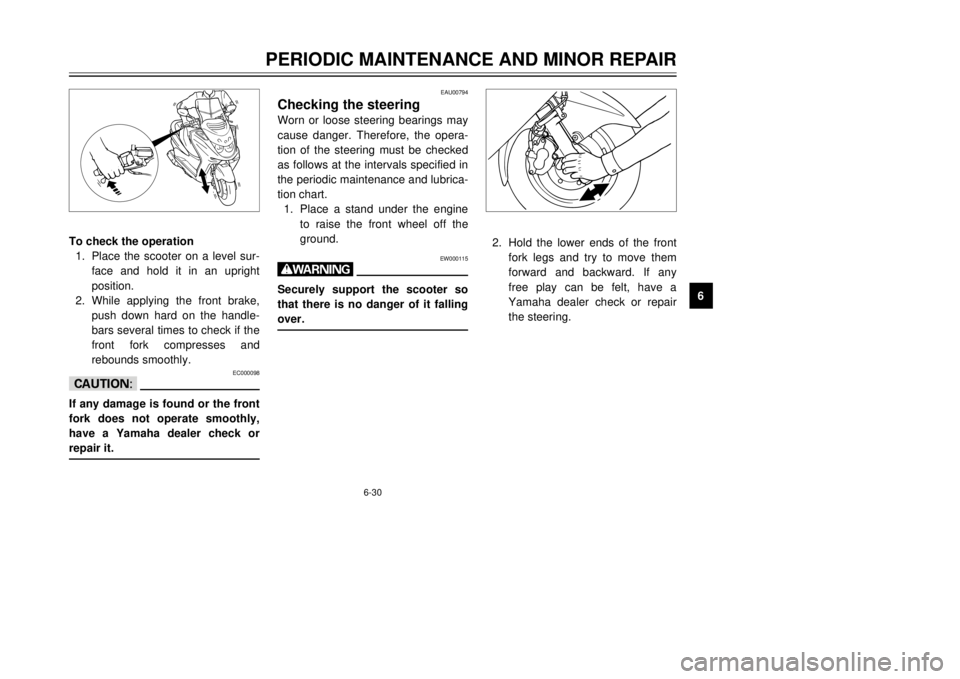
9 To check the operation
1.Place the scooter on a level sur-
face and hold it in an upright
position.
2.While applying the front brake,
push down hard on the handle-
bars several times to check if the
front fork compresses and
rebounds smoothly.
EC000098
cCIf any damage is found or the front
fork does not operate smoothly,
have a Yamaha dealer check or
repair it.
EAU00794
Checking the steeringWorn or loose steering bearings may
cause danger. Therefore, the opera-
tion of the steering must be checked
as follows at the intervals specified in
the periodic maintenance and lubrica-
tion chart.
1.Place a stand under the engine
to raise the front wheel off the
ground.
EW000115
wSecurely support the scooter so
that there is no danger of it falling
over.
2.Hold the lower ends of the front
fork legs and try to move them
forward and backward. If any
free play can be felt, have a
Yamaha dealer check or repair
the steering.
5GM-9-E1(No ABS) 9/27/00 2:18 PM Page 73
Page 75 of 106

6-31
PERIODIC MAINTENANCE AND MINOR REPAIR
1
2
3
4
56
7
8
9
EAU00796
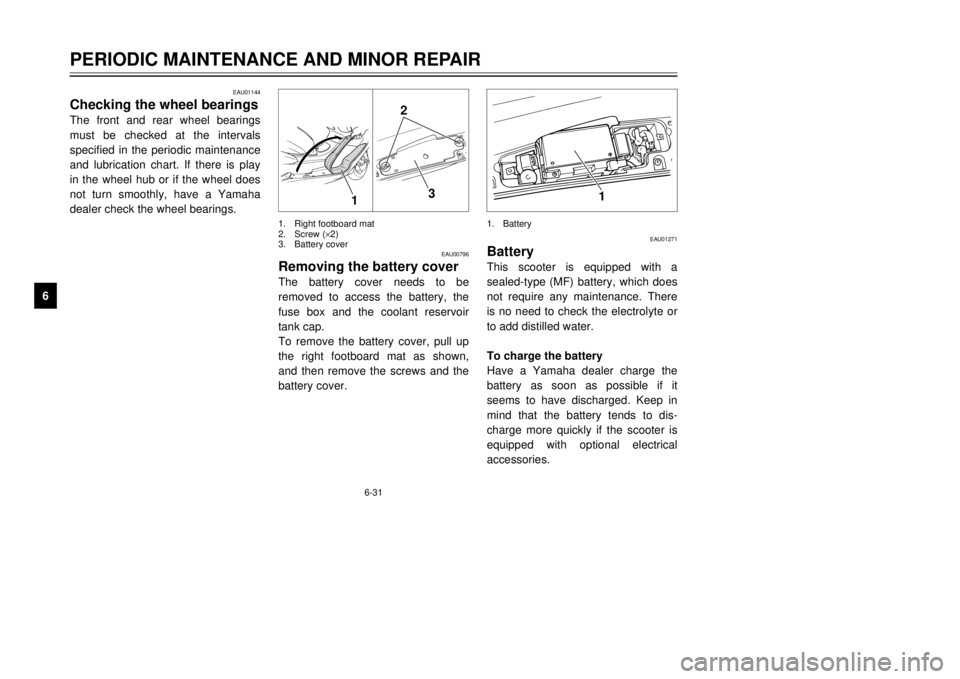
Removing the battery coverThe battery cover needs to be
removed to access the battery, the
fuse box and the coolant reservoir
tank cap.
To remove the battery cover, pull up
the right footboard mat as shown,
and then remove the screws and the
battery cover.
2
3
1
1.Right footboard mat
2.Screw (´2)
3.Battery cover
1
1.Battery
EAU01271
BatteryThis scooter is equipped with a
sealed-type (MF) battery, which does
not require any maintenance. There
is no need to check the electrolyte or
to add distilled water.
To charge the battery
Have a Yamaha dealer charge the
battery as soon as possible if it
seems to have discharged. Keep in
mind that the battery tends to dis-
charge more quickly if the scooter is
equipped with optional electrical
accessories.
EAU01144
Checking the wheel bearingsThe front and rear wheel bearings
must be checked at the intervals
specified in the periodic maintenance
and lubrication chart. If there is play
in the wheel hub or if the wheel does
not turn smoothly, have a Yamaha
dealer check the wheel bearings.
5GM-9-E1(No ABS) 9/27/00 2:18 PM Page 74