EM169±02
A11244
A11245
Timing Marks
A11218
1
3
21
3
2
11
A11219
3
2
3
2
44
44
± ENGINE MECHANICALVALVE CLEARANCE
EM±5
1121 Author�: Date�:
2001 PRIUS (RM778U)
VALVE CLEARANCE
ADJUSTMENT
HINT:
Inspect and adjust the valve clearance when the engine is cold.
1. REMOVE CYLINDER HEAD COVER
(See page EM±15)
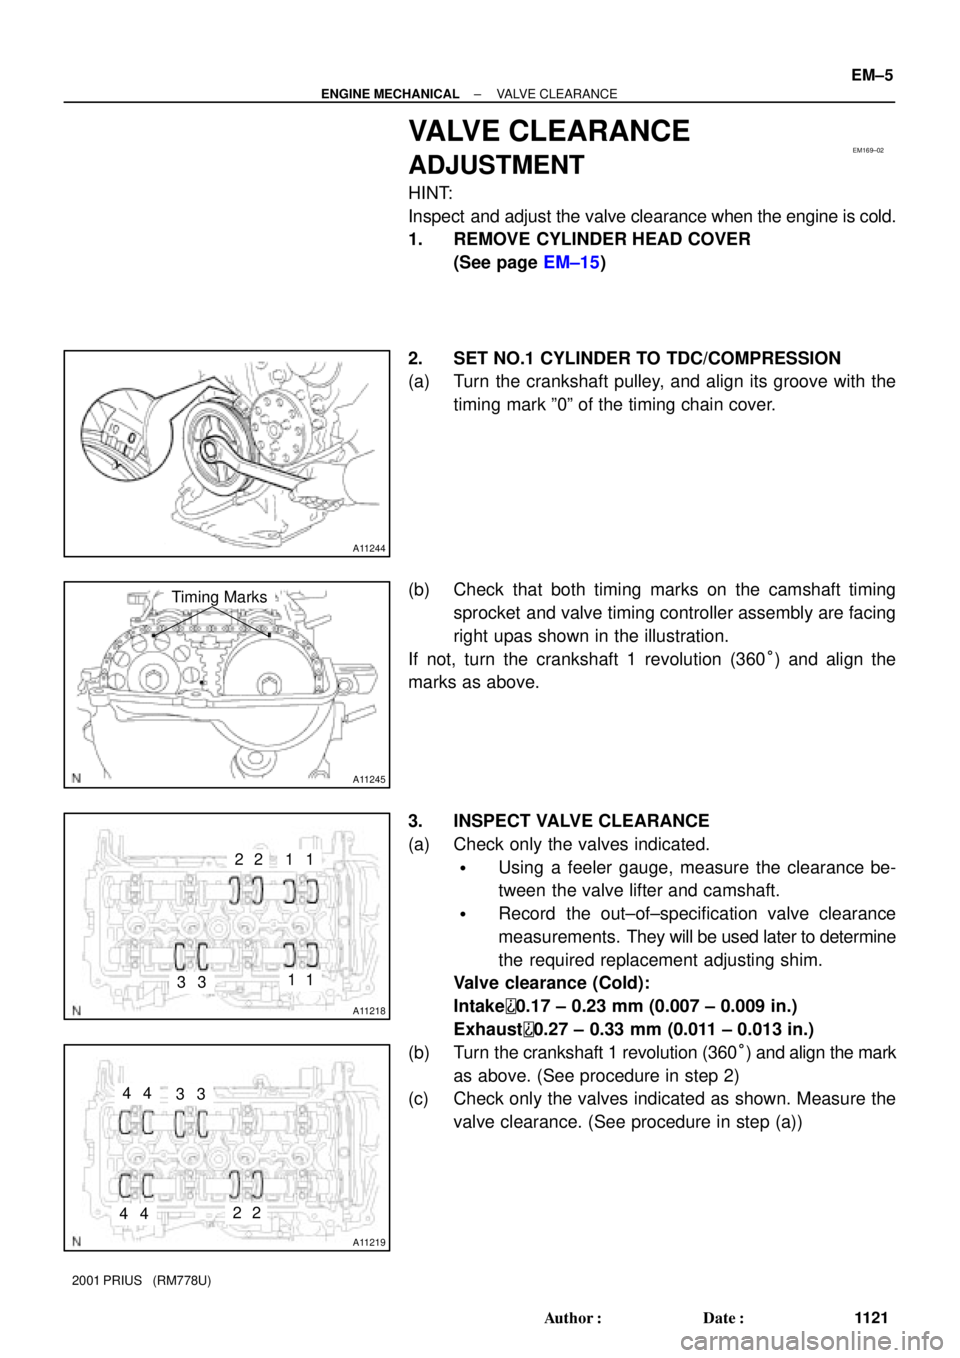
2. SET NO.1 CYLINDER TO TDC/COMPRESSION
(a) Turn the crankshaft pulley, and align its groove with the
timing mark º0º of the timing chain cover.
(b) Check that both timing marks on the camshaft timing
sprocket and valve timing controller assembly are facing
right upas shown in the illustration.
If not, turn the crankshaft 1 revolution (360°) and align the
marks as above.
3. INSPECT VALVE CLEARANCE
(a) Check only the valves indicated.
�Using a feeler gauge, measure the clearance be-
tween the valve lifter and camshaft.
�Record the out±of±specification valve clearance
measurements. They will be used later to determine
the required replacement adjusting shim.
Valve clearance (Cold):
Intake
0.17 ± 0.23 mm (0.007 ± 0.009 in.)
Exhaust
0.27 ± 0.33 mm (0.011 ± 0.013 in.)
(b) Turn the crankshaft 1 revolution (360°) and align the mark
as above. (See procedure in step 2)
(c) Check only the valves indicated as shown. Measure the
valve clearance. (See procedure in step (a))
A11252Matchmarks
A10471
EM±6
± ENGINE MECHANICALVALVE CLEARANCE
1122 Author�: Date�:
2001 PRIUS (RM778U)
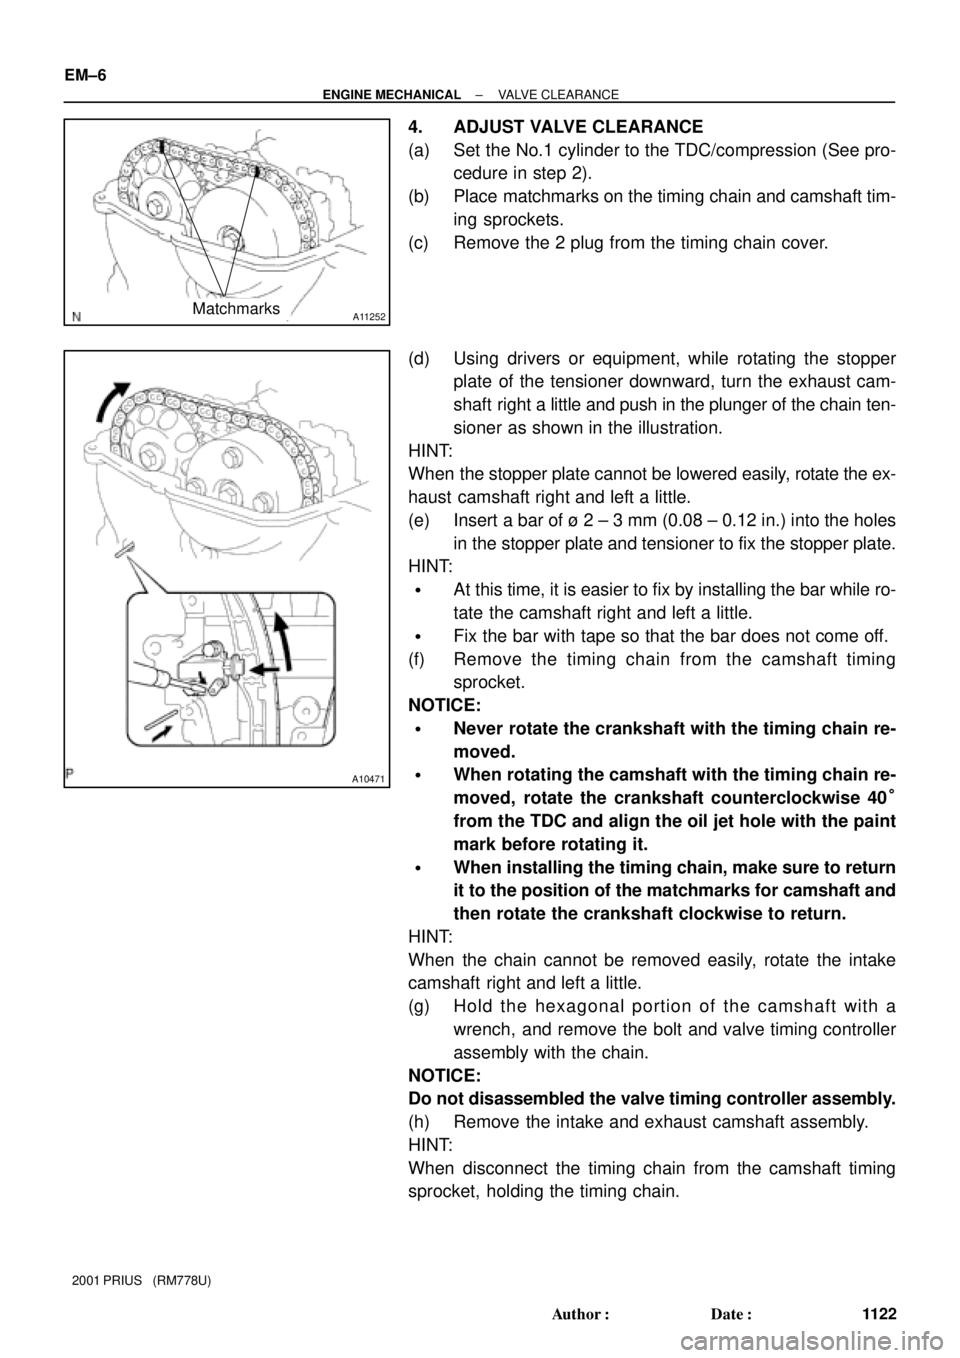
4. ADJUST VALVE CLEARANCE
(a) Set the No.1 cylinder to the TDC/compression (See pro-
cedure in step 2).
(b) Place matchmarks on the timing chain and camshaft tim-
ing sprockets.
(c) Remove the 2 plug from the timing chain cover.
(d) Using drivers or equipment, while rotating the stopper
plate of the tensioner downward, turn the exhaust cam-
shaft right a little and push in the plunger of the chain ten-
sioner as shown in the illustration.
HINT:
When the stopper plate cannot be lowered easily, rotate the ex-
haust camshaft right and left a little.
(e) Insert a bar of ù 2 ± 3 mm (0.08 ± 0.12 in.) into the holes
in the stopper plate and tensioner to fix the stopper plate.
HINT:
�At this time, it is easier to fix by installing the bar while ro-
tate the camshaft right and left a little.
�Fix the bar with tape so that the bar does not come off.
(f) Remove the timing chain from the camshaft timing
sprocket.
NOTICE:
�Never rotate the crankshaft with the timing chain re-
moved.
�When rotating the camshaft with the timing chain re-
moved, rotate the crankshaft counterclockwise 40°
from the TDC and align the oil jet hole with the paint
mark before rotating it.
�When installing the timing chain, make sure to return
it to the position of the matchmarks for camshaft and
then rotate the crankshaft clockwise to return.
HINT:
When the chain cannot be removed easily, rotate the intake
camshaft right and left a little.
(g) Hold the hexagonal portion of the camshaft with a
wrench, and remove the bolt and valve timing controller
assembly with the chain.
NOTICE:
Do not disassembled the valve timing controller assembly.
(h) Remove the intake and exhaust camshaft assembly.
HINT:
When disconnect the timing chain from the camshaft timing
sprocket, holding the timing chain.
I01450
Condition: Insufficient cooling
I01393
Condition : Does not cool AC±8
± AIR CONDITIONINGAIR CONDITIONING SYSTEM
2001 PRIUS (RM778U)
(8) Expansion valve improperly
Symptom seen in
refrigeration systemProbable causeDiagnosisRemedy
� Pressure too high on both low
and high pressure sides
� Frost or large amount of dew on
piping on low pressure side
Trouble in expansion valve
� Excessive refrigerant in low
pressure piping
� Expansion valve opened too
wide
Check expansion valve
Replace if defective
(9) Defective compression compressor
Symptom seen in
refrigeration systemProbable causeDiagnosisRemedy
� Pressure too high on low and
high pressure sides
� Pressure too low on high pres-
sure side
Internal leak in compressor
� Compression defective
� Valve leaking or broken sliding
parts
Repair or replace compressor

(8) Expansion valve improperly
Symptom seen in
refriger")