Page 106 of 373

2-37
Automatic Transaxle Operation
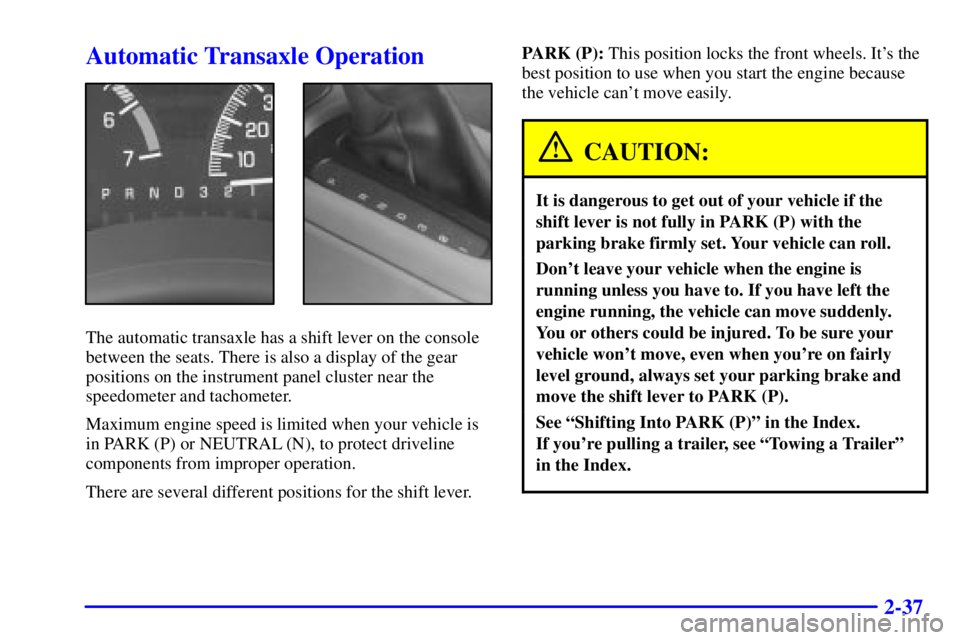
The automatic transaxle has a shift lever on the console
between the seats. There is also a display of the gear
positions on the instrument panel cluster near the
speedometer and tachometer.
Maximum engine speed is limited when your vehicle is
in PARK (P) or NEUTRAL (N), to protect driveline
components from improper operation.
There are several different positions for the shift lever.PARK (P): This position locks the front wheels. It's the
best position to use when you start the engine because
the vehicle can't move easily.
CAUTION:
It is dangerous to get out of your vehicle if the
shift lever is not fully in PARK (P) with the
parking brake firmly set. Your vehicle can roll.
Don't leave your vehicle when the engine is
running unless you have to. If you have left the
engine running, the vehicle can move suddenly.
You or others could be injured. To be sure your
vehicle won't move, even when you're on fairly
level ground, always set your parking brake and
move the shift lever to PARK (P).
See ªShifting Into PARK (P)º in the Index.
If you're pulling a trailer, see ªTowing a Trailerº
in the Index.
Page 116 of 373

2-47
Turn Signal/Multifunction Lever
The lever on the left side of the steering column
includes the following:
�Turn and Lane Change Signals
�Headlamp High/Low
-Beam Changer
�Flash
-to-Pass Feature
�Windshield Wipers
�Windshield Washer
�Cruise Control (If Equipped)
Turn and Lane Change Signals
The turn signal has two upward (for right) and
two downward (for left) positions. These positions
allow you to signal a turn or a lane change.
To signal a turn, move the lever all the way up or down.
When the turn is finished, the lever will return to its
original position automatically.
An arrow on the instrument
panel cluster will flash in
the direction of the turn or
lane change.
To signal a lane change, just raise or lower the lever
until the arrow starts to flash. Hold it there until you
complete your lane change. The lever will return to its
original position when you release it.
As you signal a turn or a lane change, if the arrow
flashes faster than normal, a signal bulb may be burned
out and other drivers won't see your turn signal.
Page 117 of 373

2-48
If a bulb is burned out, replace it to help avoid an
accident. If the arrows don't go on at all when you
signal a turn, check for burned
-out bulbs and then check
the fuse (see ªFuses and Circuit Breakersº in the Index).
A chime will sound if you leave the turn signal on for
more than 3/4 mile (1.2 km).
Headlamp High/Low-Beam Changer
To change the headlamps from low beam to high beam,
or high to low, pull the multifunction lever all the way
toward you. Then release it.
When the high beams
are on, a light on the
instrument panel cluster
also will be on. While
the high
-beam headlamps
are on, the fog lamps will
not be illuminated.
Flash-to-Pass Feature
When the headlamps are off, pull the lever toward you
to momentarily turn on the high beams (to signal that
you are going to pass). When you release the lever,
they will turn off and stay off.
Windshield Wipers
You control the windshield wipers by turning the band
marked WIPER on the turn signal/multifunction lever.
For a single wiping cycle, turn the band to MIST. Hold
it there until the wipers start, then let go. The wipers will
stop after one cycle. If you want more cycles, hold the
band on MIST longer.
For steady wiping at low speed, turn the band to LOW.
For high
-speed wiping, turn the band further, to HIGH.
To stop the wipers, turn the band to OFF.
You can set the wiper speed for a long or short delay
between wipes. This can be very useful in light rain or
snow. Turn the band to choose the delay time. The
closer to LOW, the shorter the delay.
Be sure to clear ice and snow from the wiper blades
before using them. If they're frozen to the windshield,
carefully loosen or thaw them. If the blades do become
damaged, get new blades or blade inserts.
Heavy snow or ice can overload the wipers. A circuit
breaker will stop them until the motor cools. Clear away
snow or ice to prevent an overload.
Page 122 of 373

2-53
The DRL system will make your low-beam headlamps
come on at a reduced brightness when the following
conditions are met:
�The ignition is on,
�the headlamp switch is off,
�the transaxle is not in PARK (P) and
�the parking brake is released.
When the DRL are on, only your low
-beam headlamps,
at a reduced brightness, will be on. The taillamps,
sidemarker and other lamps won't be on. Your
instrument panel won't be lit up either.
When it's dark enough outside, your headlamps will
change to full brightness. The other lamps that come on
with your headlamps will also come on.
When it's bright enough outside, the regular lamps will
go out, and your low
-beam headlamps change to the
reduced brightness of DRL.
To idle your vehicle with the DRL off, set the parking
brake while the ignition is in OFF or LOCK. Then start
your vehicle. The DRL will stay off until you shift out
of PARK (P) and release the parking brake.
As with any vehicle, you should turn on the regular
headlamp system when you need it.
Fog Lamps
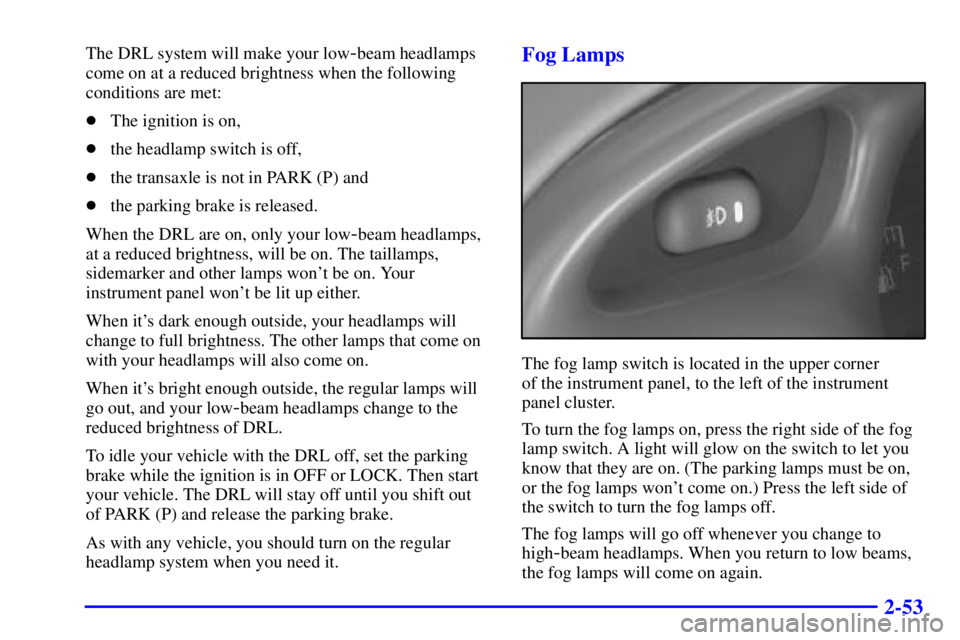
The fog lamp switch is located in the upper corner
of the instrument panel, to the left of the instrument
panel cluster.
To turn the fog lamps on, press the right side of the fog
lamp switch. A light will glow on the switch to let you
know that they are on. (The parking lamps must be on,
or the fog lamps won't come on.) Press the left side of
the switch to turn the fog lamps off.
The fog lamps will go off whenever you change to
high
-beam headlamps. When you return to low beams,
the fog lamps will come on again.
Page 140 of 373
2-71
The main components of the instrument panel are listed here:
A. Side Window Defogger Vents
B. Fog Lamp Switch
C. Multifunction Lever
D. Instrument Panel Cluster
E. Hazard Button
F. Horn, Driver's Side Air Bag
G. Trip Computer/Driver Information Center (DIC)
H. Instrument Panel Vents
I. Interior Lamp ControlJ. Exterior Lamp Control
K. Tilt Wheel Control
L. Audio Steering Controls (If Equipped)
M. HUD Display Controls (Option)
N. Comfort Controls
O. Ashtray and Cigarette Lighter
P. Audio System
Q. Glove Box
R. Instrument Panel Fuse Block
Page 141 of 373
2-72 Instrument Panel Cluster
United States Version Shown, Canadian Similar
Your vehicle is equipped with this cluster or one very similar to it. It includes indicator warning lights and gages that
are explained on the following pages. Be sure to read about them.
Page 142 of 373

2-73 Speedometer and Odometer
The speedometer lets you see your speed in both
miles per hour (mph) and kilometers per hour (km/h).
The odometer shows how far the vehicle has been
driven in either miles (used in the United States) or in
kilometers (used in Canada).
The vehicle has a tamper
-resistant odometer. If you see
silver lines between the numbers, you'll know someone
has probably tampered with it and the numbers may not
be correct.
You may wonder what happens if the vehicle needs a
new odometer installed. If the new one can be set to the
mileage total of the old odometer, then that will be done.
If it can't, then it will be set at zero and a label must be
put on the driver's door to show the old mileage reading
when the new odometer was installed.
Trip Odometer
The trip odometer tells how far you have driven since
you last reset it. To set it to zero, press the RESET
button to the right of the instrument panel cluster.
Tachometer
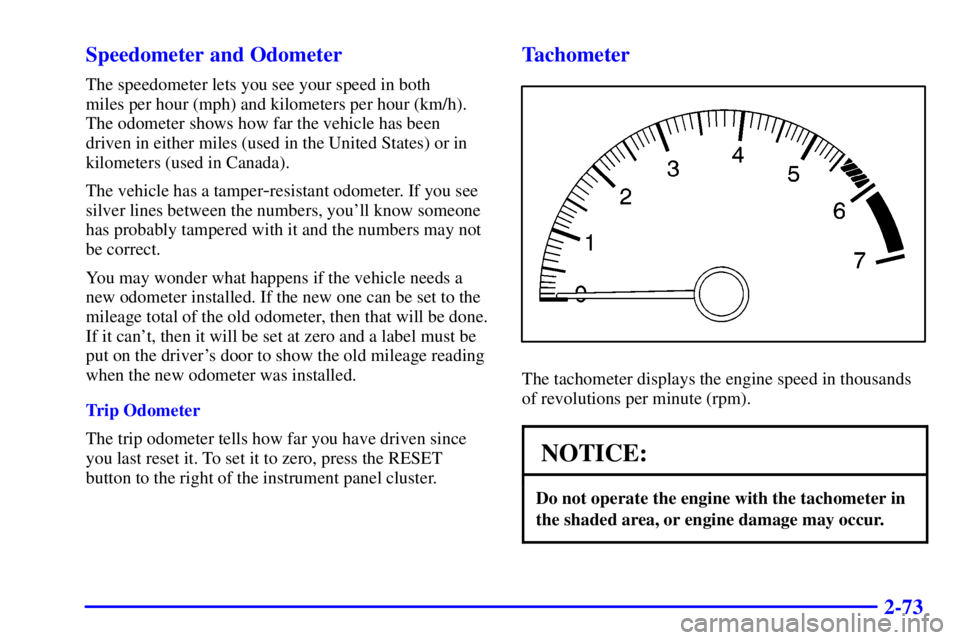
The tachometer displays the engine speed in thousands
of revolutions per minute (rpm).
NOTICE:
Do not operate the engine with the tachometer in
the shaded area, or engine damage may occur.
Page 162 of 373

2-93
The HUD also shows the following lights when they are
lit on the instrument panel cluster:
�Turn Signal Indicators
�High
-Beam Indicator Symbol
�Low Fuel Symbol
The HUD will display ªCHECK GAGEº when the
following items are lit on the instrument panel cluster:
�Oil Warning Symbol
�Coolant Temperature Symbol
�Charging System Symbol
When you sit straight in your seat, the HUD image will
appear straight ahead near the front bumper.
When the ignition key is turned to RUN, the HUD
image will come on. Then the Head
-Up Display will
operate normally.
NOTICE:
Although the HUD image appears to be near the
front of the vehicle, do not use it as a parking aid.
The HUD was not designed for that purpose.
If you try to use it that way, such as in a parking
lot, you may misjudge distance and run
into something.
When the HUD is on, the speedometer reading will be
displayed continually. The current radio station or CD
track number will only be displayed for three seconds
after the radio or CD track status changes. This will
happen whenever one of the radio controls is pressed,
either on the radio itself or on the optional steering
wheel controls.