Page 102 of 341

2-32 Torque Lock (Automatic Transaxle)
If you are parking on a hill and you don't shift your
transaxle into PARK (P) properly, the weight of the
vehicle may put too much force on the parking pawl in
the transaxle. You may find it difficult to pull the shift
lever out of PARK (P). This is called ªtorque lock.º To
prevent torque lock, set the parking brake and then shift
into PARK (P) properly before you leave the driver's
seat. To find out how, see ªShifting Into PARK (P)º in
the Index.
When you are ready to drive, move the shift lever out
of PARK (P) before you release the parking brake.
If torque lock does occur, you may need to have another
vehicle push yours a little uphill to take some of the
pressure from the parking pawl in the transaxle, so you
can pull the shift lever out of PARK (P).
Shifting Out of PARK (P)
(Automatic Transaxle Only)
Your vehicle has an automatic transaxle shift lock
control system. You have to apply your regular brake
before you can shift from PARK (P) when the ignition
is in ON. See ªAutomatic Transaxleº in the Index.
If you cannot shift out of PARK (P), ease pressure on
the shift lever and push the shift lever all the way into
PARK (P) as you maintain brake application. Then
move the shift lever into the gear you wish. Press the
shift lever button before moving the shift lever.
If you ever hold the brake pedal down but still can't
shift out of PARK (P), try this:
1. Turn the ignition key to ACC.
2. Apply and hold the regular brake until the end
of Step 5.
3. Shift to NEUTRAL (N).
4. Turn the ignition key to START, to start the vehicle.
5. Shift to the drive gear you want.
6. Have the vehicle fixed as soon as you can.
Page 103 of 341
2-33
Parking Your Vehicle/Key Removal
(Manual Transaxle Models Only)
Before leaving your vehicle, fully press the clutch pedal
in, move the shift lever into REVERSE (R) and firmly
apply the parking brake. Once the shift lever has been
placed in REVERSE (R) with the clutch pedal pressed
in, you can turn the ignition key to OFF, remove the key
and release the clutch. See ªManual Transaxle
Operationº in the Index.
Parking Over Things That Burn
CAUTION:
Things that can burn could touch hot exhaust
parts under your vehicle and ignite. Don't park
over papers, leaves, dry grass or other things that
can burn.
Page 115 of 341
2-45 Delayed Headlamps
The delayed headlamps feature will continue to
illuminate the headlamps for 20 seconds after the key is
turned to OFF, then the headlamps will automatically
turn off.
To override the 20 second delayed headlamp feature
while it is active turn the turn signal/multifunction lever
up one position and then back to AUTO.
Fog Lamps
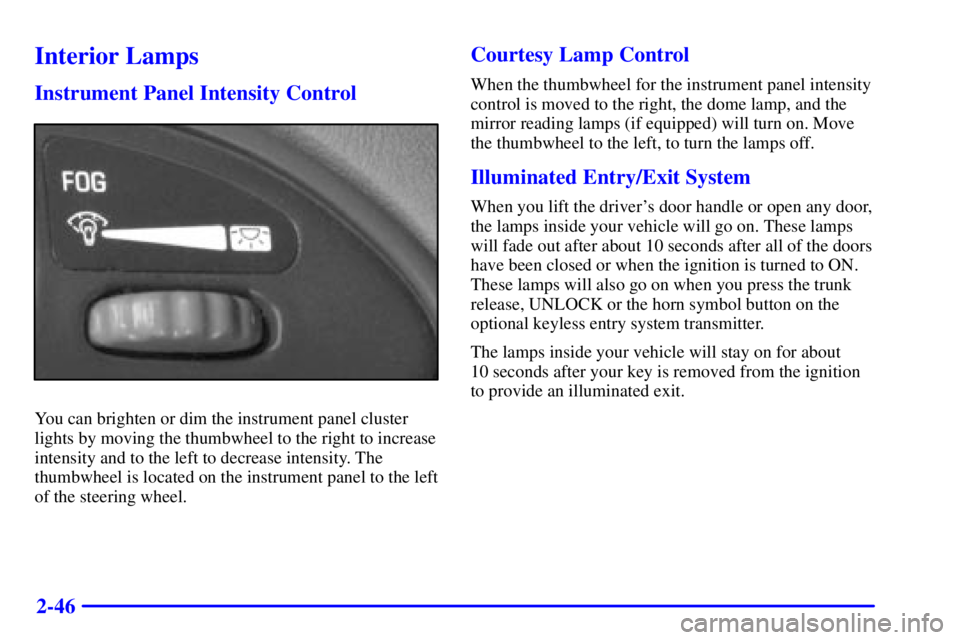
The button for your fog
lamps is located on the
instrument panel, to the left
of the steering wheel, beside
the instrument panel
intensity control.When using the fog lamps, the ignition must be on as
well as the parking lamps or the low
-beam headlamps.
Push the button to turn the fog lamps on. An indicator
light on the button will glow when the fog lamps are on.
Push the button again to turn the fog lamps off.
The fog lamps will turn off whenever the high
-beam
headlamps are turned on. When the high beams are
turned off, the fog lamps will come on again.
Page 116 of 341

2-46
Interior Lamps
Instrument Panel Intensity Control
You can brighten or dim the instrument panel cluster
lights by moving the thumbwheel to the right to increase
intensity and to the left to decrease intensity. The
thumbwheel is located on the instrument panel to the left
of the steering wheel.
Courtesy Lamp Control
When the thumbwheel for the instrument panel intensity
control is moved to the right, the dome lamp, and the
mirror reading lamps (if equipped) will turn on. Move
the thumbwheel to the left, to turn the lamps off.
Illuminated Entry/Exit System
When you lift the driver's door handle or open any door,
the lamps inside your vehicle will go on. These lamps
will fade out after about 10 seconds after all of the doors
have been closed or when the ignition is turned to ON.
These lamps will also go on when you press the trunk
release, UNLOCK or the horn symbol button on the
optional keyless entry system transmitter.
The lamps inside your vehicle will stay on for about
10 seconds after your key is removed from the ignition
to provide an illuminated exit.
Page 117 of 341

2-47 Mirror Reading Lamps
Press the switch next to each lamp to turn them on
and off.
Three-Position Dome Lamp (If Equipped)
The switch on this lamp has three positions. The ON
position will turn on the light. The DOOR position will
turn on the light whenever a door is opened or when the
instrument panel intensity control thumbwheel is moved
to the right. The OFF position will shut off the lamp
completely, even when a door is opened.
Your vehicle may also have two reading lamps as part of
the dome lamp. Push the lens of either lamp to turn them
on and off.
Trunk Lamp
The trunk lamp comes on when you open your trunk.
Battery Saver
Your vehicle is equipped with a battery saver feature
designed to protect your vehicle's battery.
When any interior lamp (trunk, mirror reading lamps,
dome lamp or glove box) is left on when the ignition is
turned off, the battery saver system will automatically
shut the lamp off after 20 minutes. This will avoid
draining the battery.
To reactivate the interior lamps, do one of the following:
�Lift the driver's door handle,
�open any door,
�press any remote keyless entry transmitter button
(if equipped),
�press the power door lock switch,
�press the remote trunk release, or
�turn the lamp that was left on to off then to on again.
Page 119 of 341

2-49 Convex Outside Mirror
Your passenger's side mirror is convex. A convex
mirror's surface is curved so you can see more from the
driver's seat.
CAUTION:
A convex mirror can make things (like other
vehicles) look farther away than they really are.
If you cut too sharply into the right lane, you
could hit a vehicle on your right. Check your
inside mirror or glance over your shoulder before
changing lanes.
Storage Compartments
Glove Box
Use the key to lock and unlock the glove box. To open,
pull the glove box handle up.
Center Console Storage Area
The center console has two separate storage areas. The
upper compartment, which is also the armrest, can be
used to store maps, gloves, etc. To open, pull up on the
front of the lid.
Rear Seat Cupholder
Pull down the door on the rear of the center console to
use the rear seat cupholder.
Convenience Net (If Equipped)
Your vehicle may have a convenience net. You'll see it
just inside the back wall of the trunk.
Put small loads, like grocery bags, behind the net. It can
help keep them from falling over during sharp turns or
quick starts and stops.
The net isn't for larger, heavier loads. Store them in the
trunk as far forward as you can.
You can unhook the net so that it will lie flat when
you're not using it.
Page 126 of 341

2-56
Warning Lights, Gages
and Indicators
This part describes the warning lights and gages that
may be on your vehicle. The pictures will help you
locate them.
Warning lights and gages can signal that something is
wrong before it becomes serious enough to cause an
expensive repair or replacement. Paying attention to
your warning lights and gages could also save you or
others from injury.
Warning lights come on when there may be or is a
problem with one of your vehicle's functions. As you
will see in the details on the next few pages, some
warning lights come on briefly when you start the
engine just to let you know they're working. If you are
familiar with this section, you should not be alarmed
when this happens.
Gages can indicate when there may be or is a problem
with one of your vehicle's functions. Often gages and
warning lights work together to let you know when
there's a problem with your vehicle.When one of the warning lights comes on and stays on
when you are driving, or when one of the gages shows
there may be a problem, check the section that tells you
what to do about it. Please follow this manual's advice.
Waiting to do repairs can be costly
-- and even
dangerous. So please get to know your warning lights
and gages. They're a big help.
Safety Belt Reminder Light
When the key is turned to ON or START, a chime will
come on for about eight seconds to remind people to
fasten their safety belts, unless the driver's safety belt
is already buckled.
The safety belt light will
also come on and stay on
for about 20 seconds,
then it will flash for
about 55 seconds.
If the driver's belt is already buckled, neither the chime
nor the light will come on.
Page 127 of 341

2-57 Air Bag Readiness Light
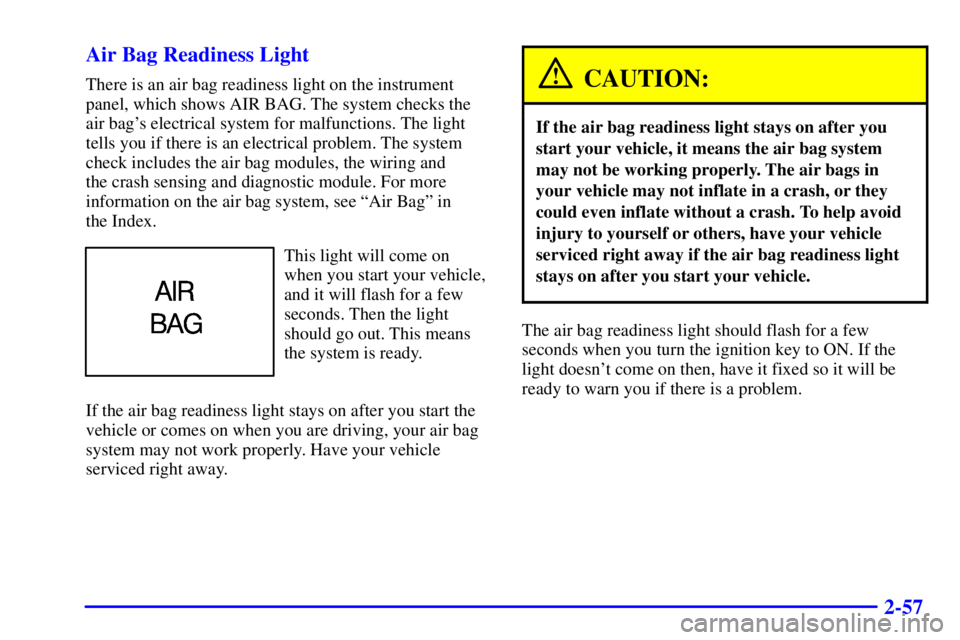
There is an air bag readiness light on the instrument
panel, which shows AIR BAG. The system checks the
air bag's electrical system for malfunctions. The light
tells you if there is an electrical problem. The system
check includes the air bag modules, the wiring and
the crash sensing and diagnostic module. For more
information on the air bag system, see ªAir Bagº in
the Index.
This light will come on
when you start your vehicle,
and it will flash for a few
seconds. Then the light
should go out. This means
the system is ready.
If the air bag readiness light stays on after you start the
vehicle or comes on when you are driving, your air bag
system may not work properly. Have your vehicle
serviced right away.
CAUTION:
If the air bag readiness light stays on after you
start your vehicle, it means the air bag system
may not be working properly. The air bags in
your vehicle may not inflate in a crash, or they
could even inflate without a crash. To help avoid
injury to yourself or others, have your vehicle
serviced right away if the air bag readiness light
stays on after you start your vehicle.
The air bag readiness light should flash for a few
seconds when you turn the ignition key to ON. If the
light doesn't come on then, have it fixed so it will be
ready to warn you if there is a problem.