2001 PEUGEOT EXPERT display
[x] Cancel search: displayPage 17 of 127
STEERING WHEEL ADJUSTMENTI-817
IMPORTANT
As a safety measure,
these manoeuvres must not be carried out when driving.
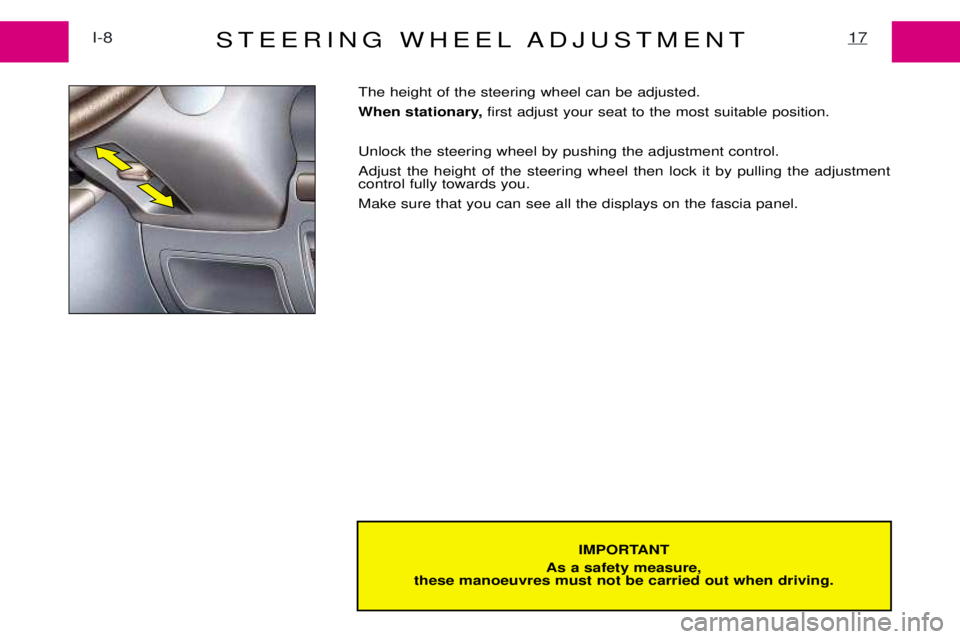
The height of the steering wheel can be adjusted.
When stationary, first adjust your seat to the most suitable position.
Unlock the steering wheel by pushing the adjustment control.Adjust the height of the steering wheel then lock it by pulling the adjustment control fully towards you. Make sure that you can see all the displays on the fascia panel.
Page 23 of 127
A
INSTRUMENT PANEL*I-12
24
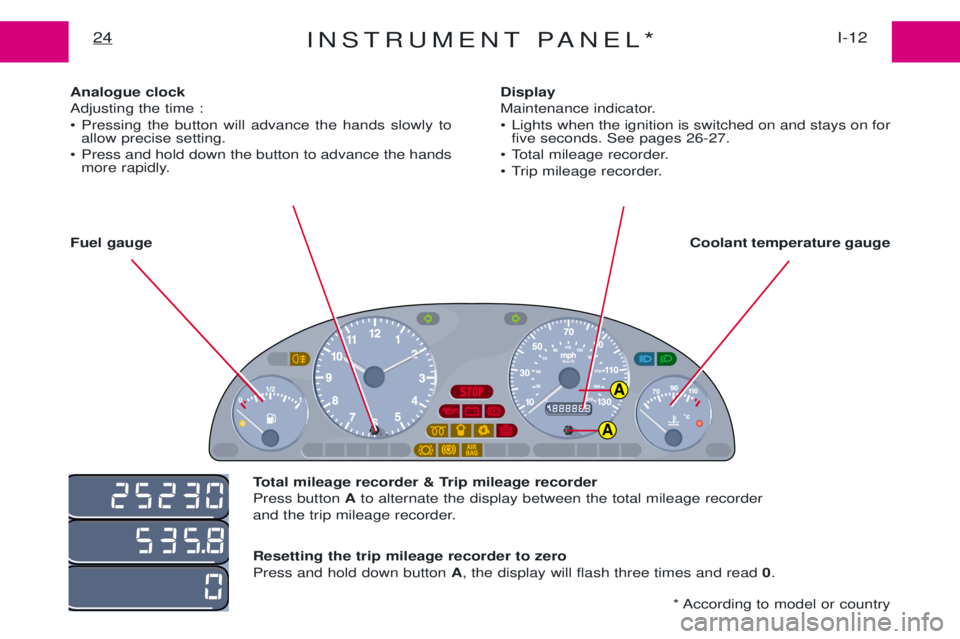
Analogue clock Adjusting the time :
¥ Pressing the button will advance the hands slowly to
allow precise setting.
¥ Press and hold down the button to advance the hands more rapidly.
Fuel gauge Coolant temperature gauge
Display
Maintenance indicator.
¥ Lights when the ignition is switched on and stays on for
five seconds. See pages 26-27.
¥ Total mileage recorder.
¥ Trip mileage recorder.
Total mileage recorder & Trip mileage recorder Press button Ato alternate the display between the total mileage recorder
and the trip mileage recorder. Resetting the trip mileage recorder to zero Press and hold down button A, the display will flash three times and read 0.
* According to model or country
A
Page 26 of 127
A
INSTRUMENT PANEL*I-12
24
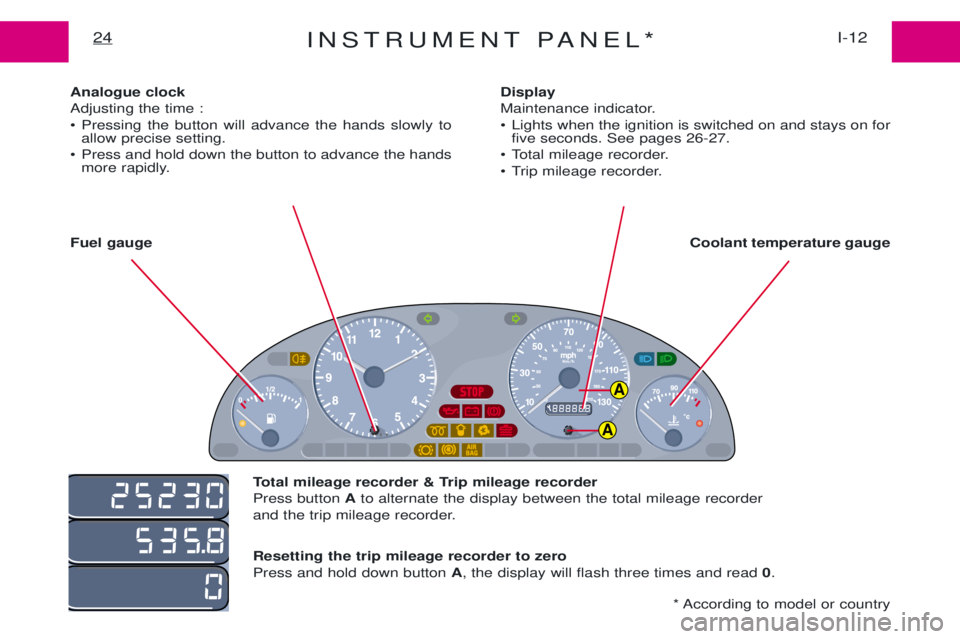
Analogue clock Adjusting the time :
¥ Pressing the button will advance the hands slowly to
allow precise setting.
¥ Press and hold down the button to advance the hands more rapidly.
Fuel gauge Coolant temperature gauge
Display
Maintenance indicator.
¥ Lights when the ignition is switched on and stays on for
five seconds. See pages 26-27.
¥ Total mileage recorder.
¥ Trip mileage recorder.
Total mileage recorder & Trip mileage recorder Press button Ato alternate the display between the total mileage recorder
and the trip mileage recorder. Resetting the trip mileage recorder to zero Press and hold down button A, the display will flash three times and read 0.
* According to model or country
A
Page 27 of 127

MAINTENANCE INDICATOR*I-12
26
The maintenance indicator displays the number of miles to be covered before the next service (in accordance with the servicing schedules which appear in the Maintenance Guide). Operation: On switching on the ignition, the maintenance indicator spannerappears in the display for severalseconds ; the mileage recorder dis-play indicates how many milesremain to be travelled before thenext service is due. For example: you have the follo-
wing distance left to travel before the next service: Five seconds after switching on the ignition, the total mileage recorderreverts to normal operation and thetotal or trip mileages appear on the
display. Distance to be covered beforethe next service is less than
1000 miles. For example:
you have the follo-
wing distance left to travel before the next service: 900 Miles. For five seconds on switching on the ignition, the display shows: Five seconds after switching on the ignition, the total mileage recorderreverts to normal operation and themaintenance spanner remains illu-minated. This signifies that the vehicle will be
due for a service shortly. The totalor trip mileages appear on the dis-
play. The pre-set service distance hasbeen exceeded. The spanner and total number of miles exceeded flash in the displayfor five seconds after the ignition isswitched on. For example:
the pre-set service
distance has been exceeded by
300 miles. Your vehicle must beserviced as soon as possible. Five seconds after switching on the ignition, the total mileage recorderreverts to normal operation and themaintenance spanner remains illu-minated.
* According to model or country
Page 28 of 127

MAINTENANCE INDICATOR27I-12
Maintenance intervals If your vehicle is used in particular- ly harsh conditions, it is necessaryto select the maintenance sche-dules for Òspecial operating condi-tionsÓ (see the Maintenance Guide)which consist of more frequent ser-vices. Note: the maintenence spanner will
come on, and the display will read ''0'' if the maximum length of time
between services is attained beforethe mileage limit is reached. To change the maintenance intervals:
- Switch off the ignition.
- Press and hold down button
1.
- Switch on the ignition.
- The distance remaining until the next service flashes.
- Release the button immediately.
- The maintenance interval is dis- played.
- Pressing button 1briefly allows
the maintenance intervals to be alternated. - When the desired maintenance
interval is displayed, press button1 for ten seconds to validate (the
selected maintenance interval willflash for ten seconds).
Release the button to validate whenthe display stops flashing. Resetting the maintenance indicator to zero
Your dealer will perform this opera-
tion after each service. However, ifyou intend to service the vehicleyourself, the procedure for resettingthe maintenance indicator is as fol-lows:
- Switch off the ignition.
- Press and hold down button 1.
- Switch on the ignition.
- The distance remaining until the next service flashes.
- Hold button 1down for ten
seconds.
- The display will read Ò=0Óand the
spanner will disappear.
1
11
Page 70 of 127
AUDIO-SYSTEM122
GENERAL FUNCTIONS On / off
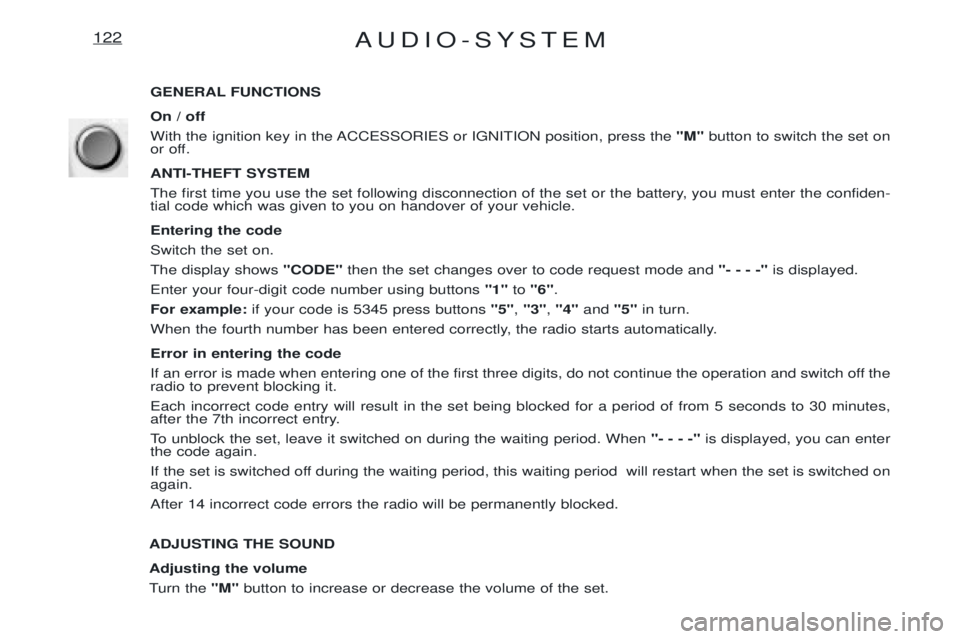
With the ignition key in the ACCESSORIES or IGNITION position, press the"M"button to switch the set on
or off. ANTI-THEFT SYSTEM
The first time you use the set following disconnection of the set or the battery, you must enter the confiden- tial code which was given to you on handover of your vehicle. Entering the code Switch the set on.The display shows "CODE"then the set changes over to code request mode and "- - - -"is displayed.
Enter your four-digit code number using buttons "1"to "6" .
For example: if your code is 5345 press buttons "5", "3" , "4" and "5"in turn.
When the fourth number has been entered correctly, the radio starts automatically. Error in entering the code
If an error is made when entering one of the first three digits, do not continue the operation and switch off the radio to prevent blocking it. Each incorrect code entry will result in the set being blocked for a period of from 5 seconds to 30 minutes,
after the 7th incorrect entry.
To unblock the set, leave it switched on during the waiting period. When "- - - -"is displayed, you can enter
the code again.
If the set is switched off during the waiting period, this waiting period will restart when the set is switched on again. After 14 incorrect code errors the radio will be permanently blocked.
ADJUSTING THE SOUND Adjusting the volume
Turn the "M"button to increase or decrease the volume of the set.
Page 71 of 127
AUDIO-SYSTEM123
AUDIO SETTINGS Press the ÒAUDIOÓbutton several times in succession to access the bass (BASS), treble (TREB) , loudness
(LOUD) , fader (FAD)and balance (BAL).
Exit from audio mode is automatic after a few seconds, without pressing any button or by pressing the ÒAUDIOÓ button after adjusting the balance.
Note: bass and treble settings are specific to each source. It is possible to set them differently for radio, cas-
sette and CD*. Bass setting When ÒBASSÓ is displayed, press the ÒGÓor ÒHÓ buttons to vary the setting.
- ÒBASS Ð9Ó for a minimum bass setting,
- ÒBASS 0Ó for a normal position,
- ÒBASS +9Ó for a maximum bass setting.
Treble settingWhen ÒTREBÓ is displayed, press the ÒGÓor ÒHÓ buttons to vary the setting.
- ÒTREB Ð9Ó for a minimum treble setting,
- ÒTREB 0Ó for a normal position,
- ÒTREB +9Ó for a maximum treble setting.
Adjusting the loudness
This function automatically emphasises bass and treble tones when the volume is low. Press the ÒGÓor ÒHÓ buttons to switch this function on or off.
Setting the front/rear sound distribution (Fader) When ÒFADÓ is displayed, press the ÒGÓor ÒHÓ buttons to vary the setting.
The ÒGÓ button increases the volume at the front.
The ÒHÓbutton increases the volume at the rear.
Setting the right/left sound distribution (Balance)When ÒBALÓ is displayed, press the ÒGÓor ÒHÓ buttons to vary the setting.
The ÒGÓ button increases the volume on the right-hand side.
The ÒHÓbutton increases the volume on the left-hand side.
* According to specification
Page 72 of 127
AUDIO-SYSTEM124
RADIO Notes on radio reception
Your car radio receiver is subject to phenomena which do not affect domestic sets. Both amplitude modula-
tion (MW/LW) and frequency modulation (FM) reception are subject to various forms of interference whichare not a reflection on the quality of your set, but are due to the nature of the signals and the way in whichthey are transmitted.
On MW/LW, interference may be noticed when passing underneath high voltage power lines or bridges or in tunnels.
On FM, interference may be the result of distance from the transmitter, reflection of the signal by obstacles (mountains, hills, buildings etc), or of being in a shadow area (an area which is not covered by a transmitter). Selecting the radio Press the "SRC"button, until the radio is selected.
Selecting a wavebandBy short presses on the "BND/AST"button, you can select the FM1, FM2, FM3 and AM wavebands.
Automatic station searchBriefly press button "J"or "K" to search for the next station up or down the waveband. By continuing to press
the button in the direction selected, you will obtain continous scrolling of the frequency. The scrolling stops at the first station found as soon as you release the button.
If the TA traffic programme is selected, only stations broadcasting this type of programme are selected.Searching for a station occurs first in "LO"sensitivity (selection of the most powerful transmitters, while scan-
ning the waveband, then in "DX"sensitivity (selection of weaker and more distant transmitters).
Manual station searchPress the ÒMANÓbutton.
Briefly press button ÒJÓor ÒKÓ respectively to increase or reduce the frequency displayed.
By continuing to press the button in the direction selected, you will obtain continuous scrolling of the frequency.Scrolling stops as soon as you release the button.Pressing the ÒMANÓbutton again returns you to automatic station search.