Page 86 of 123

YOUR 206 CC IN DETAIL
86
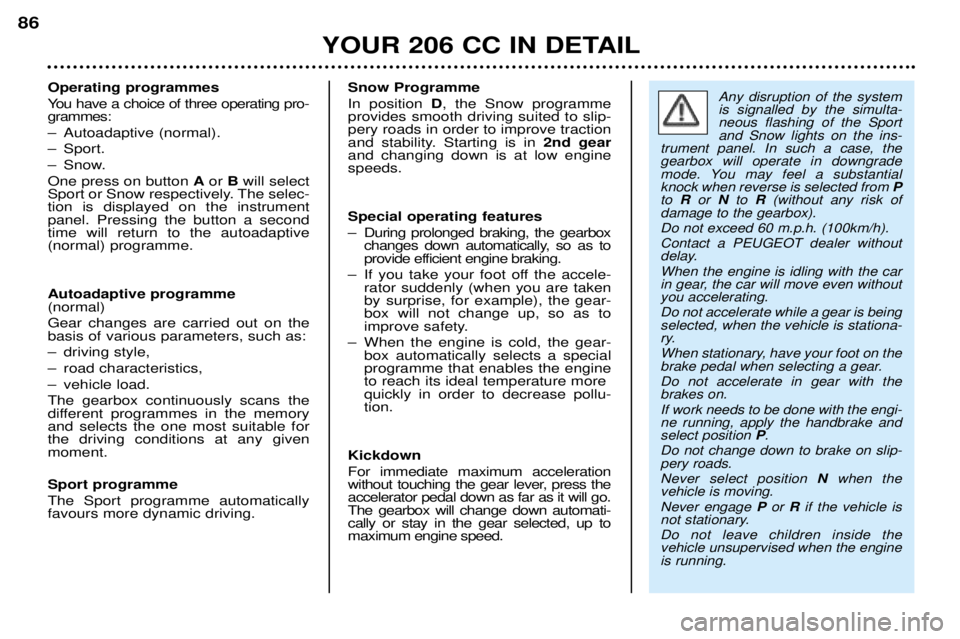
Operating programmes
You have a choice of three operating pro- grammes:
Ð Autoadaptive (normal).
Ð Sport.
Ð Snow.One press on button
Aor Bwill select
Sport or Snow respectively. The selec- tion is displayed on the instrumentpanel. Pressing the button a secondtime will return to the autoadaptive(normal) programme. Autoadaptive programme (normal) Gear changes are carried out on the basis of various parameters, such as:
Ð driving style,
Ð road characteristics,
Ð vehicle load.The gearbox continuously scans the
different programmes in the memoryand selects the one most suitable forthe driving conditions at any givenmoment. Sport programme The Sport programme automatically favours more dynamic driving. Snow Programme In position
D, the Snow programme
provides smooth driving suited to slip- pery roads in order to improve traction
and stability. Starting is in 2nd gear
and changing down is at low enginespeeds. Special operating features
Ð During prolonged braking, the gearbox changes down automatically, so as to
provide efficient engine braking.
Ð If you take your foot off the accele- rator suddenly (when you are takenby surprise, for example), the gear-box will not change up, so as to
improve safety.
Ð When the engine is cold, the gear- box automatically selects a specialprogramme that enables the engineto reach its ideal temperature more quickly in order to decrease pollu-tion.
Kickdown For immediate maximum acceleration
without touching the gear lever, press theaccelerator pedal down as far as it will go.The gearbox will change down automati-cally or stay in the gear selected, up tomaximum engine speed.Any disruption of the system is signalled by the simulta-neous flashing of the Sportand Snow lights on the ins-
trument panel. In such a case, thegearbox will operate in downgrade
mode. You may feel a substantialknock when reverse is selected from P
to Ror Nto R(without any risk of
damage to the gearbox). Do not exceed 60 m.p.h. (100km/h).Contact a PEUGEOT dealer without
delay. When the engine is idling with the car
in gear, the car will move even withoutyou accelerating. Do not accelerate while a gear is being selected, when the vehicle is stationa-
ry.
When stationary, have your foot on the
brake pedal when selecting a gear. Do not accelerate in gear with the brakes on. If work needs to be done with the engi- ne running, apply the handbrake andselect position P.
Do not change down to brake on slip-pery roads. Never select position Nwhen the
vehicle is moving.Never engage Por Rif the vehicle is
not stationary.Do not leave children inside the vehicle unsupervised when the engineis running.
Page 87 of 123
YOUR 206 CC IN DETAIL87
The normal operation of the ABS may make itself felt by slight vibra-tions of the brake pedal. In emergency braking, press very firmly without releasing thepressure.
The ABS Anti-lock Braking System*
When used with approved tyres in
good condition, the ABS increases thestability and manoeuvrability of yourvehicle, particularly on poor or slipperyroad surfaces. The anti-lock braking system comes into operation automatically whenthere is a risk of wheel lock.
Handbrake Locking When parking, pull the handbrake to immobilise your vehicle. Unlocking Pull the handle and press the button to release the handbrake.
* According to specification .
Page 88 of 123

YOUR 206 CC IN DETAIL
88
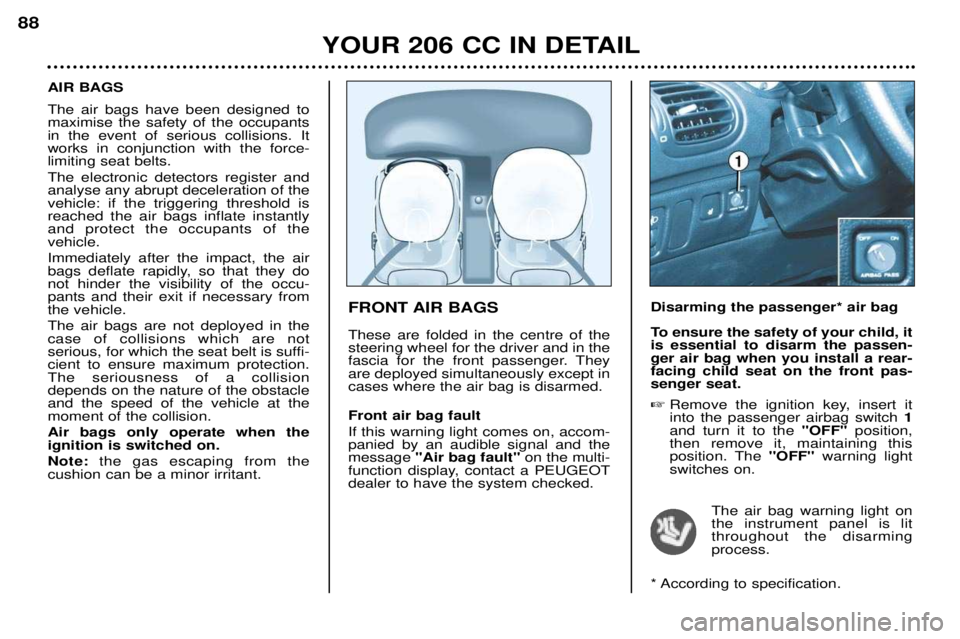
FRONT AIR BAGS These are folded in the centre of the steering wheel for the driver and in the
fascia for the front passenger. Theyare deployed simultaneously except incases where the air bag is disarmed. Front air bag fault If this warning light comes on, accom- panied by an audible signal and themessage
"Air bag fault" on the multi-
function display, contact a PEUGEOTdealer to have the system checked.
AIR BAGS The air bags have been designed to maximise the safety of the occupantsin the event of serious collisions. Itworks in conjunction with the force-limiting seat belts. The electronic detectors register and analyse any abrupt deceleration of thevehicle: if the triggering threshold isreached the air bags inflate instantlyand protect the occupants of thevehicle. Immediately after the impact, the air
bags deflate rapidly, so that they donot hinder the visibility of the occu-pants and their exit if necessary fromthe vehicle. The air bags are not deployed in the case of collisions which are not
serious, for which the seat belt is suffi-cient to ensure maximum protection.The seriousness of a collisiondepends on the nature of the obstacleand the speed of the vehicle at themoment of the collision. Air bags only operate when the ignition is switched on. Note:
the gas escaping from the
cushion can be a minor irritant. Disarming the passenger* air bag
To ensure the safety of your child, it is essential to disarm the passen-ger air bag when you install a rear-facing child seat on the front pas-senger seat. �
Remove the ignition key, insert it into the passenger airbag switch 1
and turn it to the "OFF"position,
then remove it, maintaining thisposition. The ''OFF''warning light
switches on.
The air bag warning light onthe instrument panel is litthroughout the disarmingprocess.
* According to specification.
Page 89 of 123

YOUR 206 CC IN DETAIL89
In the
"OFF" position, the passenger
air bag will not be triggered in the event of an impact. As soon as you remove the rear-fac- ing child seat from the front passengerseat, turn the air bag switch to the"ON" position, to arm the air bag
again and thus ensure the safety ofyour passenger in an impact. Operating check This is provided by an indicator light, accompanied by an audible signal anda message on the multifunction dis-
play. When the ignition is on (2nd notch on the ignition key), switching on of thiswarning light, accompanied by anaudible signal and the message ''Pas-
senger air bag disarmed'' on the
multifunction screen, indicates that thepassenger air bag is disarmed ( ''OFF''
position on the control).SIDE AIRBAGS* These are incorporated into the frame of the front seat back, on the doorside. They are deployed independently of each other depending on which sidethe collision occurs, in collisions whichcould cause injury to the chest, theabdomen or the head. Operating check This is confirmed by an indica-
tor light on the instrument panel. It comes on for 6 seconds, each time the ignition is switched on. If the indicator light:
Ð does not light up when the ignition is switched on, or
Ð does not go out after 6 seconds or,
Ð flashes for 5 minutes then stays on,
Contact a PEUGEOT dealer.
*According to specification
Page 91 of 123

YOUR 206 CC IN DETAIL89
In the
"OFF" position, the passenger
air bag will not be triggered in the event of an impact. As soon as you remove the rear-fac- ing child seat from the front passengerseat, turn the air bag switch to the"ON" position, to arm the air bag
again and thus ensure the safety ofyour passenger in an impact. Operating check This is provided by an indicator light, accompanied by an audible signal anda message on the multifunction dis-
play. When the ignition is on (2nd notch on the ignition key), switching on of thiswarning light, accompanied by anaudible signal and the message ''Pas-
senger air bag disarmed'' on the
multifunction screen, indicates that thepassenger air bag is disarmed ( ''OFF''
position on the control).SIDE AIRBAGS* These are incorporated into the frame of the front seat back, on the doorside. They are deployed independently of each other depending on which sidethe collision occurs, in collisions whichcould cause injury to the chest, theabdomen or the head. Operating check This is confirmed by an indica-
tor light on the instrument panel. It comes on for 6 seconds, each time the ignition is switched on. If the indicator light:
Ð does not light up when the ignition is switched on, or
Ð does not go out after 6 seconds or,
Ð flashes for 5 minutes then stays on,
Contact a PEUGEOT dealer.
*According to specification
Page 101 of 123
PRACTICAL ASPECTS OF YOUR VEHICLE99
Ð Pull tab
Aupwards and remove the protective cover.
Ð Disconnect the connector.
Ð Press the end of the securing clip to remove it. Change the faulty bulb.
Ð On fitting, ensure that the direction notches are in the cor- rect position and that the clip is secured correctly.
Ð Reconnect the connector.
Ð Replace the protective cover. Remarks
Ð Only touch the bulbs with a dry cloth.
Ð To replace the bulbs on the right-hand side, remove the wash-wipe reservoir filler pipe first.
Ð Condensation may form inside the headlamps. It will disap- pear when they are used.
Changing a bulb Dipped/main headlamps H7 55WSide lights W5W
Turn the pin connector Ba quarter turn and remove it.
Change the bulb.
Page 103 of 123
PRACTICAL ASPECTS OF YOUR VEHICLE101
Rear lights Release the top of the boot side trim. Unscrew the wing bolt inside the boot
using the wheelbrace if necessary. Disconnect the connector
A.
Release the light unit.Release spanner B from the bulb hol-
der.Unscrew nut Cusing spanner B and
removet the bulb holder.Change the faulty bulb.When refitting, stow spanner B on
support D and refit the light .
1. Amber direction indicators
PY21W.
2. Reversing lights P21W.
3. Brake lights/side lights P21/5W.Front fog lamps H1 55W Press underneath the access flap to release it. Open the flap.
Turn the cover to remove it.Disconnect the bulb.Press both ends of the securing clip to release the bulb.
The ÒamberÓ bulbs must be replaced by bulbs of identi-
cal specification and colour.
Page 104 of 123
PRACTICAL ASPECTS OF YOUR VEHICLE101
Rear lights Release the top of the boot side trim. Unscrew the wing bolt inside the boot
using the wheelbrace if necessary. Disconnect the connector
A.
Release the light unit.Release spanner B from the bulb hol-
der.Unscrew nut Cusing spanner B and
removet the bulb holder.Change the faulty bulb.When refitting, stow spanner B on
support D and refit the light .
1. Amber direction indicators
PY21W.
2. Reversing lights P21W.
3. Brake lights/side lights P21/5W.Front fog lamps H1 55W Press underneath the access flap to release it. Open the flap.
Turn the cover to remove it.Disconnect the bulb.Press both ends of the securing clip to release the bulb.
The ÒamberÓ bulbs must be replaced by bulbs of identi-
cal specification and colour.