Page 2 of 107
YOUR 106 AT A GLANCE3
1-Side windows demisting vents
2 -Windscreen demisting vents
3 -Passenger airbag
4 -Adjustable centre vents
5 -Radio cassette player or spare
6 -Headlamp height adjustment
7 -Interior alarm protection disarm button
8 -Lights, fog lamps and horn stalk
9 -Instrument panel lighting rheostat
10 -Steering wheel with AIR BAG
11 -Windscreen wash/wipe stalk
12 -Ignition,ignition lock and engine immobiliser
13 -Electric mirrors switch
14 -Storage compartment 15
-Controls for: ¥Air conditioning or left-hand heated seat
¥ Lighter
¥ Hazard warning lights
¥ Rear screen and mirrors demisting
¥ Air recirculation or right-hand heated seat
16 -Gear lever
17 -Handbrake
18 -Electric window switches
19 -Passenger airbag disarming switch
20 -Ashtray
21 -Glove box
22 -Adjustable side vent
23 -Fuse box
24 -Bonnet opening control
06-05-2002
Page 49 of 107

YOUR 106 IN DETAIL50
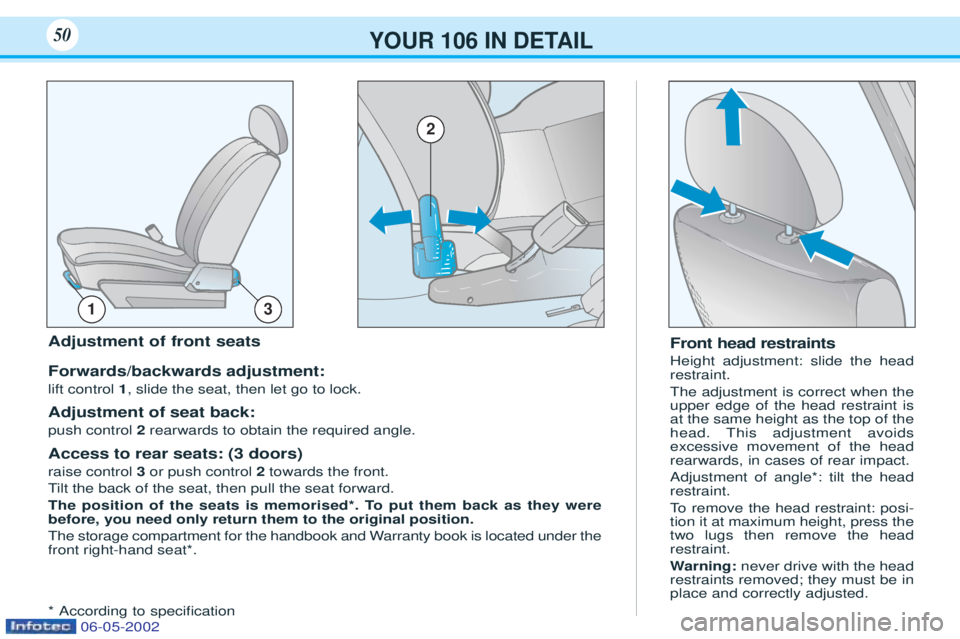
Front head restraints Height adjustment: slide the head restraint. The adjustment is correct when the upper edge of the head restraint isat the same height as the top of thehead. This adjustment avoidsexcessive movement of the headrearwards, in cases of rear impact. Adjustment of angle*: tilt the head restraint.
To remove the head restraint: posi-
tion it at maximum height, press the two lugs then remove the headrestraint. W arning: never drive with the head
restraints removed; they must be in place and correctly adjusted.Adjustment of front seats Forwards/backwards adjustment: lift control 1, slide the seat, then let go to lock.
Adjustment of seat back:push control 2rearwards to obtain the required angle.
Access to rear seats: (3 doors)raise control 3or push control 2towards the front.
T ilt the back of the seat, then pull the seat forward.
The position of the seats is memorised*. To put them back as they were before, you need only return them to the original position.
The storage compartment for the handbook and Warranty book is located under the front right-hand seat*. * According to speciÞcation
13
2
06-05-2002
Page 53 of 107

YOUR 106 IN DETAIL54
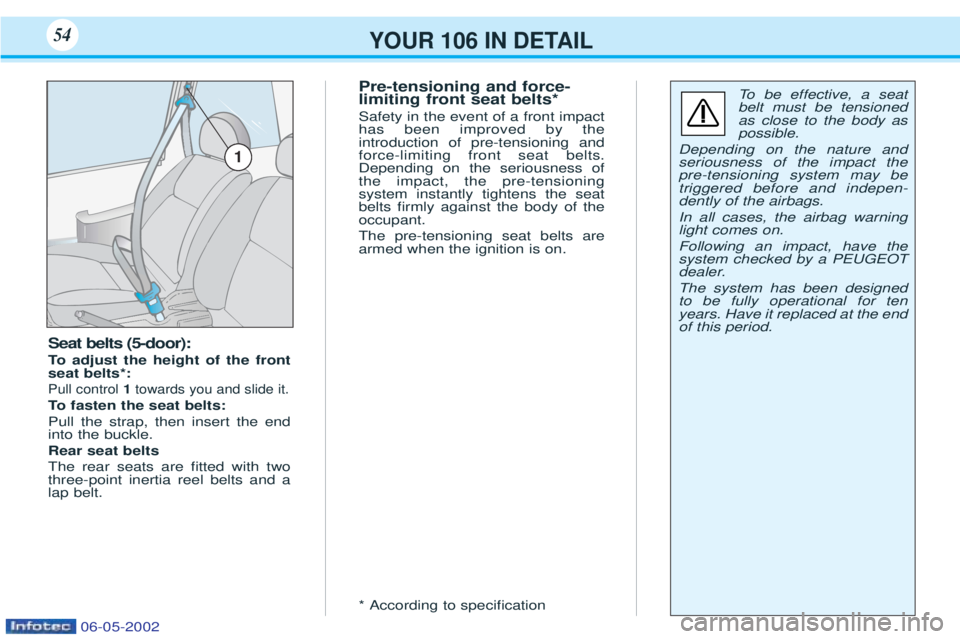
Seat belts (5-door):
To adjust the height of the front
seat belts*:
Pull control 1towards you and slide it.
To fasten the seat belts:
Pull the strap, then insert the end into the buckle. Rear seat beltsThe rear seats are Þtted with two three-point inertia reel belts and alap belt.
1
To be effective, a seat
belt must be tensioned as close to the body aspossible.
Depending on the nature andseriousness of the impact thepre-tensioning system may betriggered before and indepen-dently of the airbags. In all cases, the airbag warning light comes on. Following an impact, have the system checked by a PEUGEOT
dealer. The system has been designed to be fully operational for tenyears. Have it replaced at the endof this period.Pre-tensioning and force- limiting front seat belts* Safety in the event of a front impact has been improved by theintroduction of pre-tensioning andforce-limiting front seat belts.Depending on the seriousness ofthe impact, the pre-tensioningsystem instantly tightens the seatbelts Þrmly against the body of theoccupant. The pre-tensioning seat belts are armed when the ignition is on. * According to speciÞcation
06-05-2002
Page 69 of 107
YOUR 106 IN DETAIL66
5
78
10
9
1
6
1112
432
CENTRAL PANEL1- Radio cassette player.
2- Central adjustable vents for heating,
ventilation and air ßow.
3- Heating and ventilation controls.
4- Passenger airbag disarming switch.
5- Interior air recirculation or left-hand heated seat control*.
6- Ashtray. 7-
Demisting control for rear screen and mirrors*.
8- Hazard warning switch.
9- Lighter.
10 - Air conditioning* or right-hand heated seat control*
11 - Headlamps height adjustment.
12 - Lighting rheostat.
* According to speciÞcation
06-05-2002
Page 85 of 107

Special procedure for Sport model Positioning the jack ÐClose the jack completely.
Ð Position the jack under the vehicle at the jacking points tilting it by 90¡, so that the jack handle hinge is at the same height as the sill trim, then straighten it.
Ð Check that the jack is in correct contact with the sill.
Replacing the wheel in the carrier Ð Position the jack storage box with the arrow pointing forwards.
PRACTICAL INFORMATION8181
For your safety, always change a wheel:
Ð on level, solid, non-slipperyground,
Ð with the handbrake applied,
Ð
with Þrst or reverse gear engaged,
Ð Chock the vehicle.
Ð Never position yourself undera vehicle which is supportedonly by a jack. Use a ramp.
After changing the wheel Ð Have the wheel bolts and the tyre pressure checked assoon as possible.
Ð Have the damaged tyrerepaired so that it can bereturned to the vehicle assoon as possible.
Ð The Òspace-savingÓ* type ofspare wheel is Þtted with a115/70R 15 tyre and is for
temporary use only. - Pressure: 61 lbf. in 2
(4.2 bars).
- Maximum speed: 50 m.p.h. (80 km/h).
* According to speciÞcation
3
Never place the jack in contact with the sill trim.
06-05-2002
Page 96 of 107

PRACTICAL INFORMATION88
Fuse Rating*Functions*
1ÑNot used.
2 25A Heater blower.
325A Heated rear screen Ð air conditioning Ð pressure switch Ð heated seats.
425A Radio Ð map reading light.
530A Heated rear screen - horn - lighter + heated mirrors.
610A Direction indicators / hazard warning lights.
710A Engine cooling Ð electronic immobiliser Ð coolant temperature control unit Ð instrument
panel Ð power steering Ð reversing lights.
8 20A Central locking - electronic immobiliser Ð interior lighting Ð boot lighting -
coolant temperature control unit - instrument panel - radio - clock.
9 30A Electric windows - hazard warning lights - electric mirrors Ð brake lights Ð front and rear
wipers - instrument panel.
10 20A Front electric windows.
11 5A Rear fog light + instrument panel lights.
12 5A Left tail-light Ð front sidelights - instrument panel lighting (rheostat) + headlamp height
adjustment.
13 5A Switch lighting Ð radio panel lighting Ð number plate lighting Ð right tail light
13 fuse box (passenger compartment)
* According to speciÞcation.
06-05-2002