Page 39 of 263

TOP TETHER STRAP CHILD RE-
STRAINT
This vehicle is equipped with 3 anchor
brackets in the rear cargo area for attaching
child restraint top tether straps.
If your child restraint has a top tether strap,
secure the child restraint with the three-
point seat belt and latch the top strap hook
onto the appropriate anchor bracket. Make
sure the shoulder belt is placed between the
seat back and child restraint.
For the rear outboard seating positions,
place the top tether strap over the seat backas shown in the illustration.
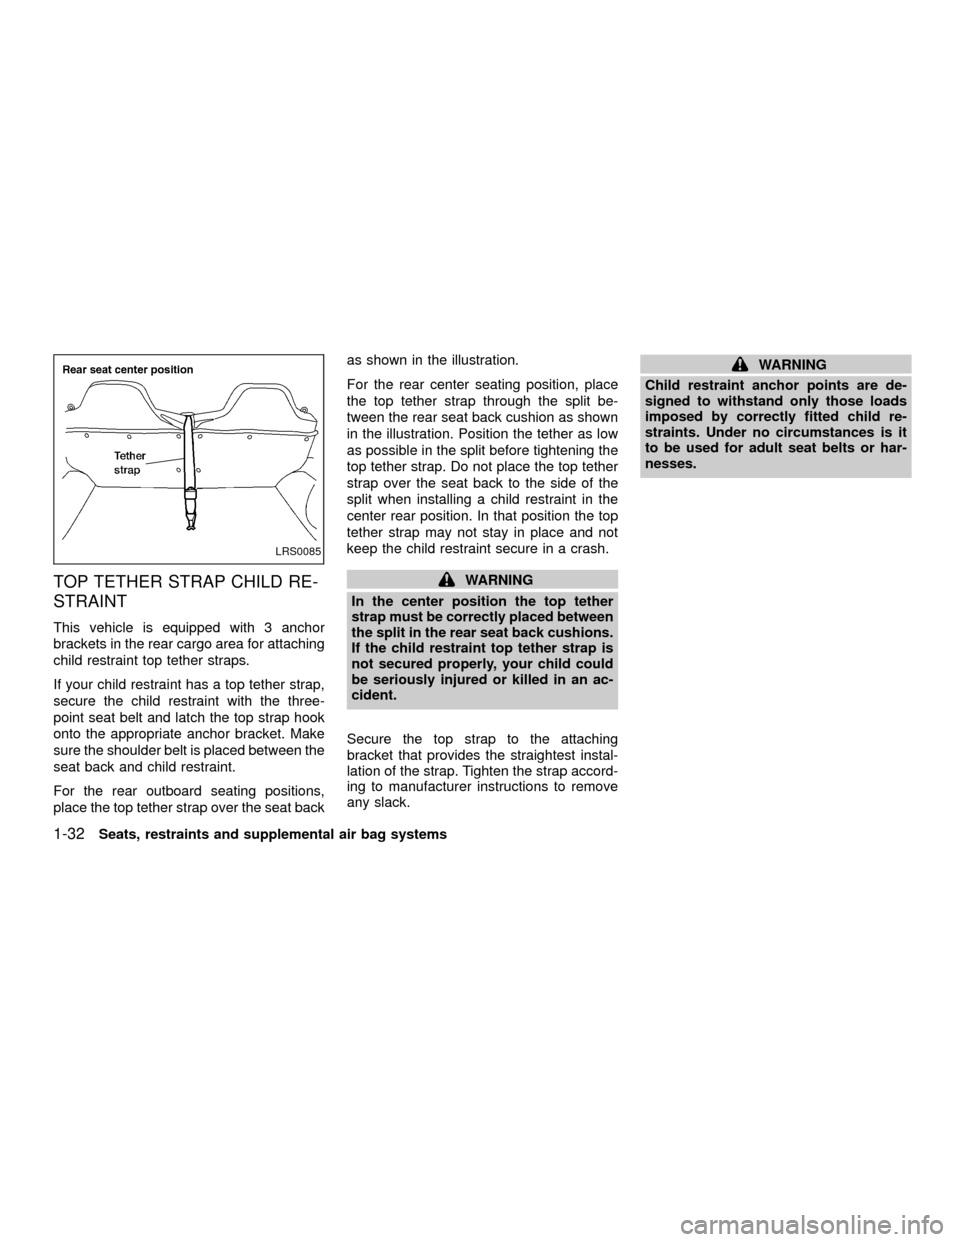
For the rear center seating position, place
the top tether strap through the split be-
tween the rear seat back cushion as shown
in the illustration. Position the tether as low
as possible in the split before tightening the
top tether strap. Do not place the top tether
strap over the seat back to the side of the
split when installing a child restraint in the
center rear position. In that position the top
tether strap may not stay in place and not
keep the child restraint secure in a crash.
WARNING
In the center position the top tether
strap must be correctly placed between
the split in the rear seat back cushions.
If the child restraint top tether strap is
not secured properly, your child could
be seriously injured or killed in an ac-
cident.
Secure the top strap to the attaching
bracket that provides the straightest instal-
lation of the strap. Tighten the strap accord-
ing to manufacturer instructions to remove
any slack.
WARNING
Child restraint anchor points are de-
signed to withstand only those loads
imposed by correctly fitted child re-
straints. Under no circumstances is it
to be used for adult seat belts or har-
nesses.
LRS0085
1-32Seats, restraints and supplemental air bag systems
ZX
Page 40 of 263
Anchor point locations
Anchor points are located in the cargo area
under the carpet.
If you have questions when installing a
top strap child restraint, consult your
NISSAN dealer for details.
Flaps are provided in the carpet for easy
access and are marked with the label shown.
INSTALLATION ON FRONT
PASSENGER SEAT
WARNING
O
Never install a rear facing child re-
straint in the front passenger seat. Air
bags inflate with great force. A rear-
facing child restraint could be struck
by the air bag in a crash and could
seriously injure or kill your child.
WRS0072LRS0073
Seats, restraints and supplemental air bag systems1-33
ZX
Page 41 of 263

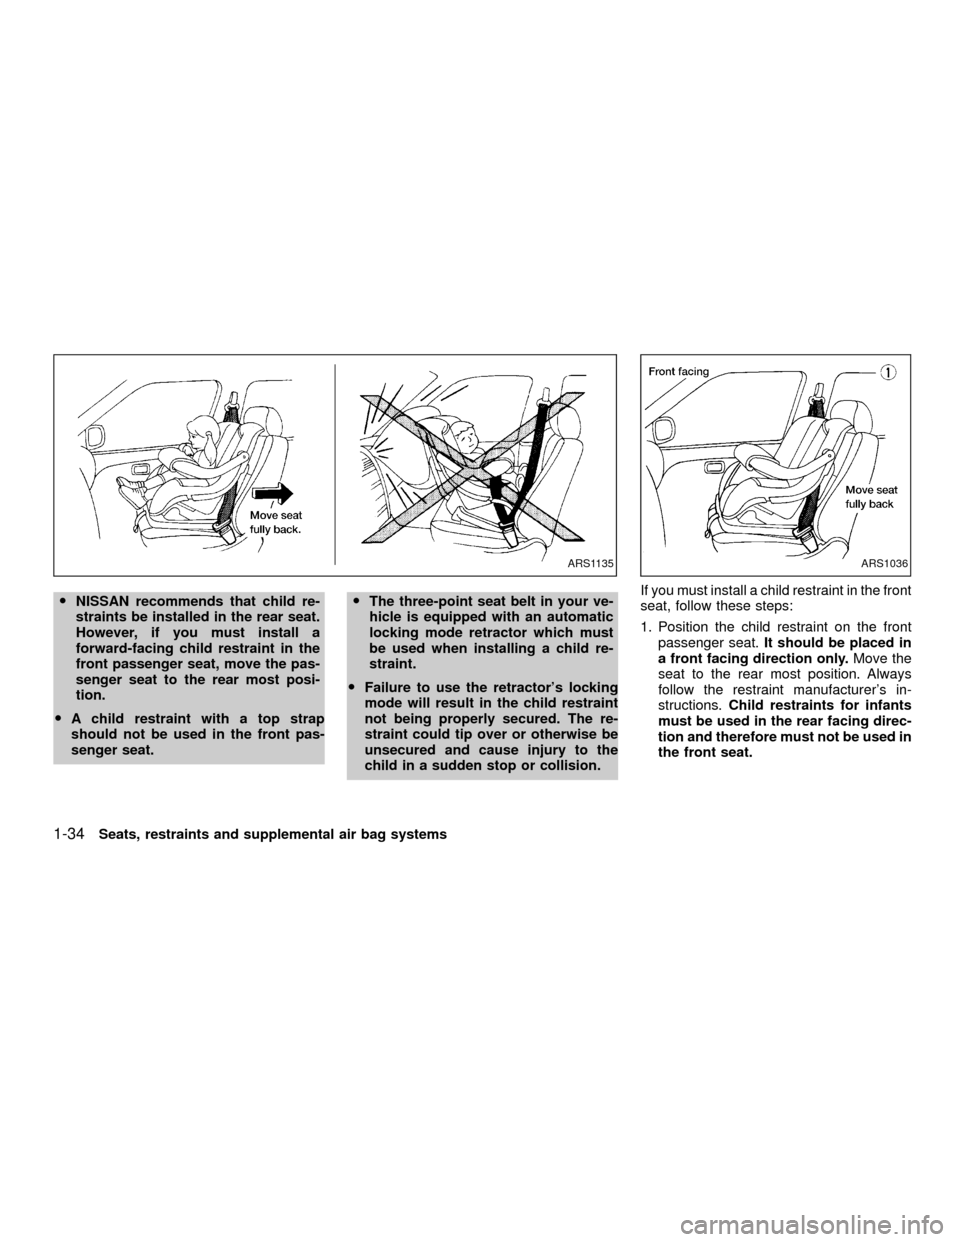
ONISSAN recommends that child re-
straints be installed in the rear seat.
However, if you must install a
forward-facing child restraint in the
front passenger seat, move the pas-
senger seat to the rear most posi-
tion.
OA child restraint with a top strap
should not be used in the front pas-
senger seat.OThe three-point seat belt in your ve-
hicle is equipped with an automatic
locking mode retractor which must
be used when installing a child re-
straint.
OFailure to use the retractor's locking
mode will result in the child restraint
not being properly secured. The re-
straint could tip over or otherwise be
unsecured and cause injury to the
child in a sudden stop or collision.If you must install a child restraint in the front
seat, follow these steps:
1. Position the child restraint on the front
passenger seat.It should be placed in
a front facing direction only.Move the
seat to the rear most position. Always
follow the restraint manufacturer's in-
structions.Child restraints for infants
must be used in the rear facing direc-
tion and therefore must not be used in
the front seat.
ARS1135ARS1036
1-34Seats, restraints and supplemental air bag systems
ZX
Page 42 of 263
2. Route the seat belt tongue through the
child restraint and insert it into the buckle
until you hear and feel the latch engage.
Be sure to follow the child restraint manu-
facturer's instructions for belt routing.3. Pull on the shoulder belt until all of the
belt is fully extended. At this time, the belt
retractor is in the automatic locking mode
(child restraint mode). It reverts back to
emergency locking mode when the belt is
fully retracted.4. Allow the seat belt to retract slightly. Pull
up on the seat belt to remove any slack in
the belt.
ARS1073ARS1034ARS1074
Seats, restraints and supplemental air bag systems1-35
ZX
Page 43 of 263
5. Before placing the child in the child re-
straint, use force to tilt the child restraint
from side to side, and tug it forward to
make sure it is securely held in place.
6.
Check that the retractor is in the automatic
locking mode by trying to pull more seat
belt out of the retractor. If you cannot pull
any more seat belt webbing out of the
retractor, the retractor is in the automatic
locking mode.
7. Check to make sure the child restraint is
properly secured prior to each use. If the
seat belt is not locked, repeat steps 3
through 6.After the child restraint is removed and the
seat belt is fully retracted, the automatic
locking mode (child restraint mode) is can-
celed.
ARS1079
1-36Seats, restraints and supplemental air bag systems
ZX
Page 53 of 263

START and remains illuminated until the
driver's seat belt is fastened. At the same
time, the chime sounds for about seven
seconds unless the driver seat belt is se-
curely fastened.
Refer to ``Seat belts'' in the ``Seats, re-
straints and supplemental air bag systems''
section for precautions on seat belt usage.
Supplemental air bag
warning light
When the ignition key is in the ON or START
position, the supplemental air bag warning
light illuminates for about 7 seconds and
then turns off. This means the system is
operational.
If any of the following conditions occur, the
supplemental air bag and pre-tensioner
seat belt systems need servicing and your
vehicle must be taken to an authorized
authorized NISSAN dealer.
O
The supplemental air bag warning light
remains on after approximately 7 seconds.
OThe supplemental air bag warning light
flashes intermittently.OThe supplemental air bag warning light
does not come on at all.
Unless checked and repaired, the supplemen-
tal air bag system and/or the pre-tensioner
seat belts may not function properly. For ad-
ditional details, see the ``Seats, Restraints and
Supplemental Air Bag Systems'' section of this
manual
WARNING
If the supplemental air bag warning
light is on, it could mean that the air
bag will not operate in an accident.
INDICATOR LIGHTS
Cruise main switch indicator
light (if so equipped)
The light comes on when the cruise control
main switch is pushed. The light goes out
when the main switch is pushed again.
While the cruise main switch indicator light
comes on, the cruise control system is
operational.
Cruise set indicator light (if
so equipped)
The light comes on while the vehicle speed
is controlled by the cruise control system. If
the light blinks while the engine is running, it
may indicate the cruise control system is not
functioning properly. Have the system
checked by your NISSAN dealer.
4-wheel drive indicator light
(if so equipped)
This light comes on when the transfer shift
control lever is in the 4H or 4L position.
WARNING
OWhen parking always make sure the
transfer control lever is in the 2H, 4H
or 4L position and the parking brake
is applied.
OFailure to engage the transfer con-
trol lever in 2H, 4H or 4L could result
in the vehicle moving unexpectedly,
which could cause serious personal
injury or property damage.
2-10Instruments and controls
ZX
Page 67 of 263
LUGGAGE HOOKS
The tie down hooks can be used to secure
cargo with ropes or other types of straps.
WARNING
OProperly secure all cargo to help
prevent it from sliding or shifting. Do
not place cargo higher than the seat-
backs. In a sudden stop or collision,
unsecured cargo could cause per-
sonal injury.
OUse suitable ropes and hooks to se-
cure cargo.
ONever allow anyone to ride in the
luggage area. It is extremely danger-
ous to ride in a cargo area inside of a
vehicle. In a collision, people riding
in these areas are more likely to be
seriously injured or killed.
ODo not allow people to ride in any
area of your vehicle that is not
equipped with seats and seat belts.
OBe sure everyone in your vehicle is
in a seat and using a seat belt prop-
erly.Do not apply a total load of more than 33
lbs (15kg) to a single hook when secur-
ing cargo.
AIC1106AIC1107
2-24Instruments and controls
ZX
Page 93 of 263

OFF position (indicator light off):
Outside air is drawn into the passenger
compartment and distributed through the
selected outlets.
Use the OFF position for normal heater or
air conditioner operation.
ON position (indicator light on):
Interior air is recirculated inside the vehicle.
Push the
button to the on position
when:
Odriving on a dusty road.
Oto prevent traffic fumes from entering the
passenger compartment.
Ofor maximum cooling when using the air
conditioner.
Air conditioner button
(if so equipped)
Start the engine, move the fan control dial to
the desired (one to four) position, and push
the air conditioner button to turn on the air
conditioner. The indicator light comes on
when the air conditioner is operating. To turn
off the air conditioner, push the button
again.The air conditioner cooling function op-
erates only when the engine is running.
HEATER OPERATION
Heating
This mode is used to direct most of the hot
air to the front and rear floor outlets. Rear
passenger heat is provided by the front
system through floor outlets located under
both front seats. A small amount of air also
flows from the defrost outlets.
1. Push the
button (if so equipped) to
the off position for normal heating.
2. Turn the air control dial to the
posi-
tion.
3. Turn the fan control dial to the desired
position.
4. Turn the temperature control dial to the
desired position between the middle and
the hot position.
Ventilation
This mode directs outside air from the side
and center vents.
1. Push the
button (if so equipped) to
the off position.2. Turn the air control dial to the
posi-
tion.
3. Turn the fan control dial to the desired
position.
4. Turn the temperature control dial to the
desired position.
Defrosting or defogging
This mode directs the air to the defrost
outlets to defrost/defog the windows.
1. Turn the air control dial to the
posi-
tion.
2. Turn the fan control dial to the desired
position.
3. Turn the temperature control dial to the
desired position.
When the
position is selected, the air
conditioner automatically turns on (however
the indicator light will not illuminate) if the
outside temperature is more than
45ÉF(7ÉC). This dehumidifies the air which
helps defog the windshield. The
mode automatically turns off, allow-
ing outside air to be drawn into the passen-
ger compartment to further improve the
defogging performance.
4-4Heater, air conditioner and audio systems
ZX