2001 NISSAN XTERRA parking brake
[x] Cancel search: parking brakePage 187 of 263
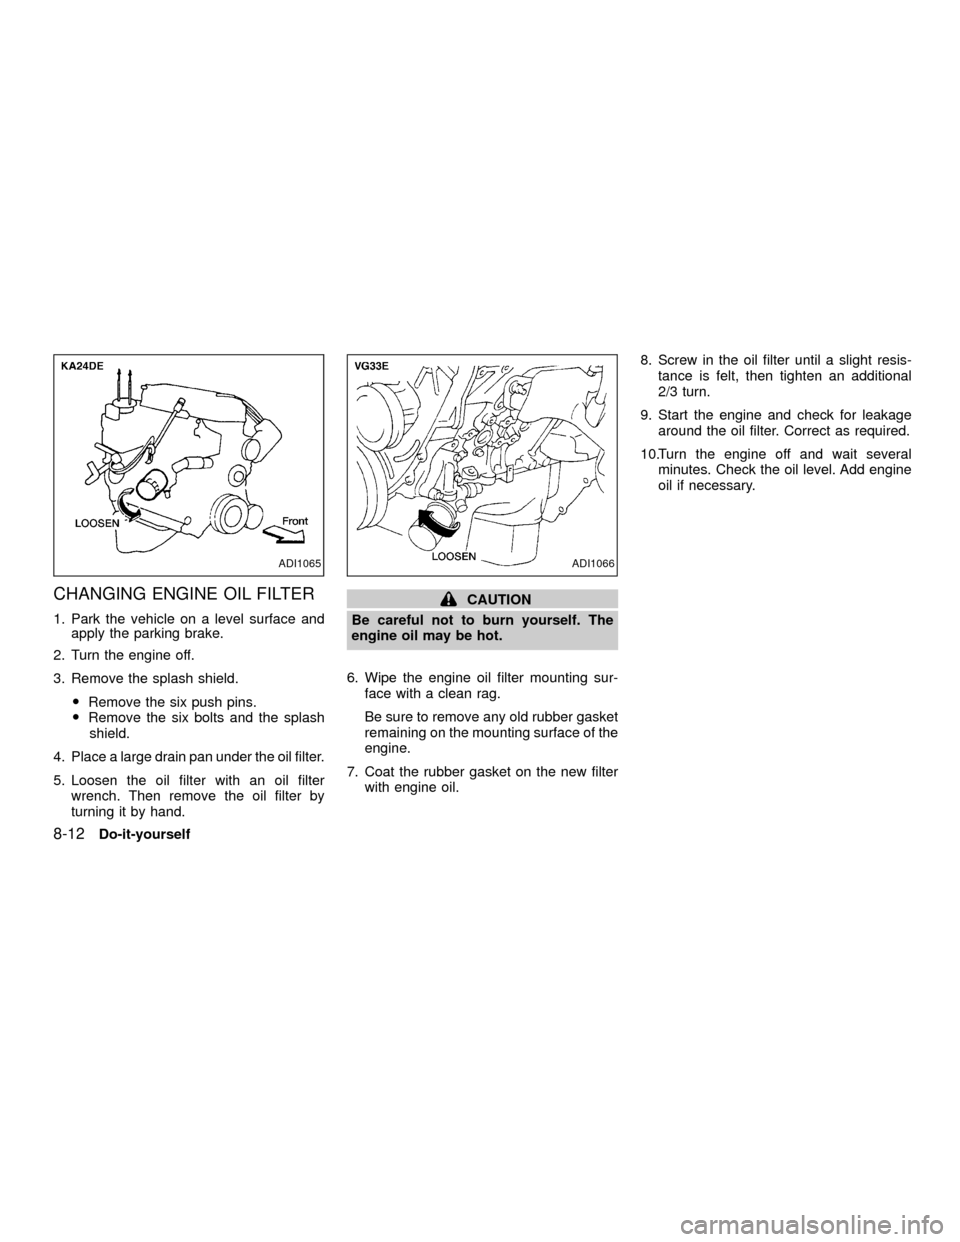
CHANGING ENGINE OIL FILTER
1. Park the vehicle on a level surface and
apply the parking brake.
2. Turn the engine off.
3. Remove the splash shield.
ORemove the six push pins.
ORemove the six bolts and the splash
shield.
4. Place a large drain pan under the oil filter.
5. Loosen the oil filter with an oil filter
wrench. Then remove the oil filter by
turning it by hand.
CAUTION
Be careful not to burn yourself. The
engine oil may be hot.
6. Wipe the engine oil filter mounting sur-
face with a clean rag.
Be sure to remove any old rubber gasket
remaining on the mounting surface of the
engine.
7. Coat the rubber gasket on the new filter
with engine oil.8. Screw in the oil filter until a slight resis-
tance is felt, then tighten an additional
2/3 turn.
9. Start the engine and check for leakage
around the oil filter. Correct as required.
10.Turn the engine off and wait several
minutes. Check the oil level. Add engine
oil if necessary.
ADI1065ADI1066
8-12Do-it-yourself
ZX
Page 188 of 263
WARNING
OWhen the engine is running, keep
hands, jewelry and clothing away
from any moving parts such as the
cooling fan and drive belts.
OAutomatic transmission fluid is poi-
sonous and should be stored care-
fully in marked containers out of the
reach of children.
TEMPERATURE CONDITIONS
FOR CHECKING
OThe fluid level should be checked using
the HOT range on the dipstick after the
following conditions have been met:
Ð The engine should be warmed up to
operating temperature.
Ð The vehicle should be driven at least 5
minutes.
Ð The ATF should be warmed to between
122 and 176ÉF (50 and 80ÉC).OThe ATF can be checked at fluid tem-
peratures of 86 to 122ÉF (30 to 50ÉC)
using the COLD range on the dipstick
after the engine is warmed up and before
driving. However, the fluid should be
re-checked using the HOT range.
1. Park the vehicle on a level surface and
set the parking brake.
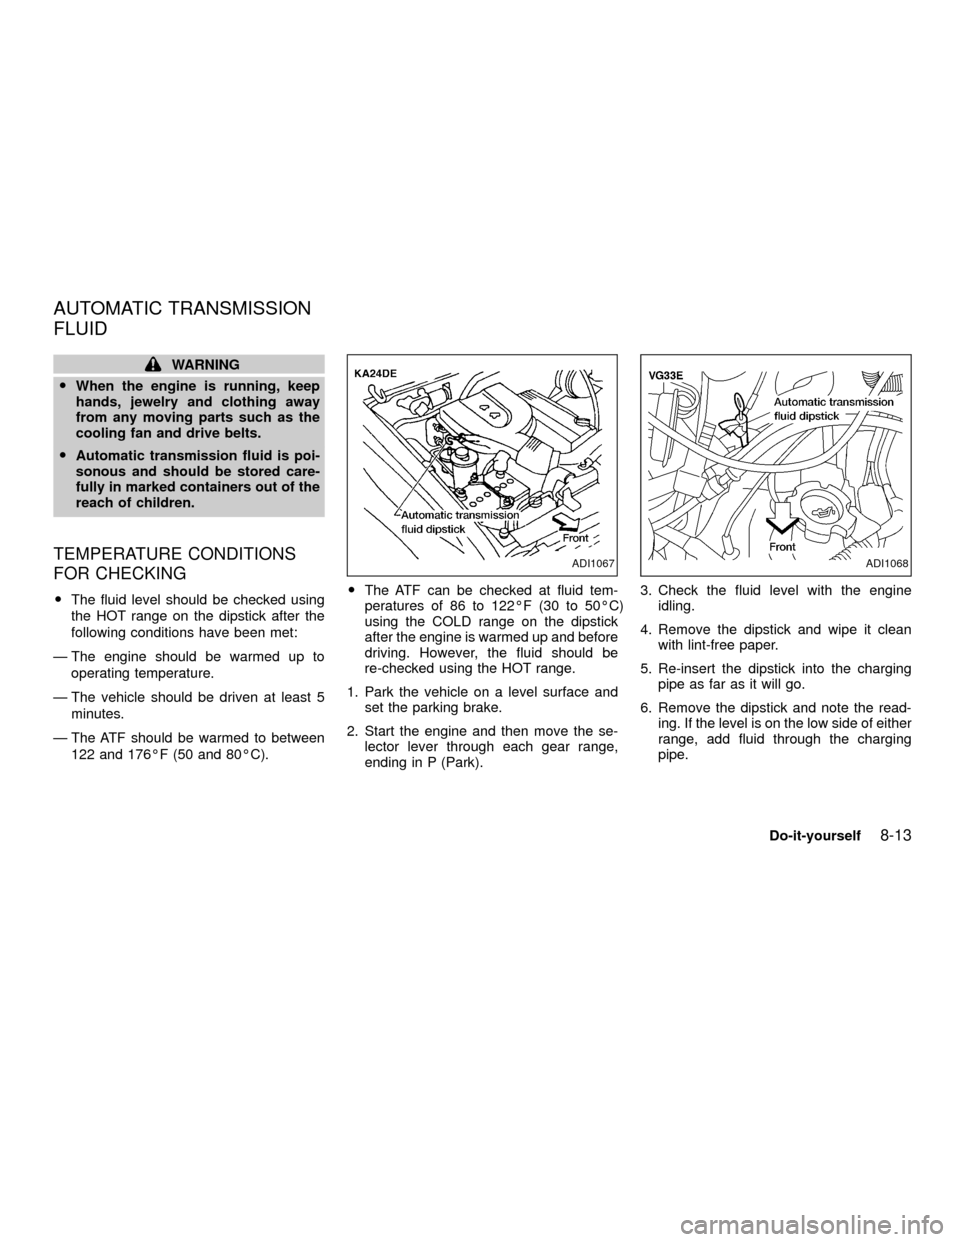
2. Start the engine and then move the se-
lector lever through each gear range,
ending in P (Park).3. Check the fluid level with the engine
idling.
4. Remove the dipstick and wipe it clean
with lint-free paper.
5. Re-insert the dipstick into the charging
pipe as far as it will go.
6. Remove the dipstick and note the read-
ing. If the level is on the low side of either
range, add fluid through the charging
pipe.
ADI1067ADI1068
AUTOMATIC TRANSMISSION
FLUID
Do-it-yourself8-13
ZX
Page 194 of 263
WARNING
Be sure the engine and ignition switch
are off and that the parking brake is
engaged securely.
CAUTION
Be sure to use the correct socket to
remove the spark plugs. An incorrect
socket can damage the spark plugs.
REPLACING SPARK PLUGS
Platinum-tipped spark plugs
It is not necessary to replace platinum-
tipped spark plugs as frequently as conven-
tional type spark plugs because they last
much longer. Follow the maintenance
schedule, but do not reuse the spark plugs
by cleaning or regapping.
OAlways replace spark plugs with rec-
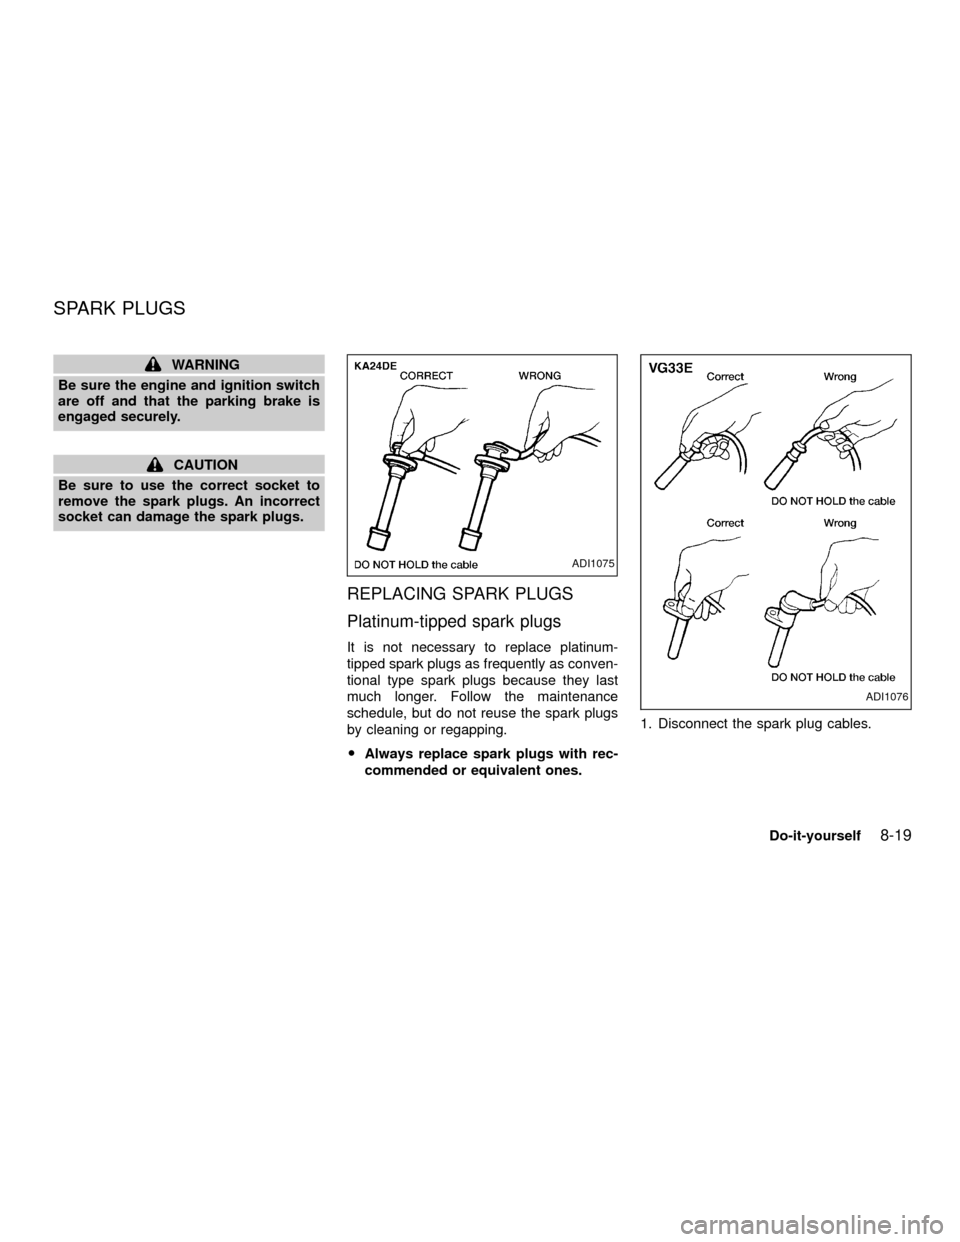
commended or equivalent ones.1. Disconnect the spark plug cables.
ADI1075
ADI1076
SPARK PLUGS
Do-it-yourself8-19
ZX
Page 199 of 263
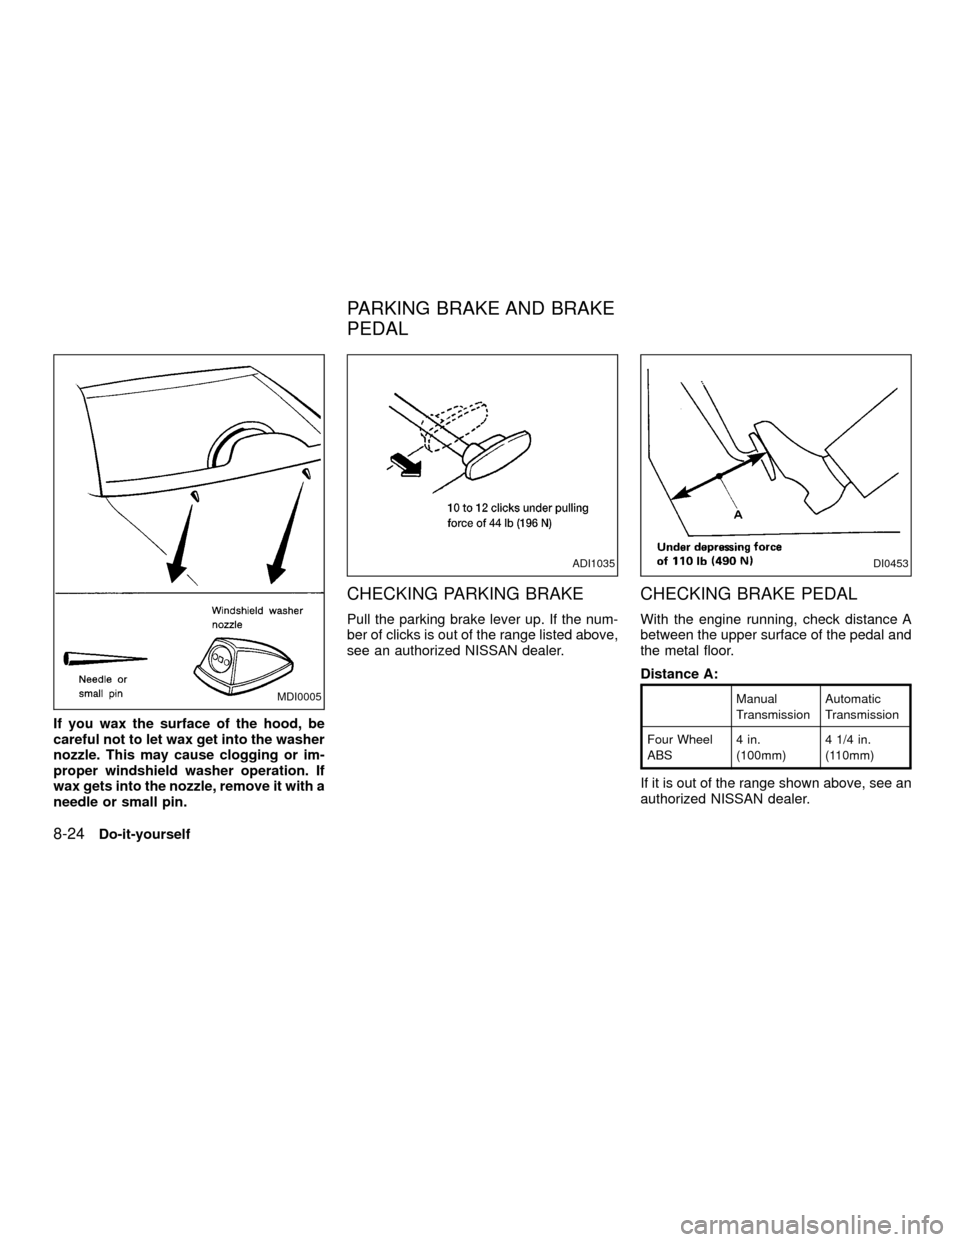
If you wax the surface of the hood, be
careful not to let wax get into the washer
nozzle. This may cause clogging or im-
proper windshield washer operation. If
wax gets into the nozzle, remove it with a
needle or small pin.
CHECKING PARKING BRAKE
Pull the parking brake lever up. If the num-
ber of clicks is out of the range listed above,
see an authorized NISSAN dealer.
CHECKING BRAKE PEDAL
With the engine running, check distance A
between the upper surface of the pedal and
the metal floor.
Distance A:
Manual
TransmissionAutomatic
Transmission
Four Wheel
ABS4 in.
(100mm)4 1/4 in.
(110mm)
If it is out of the range shown above, see an
authorized NISSAN dealer.
MDI0005
ADI1035DI0453
PARKING BRAKE AND BRAKE
PEDAL
8-24Do-it-yourself
ZX
Page 200 of 263
Self-adjusting brakes
Your vehicle is equipped with self-adjusting
brakes.
The front disc-type brakes self-adjust every
time the brake pedal is applied. The rear
drum-type brakes on two-wheel drive trucks
self-adjust every time the parking brake is
applied. The rear drum-type brakes on four-
wheel drive trucks self-adjust every time the
brake pedal is applied. If the brake pedal
goes down farther than normal, it may be
due to a lack of adjustment of the rear drum
brakes. Apply the parking brake several
times.
WARNING
If the brake pedal height does not re-
turn to normal, see an authorized NIS-
SAN dealer and have it checked.
Brake pad wear indicators
The disc brake pads on your vehicle have
audible wear indicators. When a brake pad
requires replacement, it will make a high
pitched scraping or screeching sound when
the vehicle is in motion whether or not the
brake pedal is depressed. Have the brakeschecked as soon as possible if the wear
indicator sound is heard.
Under some driving or climate conditions,
occasional brake squeak, squeal or other
noise may be heard. Occasional brake
noise during light to moderate stops is nor-
mal and does not affect the function or
performance of the brake system.
The rear drum brakes (if so equipped) do
not have audible wear indicators. Should
you ever hear an unusually loud noise from
the rear drum brakes, have them inspected
as soon as possible by an authorized NIS-
SAN dealer.
Proper brake inspection intervals should
be followed.For more information regard-
ing brake inspections, see the appropriate
maintenance schedule information in the
``Maintenance Schedule'' section of this
manual.
BRAKE BOOSTER
Check the brake booster function with the
following steps:
1. With the engine off, press and release
the brake pedal several times. When
brake pedal movement (distance oftravel) remains the same from one pedal
application to the next, continue on to
next step.
2. While depressing the brake pedal, start
the engine. The pedal height should drop
a little.
3. With the brake pedal depressed, stop the
engine. Keeping the pedal depressed for
about 30 seconds, the pedal height
should not change.
4. Run the engine for one minute without
depressing the brake pedal, then turn it
off. Depress the brake pedal several
times. The pedal travel distance will de-
crease gradually with each depression
as the vacuum is released from the
booster.
If the brakes do not operate properly, have
the brakes checked by an authorized
NISSAN dealer.
Do-it-yourself
8-25
ZX
Page 217 of 263

for smooth operation and make sure it has
the proper distance under it when de-
pressed fully. Check the brake booster func-
tion. Be certain to keep the floor mat away
from the pedal.
Parking brake*Check that the lever has
the proper travel and confirm that your
vehicle is held securely on a fairly steep hill
with only the parking brake applied.
Automatic transmission P (Park) posi-
tion mechanismCheck that the lock re-
lease button on the selector lever operates
properly and smoothly. On a fairly steep hill
check that your vehicle is held securely with
the selector lever in the P position without
applying any brakes.
Under the hood and vehicle
The maintenance items listed here should
be checked periodically (e.g., each time you
check the engine oil or refuel).
Additional information on the following
items with an ``*'' is found in the ``Do-it-
yourself operations'' section.
Windshield washer fluid*Check that there
is adequate fluid in the reservoir.
Engine oil level*Check the level afterparking the vehicle on a level surface with
the engine off. Wait a few minutes for the oil
to drain back into the oil pan.
Brake and clutch fluid levels*Make sure
that the brake and clutch fluid level is be-
tween the MIN and MAX lines on the reser-
voir.
Power steering fluid level* and lines
Check the level when the fluid is cold, with
the engine off. Check the lines for proper
attachment, leaks, cracks, etc.
Automatic transmission fluid level*
Check the level after putting the selector
lever in P with the engine idling at operating
temperature.
Engine coolant level*Check the coolant
level when the engine is cold.
Radiator and hosesCheck the front of the
radiator and clean off any dirt, insects,
leaves, etc., that may have accumulated.
Make sure the hoses have no cracks, de-
formation, rot or loose connections.
Engine drive belts*Make sure the drive
belts are not frayed, worn, cracked or oily.
Battery*Check the fluid level in each cell. It
should be between the MAX and MIN lines.Exhaust systemMake sure there are no
loose supports, cracks or holes. If the sound
of the exhaust seems unusual or there is a
smell of exhaust fumes, immediately have
the exhaust system inspected by an autho-
rized NISSAN dealer. See the carbon mon-
oxide warning in the ``Starting and driving''
section of this manual.
UnderbodyThe underbody is frequently
exposed to corrosive substances such as
those used on icy roads or to control dust. It
is very important to remove these sub-
stances from the underbody, otherwise rust
may form on the floor pan, frame, fuel lines
and exhaust system. At the end of winter,
the underbody should be thoroughly flushed
with plain water, in those areas where mud
and dirt may have accumulated. See the
``Appearance and care'' section of this
manual.
Fluid leaksCheck under the vehicle for
fuel, oil, water or other fluid leaks after the
vehicle has been parked for a while. Water
dripping from the air conditioner after use is
normal. If you should notice any leaks or if
gasoline fumes are evident, check for the
cause and have it corrected immediately.
9-4Maintenance
ZX
Page 223 of 263

Maintenance for off-road driving
(
only)
Whenever you drive off-road through sand,
mud or water as deep as the wheel hub,
more frequent maintenance may be re-
quired of the following items:
¶Brake pads and rotors
¶Brake linings and drums
¶Brake lines and hoses
¶Wheel bearing grease and free-running
hub grease
¶Differential, transmission and transfer oil
¶Steering linkage
¶Propeller shafts and front drive shafts
¶Air cleaner filter
These items should be checked frequently
to assure safe and proper operation of your
vehicle.
EXPLANATION OF
MAINTENANCE ITEMS
Additional information on the following
items with an ``*'' is found in the ``Do-it-
yourself'' section of this manual.
Emission control system
maintenance
Drive belts*Check drive belts for wear,
fraying or cracking and also for proper ten-
sion. Replace any damaged drive belts.
Air cleaner filterUnder normal driving con-
ditions, the air cleaner filter should be re-
placed in accordance with the maintenance
schedule. However, driving the vehicle in
dusty areas may cause rapid clogging of the
element. Consequently, the element may
have to be replaced more frequently.
Positive crankcase ventilation (PCV) fil-
terUnder normal driving conditions, the
filter should be replaced in accordance with
the maintenance schedule. If the vehicle is
operated under extremely adverse weather
conditions or in areas where ambient tem-
peratures are either extremely low or ex-
tremely high, the filter may become clogged
more rapidly. In such an event, replace the
filter immediately.
EVAP Vapor linesCheck vapor lines and
connections for leaks, looseness, or dete-
rioration. If leaks are found, replace the
lines.
Fuel linesCheck the fuel hoses, piping andconnections for leaks, looseness or deterio-
ration. Replace any damaged parts.
Fuel filterIf the vehicle is operated under
extremely adverse weather conditions or in
areas where ambient temperatures are ei-
ther extremely low or extremely high, the
filter might become clogged. In such an
event, replace the filter immediately.
Engine coolant*Flush and refill the cooling
system.
Engine oil and oil filter*Under normal
driving conditions, the engine oil and oil filter
should be replaced in accordance with the
maintenance schedule. However, under se-
vere driving conditions, they may have to be
replaced more frequently.
Spark plugs*Replace with new plugs hav-
ing the correct heat range.
Chassis and body maintenance
Brake lines and cablesCheck the brake
lines and hoses (including brake booster
vacuum hoses, connections & check valve)
and parking brake cables for proper attach-
ment, leaks, cracks, chafing, abrasion, de-
terioration, etc.
9-10Maintenance
ZX
Page 249 of 263
4) Connect the tow harness connector
(SAE J1239) to your trailer.
5) Confirm proper vehicle and trailer
stop/turn lamp operation.
6) When towing is completed, disconnect
the tow harness from the trailer and the
vehicle. Store the tow harness in the
glove box. Reinstall the connector cap to
the vehicle harness.
If you need further assistance in wiring
a trailer to your NISSAN, contact an autho-
rized NISSAN dealer.
Always confirm proper vehicle and
trailer stop/turn lamp operation every
time the trailer light circuits are con-
nected for use.
Trailer brakes
If your trailer is equipped with a braking
system, make sure it conforms to Federal
and/or local regulations and that it is prop-
erly installed.
WARNING
Never connect a trailer brake system
directly to the vehicle brake system.
Pre-towing tips
OBe certain your vehicle maintains a level
position when a loaded and/or unloaded
trailer is hitched. Do not drive the vehicle
if it has an abnormal nose-up or nose-
down condition; check for improper
tongue load, overload, worn suspension
or other possible causes of either condi-
tion.
OAlways secure items in the trailer to
prevent load shift while driving.
OBe certain your outside mirrors conform
to all federal, state or local regulations. If
not, install any mirrors required for towing
before driving the vehicle.
Trailer towing tips
In order to gain skill and an understanding
of the vehicle's behavior, you should prac-
tice turning, stopping and backing up in an
area which is free from traffic. Steering,
stability and braking performance will be
somewhat different than under normal driv-
ing conditions.
OAlways secure items in the trailer to
prevent load shift while driving.
O
Avoid abrupt starts, acceleration or stops.
OAvoid sharp turns or lane changes.
OAlways drive your vehicle at a moderate
speed.
OAlways block the wheels on both vehicle
and trailer when parking. Parking on a
slope is not recommended; however, if
you must do so, and if your vehicle is
equipped with automatic transmission,
first block the wheels and apply the park-
ing brake, and then move the transmis-
sion shift selector lever into the P (Park)
position. If you move the shift lever to the
P (Park) position before blocking the
wheels and applying the parking brake,
transmission damage could occur.
OWhen going down a hill, shift into a lower
gear and use the engine braking effect.
When ascending a long grade, downshift
the transmission to a lower gear and
reduce speed to reduce chances of en-
gine overloading and/or overheating.
However, for long steep grades, do not
stay in 1st or 2nd gear when driving
above 35 MPH (56 km/h).
OIf the engine coolant rises to an ex-
tremely high temperature when the air
conditioning system is on, turn off the air
conditioner. Coolant heat can be addi-
10-24Technical and consumer information
ZX