2001 NISSAN XTERRA key
[x] Cancel search: keyPage 76 of 263

Power (if so equipped)
The power door lock system allows you to
lock or unlock all doors simultaneously.
Turning the key to the front of the vehicle
locks all doors.
Turning the key one time to the rear of the
vehicle unlocks that door. From that posi-
tion, returning the key to neutral (where the
key can only be removed and inserted) and
turning it to the rear again within 5 seconds
unlocks all doors. The selective unlock func-
tion and locking all doors can be operated
from the driver, or back door.
LOCKING WITH INSIDE LOCK
KNOB
To lock the door without the key, push the
inside lock knob to the lock position, then
close the door.
When locking the door this way, be certain
not to leave the key inside the vehicle.
LOCKING WITH POWER DOOR
LOCK SWITCH
To lock the doors without a key, push the
power door lock switch (driver or passenger
side), then close the door. When locking the
doors this way, be certain not to leave the
key inside the vehicle.
If the key is in the ignition, all doors will
unlock automatically.
APD1077AIC1012APD1014
Pre-driving checks and adjustments3-3
ZX
Page 77 of 263

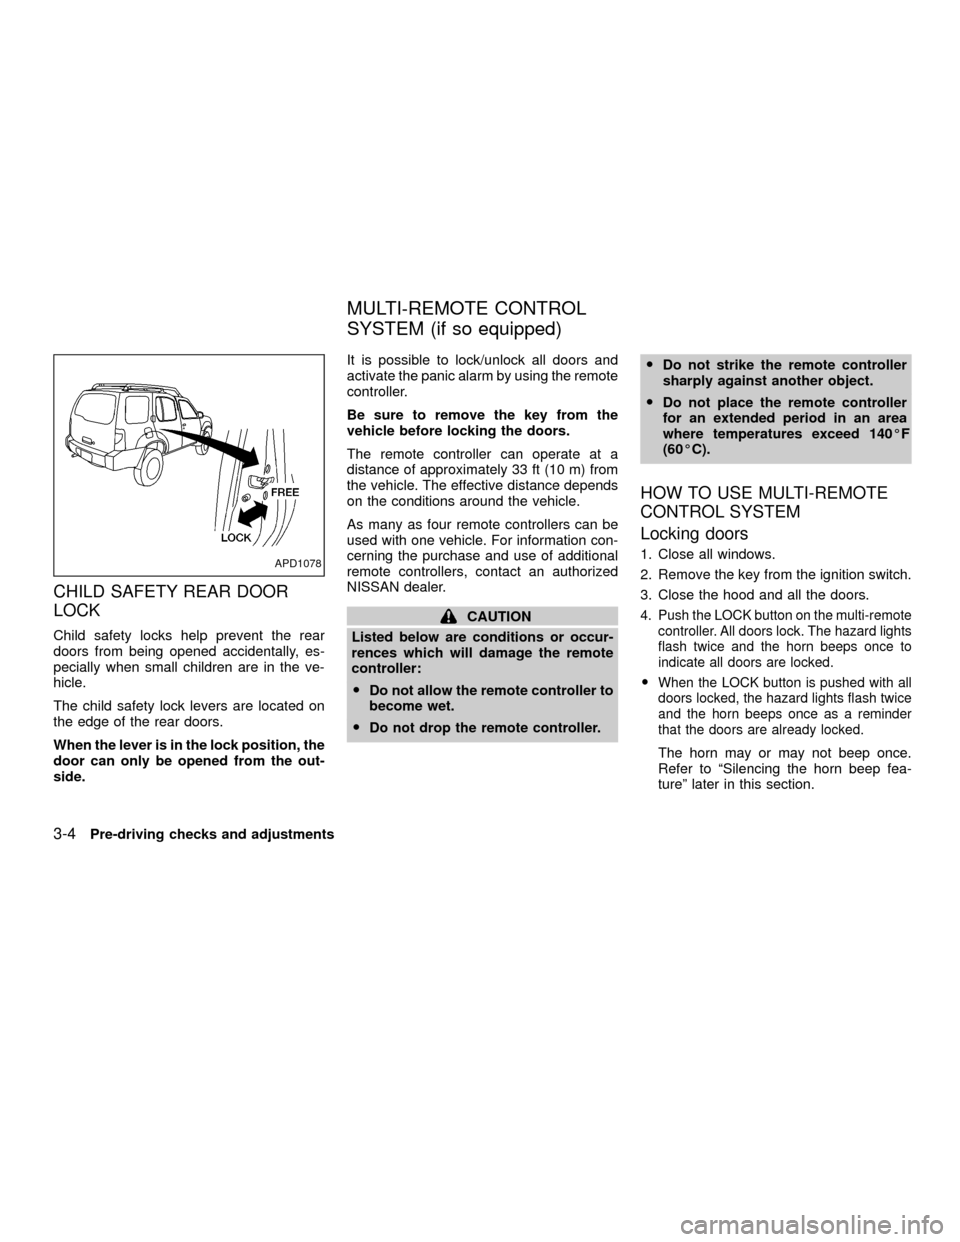
CHILD SAFETY REAR DOOR
LOCK
Child safety locks help prevent the rear
doors from being opened accidentally, es-
pecially when small children are in the ve-
hicle.
The child safety lock levers are located on
the edge of the rear doors.
When the lever is in the lock position, the
door can only be opened from the out-
side.It is possible to lock/unlock all doors and
activate the panic alarm by using the remote
controller.
Be sure to remove the key from the
vehicle before locking the doors.
The remote controller can operate at a
distance of approximately 33 ft (10 m) from
the vehicle. The effective distance depends
on the conditions around the vehicle.
As many as four remote controllers can be
used with one vehicle. For information con-
cerning the purchase and use of additional
remote controllers, contact an authorized
NISSAN dealer.
CAUTION
Listed below are conditions or occur-
rences which will damage the remote
controller:
ODo not allow the remote controller to
become wet.
ODo not drop the remote controller.ODo not strike the remote controller
sharply against another object.
ODo not place the remote controller
for an extended period in an area
where temperatures exceed 140ÉF
(60ÉC).
HOW TO USE MULTI-REMOTE
CONTROL SYSTEM
Locking doors
1. Close all windows.
2. Remove the key from the ignition switch.
3. Close the hood and all the doors.
4. Push the LOCK button on the multi-remote
controller. All doors lock. The hazard lights
flash twice and the horn beeps once to
indicate all doors are locked.
OWhen the LOCK button is pushed with all
doors locked, the hazard lights flash twice
and the horn beeps once as a reminder
that the doors are already locked.
The horn may or may not beep once.
Refer to ªSilencing the horn beep fea-
tureº later in this section.
APD1078
MULTI-REMOTE CONTROL
SYSTEM (if so equipped)
3-4Pre-driving checks and adjustments
ZX
Page 78 of 263

OIf a door is open and you push the LOCK
button, the doors will lock but the horn
will not beep and the hazard lights will not
flash.Unlocking doors
1. Push the UNLOCK button on the multi-
remote controller. Only the driver's side
door unlocks.2. Push the UNLOCK button on the multi-
remote controller again within five sec-
onds. All doors unlock.
3. The interior lights illuminate for 30 sec-
onds when the interior light switch is in
the O or DOOR position.
The interior lights can be turned off without
waiting 30 seconds by inserting the key into
the ignition and turning to the ON or START
position, locking the doors with the multi-
remote controller or pushing the
interior light switch to the OFF position.
Using the panic alarm
If you are near your vehicle and feel threat-
ened, you may activate the panic alarm to
call attention as follows:
1. Push the PANIC button on the remote
controller forlonger than 0.5 seconds.
2. The theft warning alarm and headlights
will stay on for 30 seconds.
3. The panic alarm stops when:
Oit has run for 30 seconds, or
Othe LOCK or UNLOCK button is pressed,
on the multi-remote controller.
WPD0048
Pre-driving checks and adjustments3-5
ZX
Page 82 of 263

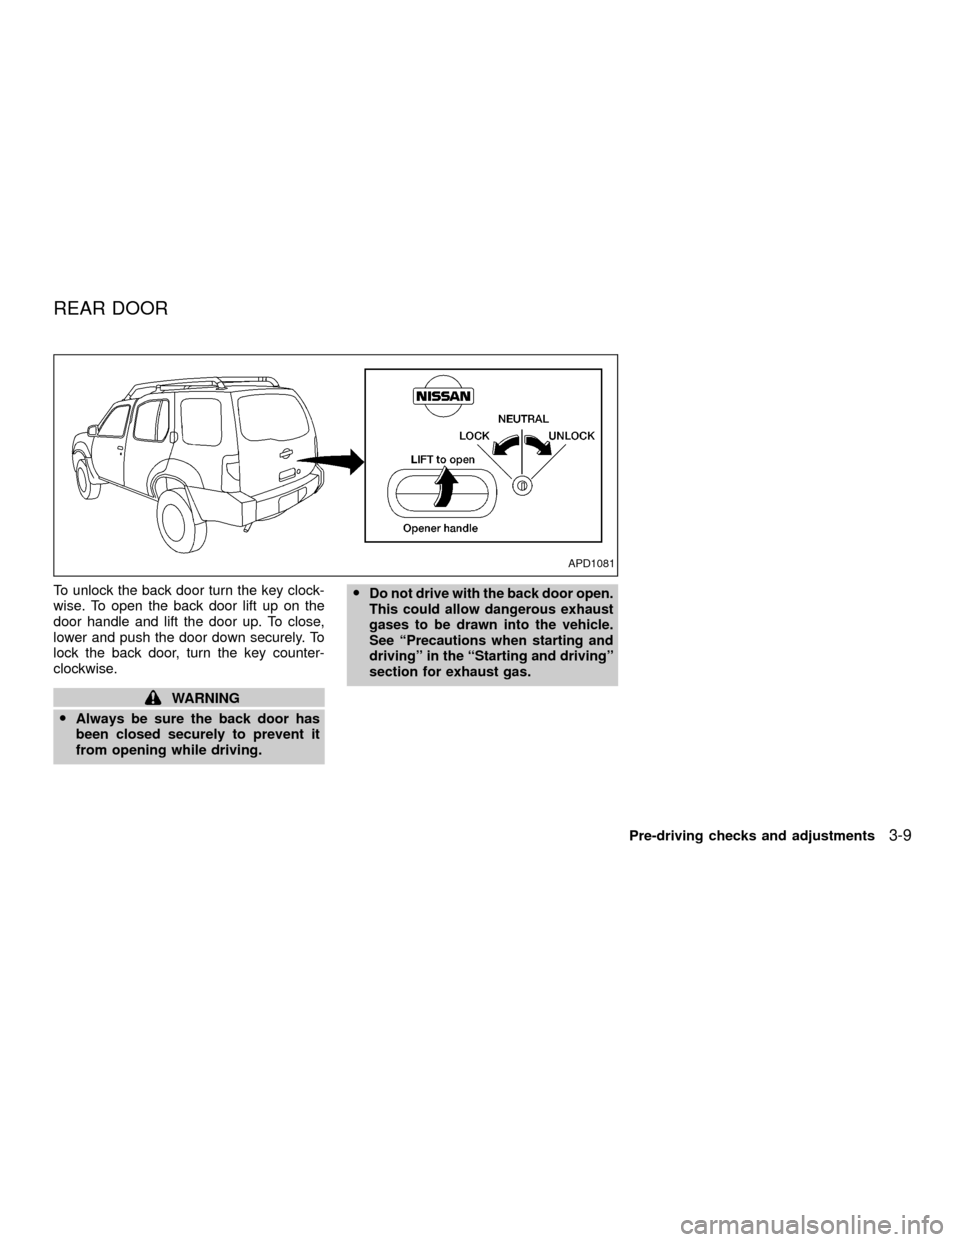
To unlock the back door turn the key clock-
wise. To open the back door lift up on the
door handle and lift the door up. To close,
lower and push the door down securely. To
lock the back door, turn the key counter-
clockwise.
WARNING
OAlways be sure the back door has
been closed securely to prevent it
from opening while driving.O
Do not drive with the back door open.
This could allow dangerous exhaust
gases to be drawn into the vehicle.
See ªPrecautions when starting and
drivingº in the ªStarting and drivingº
section for exhaust gas.
APD1081
REAR DOOR
Pre-driving checks and adjustments3-9
ZX
Page 99 of 263

FM-AM RADIO WITH COMPACT
DISC (CD) PLAYER (if so
equipped)
Audio main operation
To turn the radio on, turn the ignition key to
ACC or ON. If you listen to the radio with the
engine not running, turn the key to the ACC
position.
Radio reception is affected by station signal
strength, distance from radio transmitter,
buildings, bridges, mountains and other ex-
ternal influences. Intermittent changes in
reception quality normally are caused by
these external influences.
Using a cellular phone in or near the
vehicle may influence radio reception
quality.
Power/Volume control
Turn the ignition key to ACC or ON, then
push the power/volume control knob. The
mode (radio or CD) which was playing im-
mediately before the system was turned off
resumes playing. When no CD is loaded,
the radio comes on. Pushing the
power/volume control knob again turns the
system off.
WHA0054
AUDIO SYSTEM
4-10Heater, air conditioner and audio systems
ZX
Page 103 of 263

SCAN tuning
Push the SEEK/SCAN tuning button
or
for more than 1.5 seconds. SCAN ap-
pears in the display window. SCAN tuning
begins from high to low frequencies or low
to high frequencies, depending on which
button is pressed. SCAN tuning stops at
each broadcasting station for five seconds.
Pushing the button again during this five
second period stops SCAN tuning and the
radio remains tuned to that station.
Station memory operations
Six stations can be set for the AM band. 12
stations can be set for the FM band (six for
FM1, six for FM2).
1. Push band select button (FM/AM) to se-
lect AM, FM1, or FM2. The selected band
illuminates in the display.
2. Tune to the desired station.
3. Push the desired station select button for
more than 1.5 seconds. The radio mutes
when the select button is pushed.
4. When the indicator illuminates in the
display and the sound resumes, memo-
rizing is complete.5. Other station select buttons can be set in
the same manner.If the battery cable is disconnected, or if the
radio fuse opens, the radio memory is can-
celled. In that case, reset the desired stations.
COMPACT DISC (CD) player op-
eration
Turn the ignition key to the ACC or ON
position, and carefully insert the compact
disc into the slot with the label side up. The
compact disc is automatically pulled into the
slot and starts to play.
If the radio is already operating, it automati-
cally turns off and the compact disc begins
to play.
CAUTION
Do not force the compact disc into the
slot. This could damage the player.
CD button
When this button is pushed with the compact
disc loaded and the radio playing, the radio
turns off and the compact disc starts to play.
When power/volume control knob is pushedwhile the compact disc is playing, the com-
pact disc stops playing.
FF (Fast forward), REW
(Rewind)
When the
orbutton is pushed
while the compact disc is playing, the com-
pact disc plays at an increased speed while
fast forwarding or rewinding. When the but-
ton is released, the compact disc returns to
normal play speed.
APS (Automatic Program
Search) FF, APS REW
When thebutton is pushed while the
compact disc is playing, the selection fol-
lowing the present one starts to play from
the beginning. Push or hold the
but-
ton several times to skip several selections.
Each time the button is pushed, the CD
advances one selection. (When the last
selection on the compact disc is skipped,
the first selection is played.)
When thebutton is pushed, the selec-
tion being played returns to the beginning.
Push or hold the
button several
times to skip back several selections. Each
4-14Heater, air conditioner and audio systems
ZX
Page 106 of 263

FM-AM RADIO WITH CASSETTE
PLAYER AND COMPACT DISC
(CD) PLAYER (if so equipped)
Audio main operation
Radio reception is affected by station signal
strength, distance from radio transmitter,
buildings, bridges, mountains, and other
external influences. Intermittent changes in
reception quality normally are caused by
these external influences.
Using a cellular phone in or near the
vehicle may influence radio reception
quality.
ONzOFF/VOL control
Turn the ignition key to the ACC or ON
position, then push the ONzOFF/VOL con-
trol knob button. If you listen to the radio
with the engine not running, turn the key to
the ACC position. The mode (radio, tape or
CD) which was playing immediately before
the system was turned off resumes playing.
When no CD or tape is loaded, the radio
comes on. Push the ONzOFF/VOL control
knob button again turns the system off.
AHA1112
Heater, air conditioner and audio systems4-17
ZX
Page 109 of 263

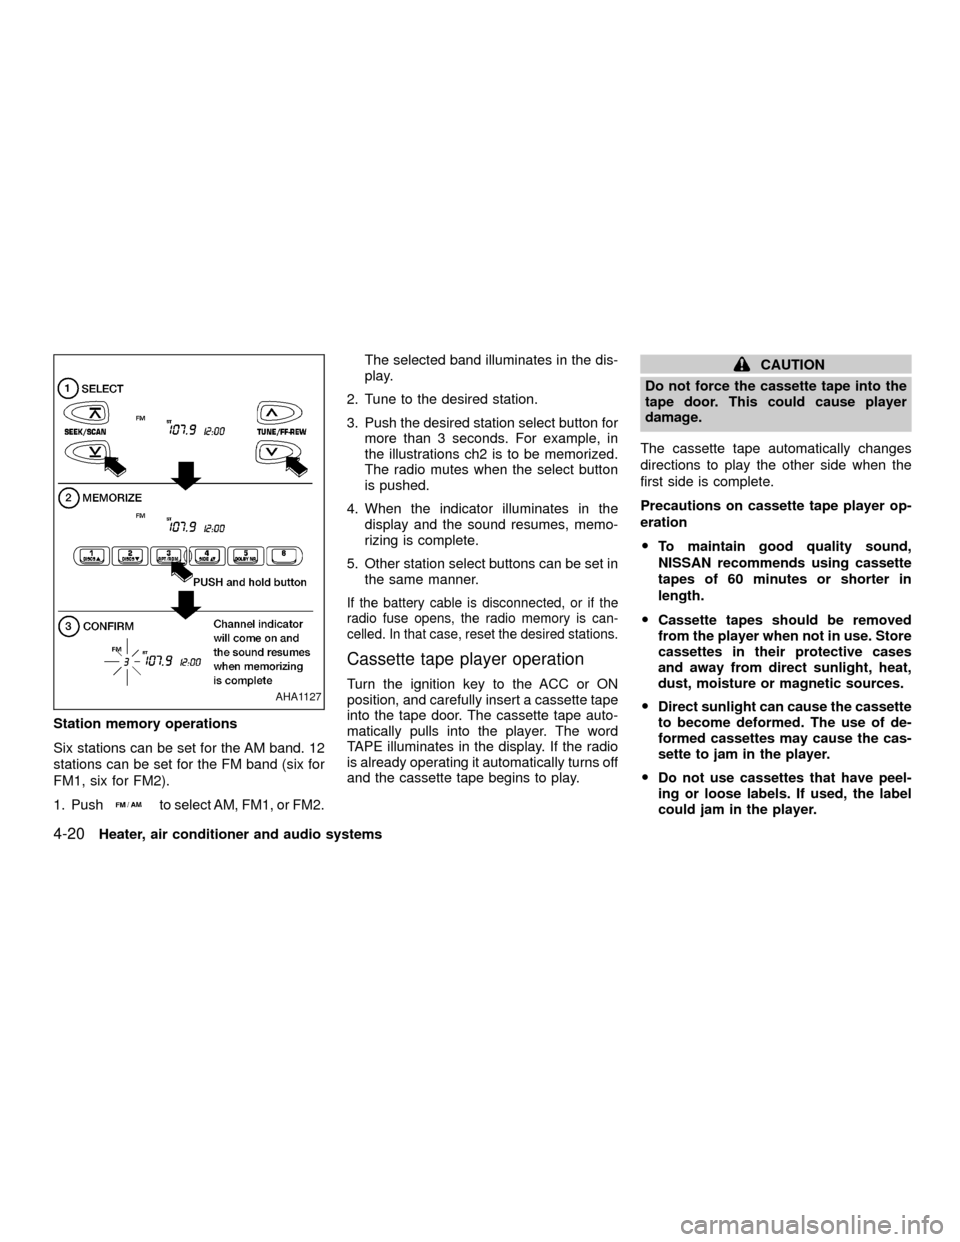
Station memory operations
Six stations can be set for the AM band. 12
stations can be set for the FM band (six for
FM1, six for FM2).
1. Push
to select AM, FM1, or FM2.The selected band illuminates in the dis-
play.
2. Tune to the desired station.
3. Push the desired station select button for
more than 3 seconds. For example, in
the illustrations ch2 is to be memorized.
The radio mutes when the select button
is pushed.
4. When the indicator illuminates in the
display and the sound resumes, memo-
rizing is complete.
5. Other station select buttons can be set in
the same manner.
If the battery cable is disconnected, or if the
radio fuse opens, the radio memory is can-
celled. In that case, reset the desired stations.
Cassette tape player operation
Turn the ignition key to the ACC or ON
position, and carefully insert a cassette tape
into the tape door. The cassette tape auto-
matically pulls into the player. The word
TAPE illuminates in the display. If the radio
is already operating it automatically turns off
and the cassette tape begins to play.
CAUTION
Do not force the cassette tape into the
tape door. This could cause player
damage.
The cassette tape automatically changes
directions to play the other side when the
first side is complete.
Precautions on cassette tape player op-
eration
OTo maintain good quality sound,
NISSAN recommends using cassette
tapes of 60 minutes or shorter in
length.
OCassette tapes should be removed
from the player when not in use. Store
cassettes in their protective cases
and away from direct sunlight, heat,
dust, moisture or magnetic sources.
ODirect sunlight can cause the cassette
to become deformed. The use of de-
formed cassettes may cause the cas-
sette to jam in the player.
ODo not use cassettes that have peel-
ing or loose labels. If used, the label
could jam in the player.
AHA1127
4-20Heater, air conditioner and audio systems
ZX