2001 NISSAN XTERRA coolant temperature
[x] Cancel search: coolant temperaturePage 44 of 263

2 Instruments and controls
Meters and gauges ................................................2-2
Speedometer and odometer .............................2-3
Tachometer ........................................................2-5
Engine coolant temperature gauge ...................2-5
Fuel gauge ........................................................2-6
Warning/indicator lights and chimes ......................2-7
Checking bulbs ..................................................2-7
Warning lights ....................................................2-8
Indicator lights .................................................2-10
Chimes............................................................. 2-11
Security system ....................................................2-12
Vehicle security system (if so equipped).........2-12
Windshield wiper and washer switch ...................2-15
Switch operation ..............................................2-15
Rear window wiper and washer switch
(if so equipped) ....................................................2-16
Rear window defogger switch ..............................2-17
Headlight and turn signal switch ..........................2-17
Headlight switch ..............................................2-17
Turn signal switch............................................2-18
Front fog light switch (if so equipped)..................2-19Hazard warning flasher switch .............................2-19
Horn ......................................................................2-20
Cigarette lighter (accessory) and ash tray ...........2-20
Power point (if so equipped) ...........................2-21
Storage .................................................................2-22
Map pocket ......................................................2-22
Cup holders .....................................................2-22
Glove box ........................................................2-23
Luggage hooks ................................................2-24
Tonneau cover .................................................2-25
Windows .............................................................2-25
Power windows (if so equipped) .....................2-25
Manual windows ..............................................2-27
Skyroof (if so equipped) .......................................2-27
Tilting the skyroof ............................................2-27
Removing/installing..........................................2-28
Interior light...........................................................2-29
Map lights (if so equippped).................................2-30
Illuminated entry system ......................................2-30
Battery saver ...................................................2-30
ZX
Page 48 of 263

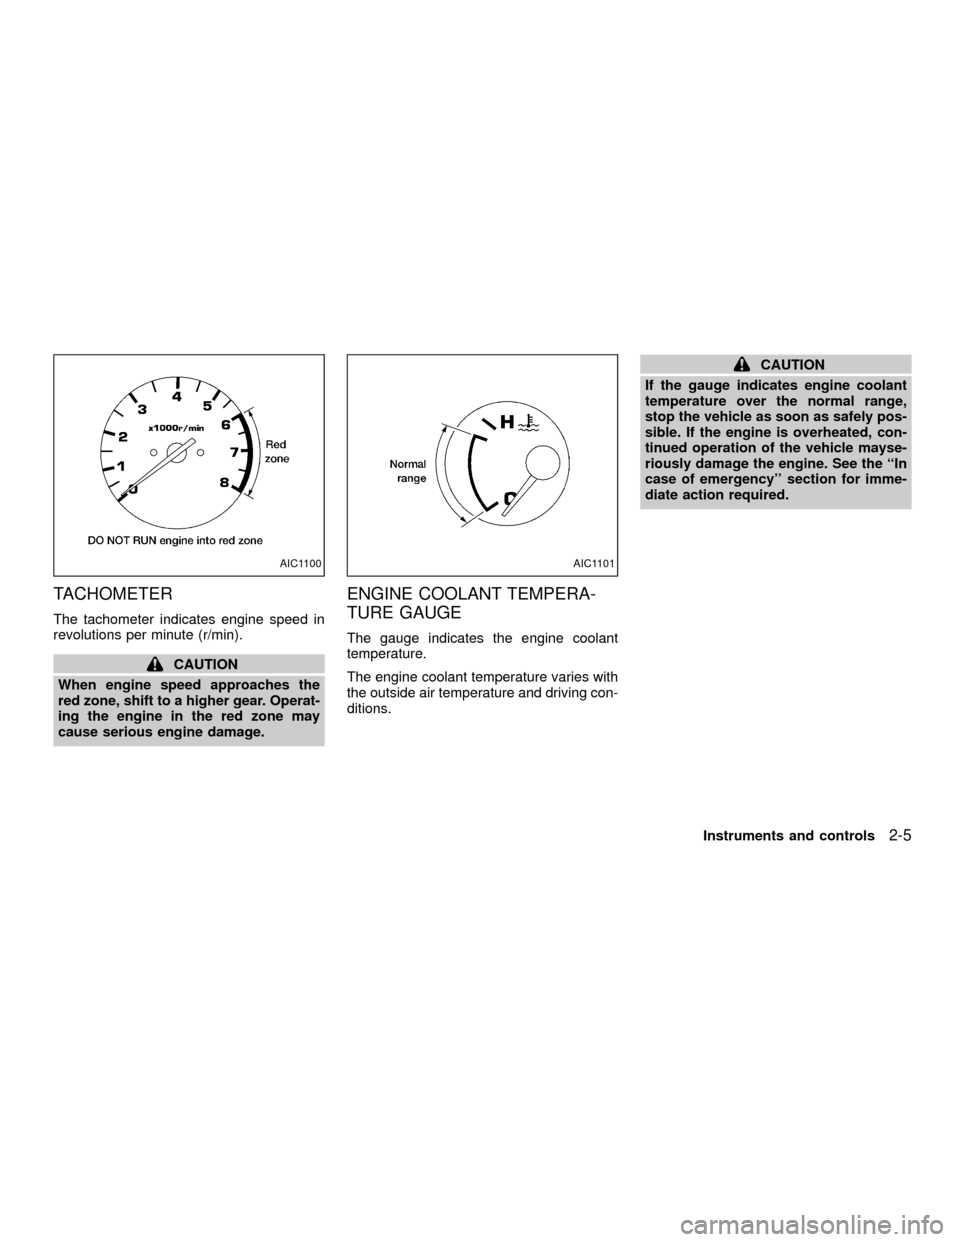
TACHOMETER
The tachometer indicates engine speed in
revolutions per minute (r/min).
CAUTION
When engine speed approaches the
red zone, shift to a higher gear. Operat-
ing the engine in the red zone may
cause serious engine damage.
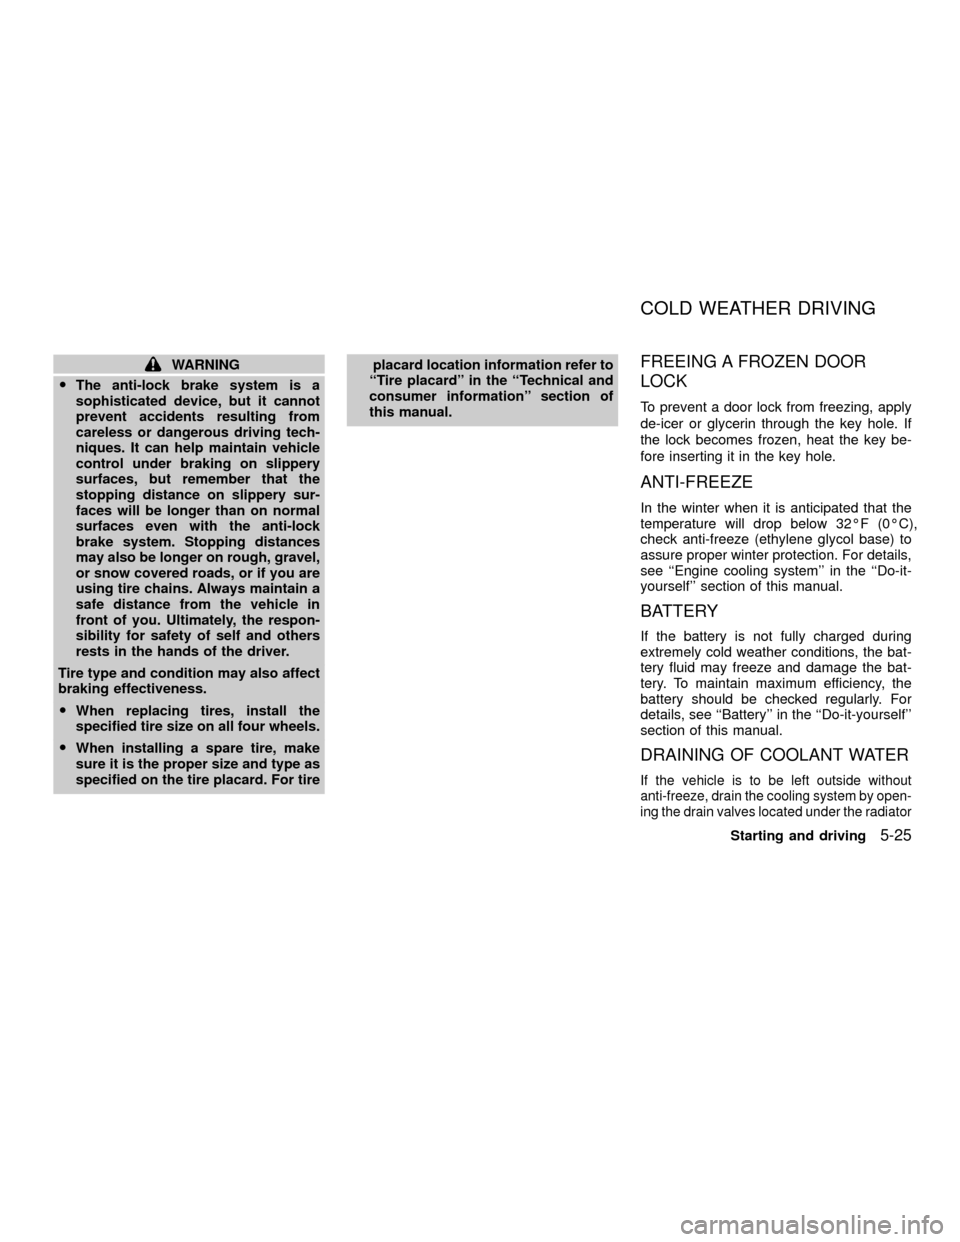
ENGINE COOLANT TEMPERA-
TURE GAUGE
The gauge indicates the engine coolant
temperature.
The engine coolant temperature varies with
the outside air temperature and driving con-
ditions.
CAUTION
If the gauge indicates engine coolant
temperature over the normal range,
stop the vehicle as soon as safely pos-
sible. If the engine is overheated, con-
tinued operation of the vehicle mayse-
riously damage the engine. See the ``In
case of emergency'' section for imme-
diate action required.
AIC1100AIC1101
Instruments and controls2-5
ZX
Page 95 of 263

2. Turn the air control dial to theposi-
tion.
3. Turn the fan control dial to the desired
position.
4. Push on the air conditioner button. The
indicator light comes on.
5. Turn the temperature control dial to the
desired position.
Dehumidified defogging
This mode directs warmed and dryed air to
the defrost outlets to defrost/defog the win-
dows.
1. Turn the air control dial to the
posi-
tion.
2. Turn the fan control dial to the desired
position.
3. Push on the air conditioner button. The
indicator light comes on.
4. Turn the temperature control dial to the
desired position.
When the
,or positions in between
are selected, the air conditioner automati-
cally turns on (however the indicator light
will not illuminate) if the outside temperatureis more than 45ÉF(7ÉC). This dehumidifies
the air which helps defog the windshield.
The
mode automatically turns off, al-
lowing outside air to be drawn into the
passenger compartment to further improve
the defogging performance.
Operating tips
OKeep windows and sunroof closed while
the air conditioner is in operation.
OAfter parking in the sun, drive for two or
three minutes with the windows open to
vent hot air from the passenger compart-
ment. Then, close the windows. This
allows the air conditioner to cool the
interior more quickly.
OThe air conditioning system should be
operated for approximately ten min-
utes at least once a month. This helps
prevent damage to the system due to
lack of lubrication.
OIf the engine coolant temperature
gauge indicates engine coolant tem-
perature over the normal range, turn
the air conditioner off. See ``If your
vehicle overheats'' in the ``In case of
emergency'' section of this manual.
AIR FLOW CHARTS
The following charts show the button and
dial positions forMAXIMUM AND QUICK
heating, cooling or defrosting.The air recir-
culation switch should always be in the
OFF position for heating and defrosting.
4-6Heater, air conditioner and audio systems
ZX
Page 152 of 263

WARNING
OThe anti-lock brake system is a
sophisticated device, but it cannot
prevent accidents resulting from
careless or dangerous driving tech-
niques. It can help maintain vehicle
control under braking on slippery
surfaces, but remember that the
stopping distance on slippery sur-
faces will be longer than on normal
surfaces even with the anti-lock
brake system. Stopping distances
may also be longer on rough, gravel,
or snow covered roads, or if you are
using tire chains. Always maintain a
safe distance from the vehicle in
front of you. Ultimately, the respon-
sibility for safety of self and others
rests in the hands of the driver.
Tire type and condition may also affect
braking effectiveness.
OWhen replacing tires, install the
specified tire size on all four wheels.
OWhen installing a spare tire, make
sure it is the proper size and type as
specified on the tire placard. For tireplacard location information refer to
``Tire placard'' in the ``Technical and
consumer information'' section of
this manual.FREEING A FROZEN DOOR
LOCK
To prevent a door lock from freezing, apply
de-icer or glycerin through the key hole. If
the lock becomes frozen, heat the key be-
fore inserting it in the key hole.
ANTI-FREEZE
In the winter when it is anticipated that the
temperature will drop below 32ÉF (0ÉC),
check anti-freeze (ethylene glycol base) to
assure proper winter protection. For details,
see ``Engine cooling system'' in the ``Do-it-
yourself'' section of this manual.
BATTERY
If the battery is not fully charged during
extremely cold weather conditions, the bat-
tery fluid may freeze and damage the bat-
tery. To maintain maximum efficiency, the
battery should be checked regularly. For
details, see ``Battery'' in the ``Do-it-yourself''
section of this manual.
DRAINING OF COOLANT WATER
If the vehicle is to be left outside without
anti-freeze, drain the cooling system by open-
ing the drain valves located under the radiator
COLD WEATHER DRIVING
Starting and driving5-25
ZX
Page 165 of 263

CAUTION
OAutomatic transmission models can-
not be push or tow started. This may
cause transmission or other vehicle
damage.
ONever try to start the vehicle by tow-
ing it. When the engine starts, the
forward surge could cause the ve-
hicle to collide with the tow vehicle.If your vehicle is overheating (indicated by
an extremely high temperature gauge read-
ing), or if you feel a lack of engine power, or
detect abnormal noise, etc., take the follow-
ing steps:
WARNING
ODo not continue to drive if your ve-
hicle overheats. Doing so could
cause a vehicle fire.
OTo avoid the danger of being
scalded, never remove the radiator
cap while the engine is still hot.
When the radiator cap is removed,
pressurized hot water will spurt out,
possibly causing serious injury.
ODo not open the hood if steam is
coming out.
1. Move the vehicle safely off the road,
apply the parking brake and move the
gearshift lever to N (Neutral), or the au-
tomatic transmission into P (Park).
Do not stop the engine.
2. Turn off the air conditioner (if so
equipped). Open all of the windows,
move the heater or air conditioner tem-perature control to maximum hot and fan
control to high speed.
3. If engine overheating is caused by climb-
ing a long hill on a hot day, run the engine
at a fast idle (approximately 1,500 r/min)
until the temperature gauge indicator re-
turns to normal.
4. Get out of the vehicle. Look and listen for
steam or coolant escaping from the ra-
diator before opening the hood. Wait until
no steam or coolant can be seen before
proceeding.
5. Open the hood.
WARNING
If steam or water is coming from the
engine, stand clear to prevent getting
burned.
6. Visually check drive belts for damage or
looseness. Also check if the cooling fan is
running. The radiator hoses and radiator
should not leak water. If coolant is leak-
ing, or the water pump belt is missing or
loose, or the cooling fan does not run,
stop the engine.
PUSH STARTING IF YOUR VEHICLE
OVERHEATS
6-10In case of emergency
ZX
Page 166 of 263

WARNING
Be careful not to allow your hands, hair,
jewelry or clothing to come into contact
with, or get caught in, engine belts or
the engine cooling fan. The engine
cooling fan can start at any time when
the coolant temperature is high.
7. After the engine cools down, check the
coolant level in the reservoir tank with the
engine running. Add coolant to the reser-
voir tank if necessary. Have your vehicle
repaired at an authorized NISSAN
dealer.When towing your vehicle, all State (Provinial
in Canada) and local regulations for towing
must be followed. Incorrect towing equipment
could damage your vehicle. Towing instruc-
tions are available from an authorized NIS-
SAN dealer. Local service operators are gen-
erally familiar with the applicable laws and
procedures for towing. To assure proper tow-
ing and to prevent accidental damage to your
vehicle, NISSAN recommends having a ser-
vice operator tow your vehicle. It is advisable
to have the service operator carefully read
the following precautions:
WARNING
ONever ride in a vehicle that is being
towed.
ONever get under your vehicle after it
has been lifted by a tow truck.
CAUTION
OWhen towing, make sure that the
transmission, axles, steering system
and powertrain are in working con-
dition. If any unit is damaged, dollies
must be used.
OAlways attach safety chains before
towing.
TOWING YOUR VEHICLE
In case of emergency6-11
ZX
Page 176 of 263

8 Do-it-yourself
Maintenance precautions .......................................8-2
Engine compartment check locations ....................8-3
Engine cooling system ...........................................8-5
Checking engine coolant level ..........................8-5
Changing engine coolant ..................................8-6
Engine oil ...............................................................8-9
Checking engine oil level ..................................8-9
Changing engine oil ........................................8-10
Changing engine oil filter.................................8-12
Automatic transmission fluid ................................8-13
Temperature conditions for checking ..............8-13
Power steering fluid..............................................8-14
Brake and clutch fluid...........................................8-15
Window washer fluid ............................................8-16
Window washer fluid reservoir ........................8-16
Battery ..................................................................8-16
Jump starting ...................................................8-17
Drive belts ............................................................8-18
Spark plugs ..........................................................8-19
Replacing spark plugs .....................................8-19
Air cleaner ............................................................8-20Windshield wiper blades ......................................8-22
Cleaning ..........................................................8-22
Replacing .........................................................8-22
Parking brake and brake pedal ............................8-24
Checking parking brake...................................8-24
Checking brake pedal .....................................8-24
Brake booster ..................................................8-25
Clutch pedal .........................................................8-26
Checking clutch pedal .....................................8-26
Fuses ....................................................................8-27
Passenger compartment .................................8-27
Multi-remote controller battery replacement ........8-28
Lights ....................................................................8-29
Headlights ........................................................8-29
Fog lights (if so equipped)...............................8-31
Exterior and interior lights ...............................8-32
Wheels and tires ..................................................8-34
Tire pressure ...................................................8-34
Types of tires ...................................................8-34
Tire chains .......................................................8-35
Changing wheels and tires ..............................8-36
ZX
Page 183 of 263

4. Open the air release plug.5. Flush the cooling system by running
fresh water through the radiator.
6. Install the radiator drain plug and cylinder
block drain plug(s).
7. See ``Capacities and recommended
fuel/lubricants'' in the ``Technical and
consumer information'' section for cool-
ing system capacity. Fill the radiator
slowly with the proper mixture of coolant
and water. Fill the reservoir tank slowly
up to the MAX level.
8. Open and close the air release plug to
release air. Then fill the radiator again
and install the radiator cap.
9. Start the engine and warm it up until it
reaches normal operating temperature.
Then race the engine two or three times
under no load. Watch the engine coolant
temperature gauge for signs of overheat-
ing.
10.Stop the engine. After it completely cools
down, refill the radiator up to the filler
opening. Fill the reservoir tank up to the
MAX level.
11.Open and close the air release plug to
release air. Then fill the radiator again
ADI1057ADI1058
8-8Do-it-yourself
ZX