2001 NISSAN FRONTIER window
[x] Cancel search: windowPage 48 of 290
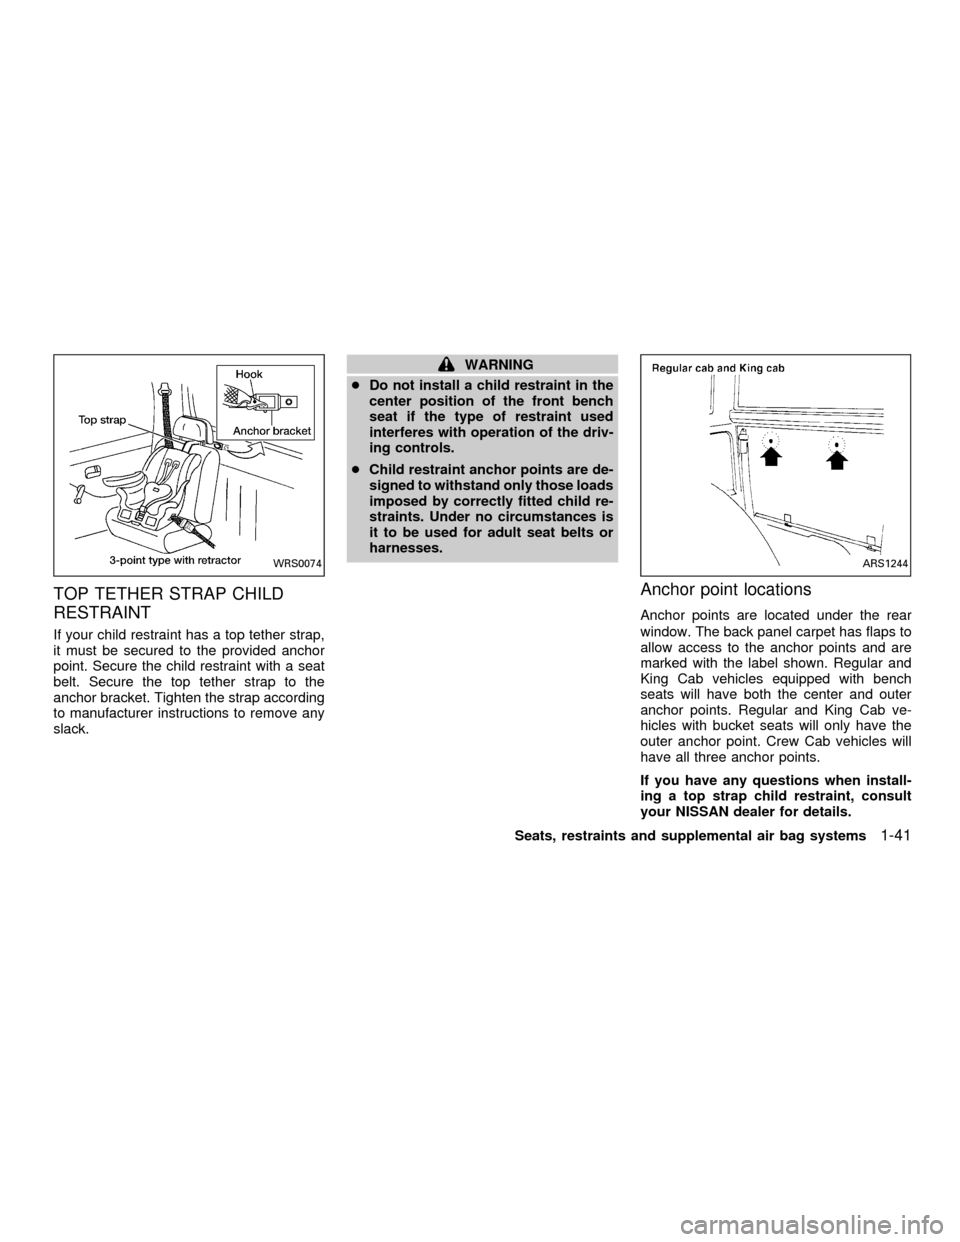
TOP TETHER STRAP CHILD
RESTRAINT
If your child restraint has a top tether strap,
it must be secured to the provided anchor
point. Secure the child restraint with a seat
belt. Secure the top tether strap to the
anchor bracket. Tighten the strap according
to manufacturer instructions to remove any
slack.
WARNING
cDo not install a child restraint in the
center position of the front bench
seat if the type of restraint used
interferes with operation of the driv-
ing controls.
cChild restraint anchor points are de-
signed to withstand only those loads
imposed by correctly fitted child re-
straints. Under no circumstances is
it to be used for adult seat belts or
harnesses.
Anchor point locations
Anchor points are located under the rear
window. The back panel carpet has flaps to
allow access to the anchor points and are
marked with the label shown. Regular and
King Cab vehicles equipped with bench
seats will have both the center and outer
anchor points. Regular and King Cab ve-
hicles with bucket seats will only have the
outer anchor point. Crew Cab vehicles will
have all three anchor points.
If you have any questions when install-
ing a top strap child restraint, consult
your NISSAN dealer for details.
WRS0074ARS1244
Seats, restraints and supplemental air bag systems1-41
ZX
Page 56 of 290

2 Instruments and controls
Meters and gauges ................................................2-2
Speedometer and odometer .............................2-3............................................2-3
Tachometer........................................................2-5
Engine coolant temperature gauge ...................2-5
Fuel gauge ........................................................2-6
Warning/indicator lights and chimes ......................2-7
Checking bulbs ..................................................2-7
Warning lights ....................................................2-8
Indicator lights .................................................2-10
Chimes.............................................................2-12
Security system ..................................................2-12
Vehicle security system (if so equipped) ........2-12
Windshield wiper and washer switch ...................2-15
Switch operation ..............................................2-16
Rear window defogger switch (Crew Cab
models only) .........................................................2-16
Headlight and turn signal switch ..........................2-17
Headlight switch ..............................................2-17
Turn signal switch............................................2-18
Front fog light switch (if so equipped)..................2-18
Hazard warning flasher switch .............................2-19Horn ......................................................................2-19
Power point (if so equipped) ................................2-20
Cigarette lighter (accessory) and ash tray ...........2-20
Storage .................................................................2-21
Storage compartment (Crew Cab
models only) ....................................................2-21
Cup holders (if so equipped) ...........................2-21
Glove box ........................................................2-22
Grocery hooks (King Cab only) .......................2-23
Windows ...............................................................2-23
Power windows (if so equipped) .....................2-23
Manual windows ..............................................2-25
Rear sliding window (if so equipped) ..............2-25
Sunroof (if so equipped).......................................2-25
Tilting the sunroof ............................................2-25
Removing/installing..........................................2-26
Interior lights .........................................................2-28
Map lights (if so equipped)...................................2-29
Illuminated entry system ......................................2-29
Battery saver ...................................................2-29
ZX
Page 65 of 290
2. If the brake fluid level is correct, have the
warning system checked by an autho-
rized NISSAN dealer.
WARNING
c
Your brake system may not be work-
ing properly if the warning light is on.
Driving could be dangerous. If you
judge it to be safe, drive carefully to
the nearest service station for repairs.
Otherwise have your vehicle towed
because driving it could be danger-
ous.
cPressing the brake pedal with the
engine stopped and/or low brake
fluid level may increase your stop-
ping distance and require greater
pedal effort as well as pedal travel.
cIf the brake fluid level is below the
MINIMUM or MIN mark on the brake
fluid reservoir, do not drive until the
brake system has been checked at
an authorized NISSAN dealer.
Charge warning light
If this light comes on while the engine is
running, it may indicate the charging systemis not functioning properly. Turn the engine
off and check the generator belt. If the belt is
loose, broken, missing or if the light remains
on, see an authorized NISSAN dealer im-
mediately.
CAUTION
Do not continue driving if the belt is
loose, broken or missing.
Door open warning light (if
so equipped)
This light comes on when any of the doors
are not closed securely while the ignition
key is in the ON position.
Engine oil pressure warning
light
This light warns of low engine oil pressure. If
the light flickers or comes on during normal
driving, pull off the road in a safe area, stop
the engineimmediatelyand call an autho-
rized NISSAN dealer.
The oil pressure warning light is not
designed to indicate a low oil level. Use
the dipstick to check the oil level.See``Engine oil'' in the ``Do-it-yourself'' section
of this manual.
CAUTION
Running the engine with the oil pres-
sure warning light on could cause seri-
ous damage to the engine almost im-
mediately. Turn off the engine as soon
as it is safe to do so.
Low fuel warning light
This light comes on when the fuel in the tank
is low. Refuel as soon as it is convenient,
preferably before the fuel gauge reaches E
(Empty).
There will be a small reserve of fuel
remaining in the tank when the fuel
gauge needle reaches E (Empty).
Low washer fluid warning
light (Canada only)
This light comes on when the washer tank
fluid is at a low level. Add washer fluid as
necessary. See ``Window washer fluid'' in
the ``Do-it-yourself'' section of this manual.
Instruments and controls
2-9
ZX
Page 69 of 290

Security indicator light
The security indicator light shows the status
of the vehicle security system.
The light operates whenever the ignition
switch is in the LOCK, OFF, or ACC posi-
tion.
The vehicle security system has four
phases. For each phase the operation of the
security indicator light is different.
How to activate the vehicle security
system
1. Close all windows.(The system can be
activated even if the windows are
open.)
2. Remove the key from the ignition switch.
3. Close the hood and all doors. The doors
can be locked using the key, power door
lock switch or multi-remote controller.
Multi-remote controller operation:
cPush the LOCK button on the multi-
remote controller. All doors lock. The
hazard lights flash twice and the horn
beeps once to indicate all doors are
locked.
cWhen the LOCK button is pushed with
all doors locked, the hazard lights flash
twice and the horn beeps once as a
reminder that the doors are already
locked. The horn may or may not beep
once. Refer to ``silencing the horn
beep feature'' later in this section.
4.
Confirm that the SECURITY indicator
light comes on. The SECURITY light
glows for about 30 seconds and then
LIC0071
LIC0053
Instruments and controls2-13
ZX
Page 72 of 290
SWITCH OPERATION
The ignition switch must be in the ON
position for the wipers or washer to be
activated. Push the lever down to operate
the wipers, and pull the lever toward you to
operate the washer. Operating the washer
automatically cycles the wipers several
times.
Intermittent wiper operation can be adjusted
from 1 to 19 seconds by turning the time
control knob (Type C only).
CAUTION
cDo not operate the washer continu-
ously for more than 30 seconds.
cDo not operate the washer if the
reservoir tank is empty.
cDo not fill the window washer reser-
voir tank with washer fluid concen-
trates at full strength. Some methyl
alcohol based washer fluid concen-
trates may permanently stain the
grille if spilled while filling the win-
dow washer reservoir tank.Pre-mix washer fluid concentrates
with water to the manufacturer's rec-
ommended levels before pouring the
fluid into the window washer reser-
voir tank. Do not use the window
washer reservoir tank to mix the
washer fluid concentrate and water.
WARNING
In freezing temperatures the washer
solution may freeze on the windshield
and obscure your vision which may
lead to an accident. Warm the wind-
shield with the defroster before you
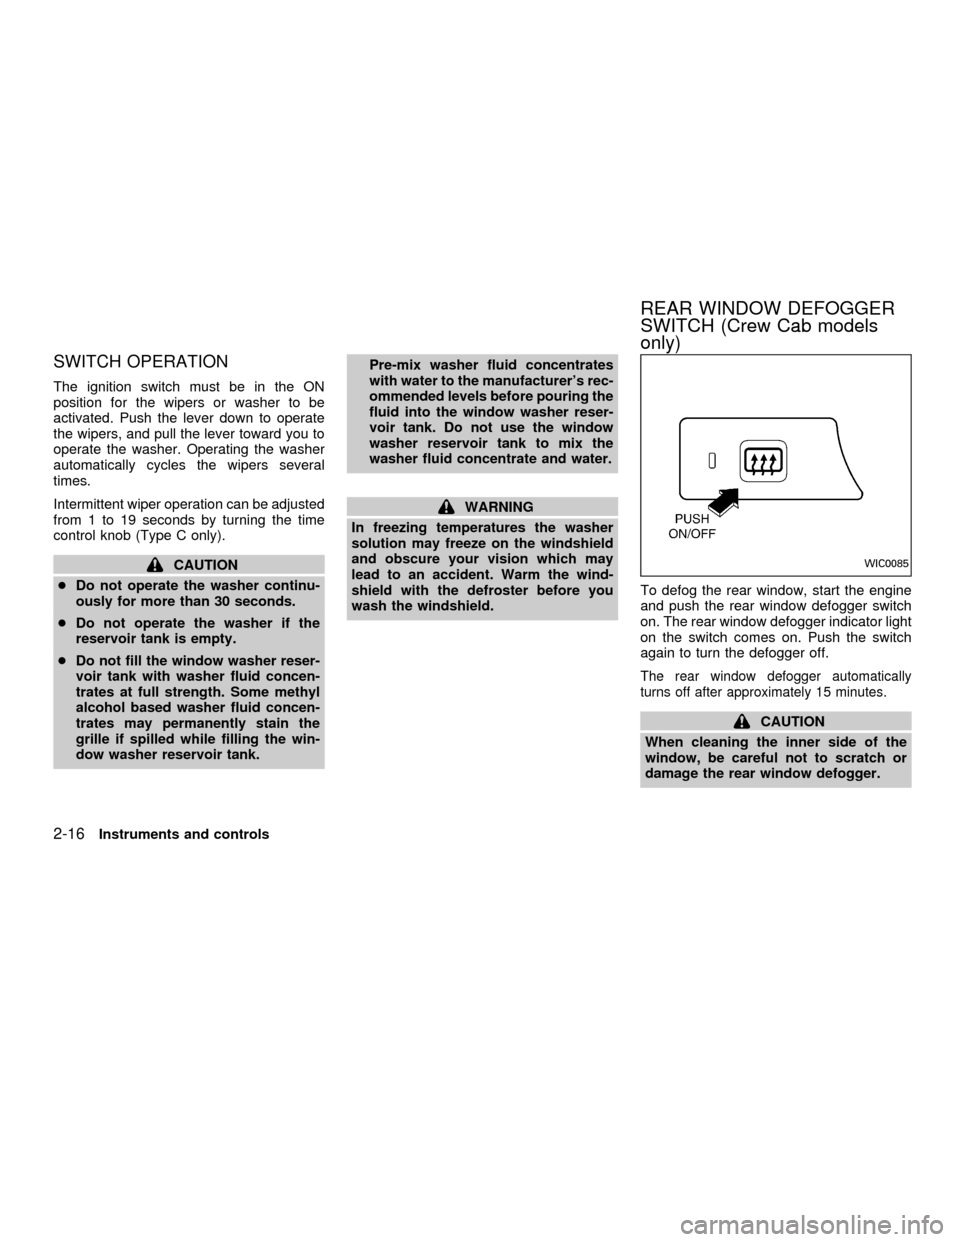
wash the windshield.To defog the rear window, start the engine
and push the rear window defogger switch
on. The rear window defogger indicator light
on the switch comes on. Push the switch
again to turn the defogger off.
The rear window defogger automatically
turns off after approximately 15 minutes.
CAUTION
When cleaning the inner side of the
window, be careful not to scratch or
damage the rear window defogger.
WIC0085
REAR WINDOW DEFOGGER
SWITCH (Crew Cab models
only)
2-16Instruments and controls
ZX
Page 76 of 290
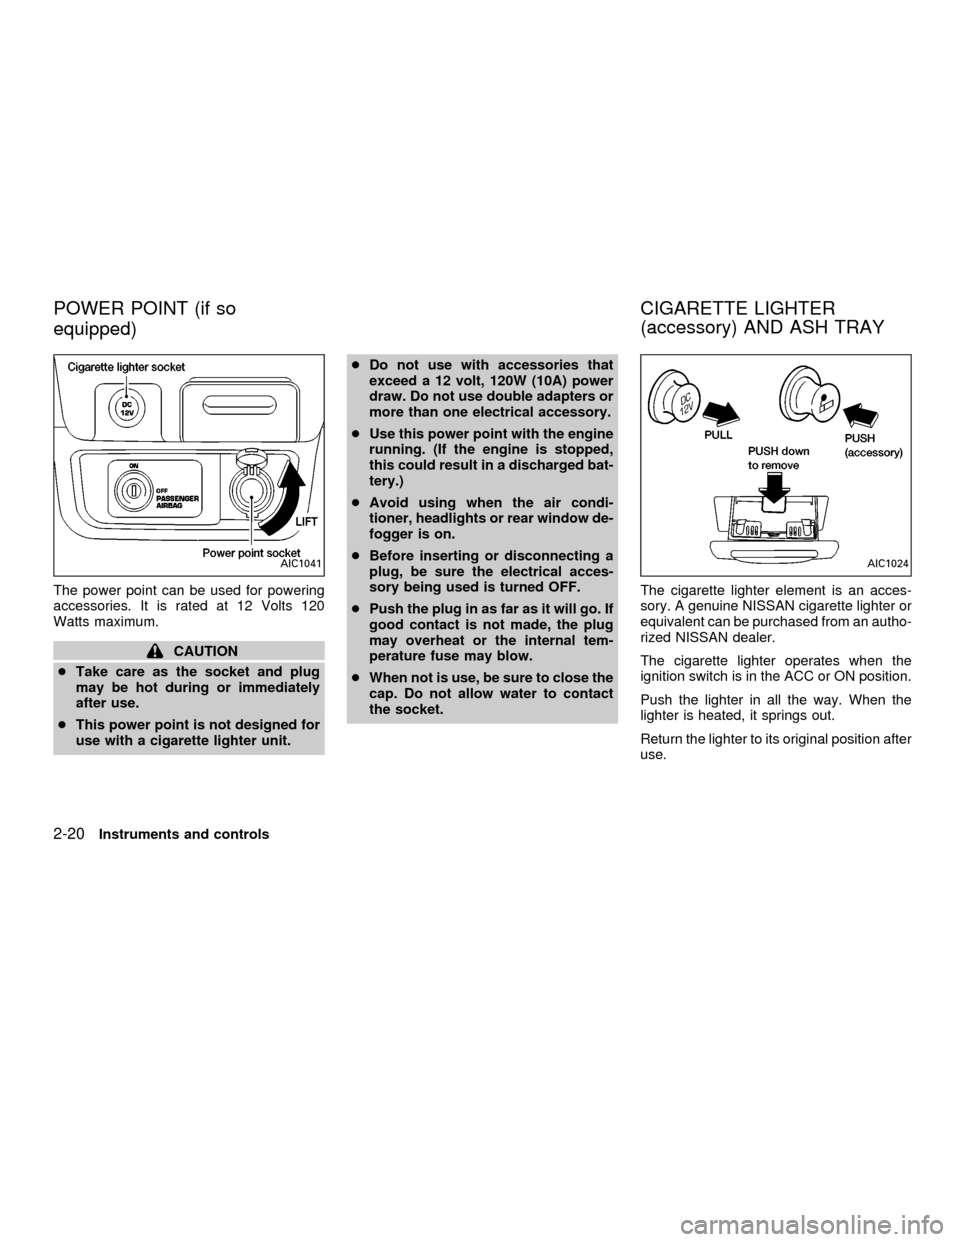
The power point can be used for powering
accessories. It is rated at 12 Volts 120
Watts maximum.
CAUTION
cTake care as the socket and plug
may be hot during or immediately
after use.
cThis power point is not designed for
use with a cigarette lighter unit.cDo not use with accessories that
exceed a 12 volt, 120W (10A) power
draw. Do not use double adapters or
more than one electrical accessory.
cUse this power point with the engine
running. (If the engine is stopped,
this could result in a discharged bat-
tery.)
cAvoid using when the air condi-
tioner, headlights or rear window de-
fogger is on.
cBefore inserting or disconnecting a
plug, be sure the electrical acces-
sory being used is turned OFF.
cPush the plug in as far as it will go. If
good contact is not made, the plug
may overheat or the internal tem-
perature fuse may blow.
cWhen not is use, be sure to close the
cap. Do not allow water to contact
the socket.The cigarette lighter element is an acces-
sory. A genuine NISSAN cigarette lighter or
equivalent can be purchased from an autho-
rized NISSAN dealer.
The cigarette lighter operates when the
ignition switch is in the ACC or ON position.
Push the lighter in all the way. When the
lighter is heated, it springs out.
Return the lighter to its original position after
use.
AIC1041AIC1024
POWER POINT (if so
equipped)CIGARETTE LIGHTER
(accessory) AND ASH TRAY
2-20Instruments and controls
ZX
Page 79 of 290
GROCERY HOOKS (King Cab
only)
The grocery hooks allow for 2 standard size
plastic grocery bags to hang side-by-side.
Do not apply a total load of more than 55 lbs
(25 kg) to a single grocery hook.
WARNING
cProperly secure all cargo to help
prevent it from sliding or shifting. Do
not place cargo higher than the seat-
backs. In a sudden stop or collision,
unsecured cargo could cause per-
sonal injury.
cUse suitable ropes and hooks to se-
cure cargo.
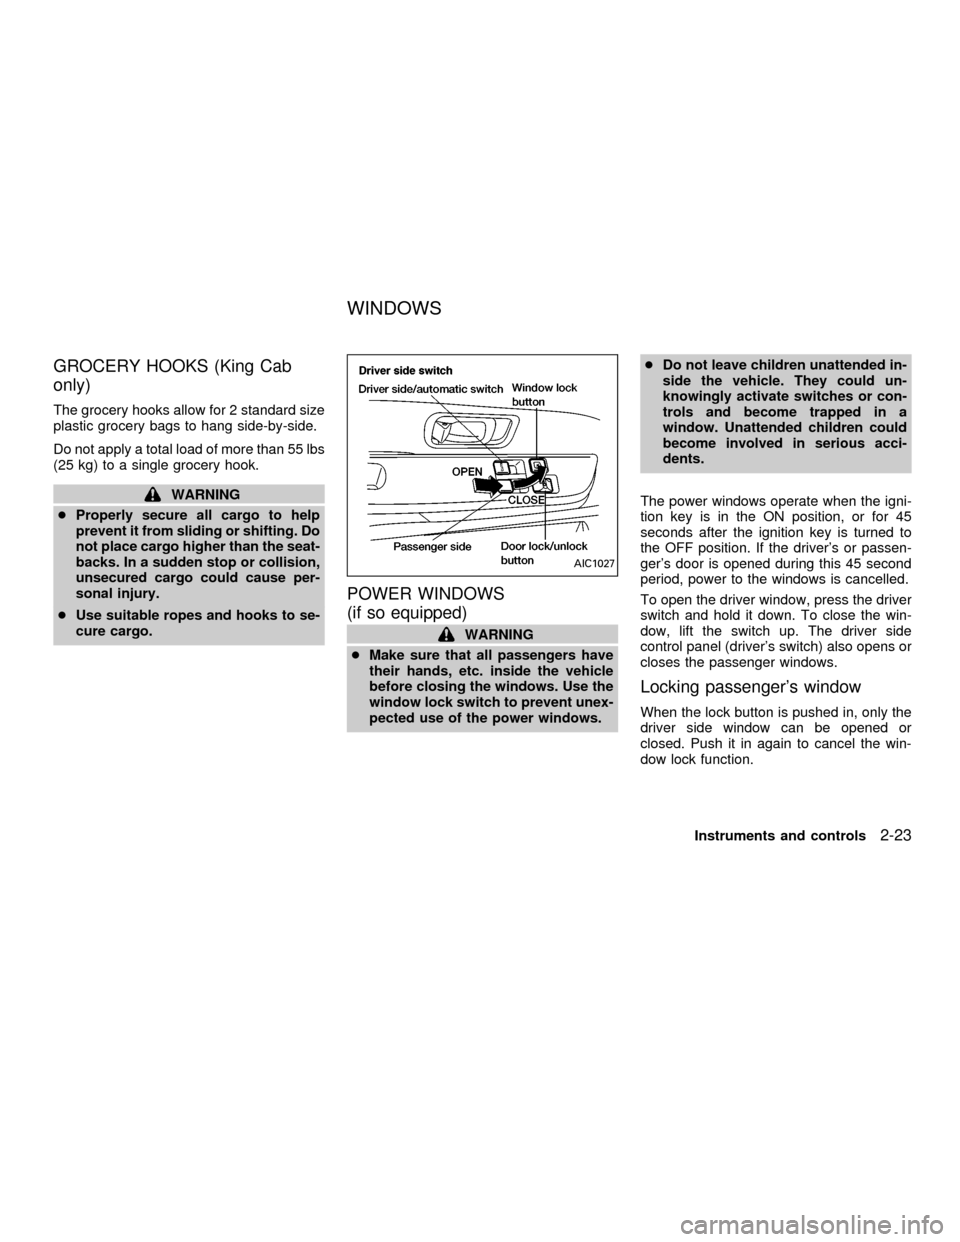
POWER WINDOWS
(if so equipped)
WARNING
cMake sure that all passengers have
their hands, etc. inside the vehicle
before closing the windows. Use the
window lock switch to prevent unex-
pected use of the power windows.cDo not leave children unattended in-
side the vehicle. They could un-
knowingly activate switches or con-
trols and become trapped in a
window. Unattended children could
become involved in serious acci-
dents.
The power windows operate when the igni-
tion key is in the ON position, or for 45
seconds after the ignition key is turned to
the OFF position. If the driver's or passen-
ger's door is opened during this 45 second
period, power to the windows is cancelled.
To open the driver window, press the driver
switch and hold it down. To close the win-
dow, lift the switch up. The driver side
control panel (driver's switch) also opens or
closes the passenger windows.
Locking passenger's window
When the lock button is pushed in, only the
driver side window can be opened or
closed. Push it in again to cancel the win-
dow lock function.
AIC1027
WINDOWS
Instruments and controls2-23
ZX
Page 80 of 290

Passenger power window switch
The passenger switch opens or closes the
passenger window. To open the window,
press the switch and hold it down. To close
the window, lift the switch up.
Rear power windows (Crew Cab
models only)
The rear power window switches open or
close the corresponding window. To open
the window, push and hold the switch down.
To close the window, push and hold the
switch up.
Automatic operation
To fully open the driver window, completely
press the driver window switch down and
release it; it need not be held. To stop the
window, lift the switch up while the window
is opening.
AIC1028AIC1114AIC1121
2-24Instruments and controls
ZX