Page 9 of 290
WARNING
cDo not ride in a moving vehicle when
the seatback is reclined. This can be
dangerous. The shoulder belt will
not be against your body. In an acci-
dent you could be thrown into it and
receive neck or other serious inju-
ries. You could also slide under the
lap belt and receive serious internal
injuries.cFor most effective protection when
the vehicle is in motion, the seat
should be upright. Always sit well
back in the seat and adjust the seat
properly. See ``Precautions on Seat
Belt Usage'' later in this section.SEAT ADJUSTMENT
WARNING
cDo not adjust the driver's seat while
driving so full attention may be given
to vehicle operation. The seat may
move suddenly and could cause
loss of control of the vehicle.
cAfter adjustment, gently rock in the
seat to make sure it is securely
locked.
ARS1152WRS0067
FRONT BUCKET SEATS
1-2Seats, restraints and supplemental air bag systems
ZX
Page 11 of 290
WARNING
After adjustment, gently rock in the
seat to make sure it is securely locked.
SEAT ADJUSTMENT
WARNING
cDo not adjust the driver's seat while
driving so full attention may be given
to vehicle operation. The seat may
move suddenly and could cause
loss of control of the vehicle.
cAfter adjustment, gently rock in the
seat to make sure it is securely
locked.
Forward and backward
Pull the lever up while you slide the seat
forward or backward to the desired position.
Release the lever to lock the seat in posi-
tion.
WRS0069
FRONT 60/40 BENCH SEATS
1-4Seats, restraints and supplemental air bag systems
ZX
Page 12 of 290
Reclining
To recline the seatback pull the lever up and
lean back. To bring the seatback forward,
pull the lever up and lean your body for-
ward. The seatback moves forward. Re-
lease the lever to lock the seatback in
position.
TILTING FRONT 60/40 BENCH
SEAT (King Cab models only)
The front passenger's seat can be tilted to
make it easier for jump seat passengers to
get in and out.
To tilt the seatback, pull the reclining lever
up or push the tilt lever down. The seat
automatically moves forward.
To return the seat, move the whole seat
backward, then push the seatback up until it
locks.
WARNING
After adjustment, gently rock in the
seat to make sure it is securely locked
WRS0070ARS1025
Seats, restraints and supplemental air bag systems1-5
ZX
Page 13 of 290

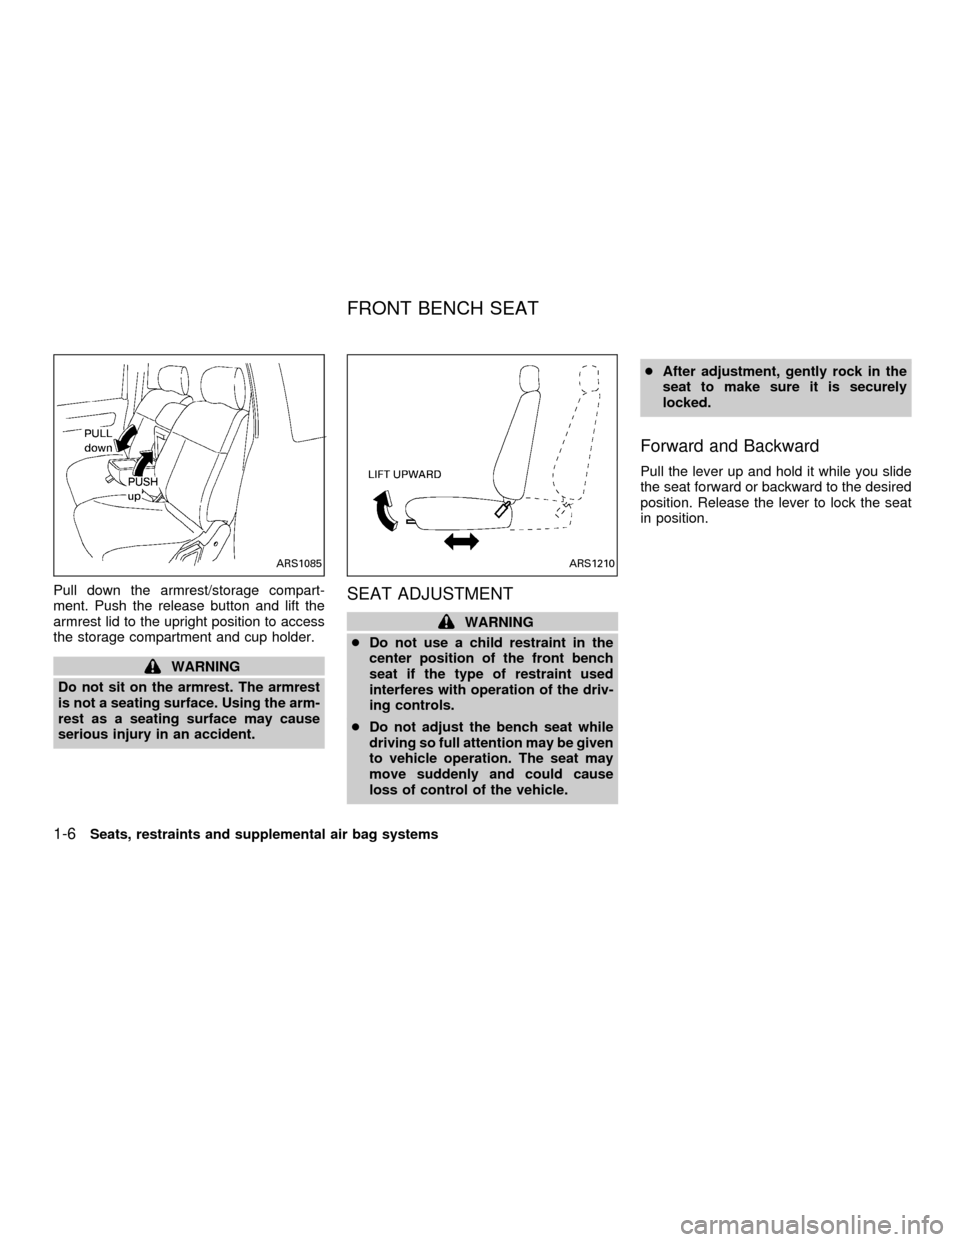
Pull down the armrest/storage compart-
ment. Push the release button and lift the
armrest lid to the upright position to access
the storage compartment and cup holder.
WARNING
Do not sit on the armrest. The armrest
is not a seating surface. Using the arm-
rest as a seating surface may cause
serious injury in an accident.
SEAT ADJUSTMENT
WARNING
cDo not use a child restraint in the
center position of the front bench
seat if the type of restraint used
interferes with operation of the driv-
ing controls.
cDo not adjust the bench seat while
driving so full attention may be given
to vehicle operation. The seat may
move suddenly and could cause
loss of control of the vehicle.cAfter adjustment, gently rock in the
seat to make sure it is securely
locked.
Forward and Backward
Pull the lever up and hold it while you slide
the seat forward or backward to the desired
position. Release the lever to lock the seat
in position.
ARS1085ARS1210
FRONT BENCH SEAT
1-6Seats, restraints and supplemental air bag systems
ZX
Page 14 of 290
TILTING FRONT BENCH SEAT
The bench seat can be tilted forward to
make it easier to remove the jacking tools
from the storage area.
To tilt the seatback, push the tilting leverdown, then pull the seatback forward.
WARNING
After adjustment, gently rock in the
seat to make sure it is securely locked.
TILTING REAR BENCH SEAT
(Crew Cab models only)
The rear bench seat can be tilted to remove
the jacking tools from the storage area.
To tilt the seat back, pull the strap up and
push the seat back forward.
APD0703
ARS1233
Seats, restraints and supplemental air bag systems1-7
ZX
Page 21 of 290

Supplemental air bag system
The driver supplemental air bag is located in
the center of the steering wheel. The passen-
ger supplemental air bag is located in the top
right section of the instrument panel.
These systems are designed to meet optional
certification requirements under U.S. regula-
tions. They are also permitted in Canada. The
optional certification allows air bags to be
designed to inflate somewhat less forcefully
than previously.However, all of the infor-mation, cautions and warnings in this
manual still apply and must be followed.
The supplemental air bag system is designed
to inflate in higher severity frontal collisions,
although it may inflate if the forces in another
type of collision are similar to those of a higher
severity frontal impact. It may not inflate in
certain frontal collisions. Vehicle damage (or
lack of it) is not always an indication of proper
supplemental air bag system operation.
The front passenger supplemental air bag is
equipped with an ON/OFF switch (except
crew cab models which have a rear seat for
child restraint installation). Because no rear
seat exists where a rear facing child restraint
can be secured in other models, the switch is
designed to turn OFF the passenger supple-
mental air bag so that a rear facing child
restraint can be used in the front passenger
seat. See ``Passenger supplemental air bag
ON/OFF switch and light'' later in this section
for details.
When the supplemental air bag inflates, a
fairly loud noise may be heard, followed by
the release of smoke. This smoke is not
harmful and does not indicate a fire, but
care should be taken not to intentionally
inhale it, as it may cause irritation and
WRS0059
1-14Seats, restraints and supplemental air bag systems
ZX
Page 35 of 290

WARNING
cAfter adjustment, release the adjust-
ment button and try to move the
shoulder belt anchor up and down to
make sure it is securely fixed in
position.
cThe shoulder belt anchor height
should be adjusted to the position
best for you. Failure to do so may
reduce the effectiveness of the en-
tire restraint system and increase
the chance or severity of injury in an
accident.
TWO-POINT TYPE SEAT BELT
WITHOUT RETRACTOR (Center
of 60/40 bench seat)
WARNING
cDo not install a child restraint in the
center position of the front seat if the
type of restraint used interferes with
operation of the driving controls.cDo not sit on the armrest. The arm-
rest is not a seating surface. Using
the armrest as a seating surface may
cause serious injury in an accident.
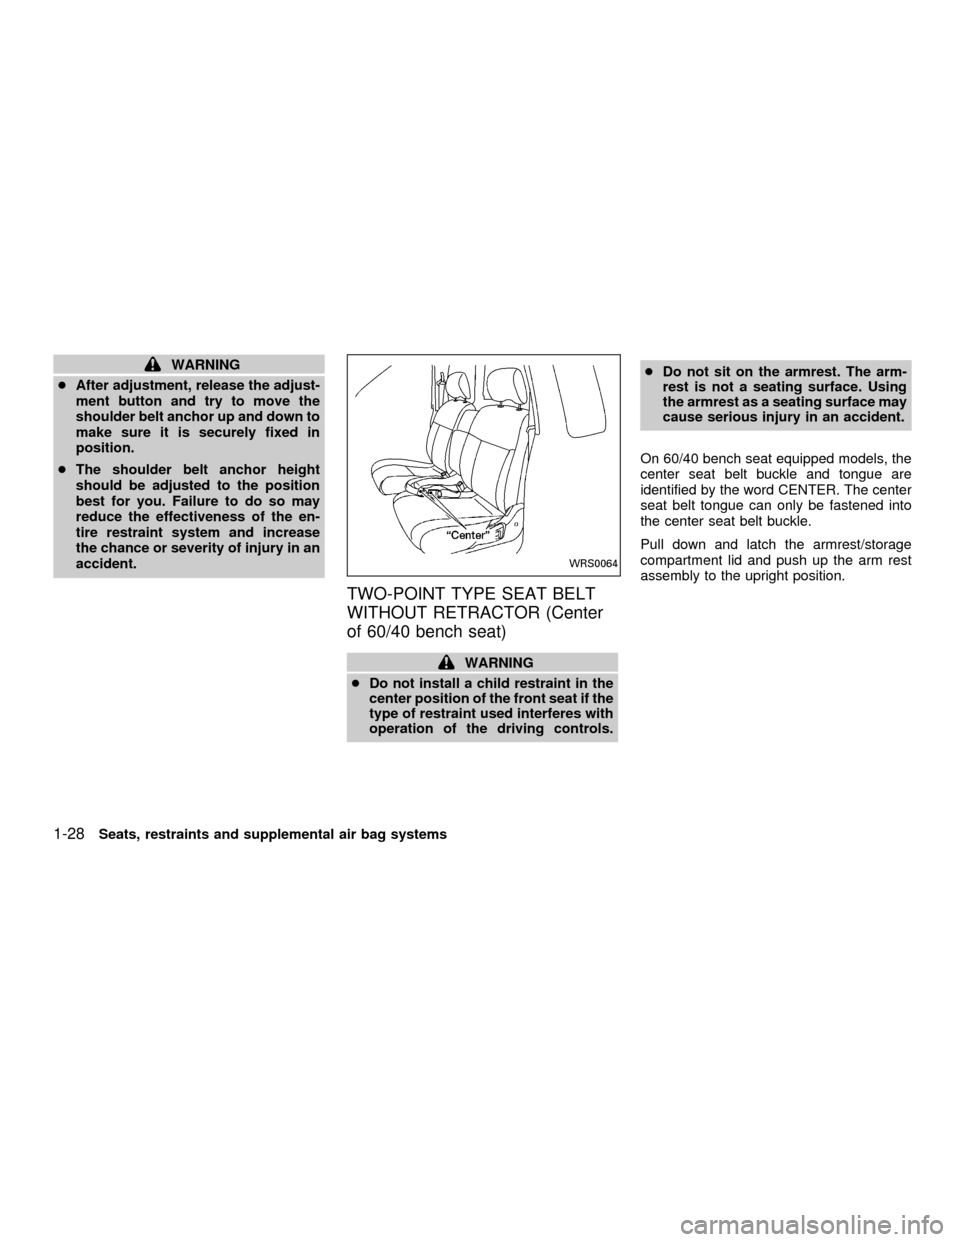
On 60/40 bench seat equipped models, the
center seat belt buckle and tongue are
identified by the word CENTER. The center
seat belt tongue can only be fastened into
the center seat belt buckle.
Pull down and latch the armrest/storage
compartment lid and push up the arm rest
assembly to the upright position.
WRS0064
1-28Seats, restraints and supplemental air bag systems
ZX
Page 40 of 290

restraint and check the various adjust-
ments to be sure the child restraint is
compatible with your child. Always follow
all of the recommended procedures.
All U.S. states and provinces of Canada
require that infants and small children be
restrained in an approved child restraint
at all times while the vehicle is being
operated.
WARNING
cDo not install a child restraint in the
jump seats (King Cab model). These
seats are not suitable for child re-
straint installation.
cDo not install a child restraint in the
center position of the front bench
seat if the type of restraint used
interferes with operation of the driv-
ing controls.
cImproper use of a child restraint can
result in increased injuries for both
the infant or child and other occu-
pants in the vehicle.cFollow all of the child restraint
manufacturer's instructions for in-
stallation and use. When purchasing
a child restraint, be sure to select
one which will fit your child and
vehicle. It may not be possible to
properly install some types of child
restraints in your vehicle.
cIf the child restraint is not anchored
properly, the risk of a child being
injured in a collision or a sudden
stop greatly increases.
cAdjustable seatbacks should be po-
sitioned to fit the child restraint, but
as upright as possible.
c
After attaching the child restraint,
test it before you place the child in it.
Tilt it from side to side. Try to tug it
forward and check to see if the belt
holds the restraint in place. If the
restraint is not secure, tighten the
belt as necessary or put the restraint
in another seat and test it again.cFor a front facing child restraint, if
the seat position where it is installed
has a 3-point type lap/shoulder belt,
check to make sure the shoulder belt
does not go in front of the child's
face or neck. If it does, put the shoul-
der belt behind the child restraint. If
you must install a front-facing child
restraint in the front seat, see(Instal-
lation on front passenger seat(later
in this section for details.
cWhen your child restraint is not in
use, keep it secured with a seat belt
to prevent it from being thrown
around in case of a sudden stop or
accident.
CAUTION
Remember that a child restraint left in a
closed vehicle can become very hot.
Check the seating surface and buckles
before placing your child in the child
restraint.
Seats, restraints and supplemental air bag systems
1-33
ZX