Page 98 of 290

WARNING
cGasoline is extremely flammable and
highly explosive under certain con-
ditions. You could be burned or se-
riously injured if it is misused or
mishandled. Always stop the engine
and do not smoke or allow open
flames or sparks near the vehicle
when refueling.
cFuel may be under pressure. Turn
the cap one-half turn and wait for
any ``hissing'' sound to stop to pre-
vent fuel from spraying out and
causing possible personal injury.
Then remove the cap.
cDo not attempt to top off the fuel
tank after the fuel pump nozzle shuts
off automatically. Continued refuel-
ing may cause fuel overflow, result-
ing in fuel spray and possibly fire.
cUse only an original equipment type
fuel filler cap as a replacement. It has
a built-in safety valve needed for
proper operation of the fuel system
and emission control system. An in-
correct cap can result in a serious
malfunction and possible injury.cNever pour fuel into the throttle body
to attempt to start your vehicle.
CAUTION
cIf fuel is spilled on the vehicle body,
flush it away with water to avoid
paint damage.
cTighten until the fuel filler cap clicks.
Failure to tighten the fuel filler cap
properly may cause the
mal-
function indicator lamp (MIL) to illu-
minate. If the
lamp illuminates
because the fuel filler cap is loose or
missing, tighten or install the cap
and continue to drive the vehicle.
The
lamp should turn off after
a few driving trips. If thelamp
does not turn off after a few driving
trips, have the vehicle inspected by
an authorized NISSAN dealer.
cFor additional information, see the
(Malfunction indicator lamp (MIL)(in
the(Instruments and Controls(sec-
tion earlier in this manual.
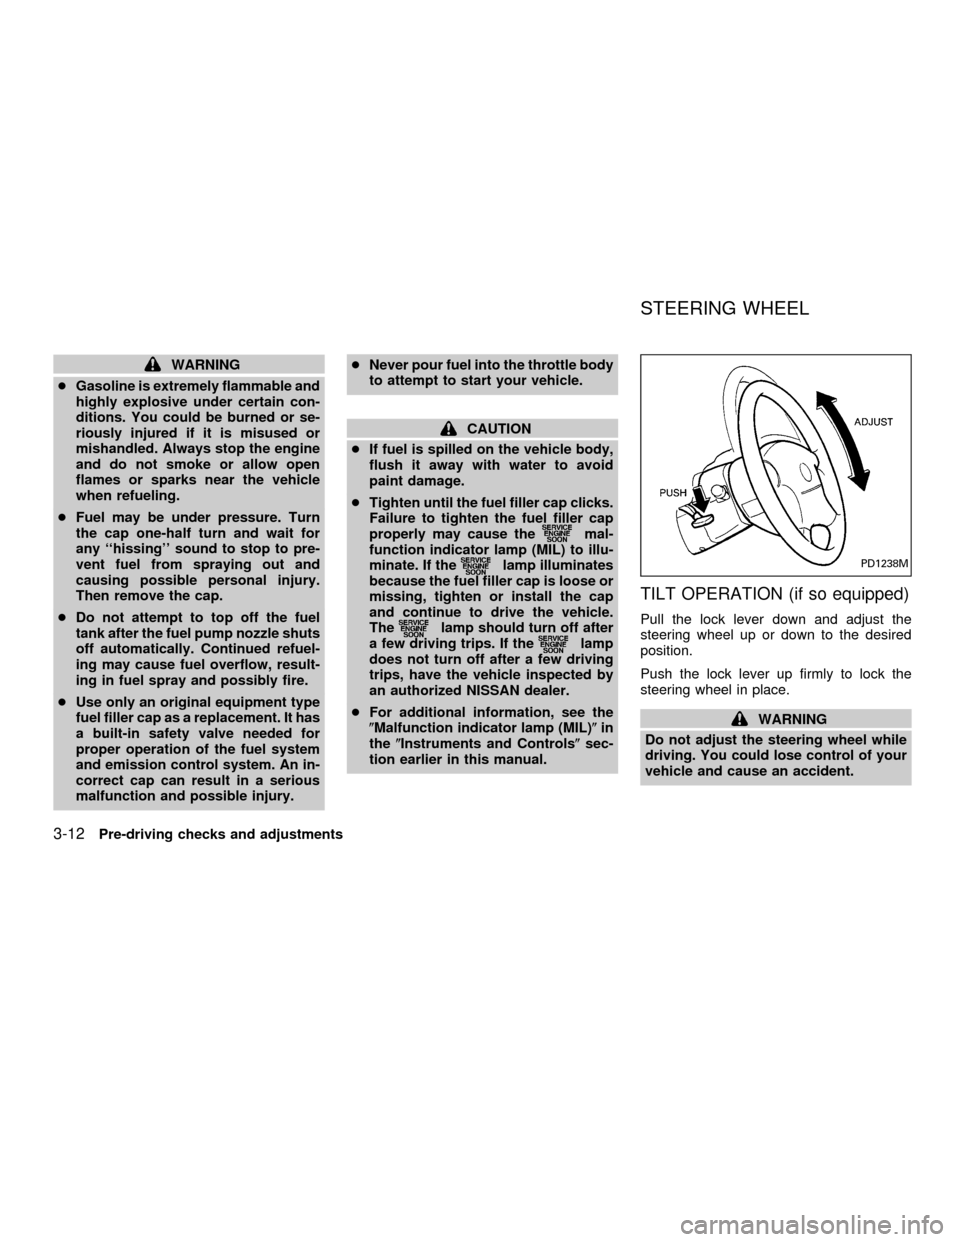
TILT OPERATION (if so equipped)
Pull the lock lever down and adjust the
steering wheel up or down to the desired
position.
Push the lock lever up firmly to lock the
steering wheel in place.
WARNING
Do not adjust the steering wheel while
driving. You could lose control of your
vehicle and cause an accident.
PD1238M
STEERING WHEEL
3-12Pre-driving checks and adjustments
ZX
Page 99 of 290
VANITY MIRROR
(if so equipped)
A vanity mirror is located on the rear side of
the passenger sunvisor.
INSIDE MIRROR
The night position reduces glare from the
headlights of vehicles behind the vehicle.
WARNING
Use the night position only when nec-
essary because it reduces rear view
clarity.
OUTSIDE MIRRORS
The outside mirror can be moved in any
direction for a better rear view.
AIC0710AIC0703APD1090
SUN VISORS MIRRORS
Pre-driving checks and adjustments3-13
ZX
Page 101 of 290
WARNING
Objects viewed in the outside mirror on
the passenger side are closer than they
appear. Be careful when moving to the
right. Using only this mirror could cause
an accident. Use the inside mirror or
glance over your shoulder to properly
judge distances to other objects.
TAILGATE
Opening the tailgate
Pull the tailgate handle upward and lower
the tailgate. The support cables hold the
tailgate open.
When closing the tailgate, make sure the
latches are securely locked.To open the tailgate to the lowest position,
lift the tailgate to a 45 degree angle, then
release the support cables.
Do not drive the vehicle with the tailgate
down, unless equipped with Nissan's
Bed Extender (accessory) in the de-
ployed position.
For proper truck box loading see9Loading
tips9under the9Vehicle loading information9
heading in the9Technical and consumer
information9section of this manual.
WPD0043APD1038
TRUCK BOX
Pre-driving checks and adjustments3-15
ZX
Page 102 of 290
WARNING
cIt is extremely dangerous to ride in a
cargo area inside a vehicle. In a
collision, people riding in these ar-
eas are more likely to be seriously
injured or killed.
cDo not allow people to ride in any
area of your vehicle that is not
equipped with seats and seat belts.
cBe sure everyone in your vehicle is
in a seat and using a seat belt
properly.
Removing the tailgate
1. Release the tailgate support cables.
2. Hold the tailgate at a 45 degree angle.
3. Pull the tailgate out from the left side
hinge.
4. Remove the tailgate from the right side
hinge.
Installing the tailgate
1. Insert the tailgate into the right side
hinge.
2. Hold the tailgate at a 45 degree angleand insert left side hinge.
3. Continue to hold tailgate at a 45 degree
angle and attach the tailgate support
cables.
4. Close the tailgate securely.
CAUTION
The tailgate is heavy. Be careful not to
drop it during removal.
IC0175
3-16Pre-driving checks and adjustments
ZX
Page 103 of 290
Locking the tailgate
To lock the tailgate, turn the key towards the
passenger side of the vehicle. To unlock,
turn the key towards the driver side.
TIE DOWN HOOKS
For your convenience, tie down hooks are
placed at each corner of the truck box.
These may be used to help secure cargo
loaded into the truck box.
cThe weight of the cargo load must be
evenly distributed over both the front and
rear axles.
cAll cargo should be securely fastened
with ropes or straps to prevent it from
shifting or sliding within the vehicle.
WARNING
cProperly secure all cargo with ropes
or straps to help prevent it from
sliding or shifting. In a sudden stop
or collision, unsecured cargo could
cause personal injury.
cDo not place cargo higher than the
seatbacks. In a sudden stop or colli-
sion, unsecured cargo could cause
personal injury.
WPD0046ATI1020
Pre-driving checks and adjustments3-17
ZX
Page 107 of 290

WARNING
cThe air conditioner cooling function
operates only when the engine is
running.
cDo not leave children, unreliable
adults, or pets alone in your vehicle.
On hot, sunny days, temperatures in
a closed vehicle could quickly be-
come high enough to cause severe
or possibly fatal injuries to people or
animals.
cDo not use the recirculation mode
for long periods as it may cause the
interior air to become stale and the
windows to fog up.
cPositioning of the heater and air con-
ditioner controls should not be done
while driving so full attention may be
given to vehicle operation.
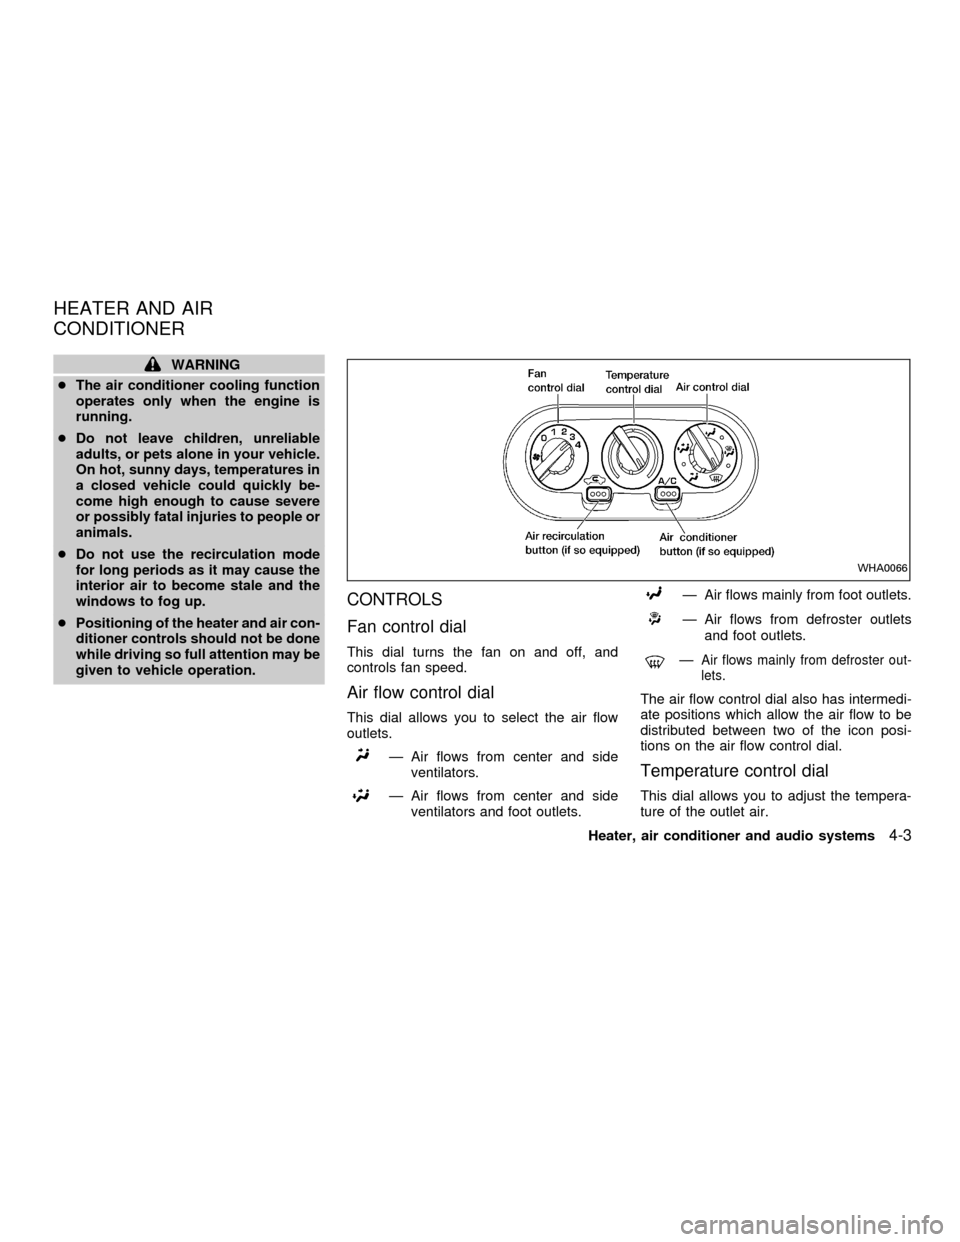
CONTROLS
Fan control dial
This dial turns the fan on and off, and
controls fan speed.
Air flow control dial
This dial allows you to select the air flow
outlets.
Ð Air flows from center and side
ventilators.
Ð Air flows from center and side
ventilators and foot outlets.
Ð Air flows mainly from foot outlets.
Ð Air flows from defroster outlets
and foot outlets.
ÐAir flows mainly from defroster out-
lets.
The air flow control dial also has intermedi-
ate positions which allow the air flow to be
distributed between two of the icon posi-
tions on the air flow control dial.
Temperature control dial
This dial allows you to adjust the tempera-
ture of the outlet air.
WHA0066
HEATER AND AIR
CONDITIONER
Heater, air conditioner and audio systems4-3
ZX
Page 113 of 290
The air conditioner system in your NISSAN
is charged with a refrigerant designed with
the environment in mind.
This refrigerant does not harm the
earth's ozone layer.
Special charging equipment and lubricant is
required when servicing your NISSAN air
conditioner. Using improper refrigerants or
lubricants causes severe damage to your
air conditioner system. See9Air conditioner
system refrigerant and lubrication recom-
mendations9in the9Technical and con-
sumer information9section of this manual.
An authorized NISSAN dealer will be able to
service your environmentally9friendly9air
conditioner system.
WARNING
The air conditioner system contains
refrigerant under high pressure. To
avoid personal injury, any air condi-
tioner service should be done only by
an experienced technician with proper
equipment.
WHA0100
SERVICING AIR
CONDITIONER
Heater, air conditioner and audio systems4-9
ZX
Page 117 of 290

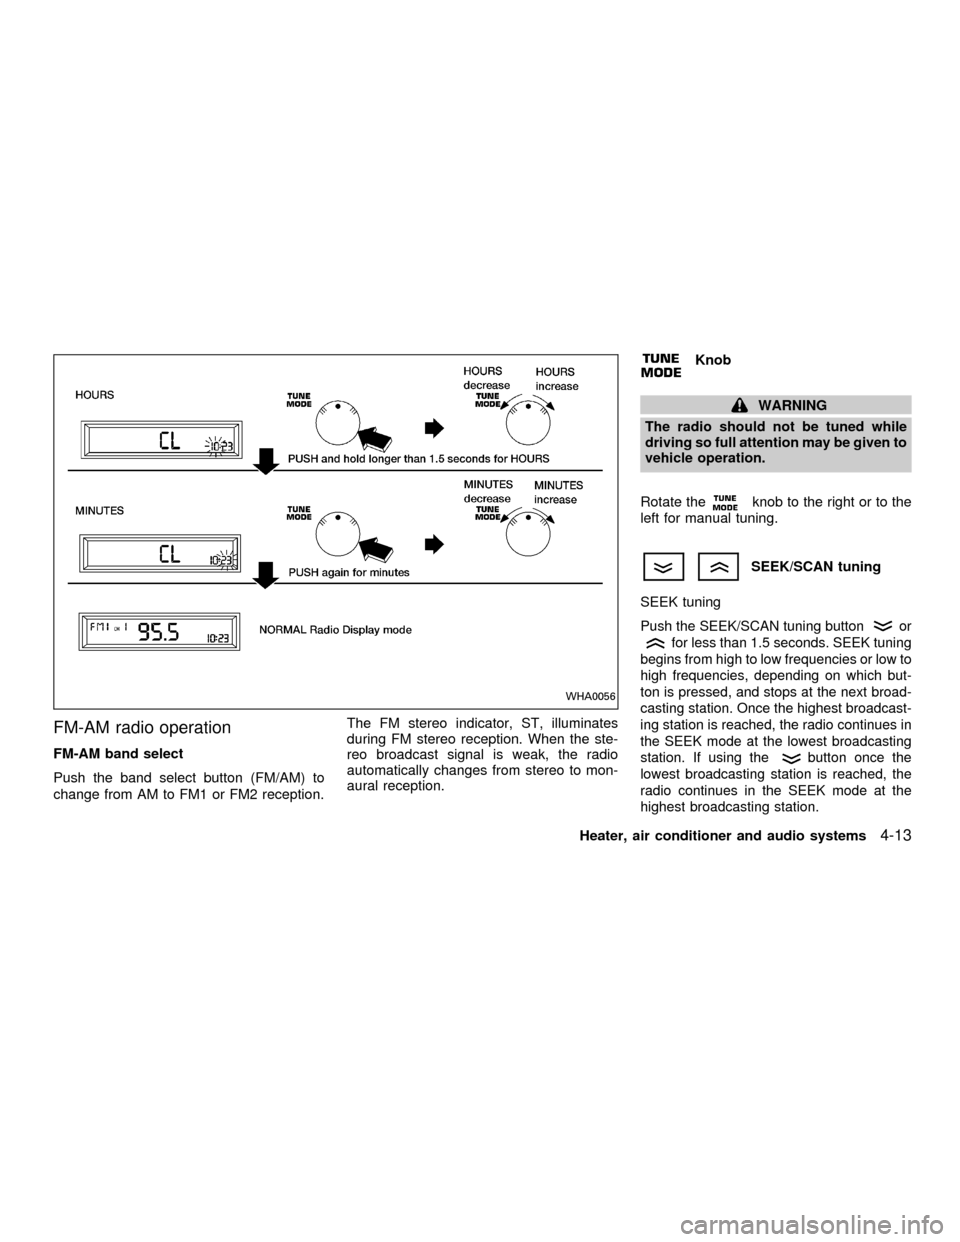
FM-AM radio operation
FM-AM band select
Push the band select button (FM/AM) to
change from AM to FM1 or FM2 reception.The FM stereo indicator, ST, illuminates
during FM stereo reception. When the ste-
reo broadcast signal is weak, the radio
automatically changes from stereo to mon-
aural reception.
Knob
WARNING
The radio should not be tuned while
driving so full attention may be given to
vehicle operation.
Rotate the
knob to the right or to the
left for manual tuning.
SEEK/SCAN tuning
SEEK tuning
Push the SEEK/SCAN tuning buttonor
for less than 1.5 seconds. SEEK tuning
begins from high to low frequencies or low to
high frequencies, depending on which but-
ton is pressed, and stops at the next broad-
casting station. Once the highest broadcast-
ing station is reached, the radio continues in
the SEEK mode at the lowest broadcasting
station. If using the
button once the
lowest broadcasting station is reached, the
radio continues in the SEEK mode at the
highest broadcasting station.
WHA0056
Heater, air conditioner and audio systems4-13
ZX