2001 NISSAN ALTIMA fuel cap
[x] Cancel search: fuel capPage 3 of 258

Welcome To The World Of NISSAN
Your new NISSAN is the result of our dedication
to produce the finest in safe, reliable and eco-
nomical transportation. Your vehicle is the prod-
uct of a successful worldwide company that
manufactures cars and trucks in over 17 coun-
tries and distributes them in 170 nations.
NISSAN vehicles are designed and manufac-
tured by Nissan Motor Co., Ltd. which was
founded in Tokyo, Japan in 1933, and NISSAN
affiliates world wide, collectively growing to be-
come the fifth largest automaker in the world. In
addition to cars and trucks, NISSAN also makes
diversified forklift trucks, marine engines, boats
and other products.
NISSAN has made a substantial and growing
investment in North America. NISSAN's commit-
ment is nearly $4 billion dollars in capital invest-
ments in facilities across the continent. Some of
the facilities include the Nissan Manufacturingfacility in Smyrna, Tennessee, vehicle styling
design at Nissan Design International in San
Diego, California, and engineering at Nissan
Technical Center North America in Farmington
Hills, Michigan. Additionally, NISSAN employs
nearly 18,000 people throughout the United
States, Canada, and Mexico. An additional
71,000 people work for the 1,500 NISSAN and
INFINITI dealers across North America.
NISSAN is also a substantial contributor to the
Canadian economy. Nissan Canada Inc., its sup-
pliers and over 140 dealers employ approxi-
mately 4,500 people. These include company
employees and the staffs of NISSAN dealers all
across Canada. In addition, many Canadians
work for companies that supply NISSAN and
NISSAN dealers with materials and services
ranging from the operation of port facilities and
transportation services, to the supply of lubri-
cants, parts and accessories.NISSAN pioneered the use of electronics and
computers in automobiles, and has led the indus-
try in improving both performance and fuel effi-
ciency through new engine designs and the use
of synthetic materials to reduce vehicle weight.
The company has also developed ways to build
quality into its vehicles at each stage of the
production process, both through extensive use
of automation and Ð most importantly Ð
through an awareness thatpeopleare the cen-
tral element in quality control.
From the time the parts arrived from our suppli-
ers until you took delivery of your new NISSAN,
dozens of checks were made to ensure that only
the best job was being done in producing and
delivering your vehicle. NISSAN also takes great
care to ensure that when you take your NISSAN
to your dealer for maintenance, the service techni-
cian will perform his work according to the quality
standards that have been established by Nissan.
Safety has also been built into your NISSAN. As
you know, seat belts are an integral part of the
safety systems that will help protect you and your
passengers in the event of a sudden stop or an
accident. We urge you to use the seat belts every
time you drive the vehicle.
The NISSAN story of growth and achievement
reflects our major goal: to provide you, our
customer, with a vehicle that is built with quality
and craftsmanship Ð a product that we can be
proud to build and you can be proud to own.
WFW0002
ZX
Page 54 of 258

While the cruise main switch indicator light
comes on, the cruise control system is
operational.
Cruise set indicator light
(if so equipped)
The light comes on while the vehicle speed
is controlled by the cruise control system. If
the light blinks while the engine is running, it
may indicate the cruise control system is not
functioning properly. Have the system
checked by your NISSAN dealer.
Malfunction indicator lamp
(MIL)
If this indicator lamp comes on steady or
blinks while the engine is running, it may
indicate a potential emission control mal-
function.
The malfunction indicator lamp may also
come on steady if the fuel filler cap is loose
or missing, or if the vehicle runs out of fuel.
Check to make sure the fuel filler cap is
installed and closed tightly, and that the
vehicle has at least three gallons of fuel in
the fuel tank.
After a few driving trips, the
lamp
should turn off if no other potential emissioncontrol system malfunction exists.
Operation
The malfunction indicator lamp will come on
in one of two ways:
cMalfunction indicator lamp on steady - An
emission control system malfunction has
been detected. Check the fuel filler cap. If
the fuel filler cap is loose or missing,
tighten or install the cap and continue to
drive the vehicle. The
lamp should
turn off after a few driving trips. If the
lamp does not turn off after a few
driving trips, have the vehicle inspected
by an authorized NISSAN dealer. You do
not need to have your vehicle towed to
the dealer.
cMalfunction indicator lamp blinking - An
engine misfire has been detected which
may damage the emission control sys-
tem. To reduce or avoid emission control
system damage:
a) do not drive at speeds above 45 MPH
(72 km/h).
b) avoid hard acceleration or decelera-
tion.
c) avoid steep uphill grades.
d) if possible, reduce the amount ofcargo being hauled or towed.
The malfunction indicator lamp may stop
blinking and come on steady. Have the
vehicle inspected by an authorized NISSAN
dealer. You do not need to have your ve-
hicle towed to the dealer.
CAUTION
Continued vehicle operation without
having the emission control system
checked and repaired as necessary
could lead to poor driveability, reduced
fuel economy, and possible damage to
the emission control system.
CHIMES
Brake pad wear warning
The disc brake pads have audible wear
warnings. When a brake pad requires re-
placement, it makes a high pitched scraping
sound when the vehicle is in motion,
whether or not the brake pedal is depressed.
Have the brakes checked as soon as pos-
sible if the warning sound is heard.
Instruments and controls2-9
ZX
Page 80 of 258

3 Pre-driving checks and adjustments
Keys .......................................................................3-2
Nissan vehicle immobilizer system
(NVIS) keys .......................................................3-2
Doors ......................................................................3-2
Locking with key ................................................3-3
Locking with inside lock knob............................3-3
Locking with power door lock switch.................3-4
Child safety rear door lock ................................3-5
Multi-remote control system (if so equipped).........3-5
How to use multi-remote control system...........3-5
Battery replacement ..........................................3-8
Hood .......................................................................3-9
Trunk lid................................................................3-10
Opener operation ............................................3-10Key operation ..................................................3-10
Interior trunk lid release (if so equipped) ........3-11
Fuel filler lid ..........................................................3-12
Opener operation ............................................3-12
Fuel filler cap ...................................................3-12
Steering wheel .....................................................3-14
Tilt operation ....................................................3-14
Sunvisors ..............................................................3-14
Vanity mirrors ..................................................3-14
Mirrors ..................................................................3-15
Inside mirror.....................................................3-15
Outside mirror remote control .........................3-15
ZX
Page 91 of 258

OPENER OPERATION
The fuel filler lid opener lever is located on
the outside of the driver's seat. To open the
fuel filler lid, push the opener lever down. To
lock, close the fuel filler lid securely.
FUEL FILLER CAP
The fuel filler cap is a ratcheting type.
Tighten the cap clockwise until ratcheting
clicks are heard.
WPD0009WPD0049
FUEL FILLER LID
3-12Pre-driving checks and adjustments
ZX
Page 92 of 258

WARNING
cGasoline is extremely flammable and
highly explosive under certain con-
ditions. You could be burned or se-
riously injured if it is misused or
mishandled. Always stop the engine
and do not smoke or allow open
flames or sparks near the vehicle
when refueling.
c
Fuel may be under pressure. Turn the
cap one-half turn, and wait for any
``hissing'' sound to stop to prevent
fuel from spraying out and possible
personal injury. Then remove the cap.
cDo not attempt to top off the fuel
tank after the fuel pump nozzle shuts
off automatically. Continued refuel-
ing may cause fuel overflow, result-
ing in fuel spray and possibly fire.
cUse only an original equipment type
fuel filler cap as a replacement. It has
a built-in safety valve needed for
proper operation of the fuel system
and emission control system. An in-
correct cap can result in a serious
malfunction and possible injury.
cNever pour fuel into the throttle body
to attempt to start your vehicle.
CAUTION
cIf fuel is spilled on the vehicle body,
flush it away with water to avoid
paint damage.
cTighten until the fuel filler cap clicks.
Failure to tighten the fuel filler cap
properly may cause the
mal-
function indicator lamp (MIL) to illu-
minate. If the
lamp illuminates
because the fuel filler cap is loose or
missing, tighten or install the cap
and continue to drive the vehicle.
The
lamp should turn off after
a few driving trips. If thelamp
does not turn off after a few driving
trips, have the vehicle inspected by
an authorized NISSAN dealer.
cFor additional information, see the
ªMalfunction indicator lamp (MIL)''
in the ªInstrument and controlsº
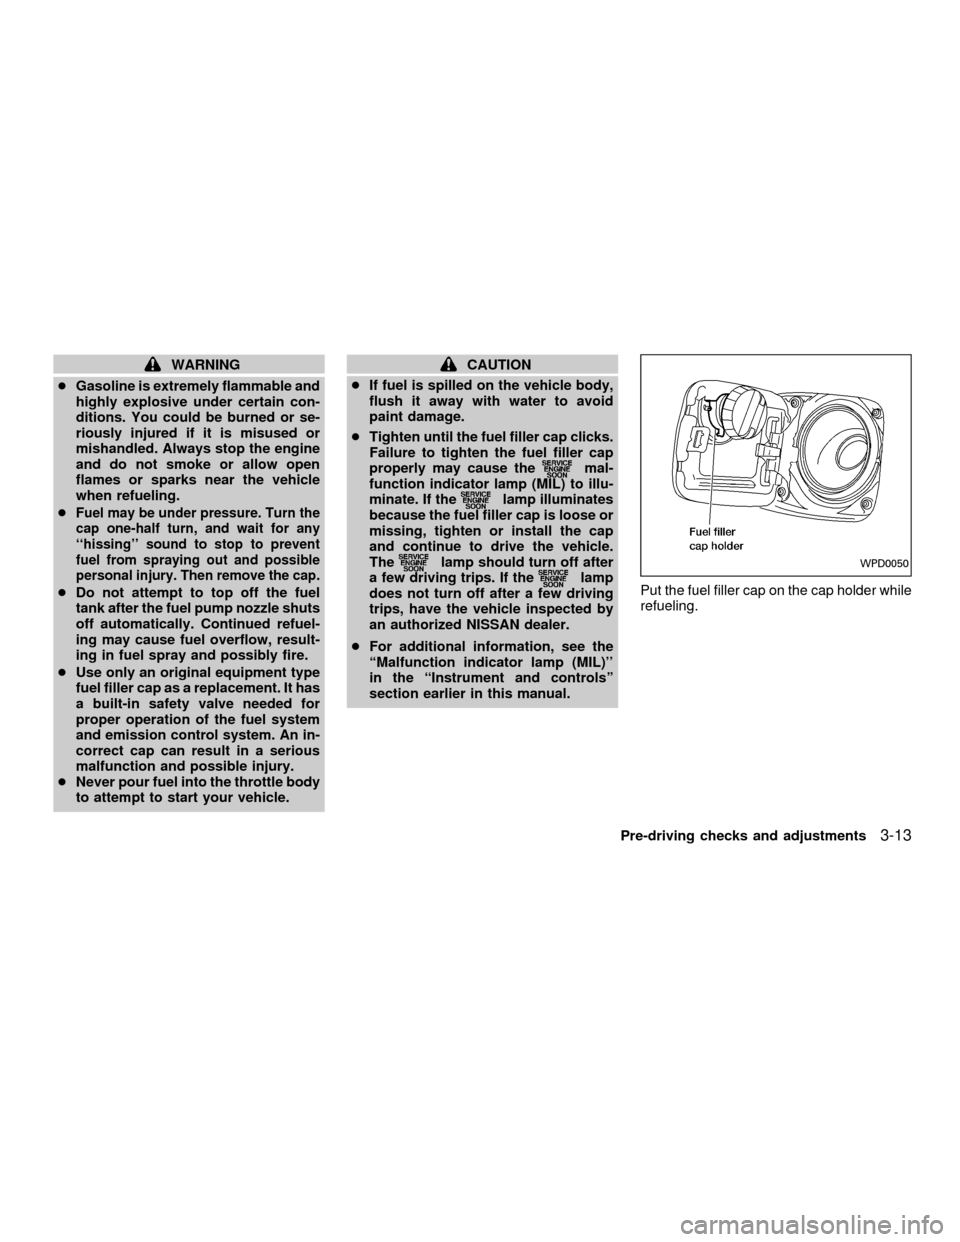
section earlier in this manual.Put the fuel filler cap on the cap holder while
refueling.WPD0050
Pre-driving checks and adjustments3-13
ZX
Page 179 of 258

When performing any inspection or mainte-
nance work on your vehicle, always take
care to prevent serious accidental injury to
yourself or damage to the vehicle. The
following are general precautions which
should be closely observed.
WARNING
cPark the vehicle on a level surface,
apply the parking brake securely and
block the wheels to prevent the ve-
hicle from moving. For manual trans-
mission models, move the shift lever
to (N) Neutral. For an automatic
transmission models, move the shift
selector lever to P (Park).
cBe sure the ignition key is in the OFF
or LOCK position when performing
any parts replacement or repairs.
cYour vehicle is equipped with an
automatic engine cooling fan. It may
come on at any time without warn-
ing, even if the ignition key is in the
OFF position and the engine is not
running. To avoid injury, always dis-
connect the negative battery cable
before working near the fan.c
If you must work with the engine run-
ning, keep your hands, clothing, hair
and tools away from moving fans,
belts and any other moving parts.
cIt is advisable to secure or remove
any loose clothing and remove any
jewelry, such as rings, watches, etc.
before working on your vehicle.
cAlways wear eye protection when-
ever you work on your vehicle.
cIf you must run the engine in an
enclosed space such as a garage, be
sure there is proper ventilation for
exhaust gases to escape.
cNever get under the vehicle while it
is supported only by a jack. If it is
necessary to work under the vehicle,
support it with safety stands.
c
Keep smoking materials, flame and
sparks away from the fuel tank and
battery.cOn gasoline engine models with the
multiport fuel injection (MFI) system,
the fuel filter or fuel lines should be
serviced by an authorized NISSAN
dealer because the fuel lines are un-
der high pressure even when the en-
gine is off.
CAUTION
cDo not work under the hood while
the engine is hot. Turn off the engine
and wait until it cools down.
cNever connect or disconnect the bat-
tery or any transistorized compo-
nent while the ignition is in the ON
position.
cNever leave the engine or automatic
transmission related component
harnesses disconnected while the
ignition is in the ON position.
c
Avoid contact with used engine oil
and coolant. Improperly disposed
engine oil, engine coolant, and/or
other vehicle fluids can damage the
environment. Always conform to lo-
cal regulations for disposal of ve-
hicle fluid.
MAINTENANCE
PRECAUTIONS
8-2Do-it-yourself
ZX
Page 190 of 258

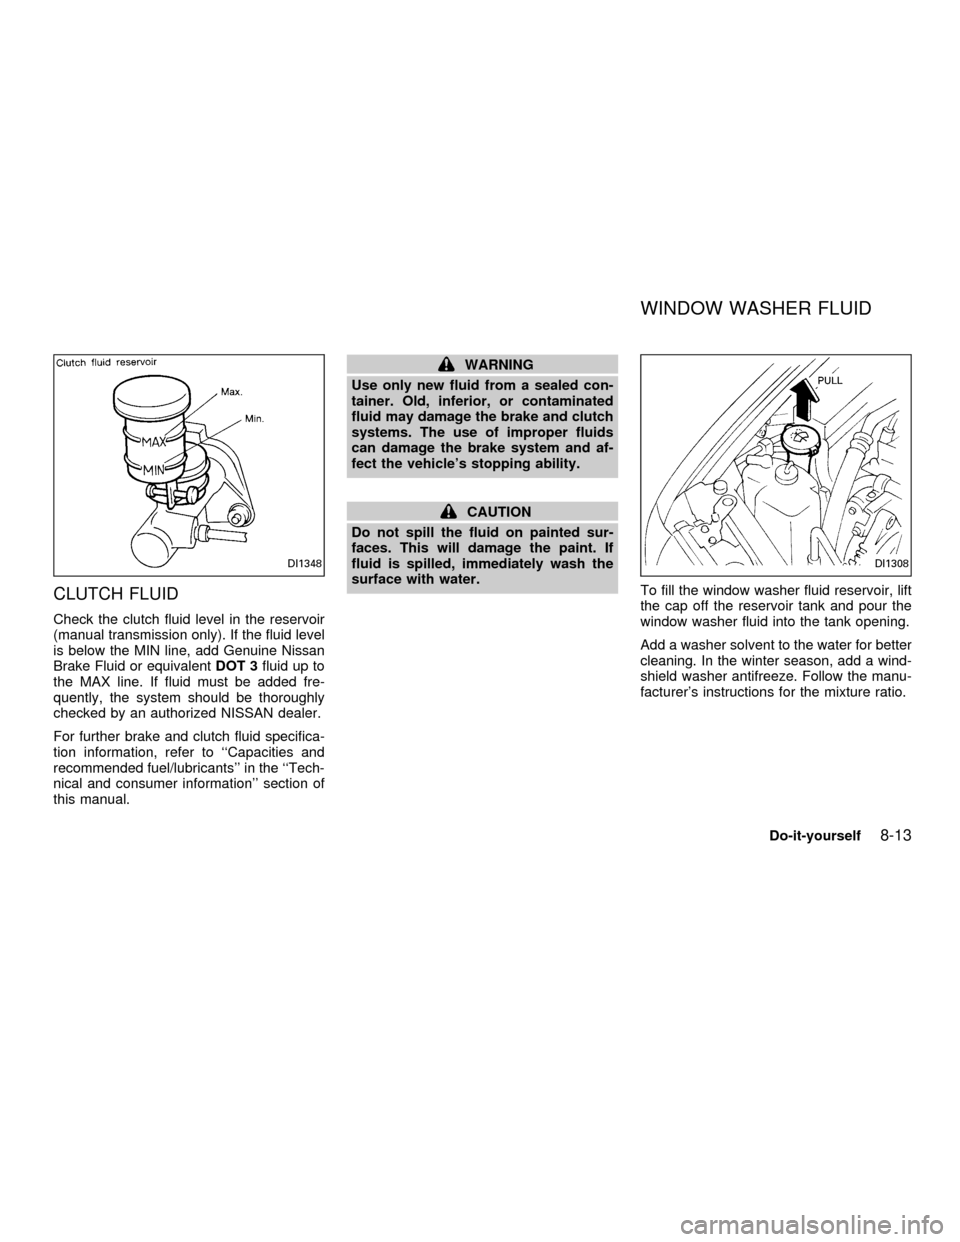
CLUTCH FLUID
Check the clutch fluid level in the reservoir
(manual transmission only). If the fluid level
is below the MIN line, add Genuine Nissan
Brake Fluid or equivalentDOT 3fluid up to
the MAX line. If fluid must be added fre-
quently, the system should be thoroughly
checked by an authorized NISSAN dealer.
For further brake and clutch fluid specifica-
tion information, refer to ``Capacities and
recommended fuel/lubricants'' in the ``Tech-
nical and consumer information'' section of
this manual.
WARNING
Use only new fluid from a sealed con-
tainer. Old, inferior, or contaminated
fluid may damage the brake and clutch
systems. The use of improper fluids
can damage the brake system and af-
fect the vehicle's stopping ability.
CAUTION
Do not spill the fluid on painted sur-
faces. This will damage the paint. If
fluid is spilled, immediately wash the
surface with water.
To fill the window washer fluid reservoir, lift
the cap off the reservoir tank and pour the
window washer fluid into the tank opening.
Add a washer solvent to the water for better
cleaning. In the winter season, add a wind-
shield washer antifreeze. Follow the manu-
facturer's instructions for the mixture ratio.
DI1348DI1308
WINDOW WASHER FLUID
Do-it-yourself8-13
ZX
Page 230 of 258

10 Technical and consumer information
Capacities and recommended fuel/lubricants ......10-2
Fuel recommendation ......................................10-3
Engine oil and oil filter recommendation .........10-5
Recommended SAE viscosity number ............10-6
Air conditioner system refrigerant and
lubricant recommendations .............................10-7
Specifications .......................................................10-8
Engine .............................................................10-8
Wheels and tires..............................................10-9
Dimensions and weights .................................10-9
When traveling or registering your vehicle in
another country ..................................................10-10
Vehicle identification ..........................................10-10
Vehicle identification number (VIN)
plate ...............................................................10-10
Vehicle identification number
(chassis number) ...........................................10-10
Engine serial number ....................................10-11
F.M.V.S.S. certification label .........................10-11
Emission control information label ................10-12Tire placard....................................................10-12
Air conditioner specification label ..................10-12
Installing front license plate................................10-13
Vehicle loading information ................................10-13
Terms.............................................................10-13
Determining vehicle load capacity.................10-14
Loading tips ...................................................10-14
Towing a trailer...................................................10-15
Maximum load limits ......................................10-15
Towing load/specification chart .....................10-16
Towing safety ................................................10-16
Uniform tire quality grading ................................10-18
Emission control system warranty .....................10-19
Reporting safety defects (US only) ....................10-19
Readiness for inspection/maintenance (I/M)
test (US only) .....................................................10-20
Owner's manual/service manual order
information .....................................................10-21
In the event of a collision ..............................10-22
ZX