Page 227 of 341

224 Parking system
Technical
data Instruments
and controlsOperationDrivingInstrument
cluster displayPractical hints Car care Index
Parking assist (Parktronic)
(optional)
The Parktronic system assists the driver during parking
maneuvers. It visually and audibly indicates the
distance between the vehicle and an obstacle.
The front area of the vehicle is monitored when driving
forward. When reversing, the front as well as the rear
areas are monitored.
With the electronic key in steering lock position 2,
Parktronic engages automatically at speeds up to
approximately 10 mph (15 km / h) and deactivates
during higher speeds.
Parktronic can be switched off by a control switch
located in the center console. It engages automatically
again when starting the engine.
See page 228 for parktronic switch.
Wa r n i n g !
Parktronic is a supplemental system. It is not
intended to nor does it replace the need for extreme
care. The responsibility during parking and other
critical maneuvers rests always with the driver.Special attention must be paid to objects having
smooth surfaces or low silhouettes (e.g. trailer
couplings, painted posts, or street curbs). Such
objects may not be detected by the system and can
damage the vehicle.The operational function of the Parktronic can be
affected by dirty sensors, especially at times of
snow and ice. See page 303 for notes on cleaning
the parktronic system sensors.Interference caused by other ultrasonic signals
(e.g. working jackhammers or the air brakes of
trucks) can cause the system to send erratic
indications, and should be taken into
consideration.
Page 231 of 341

228 Parking system
Technical
data Instruments
and controlsOperationDrivingInstrument
cluster displayPractical hints Car care Index
The obstacle may not be recognized if outside the
shaded sensor field, and no longer be indicated when
approaching it any closer (warning indicators go out).
Parktronic malfunction
All red segments of the warning indicators light up, and
a warning sounds for 3 seconds, if Parktronic does not
function properly.
A dirty sensor could be the reason. See page 303 for
instructions on cleaning the sensors in the bumpers.
After cleaning the sensors, turn electronic key in
steering lock to position 2. If the defect continues to be
displayed, have the system checked at your authorized
Mercedes-Benz Center.Parktronic switch
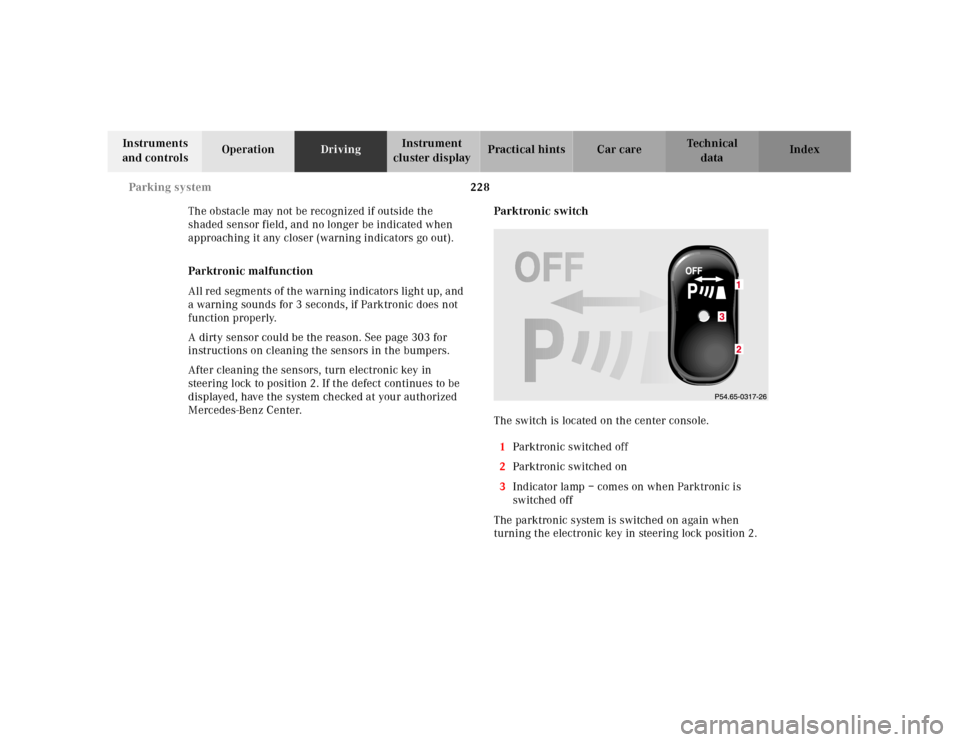
The switch is located on the center console.
1Parktronic switched off
2Parktronic switched on
3Indicator lamp – comes on when Parktronic is
switched off
The parktronic system is switched on again when
turning the electronic key in steering lock position 2.3
Page 261 of 341
258 Engine compartment
Technical
data Instruments
and controlsOperation DrivingInstrument
cluster displayPractical hintsCar care Index
To o p e n :
To unlock the hood, pull release lever (1) under the
driver’s sid e of t he instru ment pa ne l. At the sam e time a
handle will extend out of the radiator grill (it may be
necessary to lift the hood up slightly).
Caution!
To avoid damage to the windshield wiper or hood, open
the hood only with wiper in the parked position.
P68.00-2431-26
Page 268 of 341

265 Vehicle jack
Technical
data Instruments
and controlsOperation DrivingInstrument
cluster displayPractical hintsCar care Index Ve h i c l e j a c k
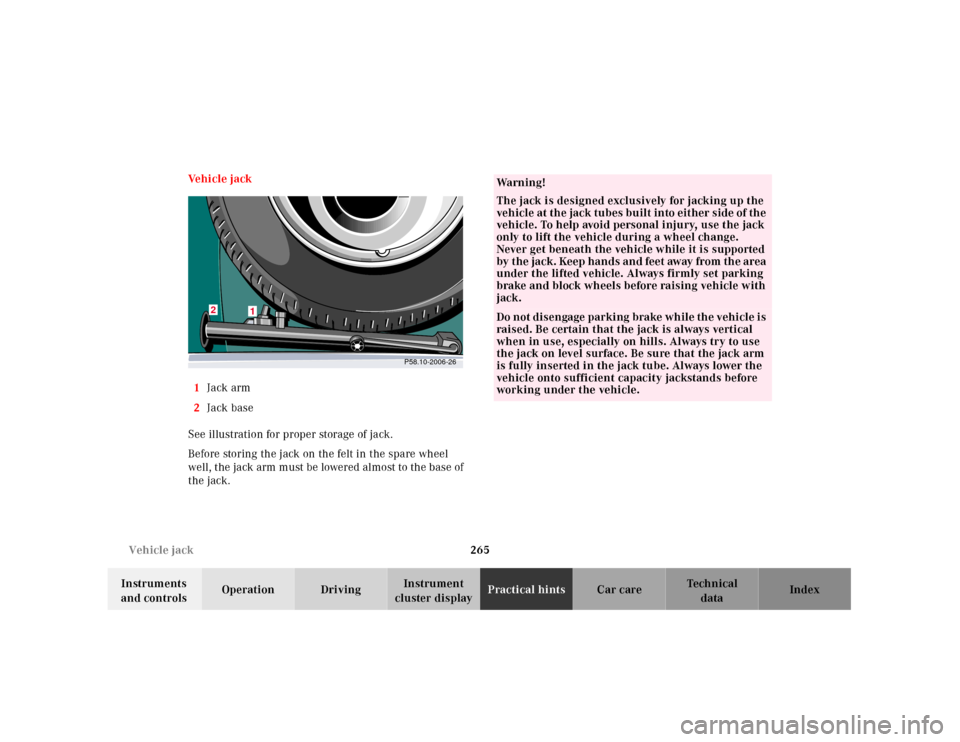
1Jack arm
2Jack base
See illustration for proper storage of jack.
Before storing the jack on the felt in the spare wheel
well, the jack arm must be lowered almost to the base of
the jack.
P58.10-2006-26
2
1
Wa r n i n g !
The jack is designed exclusively for jacking up the
veh icle at th e jack tu bes bu ilt into eit her side of th e
vehicle. To help avoid personal injury, use the jack
only to lift the vehicle during a wheel change.
Never get beneath the vehicle while it is supported
by t he jack. Keep hands and feet away from th e area
under the lifted vehicle. Always firmly set parking
brake and block wheels before raising vehicle with
jack.Do not disengage parki ng brake wh ile th e vehi cle i s
raised. Be certain that the jack is always vertical
when in use, especially on hills. Always try to use
the jack on level surface. Be sure that the jack arm
is fully inserted in the jack tube. Always lower the
vehicle onto sufficient capacity jackstands before
working under the vehicle.
Page 274 of 341

271 Tires, Wheels
Technical
data Instruments
and controlsOperation DrivingInstrument
cluster displayPractical hintsCar care Index Changing wheelsMove vehicle to a level area which is a safe distance
from the roadway.
1. Set parking brake and turn on hazard warning
flasher.
2. Move selector lever to position “P” and turn off
engine.
3. Prevent vehicle from rolling away by blocking
wheels with wheel chocks (not supplied with
vehicle) or sizable wood block or stone. When
changing a wheel on a hill, place chocks on the
downhill side blocking both wheels of the other
axl e. On a l evel road, pl ace one ch ock in front of a nd
one behind the wheel that is diagonally opposite to
the wheel being changed.
Wa r n i n g !
The jack is designed exclusively for jacking up the
veh icle at the jack tu bes bui lt into eith er si de of th e
vehicle. To help avoid personal injury, use the jack
only to lift the vehicle during a wheel change.
Never get beneath the vehicle while it is supported
by th e jack. Keep hands and feet away from the area
under the lifted vehicle. Always firmly set parking
brake and block wheels before raising vehicle with
jack.Do not disengage parking brake whi le th e vehic le is
raised. Be certain that the jack is always vertical
when in use, especially on hills. Always try to use
the jack on level surface. Be sure that the jack arm
is fully inserted in the jack tube. Always lower the
vehicle onto sufficient capacity jackstands before
working under the vehicle.
Page 291 of 341
288 Exterior lamps
Technical
data Instruments
and controlsOperation DrivingInstrument
cluster displayPractical hintsCar care Index
Turn signal lamp
1156 NA (26.9 / 5 W / 32 / 4 cp bulb)
Open hood.
Twist bulb socket (3) counterclockwise and pull out.
Push bulb into socket, turn counterclockwise and
remove.
Insert new bulb in socket, push in and twist clockwise.
Reinstall bulb socket. Reinstall lamp assembly until
properly seated.Parking and standing lamp
H 6W (6 W bulb)
Open hood.
Twist cover (2) counterclockwise and remove.
Pull off electrical connector (6).
Twist bulb socket (6) counterclockwise and pull out.
Push bulb into socket, turn counterclockwise and
remove.
Insert new bulb in socket, push in and twist clockwise.
Reinstall bulb socket. Reinstall lamp assembly until
properly seated.
Page 292 of 341
289 Exterior lamps
Technical
data Instruments
and controlsOperation DrivingInstrument
cluster displayPractical hintsCar care Index Taillamp assemblies
Open trunk lid.
Swing cover aside.
1Turn signal lamp (21 W / 24 cp bulb)
2Stop, tail and parking lamp (21 / 4 W bulb)
3Tail, parking and side marker lamp (5 W / 4 cp bulb)4Driver’s side:
Rear fog lamp (21 W / 32 cp bulb)
5Backup lamp (21 W / 32 cp bulb)
Twist bulb socket counterclockwise and pull out. Push
bulb into socket, turn counterclockwise and remove.
Insert new bulb in socket, push in and twist clockwise.
Reinstall bulb socket.
P82.10-2204-26
1
2
3
Page 306 of 341

303 Cleaning and care of the vehicle
Technical
data Instruments
and controlsOperation DrivingInstrument
cluster displayPractical hintsCar careIndex Cleaning the parktronic system sensors
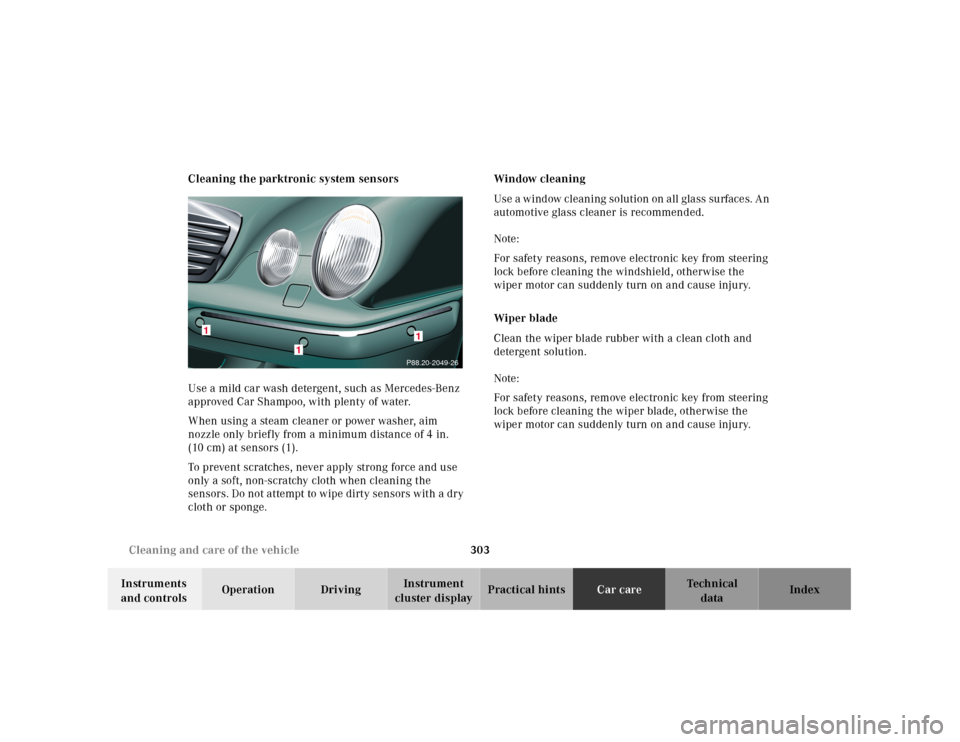
Use a mild car wash detergent, such as Mercedes-Benz
approved Car Shampoo, with plenty of water.
When using a steam cleaner or power washer, aim
nozzle only briefly from a minimum distance of 4 in.
(10 cm) at sensors (1).
To prevent scratches, never apply strong force and use
only a soft, non-scratchy cloth when cleaning the
sensors. Do not attempt to wipe dirty sensors with a dry
cloth or sponge.Window cleaning
Use a window cleaning solution on all glass surfaces. An
automotive glass cleaner is recommended.
Note:
For safety reasons, remove electronic key from steering
lock before cleaning the windshield, otherwise the
wiper motor can suddenly turn on and cause injury.
Wiper blade
Clean the wiper blade rubber with a clean cloth and
detergent solution.
Note:
For safety reasons, remove electronic key from steering
lock before cleaning the wiper blade, otherwise the
wiper motor can suddenly turn on and cause injury.
P88.20-2049-261
1
1