Page 80 of 325

77 Adjusting telescoping steering column
Te ch n ica l
data Instruments
and controlsOperationDrivingInstrument
cluster displayPractical hints Car care Index Adjusting telescoping steering columnUnlocking :
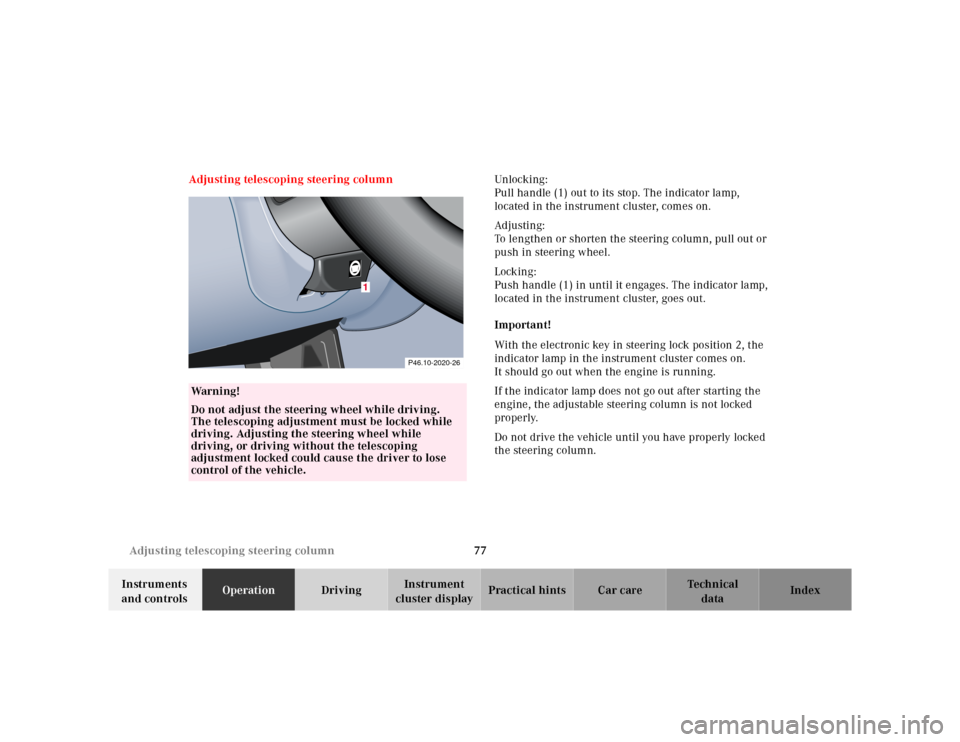
Pull handle (1) out to its stop. The indicator lamp,
located in the instrument cluster, comes on.
Ad justing:
To lengthen or shorten the steering column, pull out or
push in steering wheel.
Locking:
Push handle (1) in until it engages. The indicator lamp,
located in the instrument cluster, goes out.
Important!
With the electronic key in steering lock position 2, the
indicator lamp in the instrument cluster comes on.
It should go out when the engine is running.
If the indicator lamp does not go out after starting the
engine, the adjustable steering column is not locked
properly.
Do not drive the vehicle until you have properly locked
the steering column.
Wa r n i n g !
Do not adjust the steering wheel while driving.
The telescoping adjustment must be locked while
driving. Adjusting the steering wheel while
driving, or driving without the telescoping
adjustment locked could cause the driver to lose
control of the vehicle.
1
P46.10-2020-26
Page 173 of 325
170 Ski sack
Te ch n ica l
data Instruments
and controlsOperationDrivingInstrument
cluster displayPractical hints Car care Index
Unloading and folding
1. Loosen strap, open clasp by pressing tabs (arrows)
together, and unload skis.
2. Close flap in trunk.
3. Disconnect snap hook from eye located on center
tunnel in front of rear seat bench.4. Fold and flatten ski sack lengthwise.
5. Wrap strap with snap hook around ski sack.
6. Fold back the reinforced ski sack tip (8), then
continue to roll up the ski sack tightly.
P91.10-2048-26
8
P91.10-2058-26
Page 200 of 325
197 Automatic transmission
Te ch n ica l
data Instruments
and controlsOperationDrivingInstrument
cluster displayPractical hints Car care Index Gear ranges:
Upshift through 4th gear only. Suitable for
performance driving.
Upshift through 3rd gear only. Suitable for
moderately steep hills. Since the transmission
does not shift higher than 3rd gear, this gear
selection will allow use of the engine’s braking
power downhill.Upshift through 2nd gear only. For driving in
mountainous regions or under extreme operating
conditions. This gear selection will allow use of
the engine’s braking power when descending
steep grades.
Use this position, which makes maximum use of
the engine’s braking effect, while descending
very steep or lengthy downgrades and only at
speeds below 40 mph (60 km/h).
Page 210 of 325

207 Driving instructions
Te ch n ica l
data Instruments
and controlsOperationDrivingInstrument
cluster displayPractical hints Car care Index Winter driving instructions
The most important rule for slippery or icy roads is to
drive sensibly and to avoid abrupt acceleration, braking
and steering maneuvers. Do not use the cruise control
system under such conditions.
When the vehicle is in danger of skidding, move
selector lever to position “N”. Try to keep the vehicle
under control by corrective steering action.
Road salts and chemicals can adversely affect braking
efficiency. Increased pedal force may become necessary
to produce the normal brake effect. We therefore
recommend depressing the brake pedal periodically
when traveling at length on salt-strewn roads. This can
bring road salt impaired braking efficiency back to
normal. A prerequisite is, however, that this be done
without endangering other drivers on the road.If the vehicle is parked after being driven on salt treated
roads, the braking efficiency should be tested as soon as
possible after driving is resumed while observing the
safety rules in the previous paragraph.
Wa r n i n g !
If the vehicle becomes stuck in snow, make sure
that snow is kept clear of the exhaust pipe and
from around the vehicle with engine running.
Otherwise, deadly carbon monoxide (CO) gases may
enter vehicle interior resulting in unconsciousness
and death.To assure sufficient fresh air ventilation, open a
window slightly on the side of the vehicle not
facing the wind.
Page 269 of 325

266 Battery
Te ch n ica l
data Instruments
and controlsOperation DrivingInstrument
cluster displayPractical hintsCar care Index
If a tire constantly loses air, it should be inspected for
damage.
The spare tire should be checked periodically for
condition and inflation. Spare tire will age and become
worn over time even if never used, and thus should be
inspected and replaced when necessary.Battery
Important!
Battery replacement information:
The maintenance-free battery is located in the trunk
under the trunk floor.
The service life of the battery is dependent on its
condition of charge. The battery should always be kept
sufficiently charged, in order to last an optimum length
of time.
Wa r n i n g !
Do not overinflate tires. Overinflating tires can
result in sudden deflation (blowout) because they
are more likely to become punctured or damaged
by road debris, potholes etc.. Follow recommended
inflation pressures.Do not overload the tires by exceeding the specified
vehicle capacity weight (as indicated by the label
on the driver’s door latch post). Overloading the
tires can overheat them, possibly causing a
blowout.
Wa r n i n g !
Failure to follow these instructions can result in
severe injury or death.Never lean over batteries while connecting, you
might get injured.Battery fluid contains sulfuric acid. Do not allow
this fluid to come in contact with eyes, skin or
clothing. In case it does, immediately flush affected
area with water and seek medical help if necessary.A battery will also produce hydrogen gas, which is
flammable and explosive. Keep flames or sparks
away from battery, avoid improper connection of
jumper cables, smoking etc..
Page 271 of 325

268 Jump starting
Te ch n ica l
data Instruments
and controlsOperation DrivingInstrument
cluster displayPractical hintsCar care Index
Jump startingImportant!
A discharged battery can freeze at approx. +14°F
(–10°C). In that case, it must be thawed out before
jumper cables are used. Attempting to jump start a
frozen battery can result in it exploding, causing
personal injury.
Jumper cable specifications:
•Minimum cable cross-section of 25 mm
2 or approx.
2AWG
•Maximum length of 11.5 ft. (3.5 m).
If the battery is discharged, the engine should be started
with jumper cables and the (12 V) battery of another
vehicle.
Only use 12 V battery to jump start your vehicle. Jump
starting with more powerful battery could damage the
vehicle’s electrical systems, which will not be covered
by the Mercedes-Benz Limited Warranty.
The battery is located in the trunk under the trunk floor.
Wa r n i n g !
Failure to follow these directions will cause
damage to the electronic components, and can lead
to a battery explosion and severe injury or death.Never lean over batteries while connecting or jump
starting, you might get injured.Battery fluid contains sulfuric acid. Do not allow
this fluid to come in contact with eyes, skin or
clothing. In case it does, immediately flush affected
area with water, and seek medical help if
necessary.A battery will also produce hydrogen gas, which is
flammable and very explosive. Keep flames or
sparks away from battery, avoid improper
connection of jumper cables, smoking etc..Read all instructions before proceeding.
Page 304 of 325
301 Technical data
Te ch n ica l
data Instruments
and controlsOperation DrivingInstrument
cluster displayPractical hints Car care Index We i g h t s (see certification tag)Main dimensions
Roof load max. 220 lb (100 kg)
Trunk load max. 220 lb (100 kg)Overall vehicle length 180.2 in (4577 mm)
Overall vehicle width 67.8 in (1722 mm)
Overall height 54.0 in (1371 mm)
Wheel base 105.9 in (2690 mm)
Track, front 59.3 in (1505 mm)
Track, rear 58.0 in (1474 mm)