2001 MERCEDES-BENZ CLK CABRIOLET transmission
[x] Cancel search: transmissionPage 202 of 341
199 Automatic transmission
Te ch n ica l
data Instruments
and controlsOperationDrivingInstrument
cluster displayPractical hints Car care Index Dependent on the program mode selector switch
position “S” or “W” the maximum speed in the
reverse gear is different. However, it is not
possible to change the program mode while in
reverse.
Neutral
No power is transmitted from the engine to the
drive axle. When the brakes are released, the
vehicle can be moved freely (pushed or towed). Do
not engage “N” while driving except to coast
when the vehicle is in danger of skidding (e.g. on
icy roads, see winter driving instructions on
page 211).
Important!
Coasting the vehicle, or driving for any other
reason with selector lever in “N” can result in
transmission damage that is not covered by the
Mercedes-Benz Limited Warranty.
The transmission automatically upshifts through
5th gear. Position “D” provides optimum driving
characteristics under all normal operating
conditions.Gear selection for special circumstances
The transmission gear ranges for special circumstances
can be selected by pressing the selector lever to the
right or the left with the selector lever in position “D”.
The gear range currently selected is indicated in the
instrum ent clu ster disp lay.
Briefly press selector lever in the ç direction:
The transmission downshifts, one gear at a time, in the
order “4”, “3”, “2”, “1”.
Press and hold selector lever in the ç direction:
The selector lever position display will switch to the
gear range currently selected by the automatic
transmission.
The transmission will only shift down one gear if the
gear range currently selected has already shifted to its
highest possible gear.
Briefly press selector lever in the æ direction:
The transmission will shift from the current gear range
to the next higher gear range. If the transmission is
already in gear range “D”, an additional upshift of one
gear is possible.
Page 203 of 341
200 Automatic transmission
Te ch n ica l
data Instruments
and controlsOperationDrivingInstrument
cluster displayPractical hints Car care Index
Press and hold selector lever in the æ direction:
The transmission will shift from the current gear
directly to gear range “D”.
Important!
With transmission in gear range “D”, “4” or “3”,
upshifting from 1st to 2nd to 3rd gear is delayed
depending on vehicle speed and engine temperature.
This allows the catalytic converter to heat up more
q uickly to operating temperatures.During the brief warm-up period this delayed upshift
and increased engine noise might be perceived as a
malfunction. However, neither the engine nor
transmission are negatively affected by this mode of
operation.
The delayed upshift is effective with vehicle speeds
below 31 mph (50 km/h) at partial throttle and engine
temperatures below 95°F (35°C).
To avoid overrevving the engine when the selector lever
is moved to a lower gear range, the transmission will not
shift to a lower gear, if the engine’s revolutions per
minute limit would be exceeded. In this case there will
be no downshift, even when the vehicle speed reaches
the engine’s RPM limit of that gear, e.g. by applying the
service brakes.
To prevent the engine from laboring at low RPM when
driving uphill gradients or with your vehicle heavily
loaded, the automatic transmission will downshift when
necessary to maintain engine RPM within the best
torque range.
Wa r n i n g !
On slippery road surfaces, never downshift in order
to obtain braking action. This could result in drive
wheel slip and reduced vehicle control. Your
vehicle’s ABS will not prevent this type of loss of
control.
Page 204 of 341

201 Automatic transmission
Te ch n ica l
data Instruments
and controlsOperationDrivingInstrument
cluster displayPractical hints Car care Index Gear ranges:
Upshift through 4th gear only. Suitable for
performance driving.
Upshift through 3rd gear only. Suitable for
moderately steep hills. Since the transmission
does not shift higher than 3rd gear, this gear
selection will allow use of the engine’s braking
power downhill.Upshift through 2nd gear only. For driving in
mountainous regions or under extreme operating
conditions. This gear selection will allow use of
the engine’s braking power when descending
steep grades.
Use this position, which makes maximum use of
the engine’s braking effect, while descending
very steep or lengthy downgrades and only at
speeds below 40 mph (60 km/h).
Page 205 of 341
202 Automatic transmission
Te ch n ica l
data Instruments
and controlsOperationDrivingInstrument
cluster displayPractical hints Car care Index
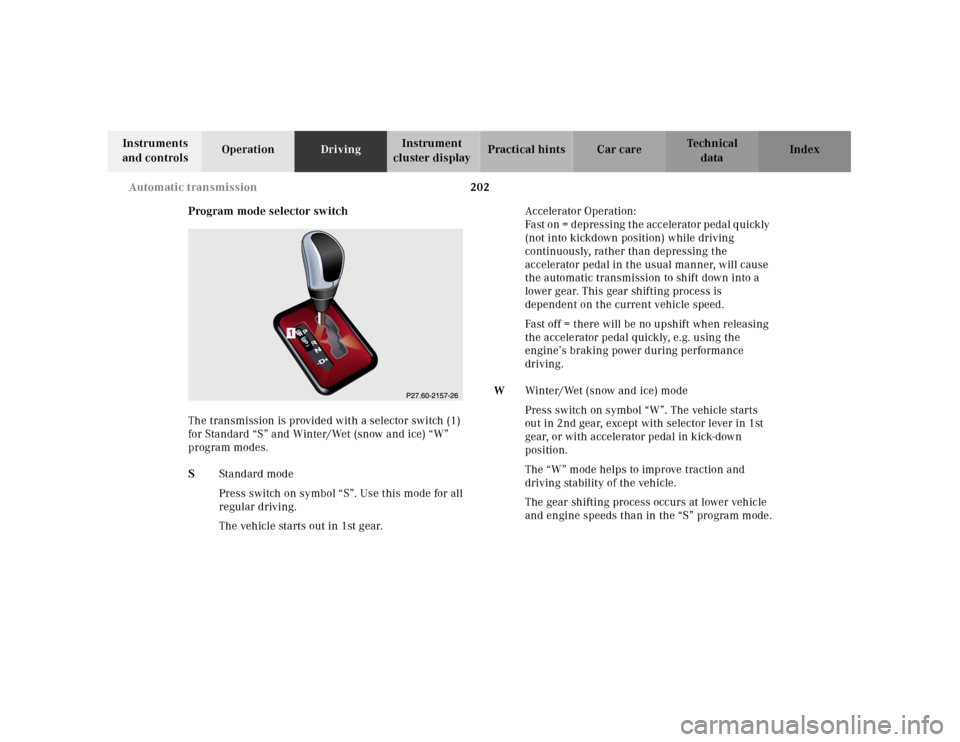
Program mode selector switch
The transmission is provided with a selector switch (1)
for Standard “S” and Winter/Wet (snow and ice) “W”
program modes.
SSta nd ard mod e
Press switch on symbol “S”. Use this mode for all
regular driving.
The vehicle starts out in 1st gear.Accelerator Operation:
Fa st o n = d e p re s s i ng t h e a c c e l e r a to r p e d a l q u i ck ly
(not into kickdown position) while driving
continuously, rather than depressing the
accelerator pedal in the usual manner, will cause
the automatic transmission to shift down into a
lower gear. This gear shifting process is
dependent on the current vehicle speed.
Fast off = there will be no upshift when releasing
the accelerator pedal quickly, e.g. using the
engine’s braking power during performance
driving.
WWinter/Wet (snow and ice) mode
Press switch on symbol “W”. The vehicle starts
out in 2nd gear, except with selector lever in 1st
gear, or with accelerator pedal in kick-down
position.
The “W” mode helps to improve traction and
driving stability of the vehicle.
The gear shifting process occurs at lower vehicle
and engine speeds than in the “S” program mode.
1
Page 206 of 341

203 Automatic transmission
Te ch n ica l
data Instruments
and controlsOperationDrivingInstrument
cluster displayPractical hints Car care Index Caution!
Never change the program mode when the selector lever
is out of position “P”. It could result in a change of
driving characteristics for which you may not be
prepared.
Important!
Always be certain of the program mode selected since
the vehicle driving characteristics change with the
selection of the program mode.
Dependent on the program mode selector switch
position “S” or “W” and the gear selector lever in
position “R”, the ratio of power transmission changes.
Emergency operation (Limp home mode)
If vehicle acceleration worsens or the transmission no
longer shifts, the transmission is most likely operating
in Limp home mode which engages when there is a
malfunction of the transmission. This condition may be
accompanied by the “CHECK ENGINE” malfunction
indicator lamp in the instrument cluster coming on.In this mode only the 2nd gear or reverse gear can be
activated.
To engage 2nd gear or reverse:
1. Stop the vehicle.
2. Move selector lever to position “P”.
3. Turn off the engine.
4. Wait approx. 10 seconds.
5. Restart the engine.
6. Move selector lever to position “D” (for 2nd gear), or
move selector lever to position “R” (for reverse gear).
Have the transmission checked at your authorized
Mercedes-Benz Center as soon as possible.
Page 215 of 341

212 Driving instructions
Te ch n ica l
data Instruments
and controlsOperationDrivingInstrument
cluster displayPractical hints Car care Index
Winter driving
Have your vehicle winterized at your authorized
Mercedes-Benz Center before the onset of winter.
•Change the engine oil if the engine contains an oil
which is not approved for winter operation. For
viscosity (SAE/CCMC class) and filling quantity, see
page 317.
•Check engine coolant anticorrosion/antifreeze
concentration.
•Additive for the windshield washer and headlamp
cleaning system: Add MB Concentrate “S” to a
premixed windshield washer solvent/antifreeze
which is formulated for below freezing temperatures
see page 259.
•Test battery: Battery capacity drops with decreasing
ambient temperature. A well charged battery helps
to ensure that the engine can be started, even at low
ambient temperatures.
•Tires: We recommend M+S rated radial-ply tires on
all four wheels for the winter season. Observe
permissible maximum speed for M+S rated
radial-ply tires and the legal speed limit.In winter operation, the maximum effectiveness of the
antilock brake system (ABS) or of the electronic stability
program (ESP) can only be achieved with M+S rated
radial-ply tires and / or snow chains recommended by
Mercedes-Benz. Snow chains maximize performance.
For driving instructions with snow chains, see page 210.
Deep water
Caution!
Do not drive t hrou gh f lood ed a rea s or water of u nk nown
depth.
If you must drive through deep water, drive slowly to
prevent water from entering the engine compartment or
passenger compartment, being ingested by the air
intake, possibly causing damage to electrical
components or wiring, to engine or transmission that is
not covered by the Mercedes-Benz Limited Warranty.
Block heater (Canada only)
The engine is equipped with a block heater.
The electrical cable may be installed at your authorized
Mercedes-Benz Center.
Page 219 of 341
216 Driving systems
Te ch n ica l
data Instruments
and controlsOperationDrivingInstrument
cluster displayPractical hints Car care Index
Notes:
If the engine does not brake the vehicle sufficiently
while driving on a downgrade, the speed you set on the
cruise control may be exceeded. In this case the
automatic transmission shifts down (max. to 3rd gear)
to maintain the set cruise control speed by using the
engine’s braking power.
As soon as the grade eases, the automatic transmission
shifts up again dependent on the selector lever position.
Neverth eless, in som e ca ses you may h ave to step on th e
b ra ke pe dal to slow d own. In t his case t he cruise control
is switched off.
Use the lever to resume the previously set speed.Brake assist system (BAS)
The BAS is designed to maximize the vehicle’s braking
capability during emergency braking maneuvers by
having maximum power boost applied to the brakes
more quickly in emergency braking conditions than
might otherwise be afforded solely by the driver’s
braking style. This can help reduce braking distances
over what ordinary driving and braking style might do.
The BAS complements the antilock brake system (ABS).
Wa r n i n g !
BAS cannot prevent the natural laws of physics
from acting on the vehicle, nor can it increase
braking efficiency beyond that afforded by the
condition of the vehicle brakes and tires or the
traction afforded. The BAS cannot prevent
accidents, including those resulting from excessive
speed in turns, following another vehicle too
closely, or aquaplaning. Only a safe, attentive, and
skillful driver can prevent accidents. The
capabilities of a BAS equipped vehicle must never
be exploited in a reckless or dangerous manner
which could jeopardize the user’s safety or the
safety of others.
Page 252 of 341
249 Contents – Practical hints
Te ch n ica l
data Instruments
and controlsOperation DrivingInstrument
cluster displayPractical hintsCar care Index
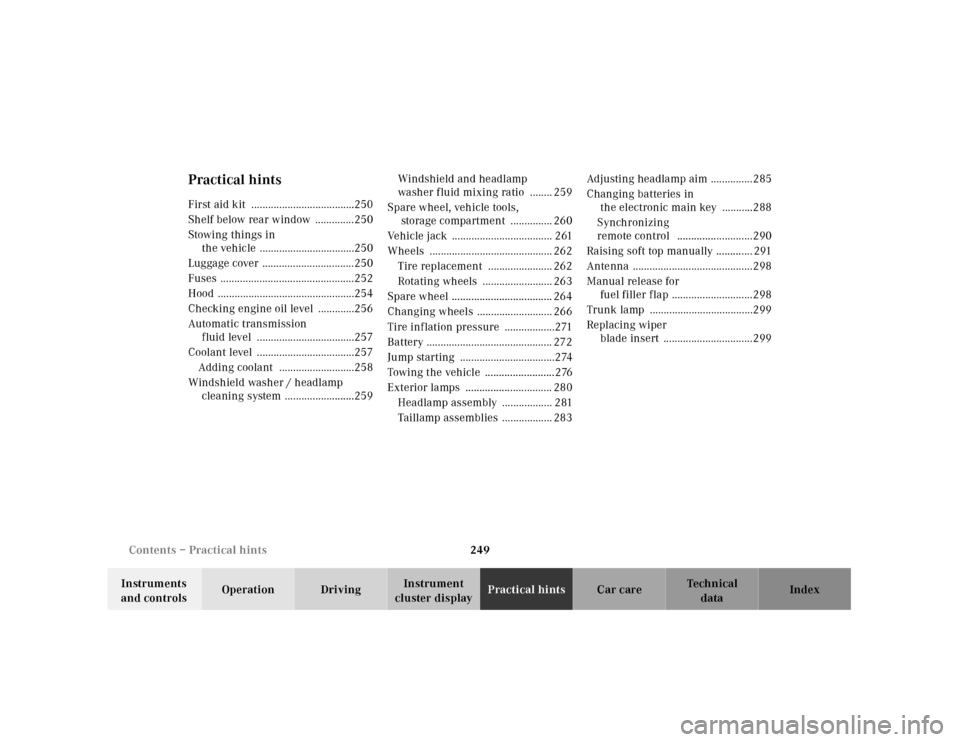
Practical hintsFirst aid kit .....................................250
Shelf below rear window ..............250
Stowing things in
the vehicle ..................................250
Luggage cover .................................250
Fuses ................................................252
Hood .................................................254
Checking engine oil level .............256
Automatic transmission
fluid level ...................................257
Coolant level ...................................257
Adding coolant ...........................258
Windshield washer / headlamp
cleaning system .........................259Windshield and headlamp
washer fluid mixing ratio ........ 259
Spare wheel, vehicle tools,
storage compartment ............... 260
Vehicle jack .................................... 261
Wheels ............................................ 262
Tire replacement ....................... 262
Rotating wheels ......................... 263
Spare wheel .................................... 264
Changing wheels ........................... 266
Tire inflation pressure ..................271
Battery ............................................. 272
Jump starting ..................................274
Towing the vehicle .........................276
Exterior lamps ............................... 280
Headlamp assembly .................. 281
Taillamp assemblies .................. 283Adjusting headlamp aim ...............285
Changing batteries in
the electronic main key ...........288
Synchronizing
remote control ...........................290
Raising soft top manually ............. 291
Antenna ...........................................298
Manual release for
fuel filler flap .............................298
Trunk lamp .....................................299
Replacing wiper
blade insert ................................299