2001 MERCEDES-BENZ C240 ECO mode
[x] Cancel search: ECO modePage 10 of 381

1 IntroductionProduct information
Kindly observe the following in your own best interest:
We recommend using Mercedes-Benz original parts as well as conversion parts and accessories
explicitly approved by us for your vehicle model.
We have tested these parts to determine their reliability, safety and their special
suitability for Mercedes-Benz vehicles.
We are unable to make an assessment for other products and therefore cannot be held responsible
for them, even if in individual cases an official approval or authorization by governmental or other
agencies should exist. Use of such parts and accessories could adversely affect the safety, performance
or reliability of your vehicle. Please do not use them.
Mercedes-Benz original parts as well as conversion parts and accessories approved by us are available
at your authorized Mercedes-Benz Center where you will receive comprehensive information, also on
permissible technical modifications, and where proper installation will be performed.
Page 36 of 381
27 Central locking system
Te ch n i c a l
data Instruments
and controlsOperationDrivingInstrument
cluster displayPractical hints Car care Index Locking and unlocking with remote control
Unlocking:
Press transmit button Œ. All turn signal lamps blink
once to indicate that the vehicle is unlocked.
The remote control can be programmed for two kinds of
unlocking modes (see below):
Selective unlocking mode –
Press transmit button Œ once to unlock driver’s door
and fuel filler flap.
Press transmit button Πtwice to unlock all doors,
fuel filler flap, and trunk.
Global unlocking mode –
Press transmit button Πonce to unlock all doors,
fuel filler flap, and trunk.
Notes:
If the trunk was previously locked separately, it will
remain locked, see page 35.
The presently active unlocking mode (selective or
global) can only be determined by unlocking the vehicle
with the remote control (see below for changing mode).If within 40 seconds of unlocking with the remote
control, neither door or trunk is opened, the electronic
key is not inserted in the starter switch, or the central
locking switch is not activated, the vehicle will
automatically lock.
Locking:
Press transmit button ‹ once. All turn signal lamps
blink three times to indicate that the vehicle is locked. If
they do not blink three times, a door or trunk is not
properly closed.
Note:
If the vehicle cannot be locked or unlocked by pressing
the transmit button, then it may be necessary to change
the batteries in the electronic main key (if ok, battery
check lamp in electronic main key will light briefly
when pressing transmit button) or to synchronize the
remote control, see pages 332 and 334.
Choosing global or selective mode on remote control
Press and hold transmit buttons‹ andŒ
simultaneously for five seconds to reprogram the
remote control. Battery check lamp will blink two times
indicating the completed mode change.
Page 54 of 381
45 Seats
Te ch n i c a l
data Instruments
and controlsOperationDrivingInstrument
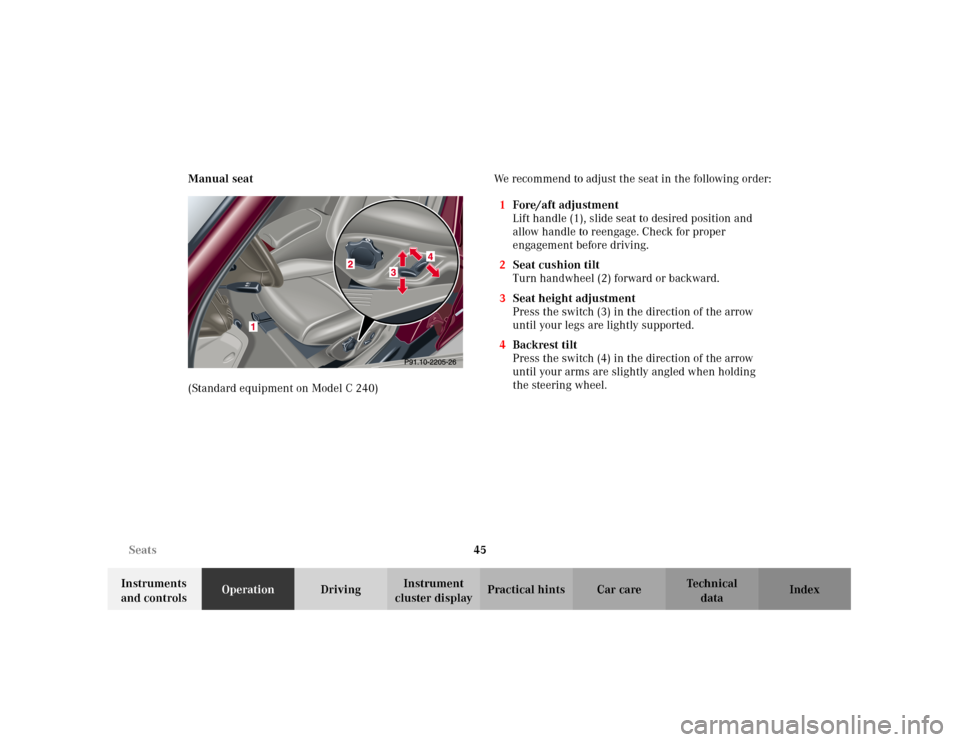
cluster displayPractical hints Car care Index Manual seat
(Standard equipment on Model C 240)We recommend to adjust the seat in the following order:
1Fore/aft adjustment
Lift handle (1), slide seat to desired position and
allow handle to reengage. Check for proper
engagement before driving.
2Seat cushion tilt
Turn handwheel (2) forward or backward.
3Seat height adjustment
Press the switch (3) in the direction of the arrow
until your legs are lightly supported.
4Backrest tilt
Press the switch (4) in the direction of the arrow
until your arms are slightly angled when holding
the steering wheel.
Page 58 of 381
49 Seats
Te ch n i c a l
data Instruments
and controlsOperationDrivingInstrument
cluster displayPractical hints Car care Index Multicontour seat (optional)
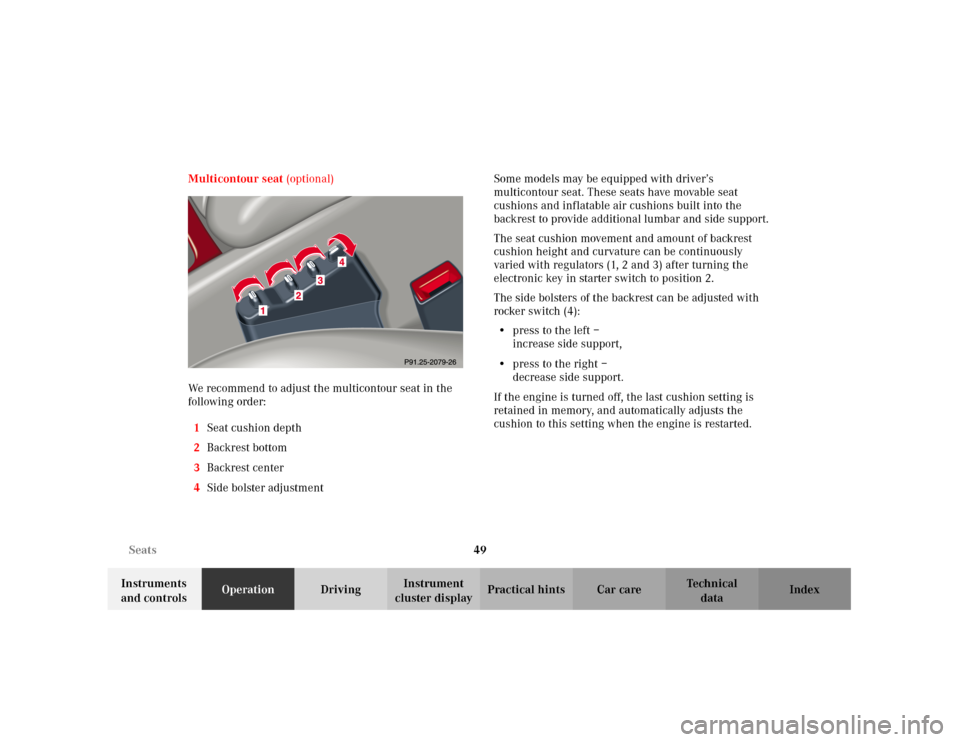
We recommend to adjust the multicontour seat in the
following order:
1Seat cushion depth
2Backrest bottom
3Backrest center
4Side bolster adjustmentSome models may be equipped with driver’s
multicontour seat. These seats have movable seat
cushions and inflatable air cushions built into the
backrest to provide additional lumbar and side support.
The seat cushion movement and amount of backrest
cushion height and curvature can be continuously
varied with regulators (1, 2 and 3) after turning the
electronic key in starter switch to position 2.
The side bolsters of the backrest can be adjusted with
rocker switch (4):
•press to the left –
increase side support,
•press to the right –
decrease side support.
If the engine is turned off, the last cushion setting is
retained in memory, and automatically adjusts the
cushion to this setting when the engine is restarted.
Page 75 of 381

66 Restraint systems
Te ch n i c a l
data Instruments
and controlsOperationDrivingInstrument
cluster displayPractical hints Car care Index
come on at all or if it fails to extinguish after
approximately 4 seconds or if it comes on thereafter,
a malfunction in the system has been detected.
The following system components are monitored or
undergo a self-check: crash-sensor(s), airbag ignition
circuits, front seat belt buckles, emergency tensioning
retractors, seat sensor.
Initially, when the electronic key is turned from starter
switch position 0 to position 1 or 2, malfunctions in the
crash sensor are detected and indicated (the “SRS”
indicator lamp stays on longer than 4 seconds or does
not come on).
Have the system checked at your authorized
Mercedes-Benz Center immediatelyIn the operational mode, after the indicator lamp has
gone out following the initial check, interruptions or
short circuits in the airbag ignition circuit and in the
driver and front passenger seat belt buckle harnesses,
and low voltage in the entire system are detected and
indicated.
Note:
See page 271 for information on the supplemental
restraint system (SRS) indicator lamp.
Wa r n i n g !
In the event a malfunction of the “SRS” is indicated
as outlined above, the “SRS” may not be
operational. For your safety, we strongly
recommend that you visit an authorized
Mercedes-Benz Center immediately to have the
system checked; otherwise the “SRS” may not be
activated when needed in an accident, which could
result in serious or fatal injury, or it might deploy
unexpectedly and unnecessarily which could also
result in injury.
Page 127 of 381
118 Multifunction steering wheel, multifunction display
Te ch n i c a l
data Instruments
and controlsOperationDrivingInstrument
cluster displayPractical hints Car care Index
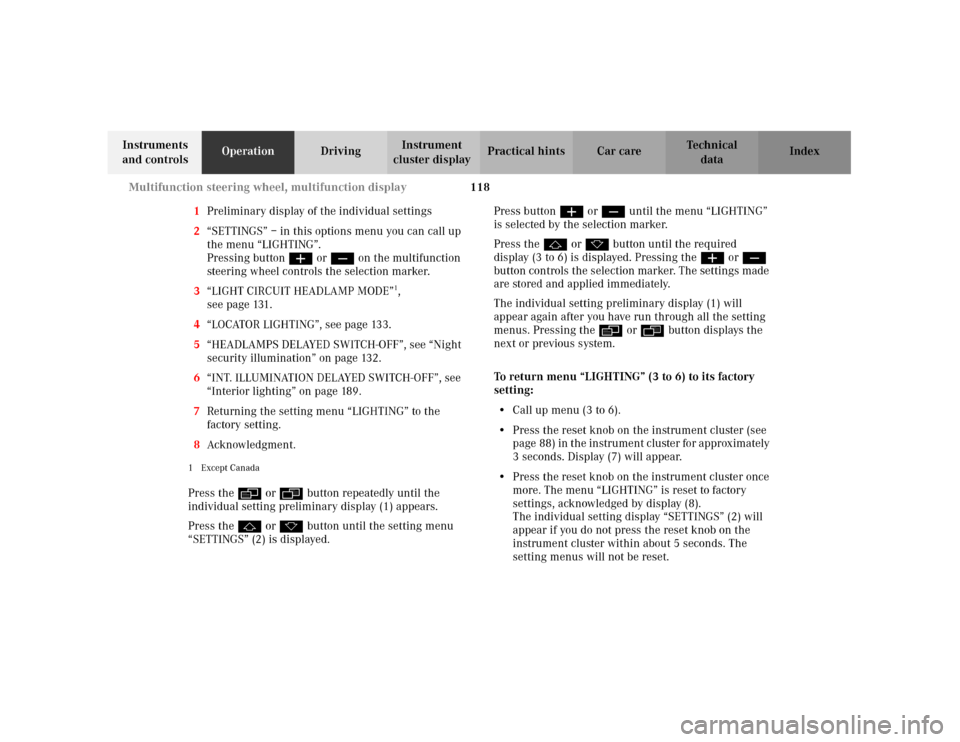
1Preliminary display of the individual settings
2“SETTINGS” – in this options menu you can call up
the menu “LIGHTING”.
Pressing buttonæ orç on the multifunction
steering wheel controls the selection marker.
3“LIGHT CIRCUIT HEADLAMP MODE”
1,
seepage131.
4“LOCATOR LIGHTING”, see page 133.
5“HEADLAMPS DELAYED SWITCH-OFF”, see “Night
security illumination” on page 132.
6“INT. ILLUMINATION DELAYED SWITCH-OFF”, see
“Interior lighting” on page 189.
7Returning the setting menu “LIGHTING” to the
factory setting.
8Acknowledgment.
1Except CanadaPress the è or ÿ button repeatedly until the
individual setting preliminary display (1) appears.
Press the j or k button until the setting menu
“SETTINGS” (2) is displayed.Press buttonæ orç until the menu “LIGHTING”
is selected by the selection marker.
Press the j or k button until the required
display (3 to 6) is displayed. Pressing the æ orç
button controls the selection marker. The settings made
are stored and applied immediately.
The individual setting preliminary display (1) will
appear again after you have run through all the setting
menus. Pressing the è or ÿ button displays the
next or previous system.
To return menu “LIGHTING” (3 to 6) to its factory
setting:
•Call up menu (3 to 6).
•Press the reset knob on the instrument cluster (see
p age 88 ) in t he in str umen t c luste r fo r app rox imately
3 seconds. Display (7) will appear.
•Press the reset knob on the instrument cluster once
more. The menu “LIGHTING” is reset to factory
settings, acknowledged by display (8).
The individual setting display “SETTINGS” (2) will
appear if you do not press the reset knob on the
instrument cluster within about 5 seconds. The
setting menus will not be reset.
Page 129 of 381
120 Multifunction steering wheel, multifunction display
Te ch n i c a l
data Instruments
and controlsOperationDrivingInstrument
cluster displayPractical hints Car care Index
1Preliminary display of the individual settings
2“SETTINGS” – in this options menu you can call up
the menu “VEHICLE”.
Pressing buttonæ orç on the multifunction
steering wheel controls the selection marker.
3“PRESS BUTTON IN AUDIO MODE”
– radio adjustment “STATION SEARCH”: use
thej ork button to select a frequency.
– radio adjustment “MEMORY”: use the j
ork button to select a stored station (preset
memory).
4“AUTOMATIC DOOR LOCK”, see automatic central
locking on page 34.
5Returning the setting menu “VEHICLE” to the
factory setting.
6Acknowledgment.
Press the è or ÿ button repeatedly until the
individual setting preliminary display (1) appears.
Press the j or k button until the setting menu
“SETTINGS” (2) is displayed.
Press buttonæ orç un til the m en u “ VE HICLE” is
selected by the selection marker.Press the j or k button until the required
display (3 to 4) is displayed. Pressing the æ orç
button controls the selection marker. The settings made
are stored and applied immediately.
The individual setting preliminary display (1) will
appear again after you have run through all the setting
menus. Pressing the è or ÿ button displays the
next or previous system.
To return menu “VEHICLE” (3 and 4) to its factory
setting:
•Call up menu (3 or 4).
•Press the reset knob on the instrument cluster (see
p age 88 ) in t he in str umen t c luste r fo r app rox imately
3 seconds. Display (5) will appear.
•Press the reset knob on the instrument cluster once
more. The menu “VEHICLE” is reset to factory
settings, acknowledged by display (6).
The individual setting display “SETTINGS” (2) will
appear if you do not press the knob for instrument
cluster illumination within about 5 seconds. The
setting menus will not be reset.
Page 139 of 381
130 Exterior lamp switch
Te ch n i c a l
data Instruments
and controlsOperationDrivingInstrument
cluster displayPractical hints Car care Index
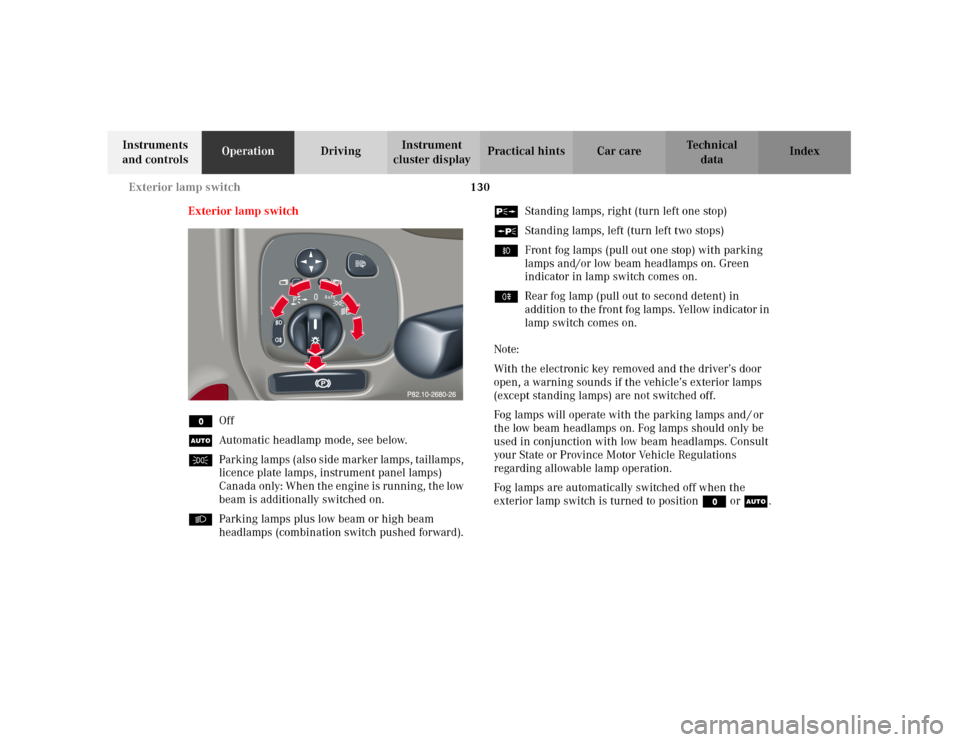
Exterior lamp switch
MOff
UAutomatic headlamp mode, see below.
CParking lamps (also side marker lamps, taillamps,
licence plate lamps, instrument panel lamps)
Canada only: When the engine is running, the low
beam is additionally switched on.
BParking lamps plus low beam or high beam
headlamps (combination switch pushed forward).ˆStanding lamps, right (turn left one stop)
‚Standing lamps, left (turn left two stops)
‡Front fog lamps (pull out one stop) with parking
lamps and/or low beam headlamps on. Green
indicator in lamp switch comes on.
†Rear fog lamp (pull out to second detent) in
addition to the front fog lamps. Yellow indicator in
lamp switch comes on.
Note:
With the electronic key removed and the driver’s door
open, a warning sounds if the vehicle’s exterior lamps
(except standing lamps) are not switched off.
Fog lamps will operate with the parking lamps and / or
the low beam headlamps on. Fog lamps should only be
used in conjunction with low beam headlamps. Consult
your State or Province Motor Vehicle Regulations
regarding allowable lamp operation.
Fog lamps are automatically switched off when the
exterior lamp switch is turned to position M or U.