Page 362 of 504
IN CASE OF AN EMERGENCY
345
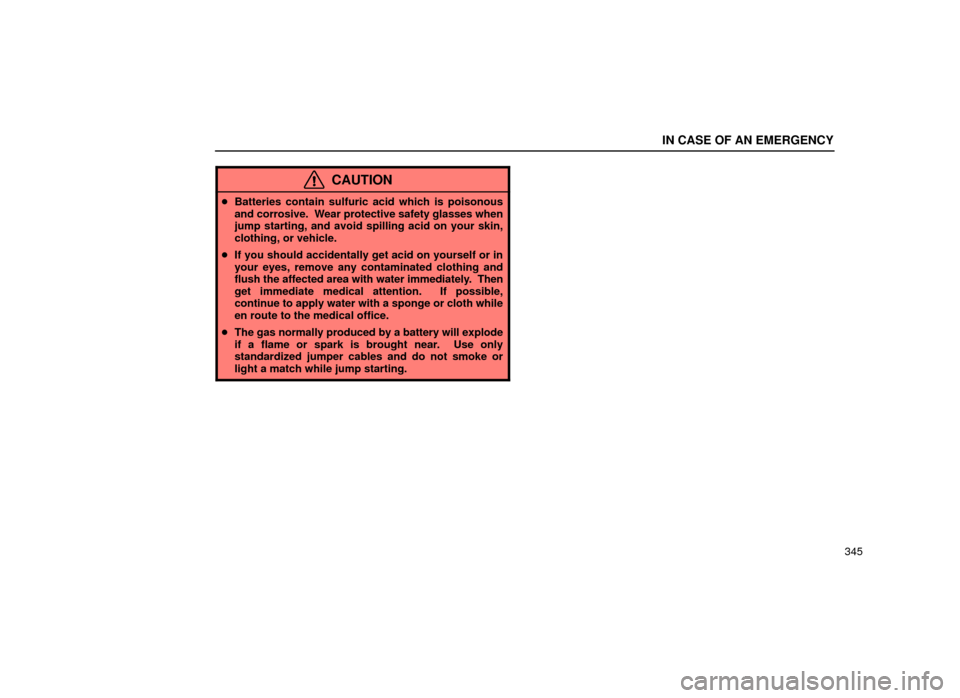
CAUTION
�Batteries contain sulfuric acid which is poisonous
and corrosive. Wear protective safety glasses when
jump starting, and avoid spilling acid on your skin,
clothing, or vehicle.
� If you should accidentally get acid on yourself or in
your eyes, remove any contaminated clothing and
flush the affected area with water immediately. Then
get immediate medical attention. If possible,
continue to apply water with a sponge or cloth while
en route to the medical office.
� The gas normally produced by a battery will explode
if a flame or spark is brought near. Use only
standardized jumper cables and do not smoke or
light a match while jump starting.
Page 364 of 504
 IN CASE OF AN EMERGENCY
347
�
5Discharged battery 6Booster batteryJUMP STARTING PROCEDURE
1. If the booster battery is installed in another vehicle,
make sure the vehicles are not touching. Turn o")
IN CASE OF AN EMERGENCY
347
�
5Discharged battery 6Booster batteryJUMP STARTING PROCEDURE
1. If the booster battery is installed in another vehicle,
make sure the vehicles are not touching. Turn off all
unnecessary lights and accessories.
2. If required, remove all the vent plugs from the booster
battery. Lay a cloth over the open vents on the booster
battery. (This helps reduce the explosion hazard,
personal injuries and burns.)
If the booster battery is an extended maintenance
interval battery, it is not necessary to remove the vent
plugs.
3. If the engine in the vehicle with the booster battery is
not running, start it and let it run for about 5 minutes.
During jump starting, run the engine at about 2000 rpm
with the accelerator pedal lightly depressed.
4. Locate po
sitive (+) and negative (±) terminals of each
battery. Connect the jumper cables in the exact order
(
1 2 3 4) shown in the illustration.
1 Connect a positive (red) jumper cable clamp to the
positive (+) terminal of the discharged battery.
2 Connect the clamp at the other end of the positive
(red) cable to the positive (+) terminal of the booster
battery.
3 Connect a negative (black) cable clamp to the
negative (±) terminal of the booster battery.
4Connect the clamp at the other end of the negative
Page 365 of 504
 IN CASE OF AN EMERGENCY
348(black) cable to a solid, stationary, unpainted
metallic point (e.g. cylinder head) away from the
battery. Do not connect it to or near any part that
moves when the engine")
IN CASE OF AN EMERGENCY
348(black) cable to a solid, stationary, unpainted
metallic point (e.g. cylinder head) away from the
battery. Do not connect it to or near any part that
moves when the engine is cranked.
CAUTION
When making the connections, to avoid serious injury,
do not lean over the battery or accidentally let the
jumper cables or clamps touch anything except the
correct battery terminals or the ground.
5. Start your engine in the normal way. After starting,
run it at about 2000 rpm for several minutes with the
accelerator pedal lightly depressed.
6. Carefully disconnect the cables in the exact reverse
order: the negative cable and then the positive cable.
7. Carefully dispose of the battery cover cloths which
may now contain sulfuric acid.
8. If removed, replace all the battery vent plugs.
If the cause of your battery discharging is not apparent
(for
example, lights left on), you should have it checked.IF YOUR VEHICLE OVERHEATS
If your engine coolant temperature gauge indicates
overheating, if you experience a loss of power, or if
you hear a loud knocking or pinging noise, the
engine has probably overheated.
Page 400 of 504
 MAINTENANCE
383
Vehicle interior
Items listed below should be checked regularly, e.g.
while performing periodic services, cleaning the
vehicle, etc.
Lights
Make sure the headlight, stop lights, tail l")
MAINTENANCE
383
Vehicle interior
Items listed below should be checked regularly, e.g.
while performing periodic services, cleaning the
vehicle, etc.
Lights
Make sure the headlight, stop lights, tail lights, turn
signal lights, and other lights are working. Check
headlight aim.
Service reminder indicators and warning buzzers
Check that all service reminder indicators and warning
buzzers function properly.
Steering wheel
Check that it has the specified freeplay. Be alert for
changes in steering condition, such as hard steering,
excessive freeplay or strange noise.
Seats
Check that all front seat controls such as seat adjusters,
seatback recliner, etc. operate smoothly. Check that the
head restraints move up and down smoothly and that the
locks hold securely in any latched position.
Seat belts
Check that the seat belt system such as buckles,
retractors and anchors operate properly and smoothly.
Make sure the belt webbing is not cut, frayed, worn or
damaged. Accelerator pedal
Check
the pedal for smooth operation and uneven pedal
effort or catching.
Brake pedal
Check the pedal for smooth operation and the proper
clearance and freeplay. Check the brake booster
function.
Brakes
At a safe place, check that the brakes do not pull to one
side when applied.
Parking brake
Check that the pedal has the proper travel and that, on
a safe incline, your vehicle is held securely with only the
parking brake applied.
Automatic transmission ªParkº mechanism
Check the lock release button of the selector lever for
proper and smooth operation. On a safe incline, check
that your vehicle is held securely with the selector lever
in ªPº position and all brakes released.
Page 420 of 504
ENGINE
403
± IGNITION SYSTEM
Spark plug ± Make DENSO NGK
± Gap
SK20R11
IFR6A11
1.1 mm (0.043 in.)
± ELECTRICAL SYSTEM
Battery ± Maintenance type battery Specific gravity reading at 20 �C (68�F):
Charging rates Quick charge Slow charge
± Non±maintenance battery Open voltage at 20�C (68�F):
Charging rates
1.260 Fully charged
1.160 Half charged
1.060 Discharged
15A max.
5A max.
12.7V Fully charged
12.3V Half charged
11.9V Discharged
[Voltage that is checked 20 minutes after the key is
removed with all the lights turned off]
5A max.
Page 421 of 504
 ENGINE
404
FUEL
Fuel type
Your vehicle must use only unleaded gasoline.
To help prevent gas station mixups, your Lexus has a
smaller fuel tank opening. The special nozzle on pumps
with unleaded fuel")
ENGINE
404
FUEL
Fuel type
Your vehicle must use only unleaded gasoline.
To help prevent gas station mixups, your Lexus has a
smaller fuel tank opening. The special nozzle on pumps
with unleaded fuel will fit it, but the larger standard nozzle
on pumps with leaded gas will not.
At a minimum, the gasoline you use should meet the
specifications of ASTM D4814 in the U.S.A. and CGSB
3.5±M93 in Canada.
NOTICE
Do not use leaded gasoline. Use of leaded gasoline will cause the three±way catalyticconverter to lose its effectiveness and theemission control system to function improperly.Also, this can increase maintenance costs.
Octane rating
Select Octane Rating 87 (Research Octane Number
91) or higher. For improved vehicle performance,
the use of premium unleaded gasoline with an
Octane Rating of 91 (Research Octane Number 96)
or higher is recommended.
Use of unleaded fuel with an Octane Rating or Research Octane Number lower than stated above will cause
persistent heavy knocking. If it is severe, this will lead
to engine damage.
If your engine knocks ...
If you detect heavy knocking even when using the
recommended
fuel, or if you hear steady knocking while
holding a steady speed on level roads, consult your
Lexus dealer.
However, now and then, you may notice light knocking
for a short time while accelerating or driving up hills. This
is no cause for concern.
Gasolines containing detergent additives
Lexus recommends the use of gasoline that contain
detergent additives to avoid build±up of engine
deposits.
For further details, ask your Lexus dealer or a local
gasoline retailer.
Quality gasoline
Automobile manufacturers in U.S., Europe and
Japan have developed a specification for quality
fuel named W orld±Wide Fuel Charter (WWFC) that is
expected to be applied world wide. The WWFC
consists of three categories that depend on
required emission levels. In the U.S., category 3 has
been adopted. The WWFC improves air quality by
providing for better emissions in vehicle fleets, and
Page 430 of 504
ENGINE
413
If the oil level is below or only slightly above the low
mark, add engine oil of the same type as already in
the engine.
Remove the oil filler cap and add engine oil a little at a
time,
checking the dipstick. The approximate quantity of
oil needed to fill between the low level mark and the full
level mark on the dipstick is indicated below for
reference.
When the level reaches within the correct range, return
the filler cap and turn the cap clockwise until you hear a
click.
Oil quantity. L (qt., lmp. qt.) 1.5 (1.6, 1.3)
NOTICE
Avoid overfilling, or the engine could be
damaged. Ch eck the oil level on the dipstick once
again after adding the oil.
Page 442 of 504
 CHASSIS
425
�
Vehicles equipped with traction control system
To check the fluid level, simply look at the
see±through
reservoir. The level should be between
the ªMAXº and ªMINº lines on the tan")
CHASSIS
425
�
Vehicles equipped with traction control system
To check the fluid level, simply look at the
see±through
reservoir. The level should be between
the ªMAXº and ªMINº lines on the tank.
It is normal for the brake fluid level to go down slightly as
the brake pads wear. So be sure to keep the reservoir
filled.
If the reservoir needs frequent refilling, it may indicate a
serious mechanical problem.
If the level is low, add FMVSS No.116 DOT 3 or SAE
J1703 brake fluid to the brake reservoir.
Remove and replace the reservoir cap by hand. Add
brake fluid up to the ªMAXº line.
Use only newly opened brake fluid. Once opened, brake
fluid absorbs moisture from the air, and excess moisture
can cause a dangerous loss of braking efficiency.
CAUTION
Take care when filling the reservoir because brake fluid
can harm your hands or eyes and damage painted
surfaces. If fluid gets in your hands or eyes, flush them
with clean water immediately. If you still feel
uncomfortable with your hands or eyes, go to the
doctor.

 ENGINE
413
If the oil level is below or only slightly above the low
mark, add engine oil of the same type as already in
the engine.
Remove the oil filler cap and add engine oil a little at a
time,
ch")