Page 17 of 394

1-4 Heated Front Seats
The control for the driver's
side heated seat is located
on the driver's side door
panel. The control for the
passenger's side heated seat
is located on the passenger's
side door panel.
The ignition must be in RUN for this feature to operate.
To activate the heated seats, press the button once for the
HI heat setting. Press the button again for the LO heat
setting. To turn off the heated seats, press the button a third
time. An indicator light on the button will illuminate for
each heat setting anytime the heated seats are operating.
The heated front seats will be canceled after the ignition
is turned to OFF. If you still want to use the heated front
seat feature after you restart your vehicle, you will need
to press the heated seat button again.
You vehicle also has rear heated seats. See the section
on ªRear Heated Seatsº later in this section for
more information.
Reclining Front Seatbacks
Your vehicles front seatbacks have a recline feature.
Vertical Control: You can use the vertical control to
adjust the angle of the seatback. Move the reclining front
seatback rearward or forward by moving the control
toward the rear or toward the front of the vehicle.
Page 35 of 394

1-22
Denali XL: The passenger's side of the second row
60/40 or rear bucket seat has an easy entry/exit feature.
This makes it easy to get in and out of the third row seat.
To operate the easy entry seat, do the following:
1. Turn the release
lever, located near
the back of the
seat, rearward.
2. Tilt the seatback toward the front of the vehicle and
the seat will release.
3. Pull (push if you are exiting the third row with no
assistance) the seat forward until it stops.
Be sure to return the seat to the passenger position when
finished. Pull forward and push rearward on the seat to
make sure it is locked in place.
Heated Rear Seats (Second Row)
The controls are
located on the back of
the center console.
The ignition must be in RUN for this feature to operate.
To activate the heated seats, press the button once for
the HI heat setting. Press the button again for the LO
heat setting. To turn off the heated seats, press the button
a third time. An indicator light on the button will
illuminate for each heat setting anytime the heated seats
are operating.
The heated seats will be canceled after the ignition is
turned to OFF. If you still want to use the heated seat
feature after you restart your vehicle, you will need to
press the heated seat button again.
Page 57 of 394

1-44 Servicing Your Air Bag-Equipped Vehicle
Air bags affect how your vehicle should be serviced.
There are parts of the air bag systems in several places
around your vehicle. Your dealer and the service manual
have information about servicing your vehicle and the
air bag systems. To purchase a service manual, see
ªService and Owner Publicationsº in the Index.
CAUTION:
For up to 10 minutes after the ignition key is
turned off and the battery is disconnected, an air
bag can still inflate during improper service. You
can be injured if you are close to an air bag when
it inflates. Avoid yellow connectors. They are
probably part of the air bag systems. Be sure to
follow proper service procedures, and make sure
the person performing work for you is qualified
to do so.
The air bag systems do not need regular maintenance.
Adding Equipment to Your Air
Bag-Equipped Vehicle
Q:If I add a push bumper or bicycle rack to the
front of my vehicle, will it keep the air bags
from working properly?
A:As long as the push bumper or bicycle rack is
attached to your vehicle so that the vehicle's basic
structure isn't changed, it's not likely to keep the
air bags from working properly in a crash.
Q:Is there anything I might add to the front or
sides of the vehicle that could keep the air bags
from working properly?
A:Yes. If you add things that change your vehicle's
frame, bumper system, front end or side sheet
metal or height, they may keep the air bag system
from working properly. Also, the air bag system
may not work properly if you relocate any of the
air bag sensors. If you have any questions about
this, you should contact Customer Assistance
before you modify your vehicle. The phone
numbers and addresses for Customer Assistance
are in Step Two of the Customer Satisfaction
Procedure in this manual. See ªCustomer
Satisfaction Procedureº in the Index.
Page 88 of 394

2-
2-1
Section 2 Features and Controls
Here you can learn about the many standard and optional features on your vehicle, and information on starting,
shifting and braking. Also explained are the instrument panel and the warning systems that tell you if everything is
working properly
-- and what to do if you have a problem.
2
-2 Windows
2
-4 Keys
2
-6 Door Locks
2
-8 Keyless Entry System
2
-12 Liftgate/Liftgate Glass
2
-12 Theft
2
-14 Content Theft-Deterrent
2
-15 Passlock�
2-16 New Vehicle ªBreak Inº
2
-16 Ignition Positions
2
-17 Starting Your Engine
2
-19 Engine Coolant Heater (If Equipped)
2
-20 Automatic Transmission Operation
2
-23 Parking Brake
2
-24 Shifting Into PARK (P)
2
-27 Shifting Out of PARK (P)
2
-27 Parking Over Things That Burn
2
-28 Engine Exhaust2
-28 Running Your Engine While You're Parked
2
-30 Locking Rear Axle
2
-30 All-Wheel Drive
2
-30 Tilt Wheel
2
-31 Turn Signal/Multifunction Lever
2
-37 Exterior Lamps
2
-40 Interior Lamps
2
-42 Mirrors
2
-46 Storage Compartments
2
-53 OnStar� System (If Equipped)
2
-57 Sunroof (If Equipped)
2
-58 HomeLink� Transmitter
2
-62 The Instrument Panel - Your
Information System
2
-64 Instrument Panel Cluster
2
-65 Warning Lights, Gages and Indicators
2
-77 Message Center
2
-83 Secondary Information Center (SIC)
Page 90 of 394

2-3 Power Windows
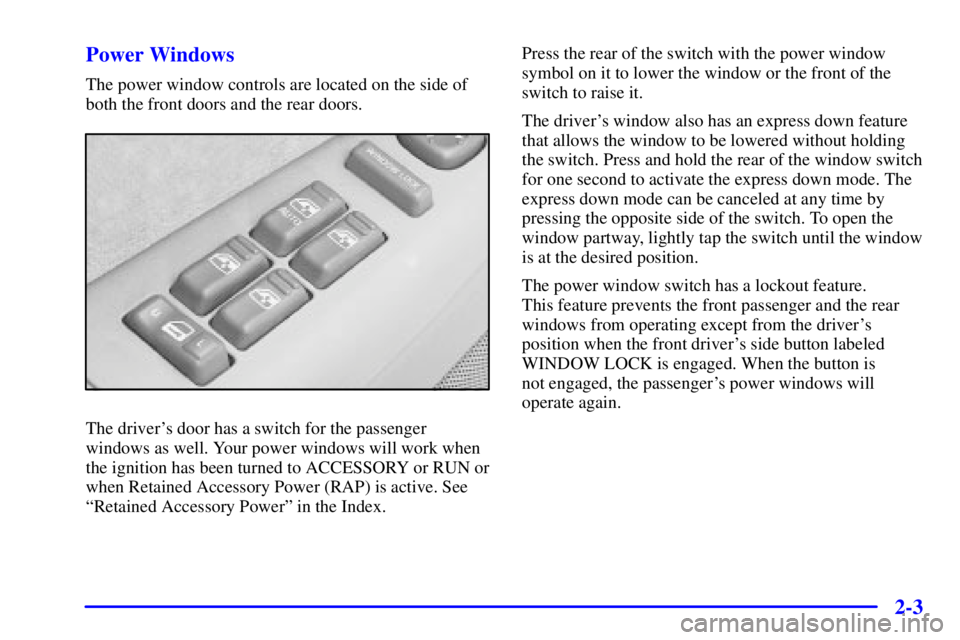
The power window controls are located on the side of
both the front doors and the rear doors.
The driver's door has a switch for the passenger
windows as well. Your power windows will work when
the ignition has been turned to ACCESSORY or RUN or
when Retained Accessory Power (RAP) is active. See
ªRetained Accessory Powerº in the Index.Press the rear of the switch with the power window
symbol on it to lower the window or the front of the
switch to raise it.
The driver's window also has an express down feature
that allows the window to be lowered without holding
the switch. Press and hold the rear of the window switch
for one second to activate the express down mode. The
express down mode can be canceled at any time by
pressing the opposite side of the switch. To open the
window partway, lightly tap the switch until the window
is at the desired position.
The power window switch has a lockout feature.
This feature prevents the front passenger and the rear
windows from operating except from the driver's
position when the front driver's side button labeled
WINDOW LOCK is engaged. When the button is
not engaged, the passenger's power windows will
operate again.
Page 91 of 394
2-4
Keys
CAUTION:
Leaving children in a vehicle with the ignition
key is dangerous for many reasons. A child or
others could be badly injured or even killed.
They could operate the power windows or other
controls or even make the vehicle move. Don't
leave the keys in a vehicle with children.
Page 92 of 394
2-5
Your vehicle has one
double
-sided key for the
ignition and all door locks
as well as the spare tire
hoist lock.
Your vehicle also has a key
that locks and unlocks the
center floor console only.
If you ever lose your keys, your dealer will be able to
assist you with obtaining replacements.
In an emergency contact roadside assistance.
See ªRoadside Assistanceº in the Index for
more information.
Page 94 of 394

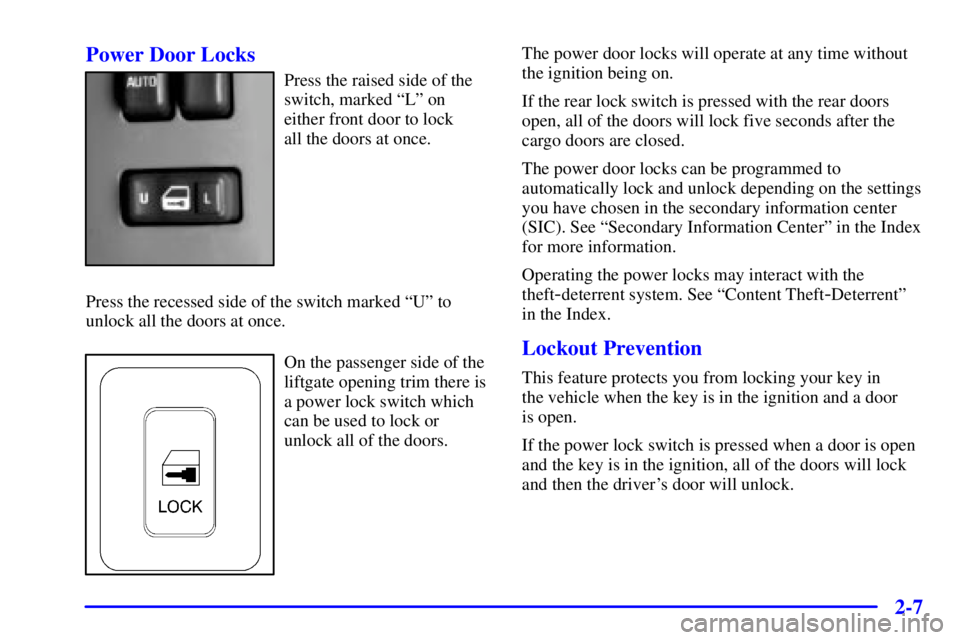
2-7 Power Door Locks
Press the raised side of the
switch, marked ªLº on
either front door to lock
all the doors at once.
Press the recessed side of the switch marked ªUº to
unlock all the doors at once.
On the passenger side of the
liftgate opening trim there is
a power lock switch which
can be used to lock or
unlock all of the doors.The power door locks will operate at any time without
the ignition being on.
If the rear lock switch is pressed with the rear doors
open, all of the doors will lock five seconds after the
cargo doors are closed.
The power door locks can be programmed to
automatically lock and unlock depending on the settings
you have chosen in the secondary information center
(SIC). See ªSecondary Information Centerº in the Index
for more information.
Operating the power locks may interact with the
theft
-deterrent system. See ªContent Theft-Deterrentº
in the Index.
Lockout Prevention
This feature protects you from locking your key in
the vehicle when the key is in the ignition and a door
is open.
If the power lock switch is pressed when a door is open
and the key is in the ignition, all of the doors will lock
and then the driver's door will unlock.