Page 15 of 394
1-2
Seats and Seat Controls
This section tells you about the seats -- how to adjust
them, and fold them up and down. It also tells you about
reclining front seatbacks and head restraints.
Power Seats
Horizontal Control: You can adjust your vehicle's front
seats with the horizontal control located on the outboard
edge of each front seat.
Raise or lower the front of the seat by raising or
lowering the forward edge of the control. Raise or lower
the rear of the seat by raising or lowering the rear edge
of the control.
Move the seat forward or rearward by moving the
whole control toward the front or toward the rear of
the vehicle.
Moving the whole control up or down raises or lowers
the entire seat cushion.
Page 19 of 394
1-6 Head Restraints
Slide the head restraint up or down so that the top of the
restraint is closest to the top of your ears. This position
reduces the chance of a neck injury in a crash.
The head restraints tilt forward and rearward also.
Pull firmly on the top of the head restraint to position it
to your liking.
The rear seat head restraints in your vehicle are adjustable.
They work the same as the front seat head restraints.
Rear Seats
60/40 Split Bench Seat (Second Row)
If your vehicle has a 60/40 split bench, the seatbacks can
be reclined and the seats can be folded to give you more
cargo space.
Reclining the 60/40 Split Bench Seatbacks
To recline the seatback, do the following:
1. Pull the lever located at
the base of the seat
cushion forward.
2. Release the lever to lock the seatback where you
want it. Pull the lever again without pushing on
the seatback and the seatback will go to an
upright position.
Page 22 of 394

1-9
Returning the Seats to an Upright Position
To return the seat to the upright position, do
the following:
1. Lift the seatback up and push it rearward all the way.
2. Lower the seat cushion until it latches into position.
3. On Denali XL models, lift the load floor panels and
latch them into the seatback.
4. Pull forward on the seatback and up on the seat
cushion to make sure the seat is securely in place.
5. Return the head restraints to the upright position.
6. Check to see that the safety belt buckles on the
driver's side seatback are accessible to the outboard
and center occupants and are not under the
seat cushions.Bucket Seats (Second Row)
If your vehicle has bucket seats, the seatbacks can be
reclined and and the seats can be folded to give you
more cargo room.
Reclining the Bucket Seats
To recline the seatback, do the following:
1. Pull the lever located at
the base of the seat
cushion forward.
2. Release the lever to lock the seatback where
you want it. Pull the lever again without pushing
on the seatback and the seatback will go to an
upright position.
Page 23 of 394
1-10
Folding the Bucket Seats
The seatbacks on the bucket seats may be folded
forward to give you more cargo space. The headrests on
these seats will have to be manually folded to fold the
seats. To do this, push the head restraints all the way
down and tilt them forward.
To fold the seatbacks on the bucket seats, do
the following:
1. Pull up on the strap loop
located at the rear of the
seat cushion and pull the
seat cushion up. Then
fold it forward.
2. Push the seatback
release lever
rearward and
pull the seatback
forward. Then fold
it down until it
is flat.
If the seatback cannot fold flat because it interferes with
the cushion, try moving the front seat forward and/or
bringing the front seatback more upright.
Page 24 of 394
1-11
Once the seatbacks are folded down, the rear seat
footwell area will be exposed and will have to be
covered by the load floor panel. To create a load floor,
do the following:
1. Release the panels from the seatbacks by pushing
forward on the latches.
2. Then fold the panels back to cover the rear seat
footwell area.Returning the Seats to an Upright Position
To return the seat to the upright position, do
the following:
1. Lift the seatback up and push it rearward all the way.
2. Lower the seat cushion until it latches into position.
3. Lift the load floor panels and latch them into
the seatback.
4. Pull forward on the seatback and up on the seat
cushion to make sure the seat is securely in place.
5. Return the head restraints to the upright position.
Page 25 of 394
1-12 50/50 Split Bench Seat (Third Row)
If your vehicle has a 50/50 split bench, the seatback(s)
can be folded and the entire seat(s) tilted or removed
from the vehicle.
Folding the Bench Seats
To fold the seatbacks, do the following:
1. Pull up on the release
lever, labeled ª1º,
located on the rear of the
seatback, and push the
seatback forward.
2. To return the seat to the
passenger position, pull
up on the release lever
labeled 1 and then pull
up on the seatback or the
assist strap located on
the outboard side of
the seat until the
seatback locks into the
upright position.
Push forward on the seatback to make sure it
is locked into position.
Page 34 of 394

1-21
Reinstalling the Bench Seat
To reinstall the bench seat, do the following:
1. While holding the rear of the seat up, slide the front
wheels into the slots on the floor. The front latches
should lock into place. If latches do not lock, try
tilting the rear of the seat upwards.
2. Once the latches are engaged, let the seat drop into
place. Release the lever labeled 1 to return the
seatback to its upright position.
3. Push and pull on the seat to make sure it is locked
into place. The seatback cannot be raised to the
upright position unless the seat is secured to
the floor.
CAUTION:
A seat that isn't locked into place properly can
move around in a collision or sudden stop. People
in the vehicle could be injured. Be sure to lock
the seat into place properly when installing it.
Entering or Exiting the Third Row Seats
Denali: To enter or exit the third row seat you must
fold the seat down following the instructions given
previously. If you are exiting the third row seat with
no assistance do the following:
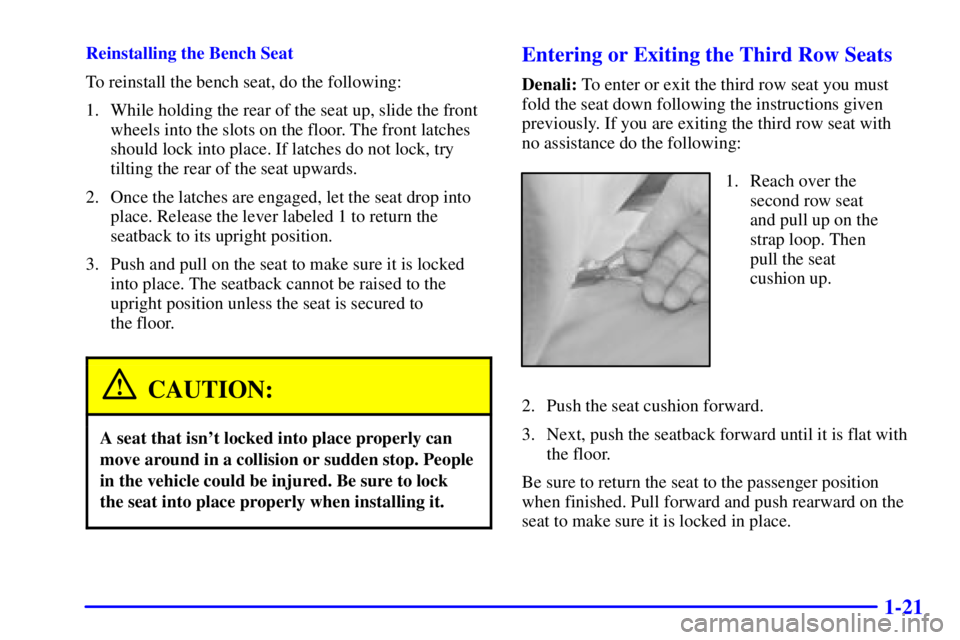
1. Reach over the
second row seat
and pull up on the
strap loop. Then
pull the seat
cushion up.
2. Push the seat cushion forward.
3. Next, push the seatback forward until it is flat with
the floor.
Be sure to return the seat to the passenger position
when finished. Pull forward and push rearward on the
seat to make sure it is locked in place.
Page 243 of 394

4-42
To find out the actual loads on your front and rear axles,
you need to go to a weigh station and weigh your vehicle.
Your dealer can help you with this. Be sure to spread out
your load equally on both sides of the centerline.
Never exceed the GVWR for your vehicle, or the GAWR
for either the front or rear axle.
And, if you do have a heavy load, you should spread it out.
CAUTION:
Do not load your vehicle any heavier than the
GVWR, or either the maximum front or rear
GAWR. If you do, parts on your vehicle can break,
and it can change the way your vehicle handles.
These could cause you to lose control and crash.
Also, overloading can shorten the life of your vehicle.
Your warranty does not cover parts or components that
fail because of overloading.
The label will help you decide how much cargo and
installed equipment your truck can carry.Using heavier suspension components to get added
durability might not change your weight ratings. Ask
your dealer to help you load your vehicle the right way.
If you put things inside your vehicle
-- like suitcases,
tools, packages, or anything else
-- they go as fast as
the vehicle goes. If you have to stop or turn quickly, or
if there is a crash, they'll keep going.
CAUTION:
Things you put inside your vehicle can strike and
injure people in a sudden stop or turn, or in a crash.
�Put things in the cargo area of your vehicle.
Try to spread the weight evenly.
�Never stack heavier things, like suitcases,
inside the vehicle so that some of them are
above the tops of the seats.
�Don't leave an unsecured child restraint in
your vehicle.
�When you carry something inside the vehicle,
secure it whenever you can.
�Don't leave a seat folded down unless you
need to.