Page 132 of 394
2-45
3. Press the COMP button on the bottom of the mirror
until the new zone number appears in the display.
After you stop pressing the button in, the display will
show a compass direction within a few seconds.
Power Outside Rearview Mirrors
The control is located on the driver's door armrest.
Move the upper selector switch to the left or right to
choose the mirror you want to adjust, then press the
arrows located on the lower control pad to adjust
the mirror.
The mirrors include ground illumination lamps (puddle
lamps) in the base of the mirror. For more information
on these lamps, see ªPuddle Lampsº in the Index.
Page 133 of 394

2-46 Driver's Outside Auto-Dimming
Rearview Mirror
The driver's outside mirror will adjust for the glare of
headlamps behind you. This feature is controlled by the
on and off settings on the electrochromic mirror. See
ªElectrochromic Inside Rearview Mirror with Compass
and Temperature Displayº earlier in this section.
Convex Outside Mirror
Your passenger's side mirror is convex. A convex
mirror's surface is curved so you can see more from the
driver's seat.
CAUTION:
A convex mirror can make things (like other
vehicles) look farther away than they really are.
If you cut too sharply into the right lane, you
could hit a vehicle on your right. Check your
inside mirror or glance over your shoulder before
changing lanes.
Heated Outside Rearview Mirrors
The outside rearview mirrors have a defrost mode.
To turn on the defrost feature, press the rear window
defogger button. See ªRear Window Defoggerº in the
Index for further information.
Storage Compartments
Glove Box
To open your glove box, lift up the latch and pull the
door open.
Page 135 of 394
2-48
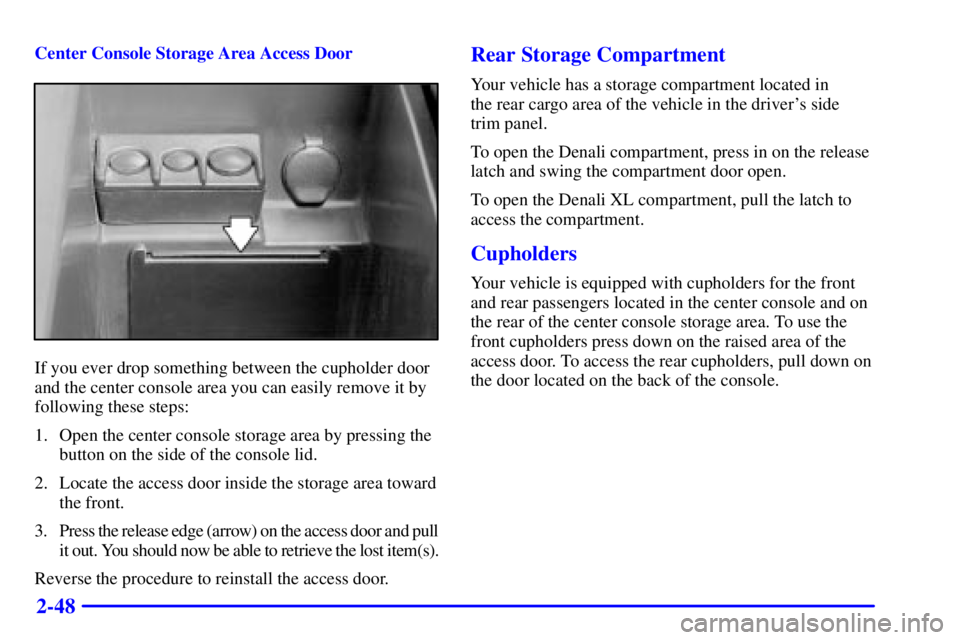
Center Console Storage Area Access Door
If you ever drop something between the cupholder door
and the center console area you can easily remove it by
following these steps:
1. Open the center console storage area by pressing the
button on the side of the console lid.
2. Locate the access door inside the storage area toward
the front.
3. Press the release edge (arrow) on the access door and pull
it out. You should now be able to retrieve the lost item(s).
Reverse the procedure to reinstall the access door.
Rear Storage Compartment
Your vehicle has a storage compartment located in
the rear cargo area of the vehicle in the driver's side
trim panel.
To open the Denali compartment, press in on the release
latch and swing the compartment door open.
To open the Denali XL compartment, pull the latch to
access the compartment.
Cupholders
Your vehicle is equipped with cupholders for the front
and rear passengers located in the center console and on
the rear of the center console storage area. To use the
front cupholders press down on the raised area of the
access door. To access the rear cupholders, pull down on
the door located on the back of the console.
Page 136 of 394
2-49 Cargo Security Shade
CAUTION:
An improperly stored cargo cover could be
thrown about the vehicle during a collision or
sudden maneuver. You or others could be
injured. If you remove the cover, always store it
outside of the vehicle. When you put it back,
always be sure that it is securely reattached.
If you have a cargo security shade, you can use it to
cover items in the cargo area of your vehicle.
To use the shade, do the following:
1. Pull the shade handle toward the rear of the vehicle.
2. Latch the shade posts into the retaining sockets on
the cargo area trim panels.
To return the shade to the retracted position, do the following:
1. Pull up on the shade handle to release the shade posts
from the retaining sockets.
2. Let the shade move forward to the full
retracted position.To remove the shade from the vehicle, do the following:
1. Let the shade go all the way into the holder.
2. Then, grasping the passenger's side shade endcap,
push the shade endcap toward the driver's side of
the vehicle. The endcap should lock in the
compressed position.
3. Lift the shade up on the passenger's side, swing the
shade rearward and take it out of the vehicle.
To put the shade in the vehicle, do the following:
1. Make sure the shade slot in the holder faces rearward
with the round surface facing down.
2. Then, hold the shade at an angle and place the shade
holder tab into the slot in the driver's side trim panel.
3. Move the other end of the shade forward and hold it
next to the passenger's side trim panel slot.
4. Push the button on top of the passenger's side
endcap. This will allow the shade to extend into the
trim slot.
5. Lightly pull on the shade holder to make sure it is
secure. On Denali XL models there are two slots.
The slots furthest forward allow the shade to be used
if the third seat is removed or folded down.
Page 153 of 394

2-66
When one of the warning lights comes on and stays on
when you are driving, or when one of the gages shows
there may be a problem, check the section that tells you
what to do about it. Please follow this manual's advice.
Waiting to do repairs can be costly
-- and even
dangerous. So please get to know your warning lights
and gages. They're a big help.
Your vehicle also has a message center that works along
with the warning lights and gages. See ªMessage
Centerº in the Index.
Safety Belt Reminder Light
When the key is turned to RUN or START, a chime
will come on for about six seconds to remind people to
fasten their safety belts, unless the driver's safety belt is
already buckled.
The safety belt light will
also come on and stay
on for about 20 seconds,
then it will flash for
about 55 seconds.
If the driver's belt is already buckled, neither the chime
nor the light will come on.
Air Bag Readiness Light
There is an air bag readiness light on the instrument
panel, which shows the air bag symbol. The system
checks the air bag's electrical system for malfunctions.
The light tells you if there is an electrical problem. The
system check includes the air bag sensors, the air bag
modules, the wiring and the crash sensing and
diagnostic module. For more information on the air bag
system, see ªAir Bagº in the Index.
This light will come on
when you start your vehicle,
and it will flash for a few
seconds. Then the light
should go out. This means
the system is ready.
If the air bag readiness light stays on after you start the
vehicle or comes on when you are driving, your air bag
system may not work properly. Have your vehicle
serviced right away.
Page 173 of 394

2-86
�You can just let the SIC exit the personalization
mode on its own by waiting approximately
15 seconds without touching any buttons.
The SIC will then display the day/date.
�Or you can press the MENU key to move on to
the next programmable feature.
The following is a list of the personal settings that can
be changed:
Automatic Door Lock
�Enabled: Doors automatically lock when vehicle
speed is above 15 mph for two seconds.
�Disabled: Doors do not lock automatically.
Automatic Door Unlock
�Driver: Driver's door unlocks when the key is
removed from the ignition.
�All: All doors unlock when the key is removed from
the ignition.
�Disabled: Doors do not unlock automatically.Remote Lock Feedback
�Horn: Horn chirps on second press of the LOCK
button on the keyless entry transmitter.
�Lamps: Parking lamps flash on each press of the
LOCK button on the keyless entry transmitter.
�Horn and Lamps: Parking lamps flash on each
press, horn chirps on second press of UNLOCK on
the keyless entry transmitter.
�None: No horn or lamp feedback to the LOCK
button on the keyless entry transmitter.
Remote Unlock Feedback
�Horn: Horn chirps on second press of the UNLOCK
button on the keyless entry transmitter.
�Lamps: Parking lamps flash on each press of the
UNLOCK button on the keyless entry transmitter.
�Horn and Lamps: Parking lamps flash on each
press, horn chirps on the second press of the
UNLOCK button on the keyless entry transmitter.
�None: No horn or lamp feedback will occur when
the UNLOCK button on the keyless entry transmitter
is pressed.
Page 182 of 394

3-7 Rear Air Conditioning and Heating Systems
with Electronic Climate Control System
Front Control
Rear ControlWith this system the rear passengers can control the
air temperature and airflow. The climate control has
three knobs.
To adjust the airflow speed, turn the fan knob located on
the left side of the control panel to the desired setting.
The system also has a front AUTO setting that can
automatically change the temperature of the rear seating
area based on information from the front control. An
OFF setting, located on the front climate control panel,
also allows the driver to turn off the rear passenger seat
controls from the front seat.
To adjust the air temperature on either control panel,
turn the temperature knob on the center of the control
panel. For warmer air, turn the knob clockwise toward
the red. Turn the knob counterclockwise toward the blue
for cooler air.
To regulate the air flow direction, adjust the right knob
on the control panel. Turn the knob clockwise for floor
vent airflow or counterclockwise for headliner vent
airflow. Generally, the upper vents are used for air
conditioning and the floor vents for heating. The knob
can be set to any blend setting.
Page 185 of 394
3-10 Ventilation System
For mild outside temperatures when little heating or
cooling is needed, use outside air to direct outside air
through your vehicle. Air will flow through the
instrument panel outlets.
Your vehicle's ventilation system supplies outside air
to the inside of your vehicle when it is moving. With
the side windows closed, air will flow into the front air
inlet grilles, through the vehicle, and out the air
exhaust valves.
Outside air will also enter the vehicle when the heater or
the air conditioning fan is running, unless you have the
recirculation button pushed in. For more information on
the recirculation button, see ªAir Conditioningº earlier
in this section.
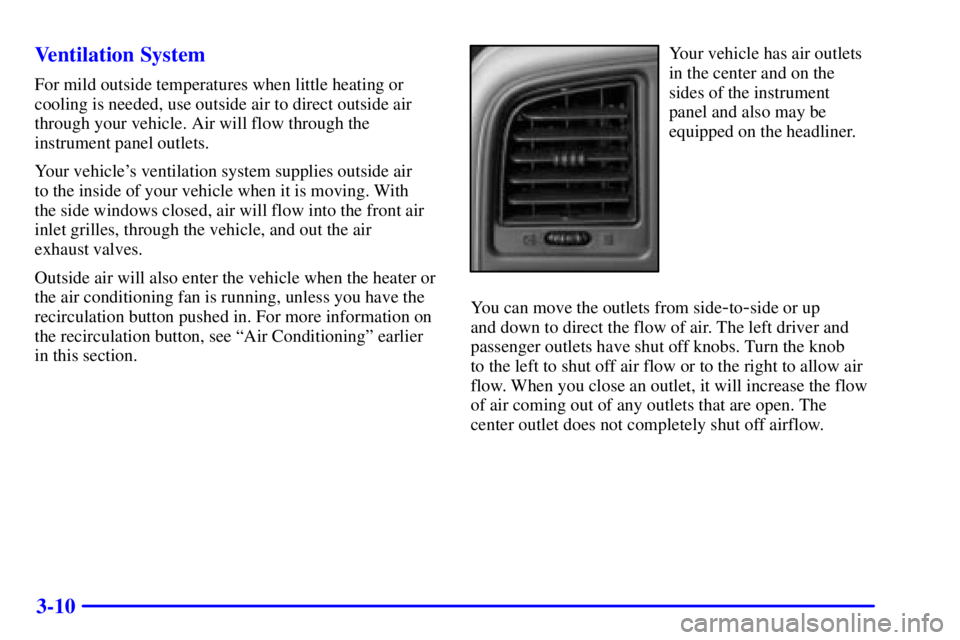
Your vehicle has air outlets
in the center and on the
sides of the instrument
panel and also may be
equipped on the headliner.
You can move the outlets from side
-to-side or up
and down to direct the flow of air. The left driver and
passenger outlets have shut off knobs. Turn the knob
to the left to shut off air flow or to the right to allow air
flow. When you close an outlet, it will increase the flow
of air coming out of any outlets that are open. The
center outlet does not completely shut off airflow.
