Page 135 of 240

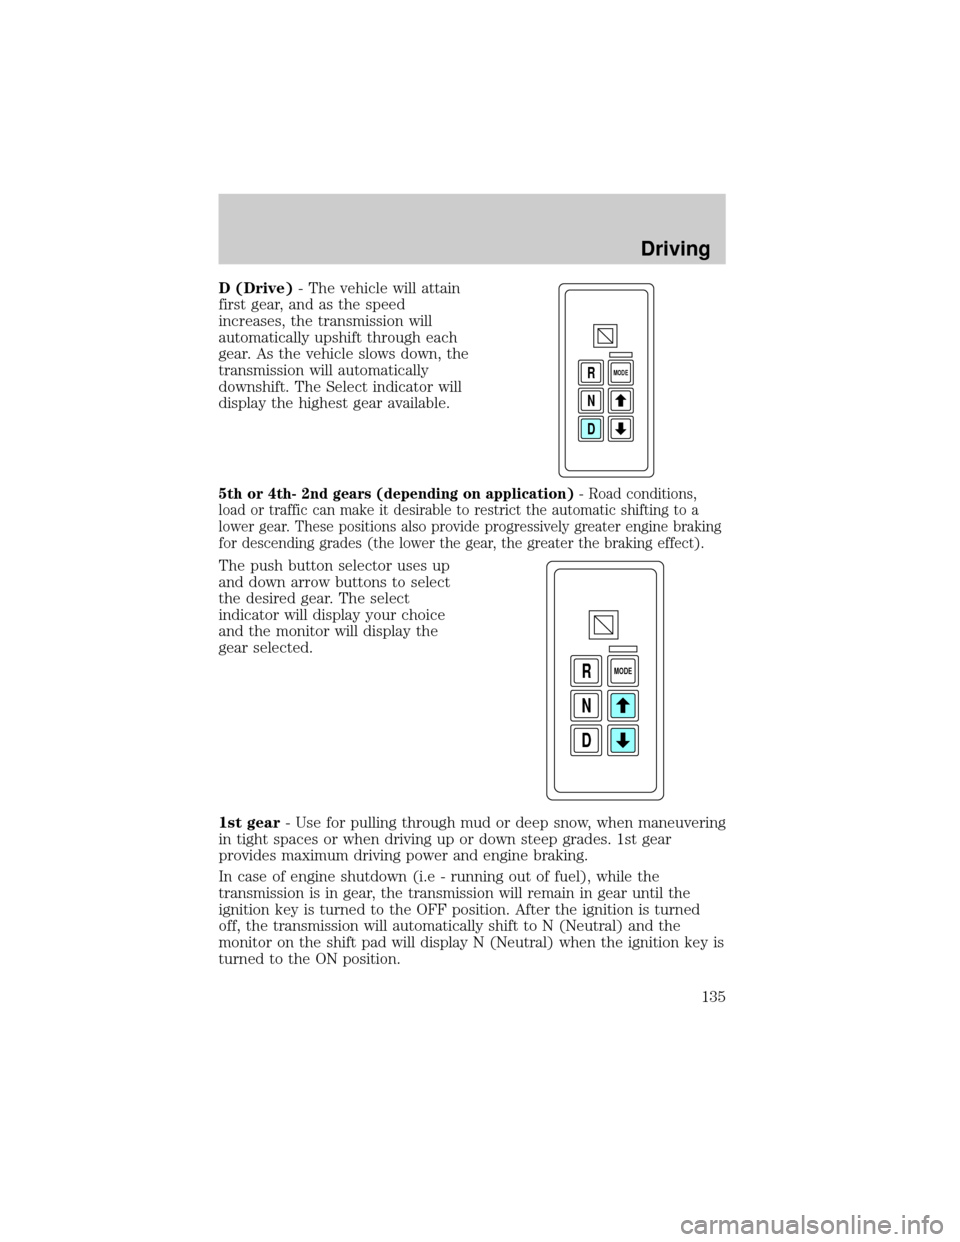
D (Drive)- The vehicle will attain
first gear, and as the speed
increases, the transmission will
automatically upshift through each
gear. As the vehicle slows down, the
transmission will automatically
downshift. The Select indicator will
display the highest gear available.
5th or 4th- 2nd gears (depending on application)- Road conditions,
load or traffic can make it desirable to restrict the automatic shifting to a
lower gear. These positions also provide progressively greater engine braking
for descending grades (the lower the gear, the greater the braking effect).
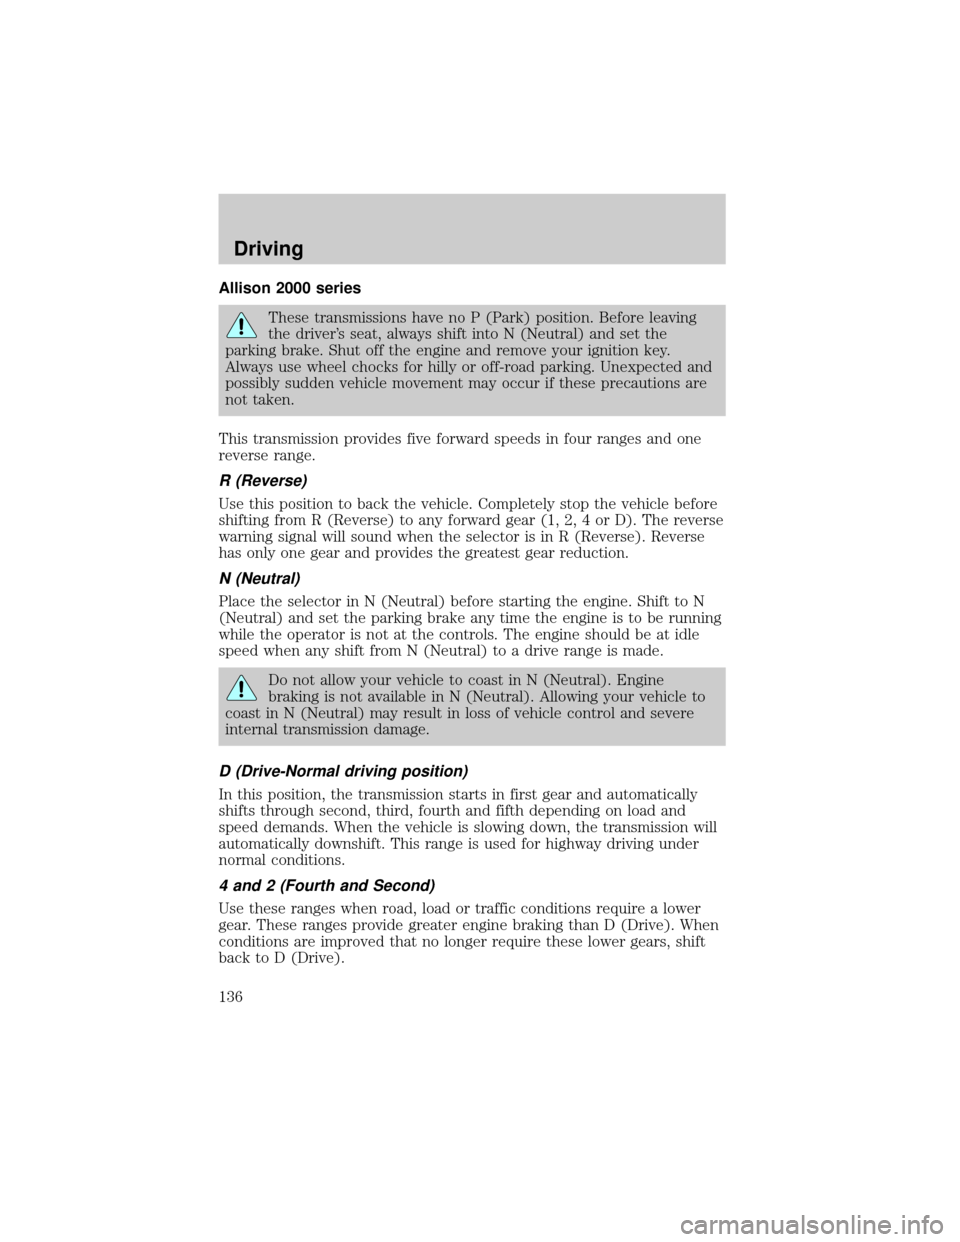
The push button selector uses up
and down arrow buttons to select
the desired gear. The select
indicator will display your choice
and the monitor will display the
gear selected.
1st gear- Use for pulling through mud or deep snow, when maneuvering
in tight spaces or when driving up or down steep grades. 1st gear
provides maximum driving power and engine braking.
In case of engine shutdown (i.e - running out of fuel), while the
transmission is in gear, the transmission will remain in gear until the
ignition key is turned to the OFF position. After the ignition is turned
off, the transmission will automatically shift to N (Neutral) and the
monitor on the shift pad will display N (Neutral) when the ignition key is
turned to the ON position.
D N R
MODE
D N R
MODE
Driving
135
Page 136 of 240

Allison 2000 series
These transmissions have no P (Park) position. Before leaving
the driver's seat, always shift into N (Neutral) and set the
parking brake. Shut off the engine and remove your ignition key.
Always use wheel chocks for hilly or off-road parking. Unexpected and
possibly sudden vehicle movement may occur if these precautions are
not taken.
This transmission provides five forward speeds in four ranges and one
reverse range.
R (Reverse)
Use this position to back the vehicle. Completely stop the vehicle before
shifting from R (Reverse) to any forward gear (1, 2, 4 or D). The reverse
warning signal will sound when the selector is in R (Reverse). Reverse
has only one gear and provides the greatest gear reduction.
N (Neutral)
Place the selector in N (Neutral) before starting the engine. Shift to N
(Neutral) and set the parking brake any time the engine is to be running
while the operator is not at the controls. The engine should be at idle
speed when any shift from N (Neutral) to a drive range is made.
Do not allow your vehicle to coast in N (Neutral). Engine
braking is not available in N (Neutral). Allowing your vehicle to
coast in N (Neutral) may result in loss of vehicle control and severe
internal transmission damage.
D (Drive-Normal driving position)
In this position, the transmission starts in first gear and automatically
shifts through second, third, fourth and fifth depending on load and
speed demands. When the vehicle is slowing down, the transmission will
automatically downshift. This range is used for highway driving under
normal conditions.
4 and 2 (Fourth and Second)
Use these ranges when road, load or traffic conditions require a lower
gear. These ranges provide greater engine braking than D (Drive). When
conditions are improved that no longer require these lower gears, shift
back to D (Drive).
Driving
136
Page 137 of 240

1 (First)
The transmission has to be manually shifted into 1 (First) and will not
shift into a higher gear. Use this position when pulling through mud or
snow, driving up steep grades, hauling extra heavy loads or where
maximum reduction is required.
Allison 2400 series
This transmission provides five forward speeds in four ranges and one
reverse range.
P (Park)
Use this position when you start the engine. The engine is designed to
start in the P (Park) or N (Neutral) position only.
Always come to a complete stop before shifting into P (Park). Make sure
the gearshift is securely latched in P (Park). This position locks the
transmission and prevents the rear wheels from turning.
Always set the parking brake fully and make sure the gearshift
lever is latched in P (Park). Turn off the ignition whenever you
leave your vehicle.
When parking on hilly or off-road terrains, be sure to set the parking
brake fully and chock the wheels to prevent unexpected and possibly
sudden vehicle movement.
R (Reverse)
Use this position to move the vehicle backwards. Completely stop the
vehicle before shifting from a forward gear (1, 2, 4 or D) to R (Reverse),
or from R (Reverse) to any forward gear. The reverse warning signal will
sound when the selector is in R (Reverse). Reverse has only one gear
and provides the greatest gear reduction.
N (Neutral)
This position can be used when starting the engine. The engine is
designed to start in the P (Park) or N (Neutral) position only. The
engine should be at idle speed when any shift from N (Neutral) to a
drive range is made.
The N (Neutral) position may also be used during stationary operation of
the Power Take-Off (PTO), if equipped.
Driving
137
Page 140 of 240

MAXIMUM VEHICLE LOADING
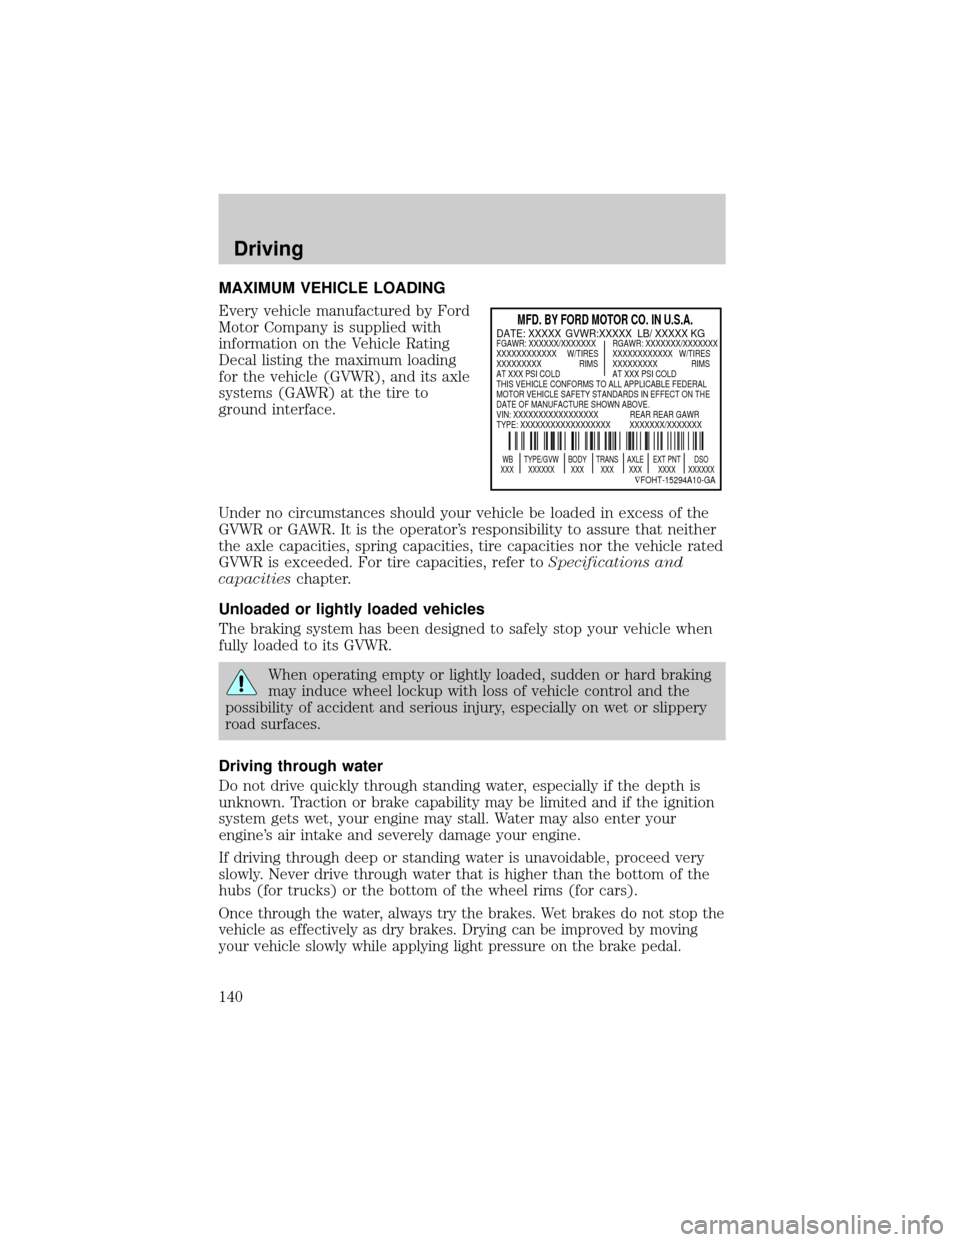
Every vehicle manufactured by Ford
Motor Company is supplied with
information on the Vehicle Rating
Decal listing the maximum loading
for the vehicle (GVWR), and its axle
systems (GAWR) at the tire to
ground interface.
Under no circumstances should your vehicle be loaded in excess of the
GVWR or GAWR. It is the operator's responsibility to assure that neither
the axle capacities, spring capacities, tire capacities nor the vehicle rated
GVWR is exceeded. For tire capacities, refer toSpecifications and
capacitieschapter.
Unloaded or lightly loaded vehicles
The braking system has been designed to safely stop your vehicle when
fully loaded to its GVWR.
When operating empty or lightly loaded, sudden or hard braking
may induce wheel lockup with loss of vehicle control and the
possibility of accident and serious injury, especially on wet or slippery
road surfaces.
Driving through water
Do not drive quickly through standing water, especially if the depth is
unknown. Traction or brake capability may be limited and if the ignition
system gets wet, your engine may stall. Water may also enter your
engine's air intake and severely damage your engine.
If driving through deep or standing water is unavoidable, proceed very
slowly. Never drive through water that is higher than the bottom of the
hubs (for trucks) or the bottom of the wheel rims (for cars).
Once through the water, always try the brakes. Wet brakes do not stop the
vehicle as effectively as dry brakes. Drying can be improved by moving
your vehicle slowly while applying light pressure on the brake pedal.
MFD. BY FORD MOTOR CO. IN U.S.A.
WB TYPE/GVW BODY TRANS AXLE EXT PNT DSO
XXX XXXXXX XXX XXX XXX XXXX XXXXXX
ÑFOHT-15294A10-GA
DATE: XXXXX GVWR:XXXXX LB/ XXXXX KGFGAWR: XXXXXX/XXXXXXX RGAWR: XXXXXXX/XXXXXXX
XXXXXXXXXXXX W/TIRES XXXXXXXXXXXX W/TIRES
XXXXXXXXX RIMS XXXXXXXXX RIMS
AT XXX PSI COLD AT XXX PSI COLD
THIS VEHICLE CONFORMS TO ALL APPLICABLE FEDERAL
MOTOR VEHICLE SAFETY STANDARDS IN EFFECT ON THE
DATE OF MANUFACTURE SHOWN ABOVE.
VIN: XXXXXXXXXXXXXXXXX REAR REAR GAWR
TYPE: XXXXXXXXXXXXXXXXXX XXXXXXX/XXXXXXX
Driving
140
Page 143 of 240
HAZARD FLASHER
Use only in an emergency to warn traffic of vehicle breakdown,
approaching danger, etc. The hazard flashers can be operated when the
ignition is off.
²The hazard lights control is
located on top of the steering
column.
²Depress hazard lights control to
activate all hazard flashers
simultaneously.
²Depress control again to turn the
flashers off.
FUSES AND RELAYS
Fuses
If electrical components in the
vehicle are not working, a fuse may
have blown. Blown fuses are
identified by a broken wire within
the fuse. Check the appropriate
fuses before replacing any electrical
components.
Always replace a fuse with one that has the specified amperage
rating. Using a fuse with a higher amperage rating can cause
severe wire damage and could start a fire.
15
Roadside emergencies
143
Page 149 of 240
Fuse/Relay
LocationFuse Amp
RatingPower Distribution Box
Description
5 15A* Air Intake Heater Relay (CAT),
Cummins PCM
6 20A* CAT PCM, Cummins PCM
7 15A* Stop Lamps
8 25A* C AT Fuel Heater
9 30A* Trailer Hook Up lamps
(SuperCrewzer only)
10 15A* Shift Modulator (Allison AT trans
only)
11 20A* Allison MD Trans, Allison
2000/2400 Trans
12 10A* Keyless Entry Module
(SuperCrewzer only)
13 10A* Park Brake Adjustment Module
(SuperCrewzer only)
14 Ð Not Used
15 7.5A* Body Builder Prep (Hydraulic
Vehicles Only)
16 10A* Allison 2000/2400 Trans
17 5A* Radio (SuperCrewzer only)
18 Ð Not Used
19 Ð Not Used
20 Ð Not Used
21 10A* GEM (Hydraulic Vehicles Only)
22 Ð Not Used
23 Ð Not Used
24 Ð Not Used
101 40A** ABS (Air Only)
102 20A** Body Builder Prep Run Feed
103 50A** Ignition Switch (JB fuses 8, 9, 11,
19, 20, 22, 23, 24, 25, 29, 30, 31)
Roadside emergencies
149
Page 150 of 240
Fuse/Relay
LocationFuse Amp
RatingPower Distribution Box
Description
104 20A** Power Point
105 20A** Power Door Locks
106 30A** Headlamps
107 50A** Junction Box Battery Feed (fuses
1, 2, 3, 4, 12, 13, 14, 15)
108 40A** Cummins Fuel Heater
109 40A** Power Windows
110 30A** Power Seats (SuperCrewzer only)
111 30A** Body Builder Prep
112 40A** Blower Motor
113 30A** Heated Seats (SuperCrewzer
only)
114 30A** E-Brake (SuperCrewzer only)
115 40A** Ignition Switch (JB fuses 5, 8, 9,
11, 21)
116 30A** Body Builder Prep
117 20A** 7.3L Power Stroke PCM
118 30A** IDM (7.3L Power Stroke only)
119
12060A** Hydraulic ABS, Air Brake Trailer
Tow Fuse Block
121
12260A** Hydromax Motor, Air Brake
Trailer Tow Fuse Block
201 Ð Washer Pump Relay
202 Ð Wiper Speed Relay
203 Ð Wiper Run/Park Relay
204 Ð 7.3L Power Stroke Neutral Start
Relay, Stoplamp Relay (CAT and
Cummins only)
205 Ð Right Hand Stop/Turn Relay
206 Ð Left Hand Stop/Turn Relay
Roadside emergencies
150
Page 154 of 240

JUMP STARTING YOUR VEHICLE
The gases around the battery can explode if exposed to flames,
sparks, or lit cigarettes. An explosion could result in injury or
vehicle damage.
Do not push start your vehicle. You could damage the catalytic
converter.
Batteries contain sulfuric acid which burns skin, eyes, and
clothing.
Preparing your vehicle
Also see the label on the battery.
1. Use only a 12±volt supply to start your vehicle. If you connect your
battery to a 24±volt power supply you can damage your starter, ignition
system and other electrical components. Do not attach the jumper cables
to the glow plug relay as this could severely damage the glow plugs,
injector driver module and PCM.
2. Do not disconnect the battery of the disabled vehicle as this could
damage the vehicle's electrical system.
3. Park the booster vehicle close to the disabled vehicle making sure
theydo nottouch. Set the parking brake on both vehicles and stay clear
of the engine cooling fan and other moving parts.
4. Check all battery terminals and remove any excessive corrosion before
you attach the battery cables.
5. Turn the heater fan on in both vehicles to protect any electrical
surges. Turn all other accessories off.
Roadside emergencies
154