Page 110 of 240

Parking brake
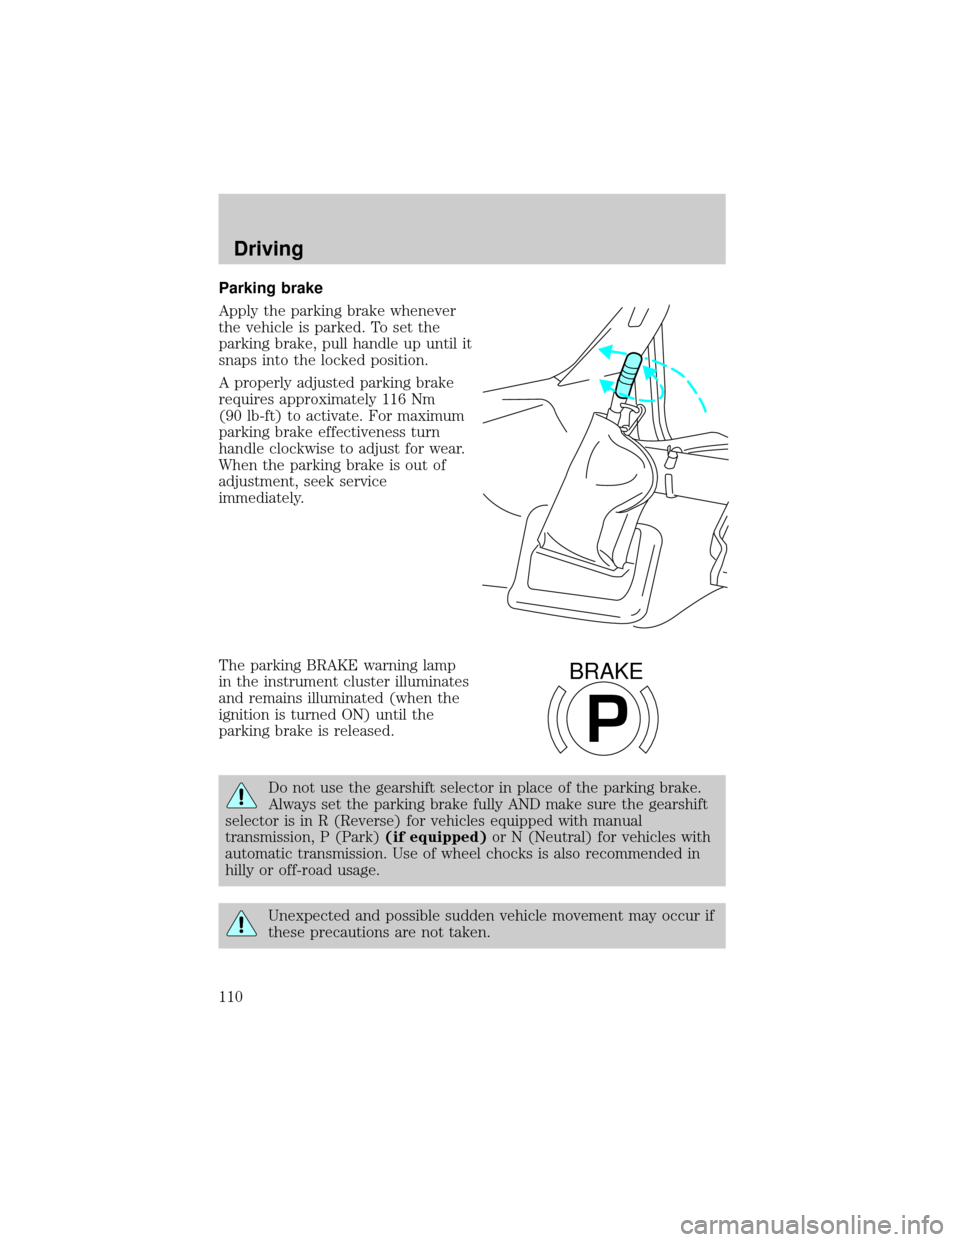
Apply the parking brake whenever
the vehicle is parked. To set the
parking brake, pull handle up until it
snaps into the locked position.
A properly adjusted parking brake
requires approximately 116 Nm
(90 lb-ft) to activate. For maximum
parking brake effectiveness turn
handle clockwise to adjust for wear.
When the parking brake is out of
adjustment, seek service
immediately.
The parking BRAKE warning lamp
in the instrument cluster illuminates
and remains illuminated (when the
ignition is turned ON) until the
parking brake is released.
Do not use the gearshift selector in place of the parking brake.
Always set the parking brake fully AND make sure the gearshift
selector is in R (Reverse) for vehicles equipped with manual
transmission, P (Park)(if equipped)or N (Neutral) for vehicles with
automatic transmission. Use of wheel chocks is also recommended in
hilly or off-road usage.
Unexpected and possible sudden vehicle movement may occur if
these precautions are not taken.
P
BRAKE
Driving
110
Page 166 of 240

ENGINE COOLANT
Checking coolant level
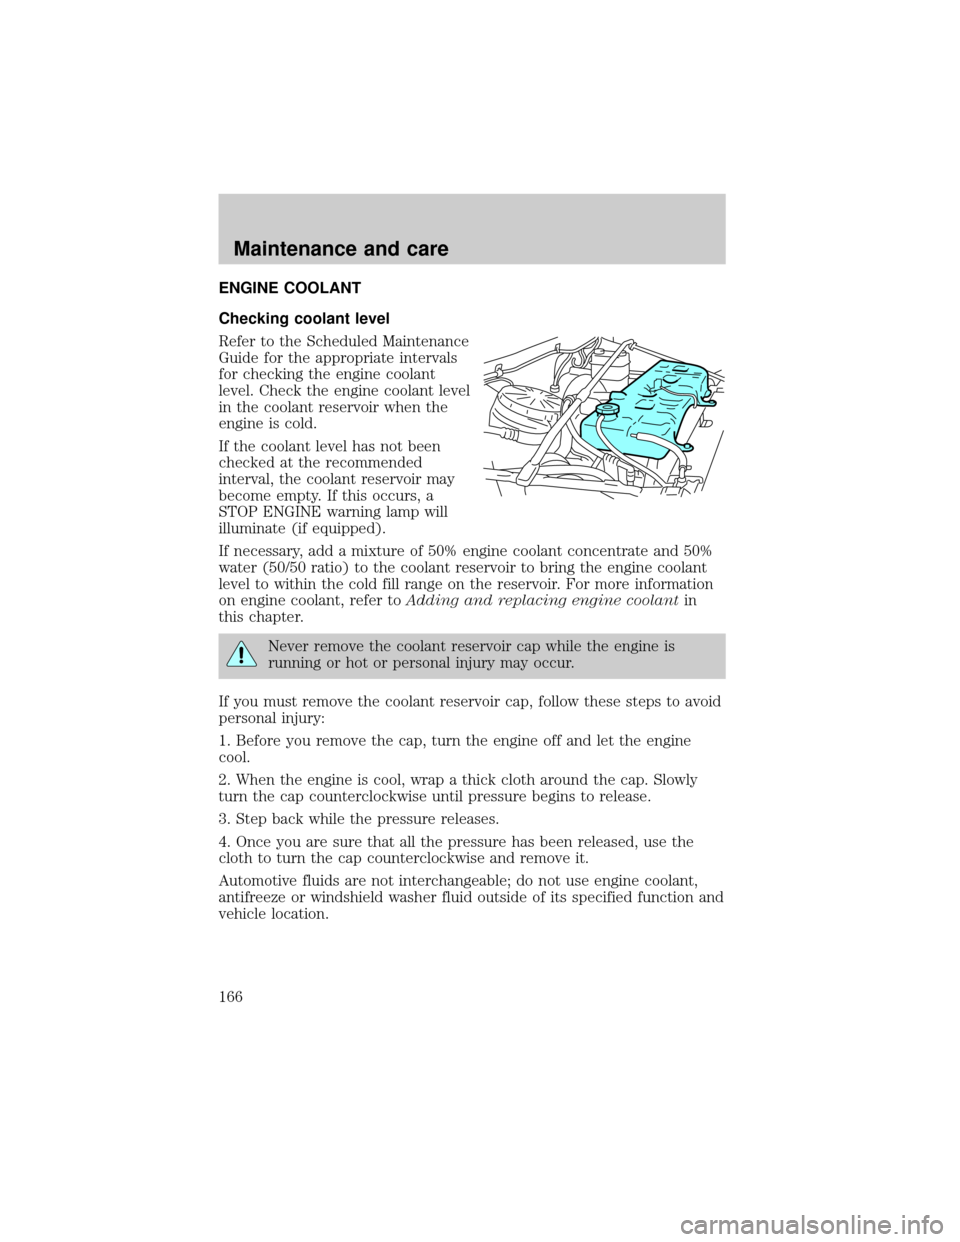
Refer to the Scheduled Maintenance
Guide for the appropriate intervals
for checking the engine coolant
level. Check the engine coolant level
in the coolant reservoir when the
engine is cold.
If the coolant level has not been
checked at the recommended
interval, the coolant reservoir may
become empty. If this occurs, a
STOP ENGINE warning lamp will
illuminate (if equipped).
If necessary, add a mixture of 50% engine coolant concentrate and 50%
water (50/50 ratio) to the coolant reservoir to bring the engine coolant
level to within the cold fill range on the reservoir. For more information
on engine coolant, refer toAdding and replacing engine coolantin
this chapter.
Never remove the coolant reservoir cap while the engine is
running or hot or personal injury may occur.
If you must remove the coolant reservoir cap, follow these steps to avoid
personal injury:
1. Before you remove the cap, turn the engine off and let the engine
cool.
2. When the engine is cool, wrap a thick cloth around the cap. Slowly
turn the cap counterclockwise until pressure begins to release.
3. Step back while the pressure releases.
4. Once you are sure that all the pressure has been released, use the
cloth to turn the cap counterclockwise and remove it.
Automotive fluids are not interchangeable; do not use engine coolant,
antifreeze or windshield washer fluid outside of its specified function and
vehicle location.
Maintenance and care
166
Page 176 of 240
²Caterpillar 3126 B engine
Replace the air filter element using the following procedure:
1. Set the parking brake and shift into N (Neutral) (automatic
transmission) or 1 (First) (manual transmission) and turn the engine off.
2. Open the hood. Protect yourself from engine heat.
3. Push in and turn the latches that retain the air filter housing cover
counterclockwise 90 degrees, then carefully remove the cover.
4. Carefully remove the air filter element.Use caution to keep dirt
and debris from falling into the engine.A twisting rocking motion
may be needed to break the seal between the filter element and the filter
housing.
Maintenance and care
176
Page 178 of 240

9. Push in on the cover latches, then turn the latches clockwise 90 degrees.
Make sure that all air filter cover latches are fully engaged.
10. Reset the air filter restriction indicator.
11. Inspect the air induction system for loose fitting, damaged or missing
components and repair as necessary.
WINDSHIELD WIPER BLADES
Check the wiper blades at least twice a year or when they seem less
effective. Substances such as tree sap and some hot wax treatments used
by commercial car washes reduce the effectiveness of wiper blades.
Checking the wiper blades
If the wiper blades do not wipe properly, clean both the windshield and
wiper blades using undiluted windshield wiper solution or a mild
detergent. Rinse thoroughly with clean water. To avoid damaging the
blades, do not use fuel, kerosene, paint thinner or other solvents.
Changing the wiper blades
To replace the wiper blades:
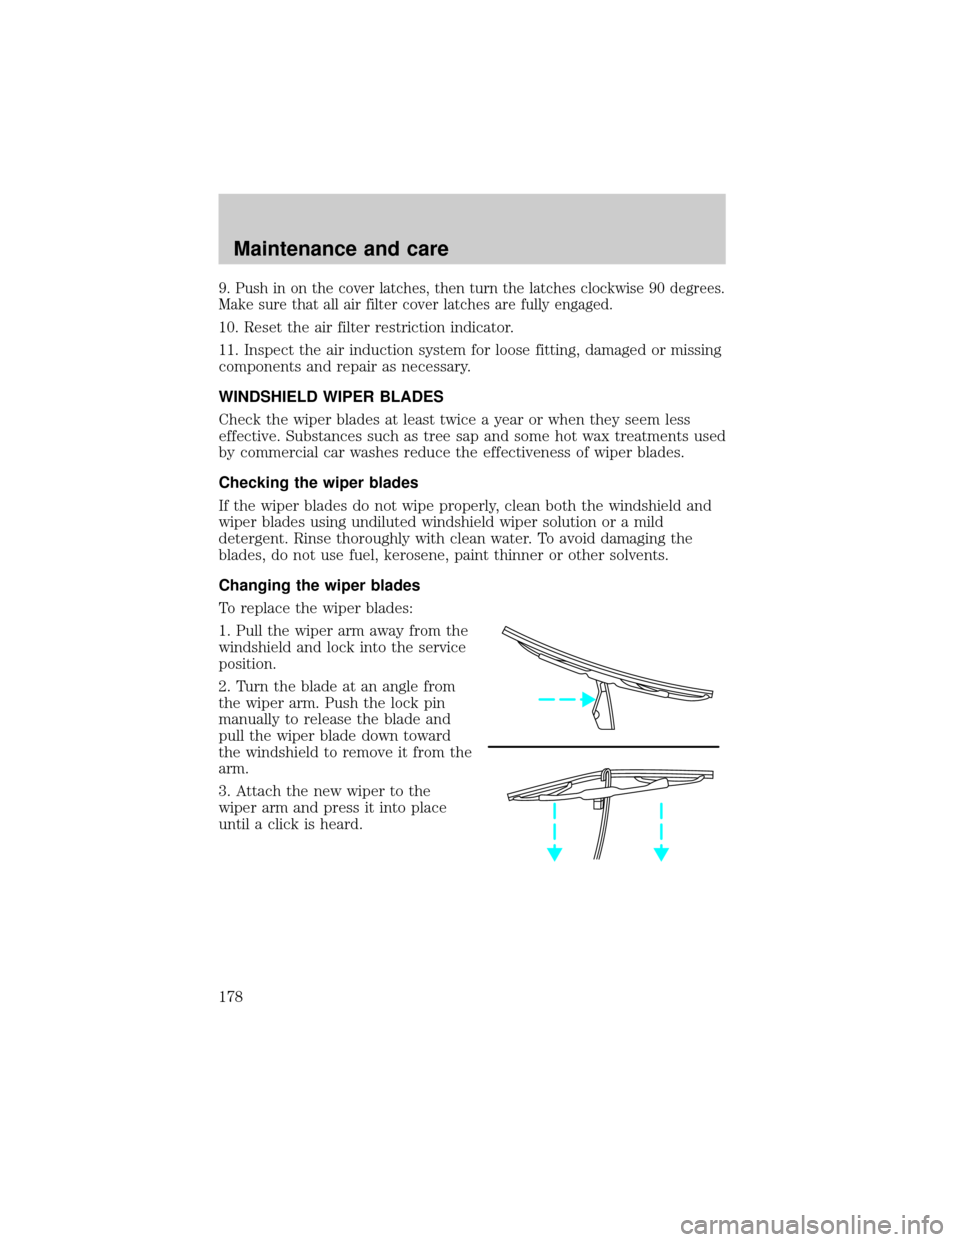
1. Pull the wiper arm away from the
windshield and lock into the service
position.
2. Turn the blade at an angle from
the wiper arm. Push the lock pin
manually to release the blade and
pull the wiper blade down toward
the windshield to remove it from the
arm.
3. Attach the new wiper to the
wiper arm and press it into place
until a click is heard.
Maintenance and care
178
Page 186 of 240
Fuel filter/water separator
The fuel filter/water separator removes any contaminated particles
and/or water from the fuel before the fuel enters the engine.
The fuel filter/water separator should be drained as recommended in the
Scheduled Maintenance Guide.
Draining the fuel filter/water separatorÐCaterpillar 3126 B engine
1. With the engine off, open the
drain valve located at the bottom of
the fuel filter/water separator by
turning it counterclockwise.
2. Drain the filter until clear fuel is visible.
3. Turn the drain valve clockwise to close the valve. Do not overtighten the
drain valve as this could cause damage to the fuel filter/water separator.
Draining the fuel filter/water separatorÐ7.3L Power Stoke engine
1. With the engine off, open the
drain valve located on the side of
the fuel filter/water separator using
your hand.
2. Drain the filter until clear fuel is visible.
3. Close the drain valve completely.
Maintenance and care
186
Page 188 of 240
Fuel filter replacementÐ7.3L Power Stroke engine
The fuel filter/water separator is
located on the right side of the
engine. Replace the fuel filter/water
separator as recommended in the
Scheduled Maintenance Guide, or
sooner if it becomes plugged.
Vehicles operated on fuel with more
than average impurities may require
replacement of the fuel filter more
frequently. The filter has a water
drain valve built into the bottom of
the filter housing.
Removal
1. Remove the fuel filter cap by
turning counterclockwise. The fuel
filter element will come out with the
cap.
2. Remove and discard the bevel gasket. Carefully clean the mating
surfaces.
3. Press in on the fuel filter element locking tabs to separate the element
from the cap.
Maintenance and care
188
Page 194 of 240
Replacing brake/tail/backup lamp bulbs
The brake/tail/backup lamp bulbs
are located in the same portion of
the tail lamp assembly. Follow the
same steps to replace either bulb:
1. Remove the four screws and the
lamp lens from lamp assembly.
2. Carefully pull the bulb straight
out of the socket and push in the
new bulb.
3. Install the lens on the lamp
assembly with the four screws.
Replacing foglamp bulbs (if equipped)
1. Remove the bulb socket from the
foglamp by turning
counterclockwise.
2. Disconnect the electrical
connector from the foglamp bulb.
3. Connect the new foglamp bulb to the electrical connector.
4. Install the bulb socket in the foglamp by turning clockwise.
Maintenance and care
194
Page 237 of 240

A
Air cleaner filter .......................174
Air conditioning ..........................22
Audio system (see Radio) .........28
Automatic transmission ............131
Auxiliary power point .................22
B
Battery .......................................172
jumping a disabled battery ....157
voltage gauge ............................19
Belt minder .................................92
Brakes ........................107, 109, 113
anti-lock ...................107±108, 116
anti-lock brake system
(ABS) warning light .........13, 108
brake warning light ............10±11
fluid, checking and adding ....163
parking ....................110, 113, 116
trailer .......................................118
C
Cassette tape player .............49±50
Child safety restraints ................96
child safety belts ......................96
Child safety seats ........................97
attaching with tether straps ..100
in front seat ..............................99
in rear seat ................................99
tether anchorage hardware ...101
Cleaning your vehicle ...............196
engine compartment ..............198
exterior ....................................197
exterior lamps .........................198
instrument cluster lens ..........199instrument panel ....................199
interior .....................................199
plastic parts ............................198
safety belts ..............................199
washing ....................................196
waxing .....................................197
wheels ......................................198
wiper blades ............................198
Climate control (see Air
conditioning or Heating) ............22
Clock ..........................32, 39, 48, 62
Clutch ........................................164
fluid ..........................................164
Compass, electronic ....................71
calibration .................................73
set zone adjustment .................72
Console
overhead ....................................71
Controls
power seat .................................84
Coolant ......................................166
checking and adding ..............166
Cruise control (see Speed
control) ........................................66
Customer Assistance ................142
Ford accessories for your
vehicle .....................................233
Ford Extended Service
Plan ..........................................226
Getting assistance outside
the U.S. and Canada ..............232
Getting roadside assistance ...142
Getting the service you
need .........................................226
Ordering additional owner's
literature .................................235
The Dispute Settlement
Board .......................................229
Index
237