2001 FORD F650 automatic transmission
[x] Cancel search: automatic transmissionPage 132 of 240
R (Reverse)
Use this position to back the vehicle. Completely stop the vehicle before
shifting from R (Reverse) to any forward gear (1, 2, 3 or D). The reverse
warning signal will sound when the selector is in R (Reverse). Reverse
has only one gear and provides the greatest gear reduction.
N (Neutral)
Place the selector in N (Neutral) before starting the engine. Shift to N
(Neutral) and set the parking brake any time the engine is to be running
while the operator is not at the controls. The engine should be at idle
speed when any shift from N (Neutral) to a drive range is made.
D (Drive-Normal driving position)
The transmission starts in first gear and automatically shifts through
second, third and fourth depending on load and speed demands. This
range is used for highway driving under normal conditions.
3 and 2 (Third and Second)
Use these ranges when road, load or traffic conditions require a lower
gear. These ranges provide greater engine braking than D (Drive). When
conditions are improved that no longer require these lower gears, shift
back to D (Drive).
1 (First)
The transmission has to be manually shifted into 1 (First) and will not
shift into a higher gear. This range is used for extra heavy loads or where
maximum reduction is required.
Allison MD Series transmissions
These transmissions have no P (Park) position. Before leaving
the driver's seat, always shift into N (Neutral) and set the
parking brake. Shut off the engine and remove your ignition key.
Always use wheel chocks for hilly or off-road parking. Unexpected and
possibly sudden vehicle movement may occur if these precautions are
not taken.
These transmissions are electronically controlled and have a push button
shifter. MD transmissions are available in five- or six-speed driving
ranges.
Driving
132
Page 135 of 240
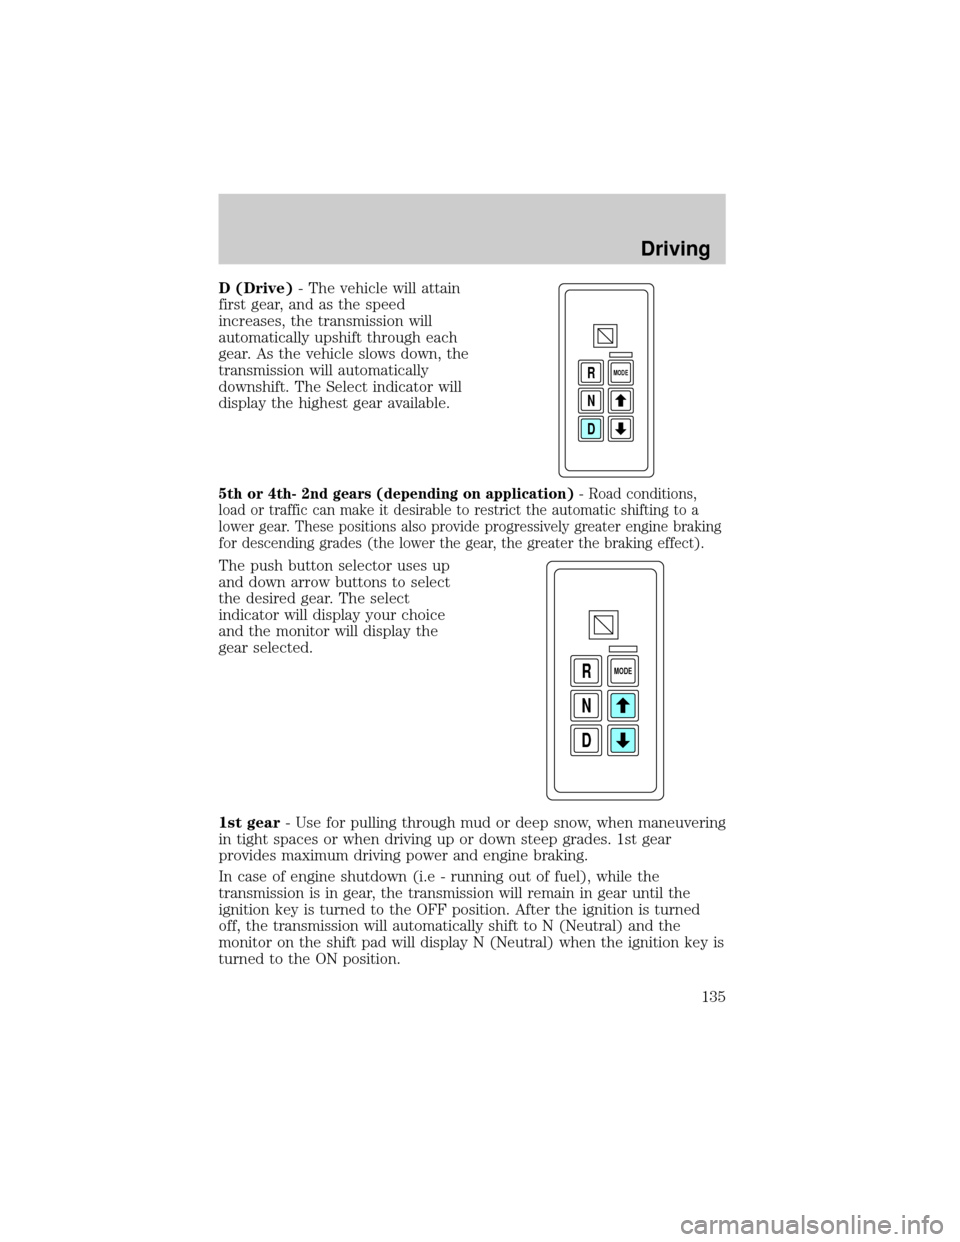
D (Drive)- The vehicle will attain
first gear, and as the speed
increases, the transmission will
automatically upshift through each
gear. As the vehicle slows down, the
transmission will automatically
downshift. The Select indicator will
display the highest gear available.
5th or 4th- 2nd gears (depending on application)- Road conditions,
load or traffic can make it desirable to restrict the automatic shifting to a
lower gear. These positions also provide progressively greater engine braking
for descending grades (the lower the gear, the greater the braking effect).
The push button selector uses up
and down arrow buttons to select
the desired gear. The select
indicator will display your choice
and the monitor will display the
gear selected.
1st gear- Use for pulling through mud or deep snow, when maneuvering
in tight spaces or when driving up or down steep grades. 1st gear
provides maximum driving power and engine braking.
In case of engine shutdown (i.e - running out of fuel), while the
transmission is in gear, the transmission will remain in gear until the
ignition key is turned to the OFF position. After the ignition is turned
off, the transmission will automatically shift to N (Neutral) and the
monitor on the shift pad will display N (Neutral) when the ignition key is
turned to the ON position.
D N R
MODE
D N R
MODE
Driving
135
Page 136 of 240
Allison 2000 series
These transmissions have no P (Park) position. Before leaving
the driver's seat, always shift into N (Neutral) and set the
parking brake. Shut off the engine and remove your ignition key.
Always use wheel chocks for hilly or off-road parking. Unexpected and
possibly sudden vehicle movement may occur if these precautions are
not taken.
This transmission provides five forward speeds in four ranges and one
reverse range.
R (Reverse)
Use this position to back the vehicle. Completely stop the vehicle before
shifting from R (Reverse) to any forward gear (1, 2, 4 or D). The reverse
warning signal will sound when the selector is in R (Reverse). Reverse
has only one gear and provides the greatest gear reduction.
N (Neutral)
Place the selector in N (Neutral) before starting the engine. Shift to N
(Neutral) and set the parking brake any time the engine is to be running
while the operator is not at the controls. The engine should be at idle
speed when any shift from N (Neutral) to a drive range is made.
Do not allow your vehicle to coast in N (Neutral). Engine
braking is not available in N (Neutral). Allowing your vehicle to
coast in N (Neutral) may result in loss of vehicle control and severe
internal transmission damage.
D (Drive-Normal driving position)
In this position, the transmission starts in first gear and automatically
shifts through second, third, fourth and fifth depending on load and
speed demands. When the vehicle is slowing down, the transmission will
automatically downshift. This range is used for highway driving under
normal conditions.
4 and 2 (Fourth and Second)
Use these ranges when road, load or traffic conditions require a lower
gear. These ranges provide greater engine braking than D (Drive). When
conditions are improved that no longer require these lower gears, shift
back to D (Drive).
Driving
136
Page 138 of 240
Do not allow your vehicle to coast in N (Neutral). Engine
braking is not available in N (Neutral). Allowing your vehicle to
coast in N (Neutral) may result in loss of vehicle control and severe
internal transmission damage.
D (DriveÐNormal driving position)
In this position, the transmission starts in first gear and automatically
shifts through second, third, fourth and fifth depending on load and
speed demands. When the vehicle is slowing down, the transmission will
automatically downshift. This range is used for highway driving under
normal conditions.
4 and 2 (Fourth and Second)
Use this position when road, load or traffic conditions make it desirable
to restrict the automatic shifting to a lower range. These ranges provide
greater engine braking than D (Drive). When conditions no longer
require these lower gears, shift back to D (Drive).
1 (First)
The transmission has to be manually shifted into 1 (First) and will not
shift into a higher gear. Use this position when pulling through mud or
snow, driving up steep grades, hauling extra heavy loads or where
maximum reduction is required.
Power take-off (PTO) operation with an Allison automatic
transmission (except MD applications and vehicles equipped with
a Caterpillar 3126E engine)
The power take-off can be operated while the vehicle is standing or
moving.
To engage the PTO, apply the brakes and shift to any gear other than N
(Neutral) - this stops the rotation of the PTO drive gear in the
transmission - then engage the PTO.
If engagement is prevented by the gear teeth not meshing properly,
release the brakes and allow the vehicle to creep slightly - or shift the
selector to N (Neutral) and then back in gear. The PTO should never be
engaged by clashing the gear teeth. This may damage the PTO unit and
the transmission PTO drive gear teeth. This could result in further
damage to the transmission and PTO.
Driving
138
Page 139 of 240
PTO operation with vehicle stationary
To operate the power take-off, stop the vehicle, idle the engine and set
the parking brake. Make sure the gear selector is in any forward drive
range, then engage the PTO. After the PTO is engaged for stationary
vehicle operation, move the range selector to N (Neutral). Increase the
engine speed until the desired power take-off operation speed is
obtained. To disengage the PTO after operation with the vehicle
standing, release the throttle, allow the drive equipment to come to a
stop, and then disengage the PTO.
When the PTO is operated with the vehicle stationary, the
transmission must be placed in N (Neutral). If the transmission
is not in N (Neutral) and is equipped with a remote throttle control, an
increase in engine speed can overpower the parking brake and cause
the vehicle to move, possibly resulting in personal and/or property
damage.
PTO operation while vehicle is moving
After the PTO is engaged for driven vehicle operation, shift to the desired
range and drive the vehicle. The speed of the PTO, during this period of
operation, will always maintain direct relation to vehicle speed. PTO speed
will decrease in relation to vehicle (transmission output) speed as shifts to
a higher gear occur. When operating the PTO while the vehicle is moving,
the PTO may be disengaged whenever it is no longer required. When there
is no load on the PTO gear, it can be pulled out of engagement.
Power take-off (PTO) operation with an Allison automatic
transmission (MD applications)
The PTO drive gear is engine driven and provides direct engine power. The
PTO can be operated when the vehicle is either stationary or moving.
The PTO gear is in constant mesh with the drive gear in the torque
converter housing. A friction clutch or constant drive is used to transmit
power to the PTO.
Power take-off (PTO) operation on vehicles equipped with a
Caterpillar 3126E engine
If your vehicle is equipped with a Caterpillar 3126E engine, the PTO will
only operate if the vehicle is in Neutral. This feature can be overriden by
a special service tool; see your dealer or service representative for more
information.
Driving
139
Page 157 of 240

WRECKER TOWING
Always unload your vehicle before towing it. The recommended method
of towing is with the drive wheels off the ground.
Before towing, make sure:
²the parking brake is released.
²if air pressure has been lost, to release the brakes manually.
Improper towing of the vehicle will not allow sufficient lubrication of the
transmission which may cause serious damage to internal transmission
components. Always follow the outlined towing procedures.
²To tow a vehicle on the front wheels,the steering wheel must be
in the straight ahead position. Secure the steering wheel with a
holding device (such as provided by a towing company).
²To tow a vehicle on the rear wheels,it will be necessary to remove
the drive axles or disconnect the driveshaft. If the drive axles are
removed, the ends of the axle housing must be sealed to prevent the
loss of axle lubricant during towing.
²To tow a vehicle with an inoperative rear axle,the rear wheels
must be raised onto a dolly or tow the vehicle on the front wheels.
²If your vehicle is equipped with tow hooks,chains must be
fastened directly to the tow hooks on the vehicle.
²If your vehicle is not equipped with tow hooks,chains must be
routed under the bottom edge of the bumper with a protection bar to
protect the bumper, and attached to the vehicle chassis. Under no
circumstances is the vehicle to be lifted or towed by attaching chains
directly to the bumper.
RAISING THE VEHICLE
Never lift the vehicle by the bumper. When raising the vehicle, attach
chains to or place the jack(s) directly beneath the main structural
members of the vehicle.
PUSH-STARTING YOUR VEHICLE
Avoid attempting to start a vehicle by pushing. Instead, use jumper
cables as described underJump starting your vehiclein theRoadside
emergencieschapter. Vehicles with an automatic transmission cannot be
started by pushing.
Roadside emergencies
157
Page 158 of 240
CHECKING UNDER THE HOOD
Opening the hood
The hood and fenders are held in position by a latch located on each
fender.
The parking brake must be fully set before opening the hood or
possible personal injury may occur.
If you must leave the engine running while checking under the
hood, do not allow any loose clothing, jewelry, hair or other
items to get near moving engine components or possible personal
injury may occur.
To open the hood:
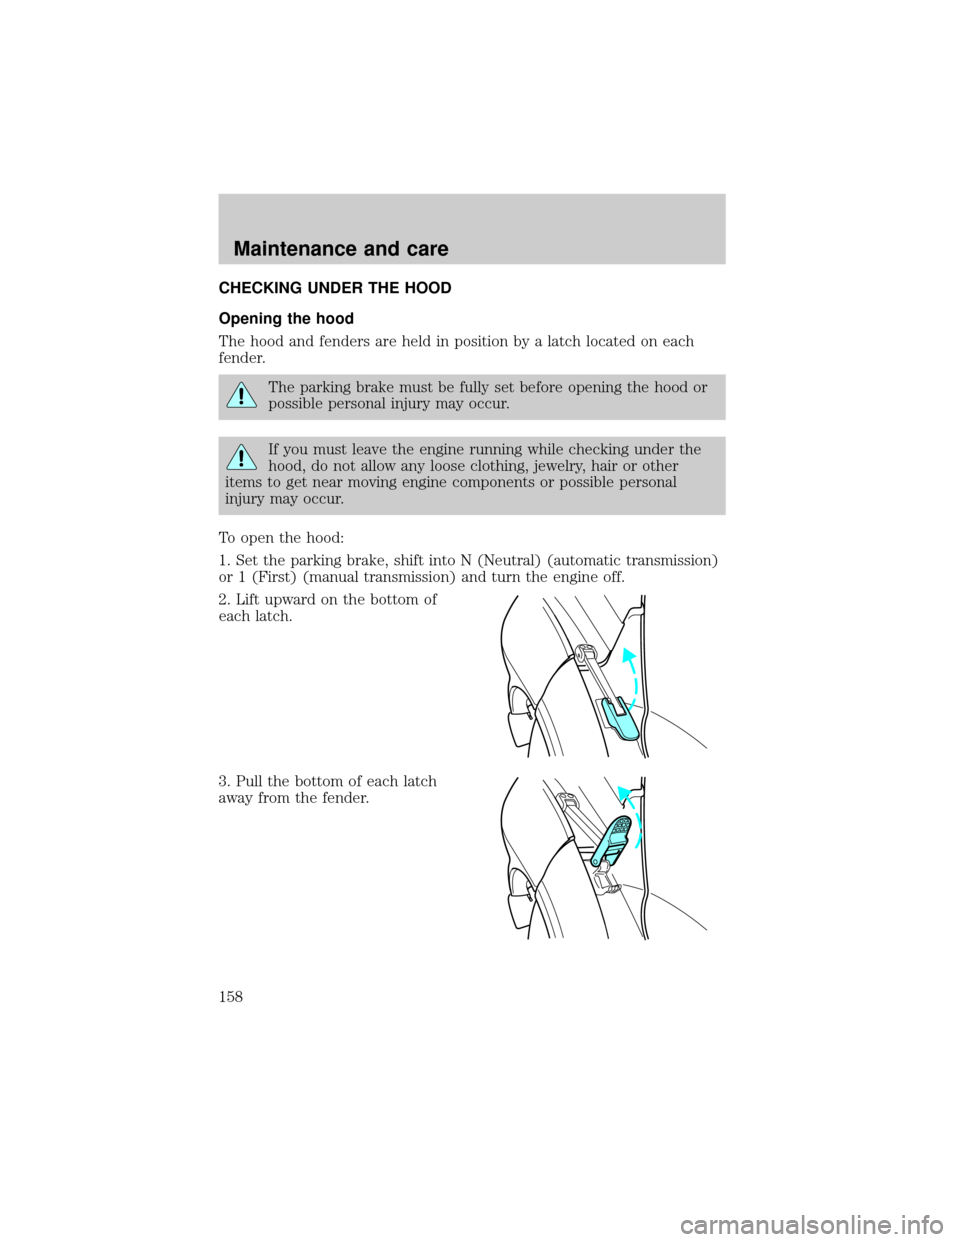
1. Set the parking brake, shift into N (Neutral) (automatic transmission)
or 1 (First) (manual transmission) and turn the engine off.
2. Lift upward on the bottom of
each latch.
3. Pull the bottom of each latch
away from the fender.
Maintenance and care
158
Page 160 of 240
Checking engine oil levelÐ7.3L Power Stroke engine
Refer to the Scheduled Maintenance Guide for the appropriate intervals
for checking the engine oil.
Check the engine oil level consistently and accurately. The following
procedure is recommended:
1. Start the engine and let it run until it reaches normal operating
temperature (the engine coolant temperature gauge indicator will be
near the center of the normal area between H and C).
2. Park the vehicle on level ground.
3. Set the parking brake and shift into N (Neutral) (automatic
transmission) or 1 (First) (manual transmission).
4. Turn off the engine and wait a few minutes for the oil to drain
completely into the oil pan.
5. Open the hood. Protect yourself from engine heat.
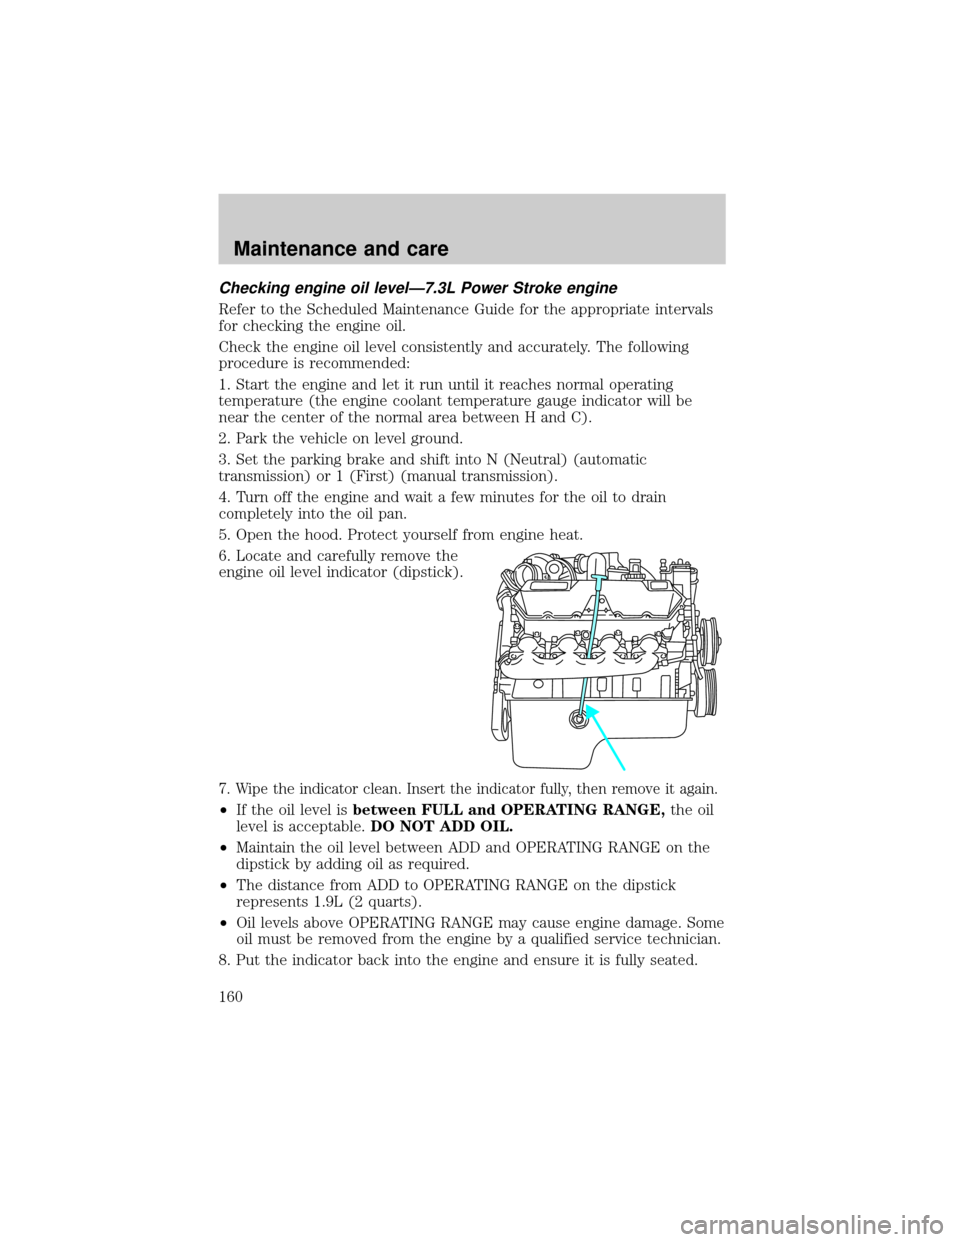
6. Locate and carefully remove the
engine oil level indicator (dipstick).
7. Wipe the indicator clean. Insert the indicator fully, then remove it again.
²If the oil level isbetween FULL and OPERATING RANGE,the oil
level is acceptable.DO NOT ADD OIL.
²Maintain the oil level between ADD and OPERATING RANGE on the
dipstick by adding oil as required.
²The distance from ADD to OPERATING RANGE on the dipstick
represents 1.9L (2 quarts).
²Oil levels above OPERATING RANGE may cause engine damage. Some
oil must be removed from the engine by a qualified service technician.
8. Put the indicator back into the engine and ensure it is fully seated.
Maintenance and care
160