Page 54 of 264

Cleaning compact discs
Inspect all discs for contamination before playing. If necessary, clean
discs only with an approved CD cleaner and wipe from the center out to
the edge. Do not use circular motion.
CD and CD changer care
²Handle discs by their edges only. Never touch the playing surface.
²Do not expose discs to direct sunlight or heat sources for extended
periods of time.
²Do not insert more than one disc into each slot of the CD changer
magazine.
Do not insert any promotional (odd shaped or sized) discs, or discs
with removable labels into the CD player as jamming may occur.
Cleaning cassette player (if equipped)
Clean the tape player head with a cassette cleaning cartridge after 10 to
12 hours of play in order to maintain the best sound and operation.
Cassette and cassette player care
²Use only cassettes that are 90 minutes long or less.
²Do not expose tapes to direct sunlight, high humidity, extreme heat or
extreme cold. Allow tapes that may have been exposed to extreme
temperatures to reach a moderate temperature before playing.
²Tighten very loose tapes by inserting a finger or pencil into the hole
and turning the hub.
²Remove loose labels before inserting tapes.
²Do not leave tapes in the cassette player for a long time when not
being played.
Radio frequency information
The Federal Communications Commission (FCC) and the Canadian Radio
and Telecommunications Commission(CRTC) establish the frequencies AM
and FM stations may use for their broadcasts. Allowable frequencies are:
AM 530, 540±1600, 1610 kHz
FM 87.7, 87.9±107.7, 107.9 MHz
Not all frequencies are used in a given area.
Controls and features
54
Page 62 of 264

Push (tap) the end of the stalk
briefly for a single swipe (no wash).
Push and hold for three swipes with
wash. Push and hold for a longer
wash (up to ten seconds).
Speed dependent wipers
When the windshield wiper control is set on the intermittent settings,
speed-sensitive front wipers automatically adjust as the vehicle's speed
changes.
OVERDRIVE CONTROL
Activating overdrive
(Overdrive) is the normal drive position for the best fuel economy.
The overdrive function allows automatic upshifts and downshifts through
all available gears.
Deactivating overdrive
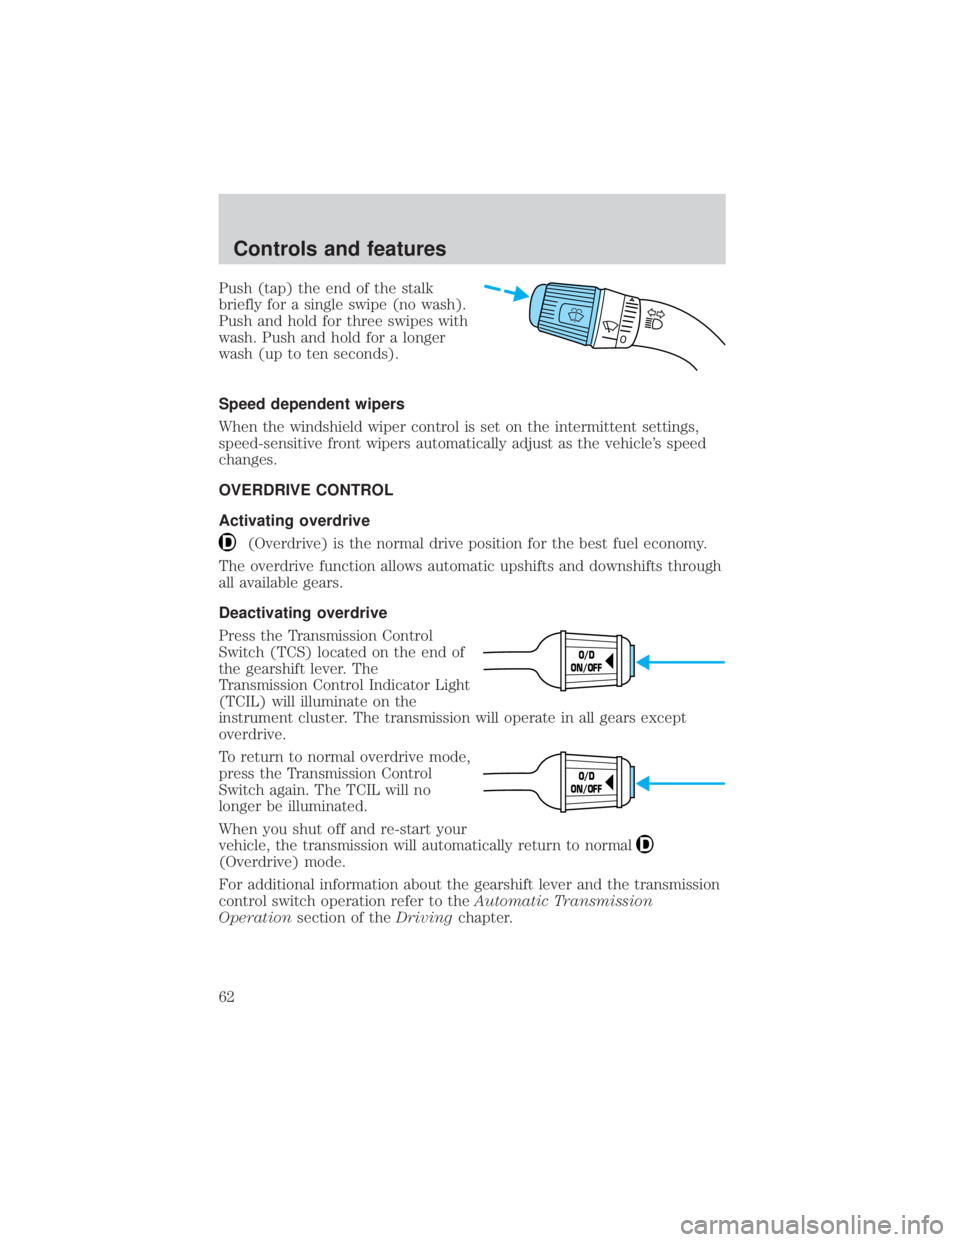
Press the Transmission Control
Switch (TCS) located on the end of
the gearshift lever. The
Transmission Control Indicator Light
(TCIL) will illuminate on the
instrument cluster. The transmission will operate in all gears except
overdrive.
To return to normal overdrive mode,
press the Transmission Control
Switch again. The TCIL will no
longer be illuminated.
When you shut off and re-start your
vehicle, the transmission will automatically return to normal
(Overdrive) mode.
For additional information about the gearshift lever and the transmission
control switch operation refer to theAutomatic Transmission
Operationsection of theDrivingchapter.
O/D
ON/OFF
O/D
ON/OFF
Controls and features
62
Page 64 of 264

²Place the provided height
adaptors onto the back of the
GARAGE control as needed.
²Press the GARAGE control to
activate the transmitter.
Moon roof (if equipped)
You can move the glass panel of the moon roof back to open or tilt up to
ventilate the vehicle.
To open the moon roof:
The moon roof is equipped with an
automatic, one-touch, express
opening feature. Press and
momentarily hold the rear portion of
the control. To stop motion at any
time during the one-touch opening,
press the control a second time.
To close the moon roof:
Press and hold the front portion of
the control until the glass panel
stops moving. Once fully closed, the rear of the glass panel will appear
higher than the front edge.
To vent:
To tilt the moon roof into the vent position (when the glass panel is
closed), press and hold the front portion of the control. To close the
moon roof from the vent position, press and hold the rear portion of the
control until the glass panel stops moving.
If the battery is disconnected, discharged, or a new battery is installed,
the moon roof needs to be opened to the vent position to reset the moon
roof positions.
The moon roof has a sliding shade that can be opened or closed when
the glass panel is shut. To close the shade, pull it toward the front of the
vehicle.
MODELAMPLAMP
Controls and features
64
Page 65 of 264

Do not let children play with the moon roof. They may seriously
hurt themselves.
Electronic compass/temperature display (if equipped)
Outside air temperature
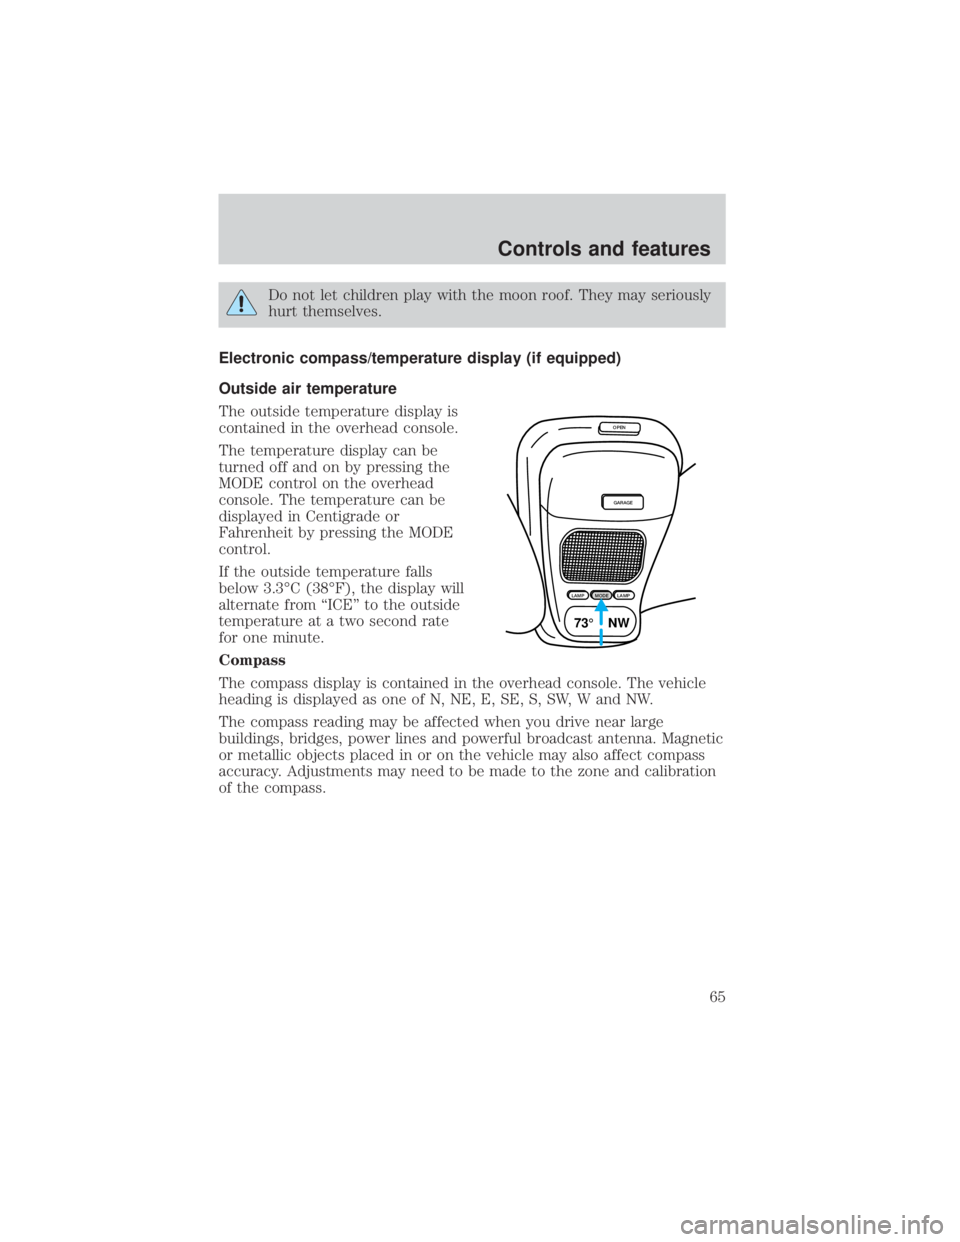
The outside temperature display is
contained in the overhead console.
The temperature display can be
turned off and on by pressing the
MODE control on the overhead
console. The temperature can be
displayed in Centigrade or
Fahrenheit by pressing the MODE
control.
If the outside temperature falls
below 3.3ÉC (38ÉF), the display will
alternate from ªICEº to the outside
temperature at a two second rate
for one minute.
Compass
The compass display is contained in the overhead console. The vehicle
heading is displayed as one of N, NE, E, SE, S, SW, W and NW.
The compass reading may be affected when you drive near large
buildings, bridges, power lines and powerful broadcast antenna. Magnetic
or metallic objects placed in or on the vehicle may also affect compass
accuracy. Adjustments may need to be made to the zone and calibration
of the compass.
OPEN
GARAGE
LAMPMODELAMP
73¡ NW
Controls and features
65
Page 67 of 264
Compass calibration adjustment
Perform this adjustment in an open
area free from steel structures and
high voltage lines:
²Press and hold the MODE control
until CAL appears in the display
(approximately eight seconds)
and release.
²Drive the vehicle slowly (less
than 5 km/h [3 mph]) in circles
until CAL indicator turns off in
about 2±3 complete circles.
Interior Lamps
Courtesy/reading lamps
The courtesy lamp lights when:
²any door is opened.
²the instrument panel dimmer
switch is held up until the
courtesy lamps come on.
²the UNLOCK control of the
remote entry controls is pressed
and the ignition is OFF.
The reading lamps can be turned on
by pressing the rocker controls next
to each lamp.
If equipped with Remote Keyless Entry, the courtesy lamp will illuminate
whenever any door is opened and will remain on for 25 seconds after the
door is shut or when the ignition is turned to the ON position.
LAMPMODELAMP
CAL
Controls and features
67
Page 87 of 264

Replacing lost transmitters
If a remote transmitter has been lost
and you would like to remove it
from the vehicle's memory, or you
would like to purchase additional
remote transmitters and have them
programmed to your vehicle:
²Takeallyour vehicle's
transmitters to your dealer for
programming, or
²Perform the programming
procedure yourself
Programming remote transmitters
It is necessary to haveall(maximum of four Ð original and/or new) of
your remote transmitters available prior to beginning this procedure.
To program the transmitters yourself:
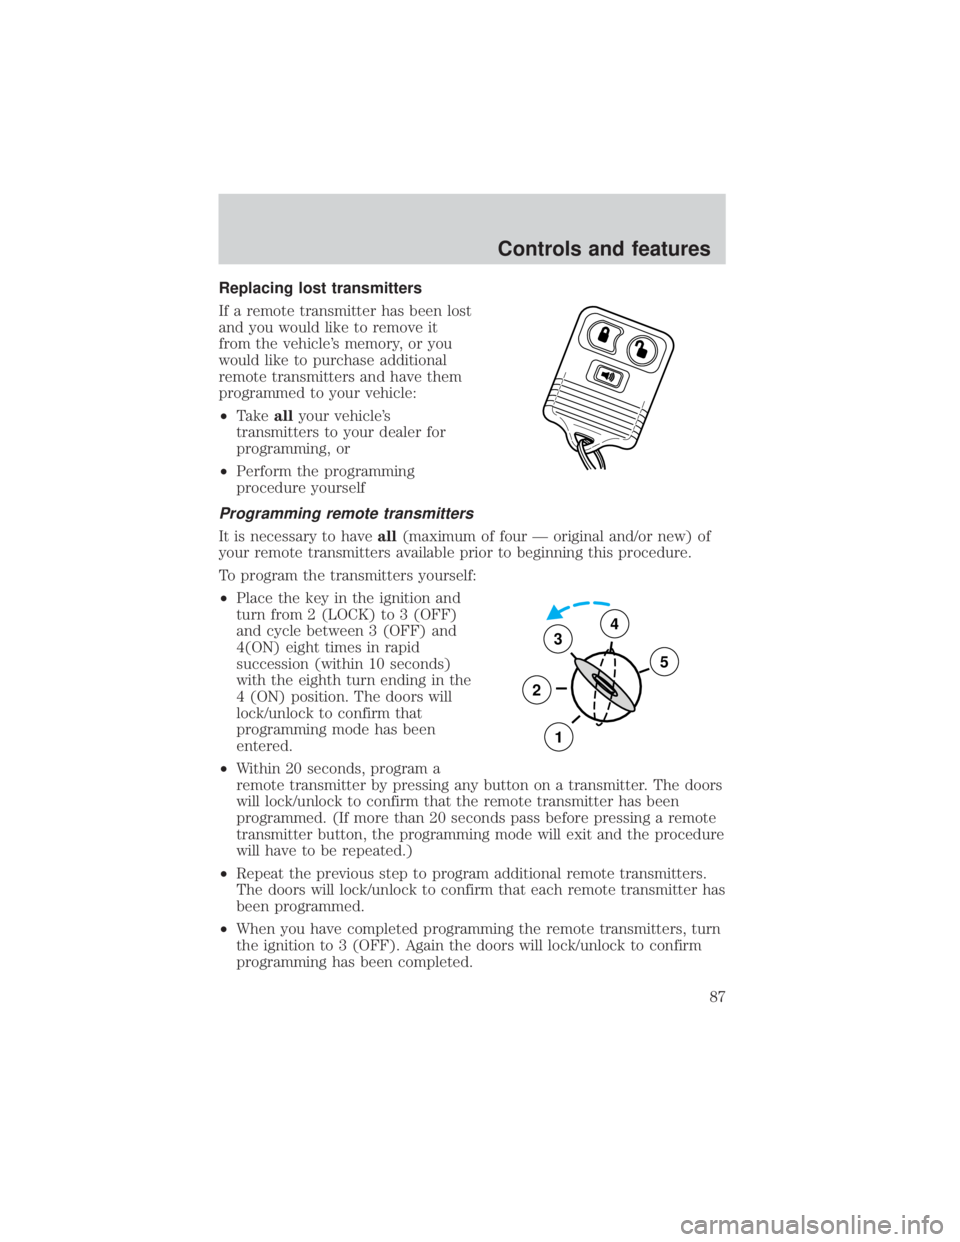
²Place the key in the ignition and
turn from 2 (LOCK) to 3 (OFF)
and cycle between 3 (OFF) and
4(ON) eight times in rapid
succession (within 10 seconds)
with the eighth turn ending in the
4 (ON) position. The doors will
lock/unlock to confirm that
programming mode has been
entered.
²Within 20 seconds, program a
remote transmitter by pressing any button on a transmitter. The doors
will lock/unlock to confirm that the remote transmitter has been
programmed. (If more than 20 seconds pass before pressing a remote
transmitter button, the programming mode will exit and the procedure
will have to be repeated.)
²Repeat the previous step to program additional remote transmitters.
The doors will lock/unlock to confirm that each remote transmitter has
been programmed.
²When you have completed programming the remote transmitters, turn
the ignition to 3 (OFF). Again the doors will lock/unlock to confirm
programming has been completed.
3
2
1
5
4
Controls and features
87
Page 90 of 264
Anti-scan feature
The keyless entry pad is disabled for
1 minute after 7 unsuccessful
attempts at entering a valid key
code. The keypad will flash during
this 1 minute mode. However, the 7/8 and 9/0 controls will still lock the
vehicle.
Anti-scan will turned off after:
²one minute of keypad inactivity
²the keyfob UNLOCK button is pressed.
²the ignition is turned to the ON position
Unlocking the doors with the keyless entry system
To unlock the driver's door, enter either the factory-set code or personal
code (each digit pressed within five seconds of the prior digit). The
interior lamps will illuminate.
To unlock all doors, enter the
factory-set code or personal code
(driver door unlocks) and press the
3/4 control within five seconds.
Locking the doors with the keyless entry system
To lock all the doors, press 7/8 and
9/0 at the same time. It is not
necessary to first enter the keypad
code.
123
45678
90
123
45678
90
123
45678
90
Controls and features
90
Page 120 of 264

When installing a child safety seat:
²Review and follow the information
presented in theAir Bag
Supplemental Restraint System
(SRS) section in this chapter.
²Use the correct safety belt buckle
for that seating position (the
buckle closest to the direction the
tongue is coming from).
²Insert the belt tongue into the
proper buckle until you hear a
snap and feel it latch. Make sure
the tongue is securely fastened in
the buckle.
²Keep the buckle release button
pointing up and away from the
safety seat, with the tongue
between the child seat and the
release button, to prevent accidental unbuckling.
²Place seat back in upright position.
²Put the safety belt in the automatic locking mode. Refer toAutomatic
locking mode(passenger side front and outboard rear seating
positions) (if equipped) section in this chapter.
Ford recommends the use of a child safety seat having a top tether
strap. Install the child safety seat in a seating position which is capable
of providing a tether anchorage. For more information on top tether
straps, refer toAttaching child safety seats with tether straps.in this
chapter.
Carefully follow all of the manufacturer's instructions included
with the safety seat you put in your vehicle. If you do not install
and use the safety seat properly, the child may be injured in a sudden
stop or collision.
Seating and safety restraints
120