Page 196 of 288
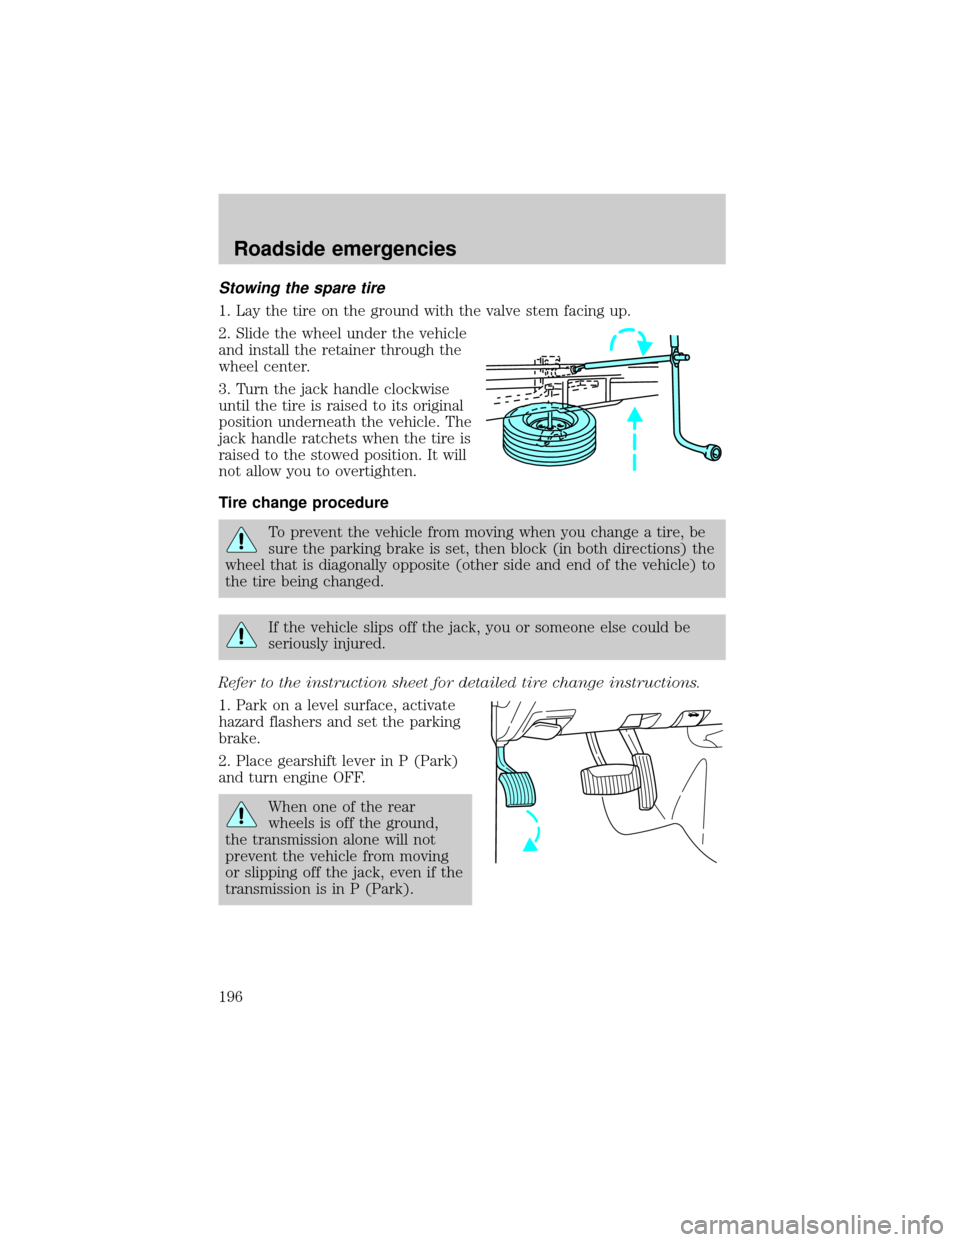
Stowing the spare tire
1. Lay the tire on the ground with the valve stem facing up.
2. Slide the wheel under the vehicle
and install the retainer through the
wheel center.
3. Turn the jack handle clockwise
until the tire is raised to its original
position underneath the vehicle. The
jack handle ratchets when the tire is
raised to the stowed position. It will
not allow you to overtighten.
Tire change procedure
To prevent the vehicle from moving when you change a tire, be
sure the parking brake is set, then block (in both directions) the
wheel that is diagonally opposite (other side and end of the vehicle) to
the tire being changed.
If the vehicle slips off the jack, you or someone else could be
seriously injured.
Refer to the instruction sheet for detailed tire change instructions.
1. Park on a level surface, activate
hazard flashers and set the parking
brake.
2. Place gearshift lever in P (Park)
and turn engine OFF.
When one of the rear
wheels is off the ground,
the transmission alone will not
prevent the vehicle from moving
or slipping off the jack, even if the
transmission is in P (Park).
Roadside emergencies
196
Page 197 of 288
3. Block the diagonally opposite
wheel.
4. Use the tip of the lug wrench to
remove any wheel trim.
5. Loosen each wheel lug nut, but
do not remove them until the wheel
is raised off the ground.
On vehicles equipped with
Air Suspension, turn OFF
the Air Suspension switch prior to
jacking, hoisting or towing your
vehicle.
6. Turn OFF the air suspension
switch (if equipped). Refer toAir
suspension systemin theDriving
chapter.
7. Position the jack according to the following guides and turn the jack
handle clockwise until the tire is a maximum of 25 mm (1 inch) off the
ground.
Roadside emergencies
197
Page 199 of 288
10. Lower the wheel by turning the jack handle counterclockwise.
11. Remove the jack and fully
tighten the lug nuts in the order
shown.
12. Stow the flat tire, jack and lug
wrench. Make sure the jack is
fastened so it does not rattle when
you drive.
13. Turn ON the air suspension
switch (if equipped).
14. Unblock the wheels.
JUMP STARTING YOUR VEHICLE
The gases around the battery can explode if exposed to flames,
sparks, or lit cigarettes. An explosion could result in injury or
vehicle damage.
Do not push start your vehicle. You could damage the catalytic
converter.
Batteries contain sulfuric acid which can burn skin, eyes, and
clothing, if contacted.
Do not attempt to push start your vehicle. Automatic
transmissions do not have push-start capability.
1
4 3
2 5
Roadside emergencies
199
Page 212 of 288
6. Wipe the indicator clean. Insert the indicator fully, then remove it
again.
²If the oil level isbetween the ADD and FULL marksorbetween
the MIN and MAX marks (depending on application),the oil
level is acceptable.DO NOT ADD OIL.
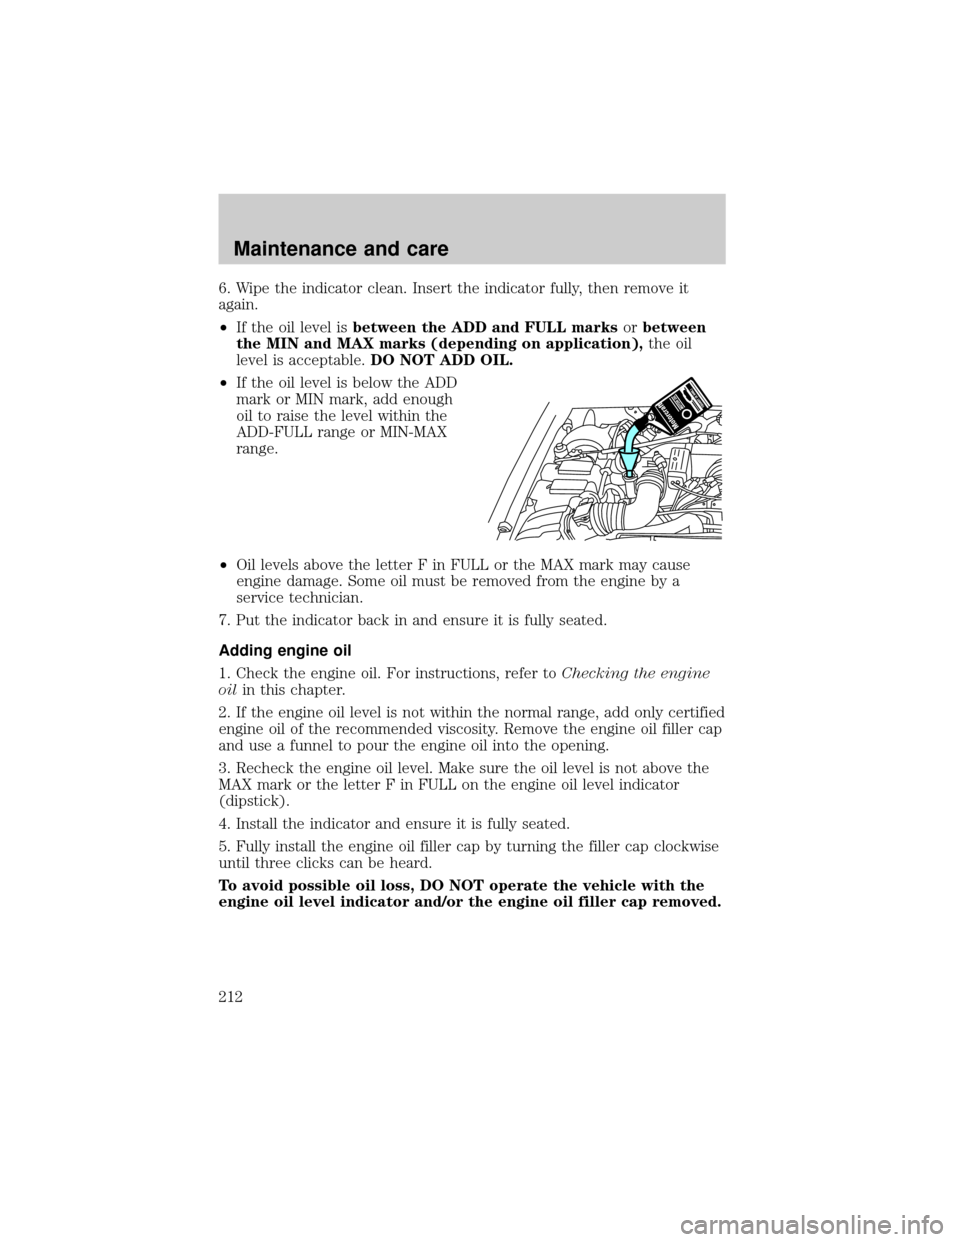
²If the oil level is below the ADD
mark or MIN mark, add enough
oil to raise the level within the
ADD-FULL range or MIN-MAX
range.
²Oil levels above the letter F in FULL or the MAX mark may cause
engine damage. Some oil must be removed from the engine by a
service technician.
7. Put the indicator back in and ensure it is fully seated.
Adding engine oil
1. Check the engine oil. For instructions, refer toChecking the engine
oilin this chapter.
2. If the engine oil level is not within the normal range, add only certified
engine oil of the recommended viscosity. Remove the engine oil filler cap
and use a funnel to pour the engine oil into the opening.
3. Recheck the engine oil level. Make sure the oil level is not above the
MAX mark or the letter F in FULL on the engine oil level indicator
(dipstick).
4. Install the indicator and ensure it is fully seated.
5. Fully install the engine oil filler cap by turning the filler cap clockwise
until three clicks can be heard.
To avoid possible oil loss, DO NOT operate the vehicle with the
engine oil level indicator and/or the engine oil filler cap removed.
Maintenance and care
212
Page 219 of 288
Have your dealer check the engine cooling system for leaks if you have
to add more than 1.0 liter (1.0 quart) of engine coolant per month.
To avoid scalding hot steam or coolant from being released from
the engine cooling system, never remove the reservoir cap while
the engine is running or hot. Failure to follow this warning may result
in damage to the engine's cooling system and possible severe personal
injury.
If you must remove the coolant cap, follow these steps to avoid personal
injury:
1. Before you remove the cap, turn the engine off and let it cool.
2. When the engine is cool, wrap a thick cloth around the cap. Slowly
turn cap counterclockwise until pressure begins to release.
3. Step back while the pressure releases.
4. When you are sure that all the pressure has been released, use the
cloth to turn it counterclockwise and remove the cap.
Recycled engine coolant
Ford Motor Company recommends the use of a recycled engine coolant
produced by Ford-approved processes.
Not all coolant recycling processes produce coolant which meets Ford
specification WSS-M97B51±A1. Use of a recycled engine coolant which
does not meet the Ford G05 specification may harm engine and cooling
system components.
Always dispose of used automotive fluids in a responsible manner.
Follow your community's regulations and standards for recycling and
disposing of automotive fluids.
Coolant refill capacity
To find out how much fluid your vehicle's cooling system can hold, refer
toRefill capacitiesin theCapacities and specificationschapter.
Fill your engine coolant reservoir as outlined inAdding engine coolant
in this chapter.
Maintenance and care
219
Page 227 of 288
Because your vehicle's engine is electronically controlled by a computer,
some control conditions are maintained by power from the battery. When
the battery is disconnected or a new battery is installed, the engine must
relearn its idle and fuel trim strategy for optimum driveability and
performance. To begin this process:
1. With the vehicle at a complete stop, set the parking brake.
2. Put the gearshift in P (Park), turn off all accessories and start the
engine.
3. Run the engine until it reaches normal operating temperature.
4. Allow the engine to idle for at least one minute.
5. Turn the A/C on and allow the engine to idle for at least one minute.
6. Drive the vehicle to complete the relearning process.
²The vehicle may need to be driven to relearn the idle and fuel trim
strategy.
²If you do not allow the engine to relearn its idle trim, the idle
quality of your vehicle may be adversely affected until the idle
trim is eventually relearned.
When the battery is disconnected or a new battery installed, the
transmission must relearn its adaptive strategy. As a result of this, the
transmission may shift firmly. This operation is considered normal and
will not affect function or durability of the transmission. Over time the
adaptive learning process will fully update transmission operation to its
optimum shift feel.
If the battery has been disconnected or a new battery has been installed,
the clock and the preset radio stations must be reset once the battery is
reconnected.
²Always dispose of automotive
batteries in a responsible manner.
Follow your local authorized
standards for disposal. Call your
local authorized recycling center
to find out more about recycling
automotive batteries.
LEAD
RETURN
RECYCLE
Maintenance and care
227
Page 237 of 288
Many of the world's automakers
issued the World-wide Fuel Charter
that recommends gasoline
specifications to provide improved
performance and emission control
system protection for your vehicle.
Gasolines that meet the World-wide
Fuel Charter should be used when
available. Ask your fuel supplier
about gasolines that meet the
World-wide Fuel Charter. In Canada,
look for fuels that display theAuto Makers' Choiceylogo.
Cleaner air
Ford endorses the use of reformulated ªcleaner-burningº gasolines to
improve air quality.
Running out of fuel
Avoid running out of fuel because this situation may have an adverse
affect on powertrain components.
If you have run out of fuel:
²You may need to cycle the ignition from OFF to ON several times after
refueling, to allow the fuel system to pump the fuel from the tank to
the engine.
²Your ªCheck Engineº indicator may come on. For more information on
the ªCheck Engineº indicator, refer to theInstrumentationchapter.
Fuel Filler Cap
Your fuel tank filler cap has an indexed design with a 1/8 turn on/off
feature.
When fueling your vehicle:
1. Turn the engine off.
2.
Carefully turn the filler cap counterclockwise 1/8 of a turn until it stops.
3. Pull to remove the cap from the fuel filler pipe.
4. To install the cap, align the tabs on the cap with the notches on the
filler pipe.
5. Turn the filler cap clockwise 1/8 of a turn until it stops.
Maintenance and care
237
Page 244 of 288
Replacing headlamp bulbs
To remove the headlamp bulb:
1. Make sure headlamp switch is in
OFF position, then lift hood and
open the hinged headlamp cover.
2. Disconnect the electrical
connector from the bulb by pulling
rearward.
3. Remove the bulb retaining ring by
rotating it counterclockwise (when
viewed from the rear) to free it
from the bulb socket, and slide the
ring off the plastic base. Keep the
ring to retain the new bulb.
4. Remove the old bulb from the
lamp assembly by gently pulling it
straight back out of the lamp
assembly.
To install the new bulb:
Handle a halogen headlamp bulb carefully and keep out of
children's reach. Grasp the bulb only by its plastic base and do
not touch the glass. The oil from your hand could cause the bulb to
break the next time the headlamps are operated.
LIFT
Maintenance and care
244