Page 112 of 280

Ensure that the second row seat is in the upright position in order to
achieve optimum access to the third row.
To minimize the risk of personal injury, the third row seat should not be
left in the forward, stowed position while the vehicle is in motion. Please
ensure that the seat is in the upright, fully latched position before
putting the vehicle in motion.
1. Locate and lift seat control“3RD ROW ENTRY”to release seatback
and cushion to flip toward the front seat.
2. After entering the seat, reverse this procedure; ensure that the latch
tub and surrounding areas are clear.
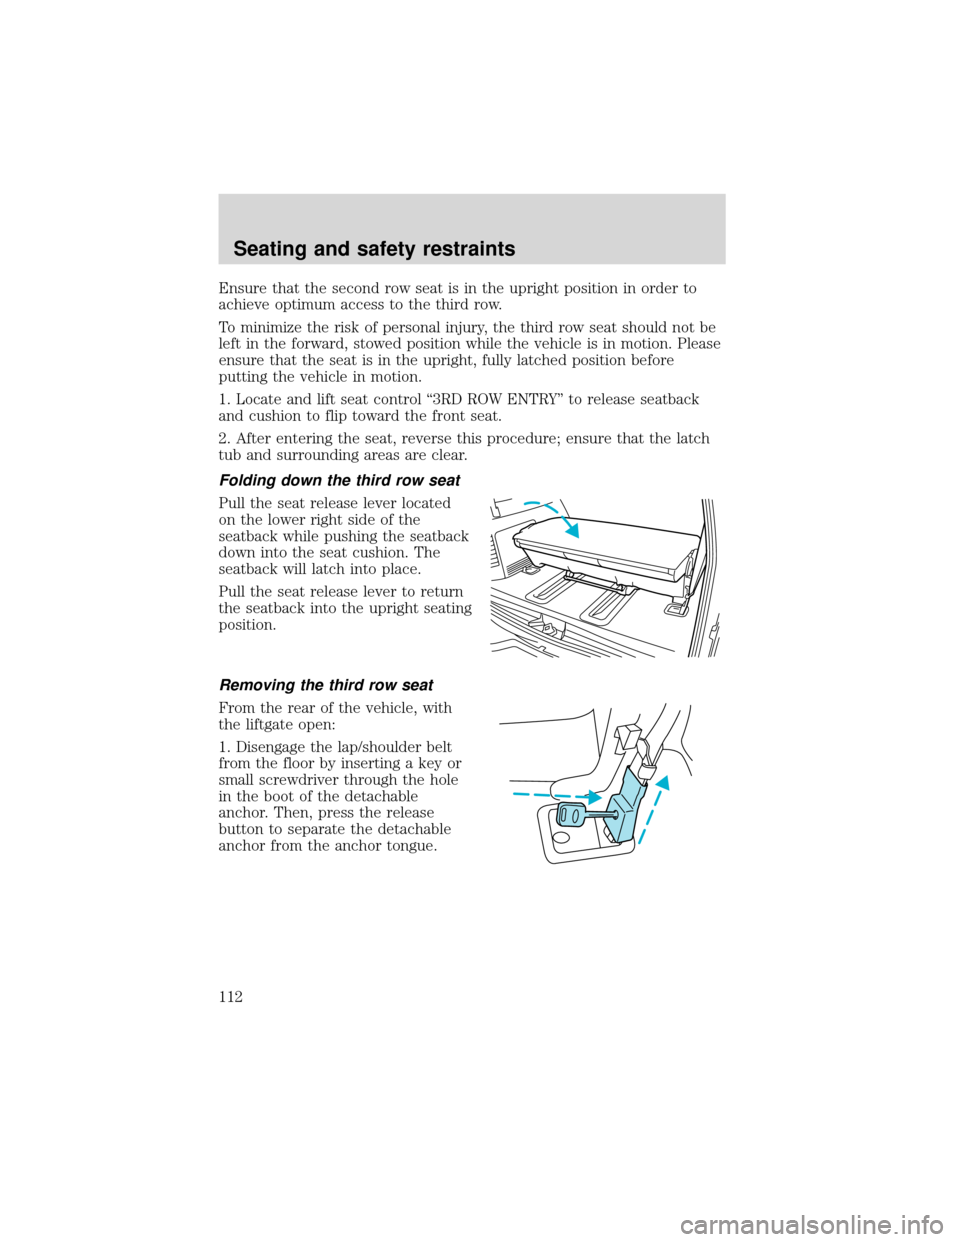
Folding down the third row seat
Pull the seat release lever located
on the lower right side of the
seatback while pushing the seatback
down into the seat cushion. The
seatback will latch into place.
Pull the seat release lever to return
the seatback into the upright seating
position.
Removing the third row seat
From the rear of the vehicle, with
the liftgate open:
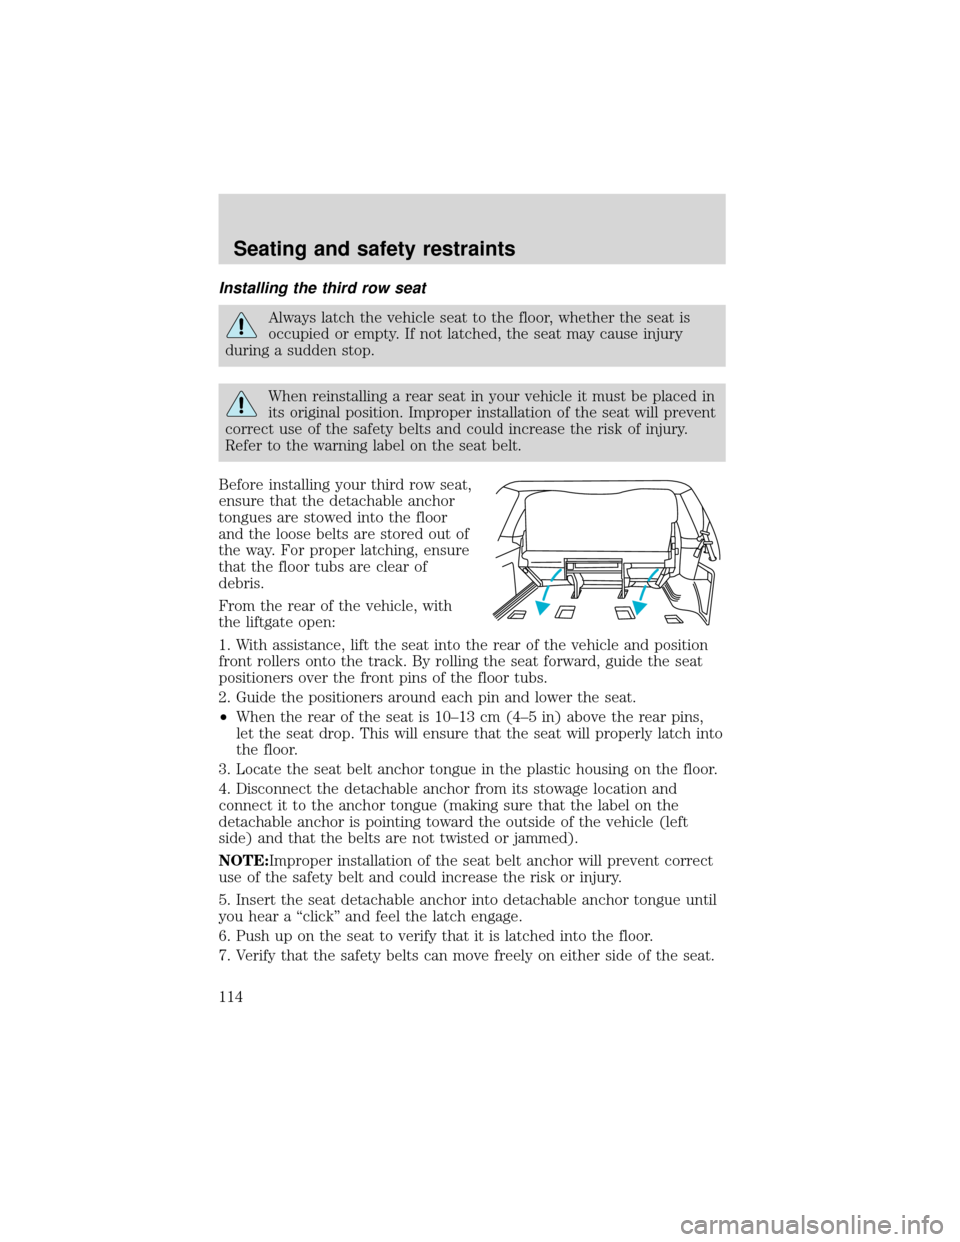
1. Disengage the lap/shoulder belt
from the floor by inserting a key or
small screwdriver through the hole
in the boot of the detachable
anchor. Then, press the release
button to separate the detachable
anchor from the anchor tongue.
Seating and safety restraints
112
Page 113 of 280
2. Before removing the seat, be sure
that the detachable anchor tongue is
stowed flat into the vehicle floor.
3. Use the black plastic clip (located
just above the detachable anchor) to
stow the loose seat belt.
•Pull the seat release lever located
on the lower right side of the
seatback while pushing the
seatback down into the seat
cushion.
•The seatback will latch into place.
4. Lift the seat release bar located
at the center of the seat near the
floor to release the floor latches.
5. While pulling up on the release
bar, lift the seat up and out of the floor tubs and roll seat rearward.
6. With assistance, lift the seat out of the vehicle.
Seating and safety restraints
113
Page 114 of 280

Installing the third row seat
Always latch the vehicle seat to the floor, whether the seat is
occupied or empty. If not latched, the seat may cause injury
during a sudden stop.
When reinstalling a rear seat in your vehicle it must be placed in
its original position. Improper installation of the seat will prevent
correct use of the safety belts and could increase the risk of injury.
Refer to the warning label on the seat belt.
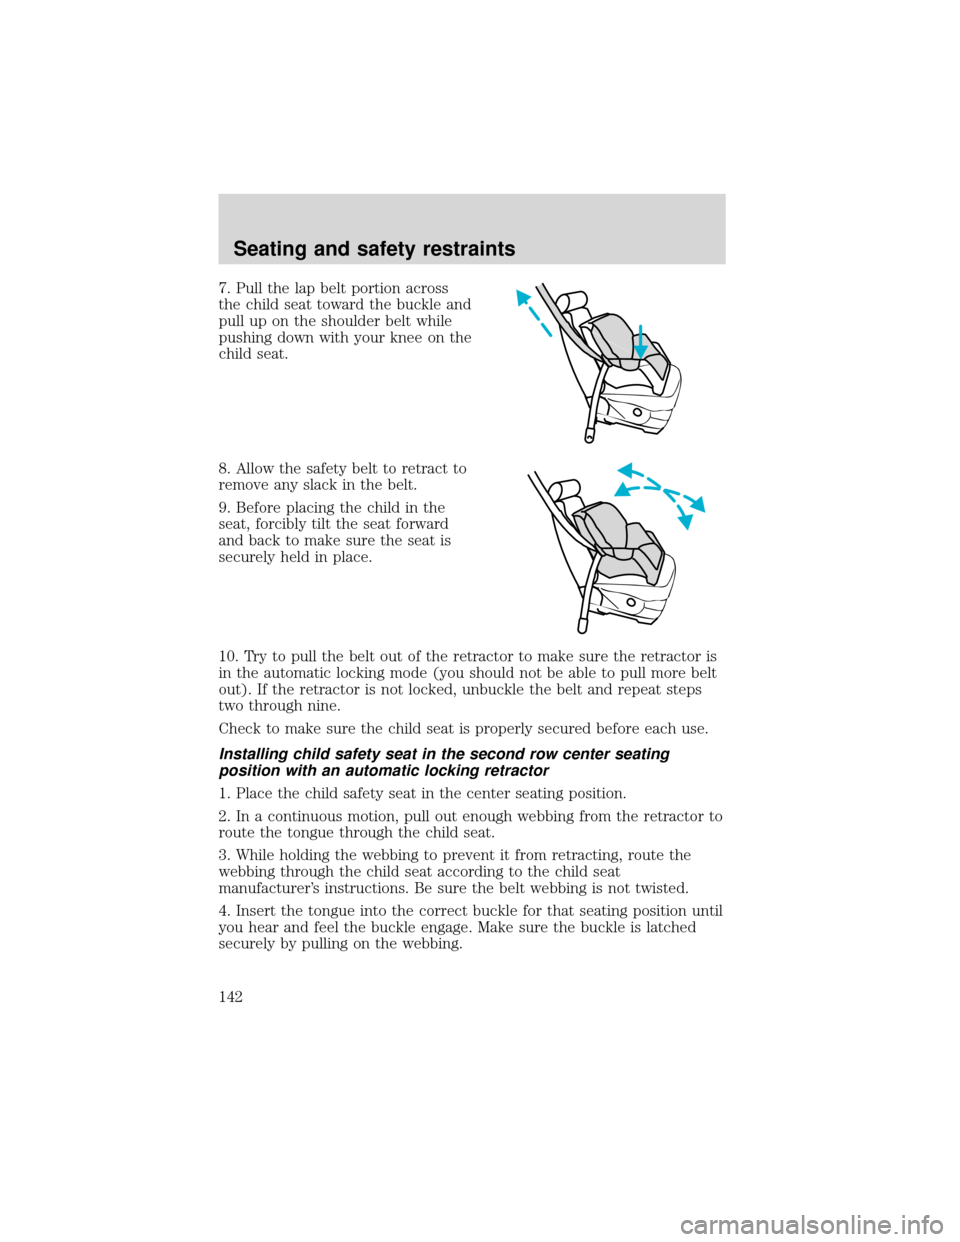
Before installing your third row seat,
ensure that the detachable anchor
tongues are stowed into the floor
and the loose belts are stored out of
the way. For proper latching, ensure
that the floor tubs are clear of
debris.
From the rear of the vehicle, with
the liftgate open:
1. With assistance, lift the seat into the rear of the vehicle and position
front rollers onto the track. By rolling the seat forward, guide the seat
positioners over the front pins of the floor tubs.
2. Guide the positioners around each pin and lower the seat.
•When the rear of the seat is 10–13 cm (4–5 in) above the rear pins,
let the seat drop. This will ensure that the seat will properly latch into
the floor.
3. Locate the seat belt anchor tongue in the plastic housing on the floor.
4. Disconnect the detachable anchor from its stowage location and
connect it to the anchor tongue (making sure that the label on the
detachable anchor is pointing toward the outside of the vehicle (left
side) and that the belts are not twisted or jammed).
NOTE:Improper installation of the seat belt anchor will prevent correct
use of the safety belt and could increase the risk or injury.
5. Insert the seat detachable anchor into detachable anchor tongue until
you hear a“click”and feel the latch engage.
6. Push up on the seat to verify that it is latched into the floor.
7. Verify that the safety belts can move freely on either side of the seat.
Seating and safety restraints
114
Page 115 of 280
3rd row tip/stow feature
The 3rd row seat has a tip/stow feature to increase cargo space without
removing the seat from the vehicle.
To put seat in tip/stow position:
1. Pull the seat release lever located
on the lower right side of the
seatback while pushing the seatback
down into the seat cushion.
2. The seatback will latch into place.
3. To release the rear floor latches
of the 3rd row seat, lift the seat
release bar located at the center of
the seat near the floor to release the
floor latches.
4. Lift back of seat up and hold.
5. Lift latch up and out of floor tub
to upright position using the strap
on the latch.
Seating and safety restraints
115
Page 130 of 280
Do not put anything on or over the air bag module. Placing
objects on or over the air bag inflation area may cause those
objects to be propelled by the air bag into your face and torso causing
serious injury.
Do not attempt to service, repair, or modify the Air Bag
Supplemental Restraint System or its fuses. See your Ford or
Lincoln Mercury dealer.
Modifications to the front end of the vehicle, including frame,
bumper, front end body structure and tow hooks may affect the
performance of the air bag sensors increasing the risk of injury. Do not
modify the front end of the vehicle.
Additional equipment may affect the performance of the air bag
sensors increasing the risk of injury. Please refer to the Body
Builders Layout Book for instructions about the appropriate installation
of additional equipment.
Seating and safety restraints
130
Page 142 of 280

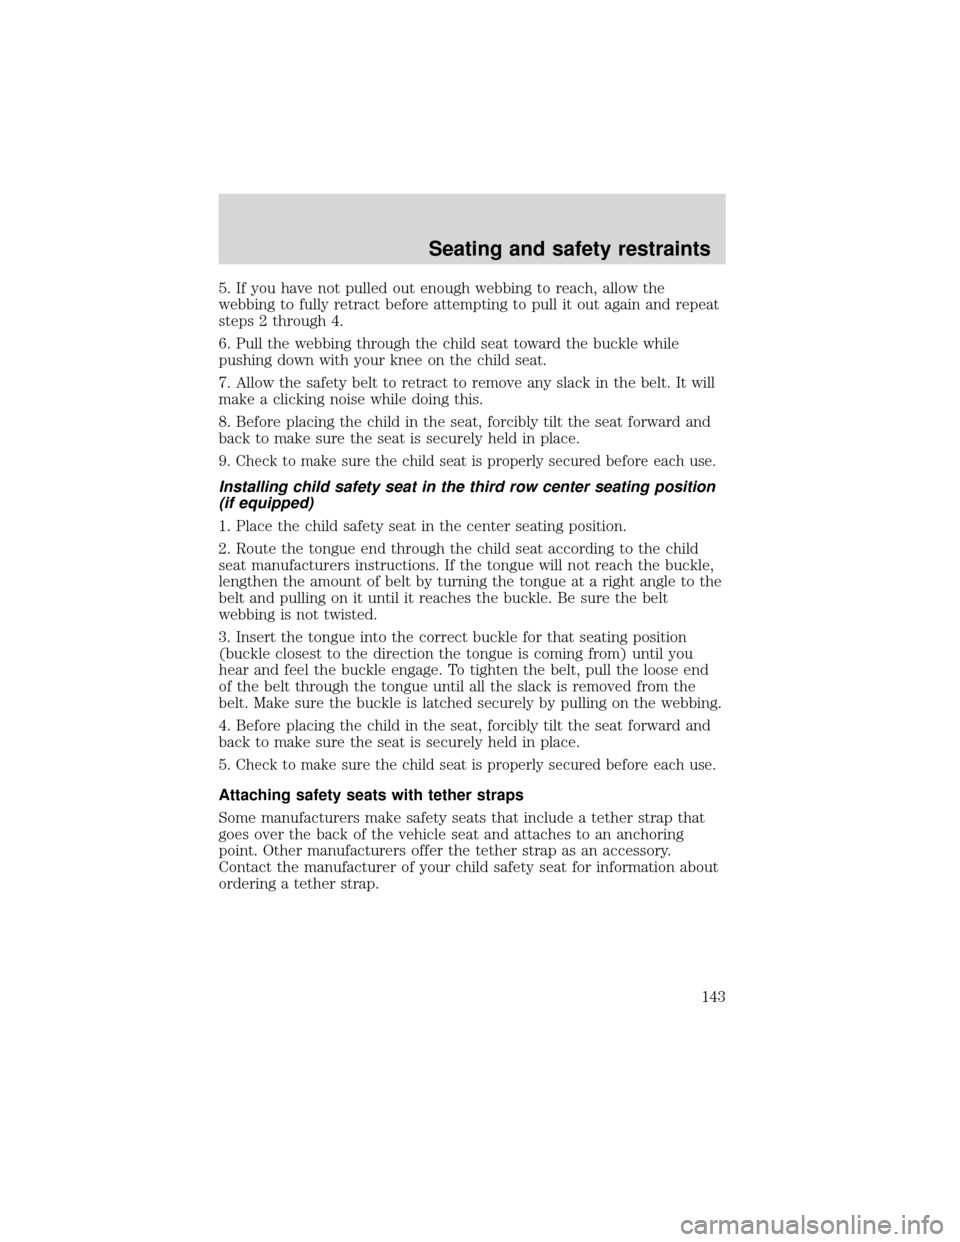
7. Pull the lap belt portion across
the child seat toward the buckle and
pull up on the shoulder belt while
pushing down with your knee on the
child seat.
8. Allow the safety belt to retract to
remove any slack in the belt.
9. Before placing the child in the
seat, forcibly tilt the seat forward
and back to make sure the seat is
securely held in place.
10. Try to pull the belt out of the retractor to make sure the retractor is
in the automatic locking mode (you should not be able to pull more belt
out). If the retractor is not locked, unbuckle the belt and repeat steps
two through nine.
Check to make sure the child seat is properly secured before each use.
Installing child safety seat in the second row center seating
position with an automatic locking retractor
1. Place the child safety seat in the center seating position.
2. In a continuous motion, pull out enough webbing from the retractor to
route the tongue through the child seat.
3. While holding the webbing to prevent it from retracting, route the
webbing through the child seat according to the child seat
manufacturer’s instructions. Be sure the belt webbing is not twisted.
4. Insert the tongue into the correct buckle for that seating position until
you hear and feel the buckle engage. Make sure the buckle is latched
securely by pulling on the webbing.
Seating and safety restraints
142
Page 143 of 280

5. If you have not pulled out enough webbing to reach, allow the
webbing to fully retract before attempting to pull it out again and repeat
steps 2 through 4.
6. Pull the webbing through the child seat toward the buckle while
pushing down with your knee on the child seat.
7. Allow the safety belt to retract to remove any slack in the belt. It will
make a clicking noise while doing this.
8. Before placing the child in the seat, forcibly tilt the seat forward and
back to make sure the seat is securely held in place.
9.
Check to make sure the child seat is properly secured before each use.
Installing child safety seat in the third row center seating position
(if equipped)
1. Place the child safety seat in the center seating position.
2. Route the tongue end through the child seat according to the child
seat manufacturers instructions. If the tongue will not reach the buckle,
lengthen the amount of belt by turning the tongue at a right angle to the
belt and pulling on it until it reaches the buckle. Be sure the belt
webbing is not twisted.
3. Insert the tongue into the correct buckle for that seating position
(buckle closest to the direction the tongue is coming from) until you
hear and feel the buckle engage. To tighten the belt, pull the loose end
of the belt through the tongue until all the slack is removed from the
belt. Make sure the buckle is latched securely by pulling on the webbing.
4. Before placing the child in the seat, forcibly tilt the seat forward and
back to make sure the seat is securely held in place.
5.
Check to make sure the child seat is properly secured before each use.
Attaching safety seats with tether straps
Some manufacturers make safety seats that include a tether strap that
goes over the back of the vehicle seat and attaches to an anchoring
point. Other manufacturers offer the tether strap as an accessory.
Contact the manufacturer of your child safety seat for information about
ordering a tether strap.
Seating and safety restraints
143
Page 157 of 280

The air suspension shut-off switch is
located behind an access panel
underneath the passenger side
instrument panel.
On vehicles equipped with
Air Suspension, turn OFF
the Air Suspension switch prior to
jacking, hoisting or towing your
vehicle.
Normal vehicle operation does not
require any action by the driver.
Check air suspension indicator light
The warning and indicator light CK SUSP illuminates when the air
suspension switch is turned off or an air suspension system fault has
been detected.
If the light is illuminated while driving and the air suspension system
switch is not turned off, safely pull off the road at your earliest
convenience. Turn the ignition switch from 4 (On) to 3 (Off) and 4 (On)
again. If the warning light illuminates again, turn the air suspension
switch off and have the vehicle serviced by a dealer or qualified service
technician.
If the vehicle is loaded beyond the recommended maximum payload, the
CK SUSP light may illuminate. To correct this condition, remove or
redistribute the payload according to the recommended requirements
and follow the procedure outlined above.
TRACTION-LOK AXLE (IF EQUIPPED)
This axle provides added traction on slippery surfaces, particularly when
one wheel is on a poor traction surface. Under normal conditions, the
Traction-Lok axle functions like a standard rear axle.
Extended use of other than the manufacturer’s specified size tires on a
Traction-Lok rear axle could result in a permanent reduction in
effectiveness. This loss of effectiveness does not affect normal driving
and should not be noticeable to the driver.
AIR SUSPENSION
SWITCH
INTERRUPTEUR DE
LA SUSPENSION
PNEUMATIQUE
OFF
Driving
157