Page 123 of 468
2-40
Electronic Transfer Case (If Equipped)
If your four-wheel-drive vehicle has the electronic
transfer case, the transfer case switches are located to
the left of the instrument panel cluster.
Use these switches to shift into and out of four
-wheel
drive. You can choose among three driving settings:
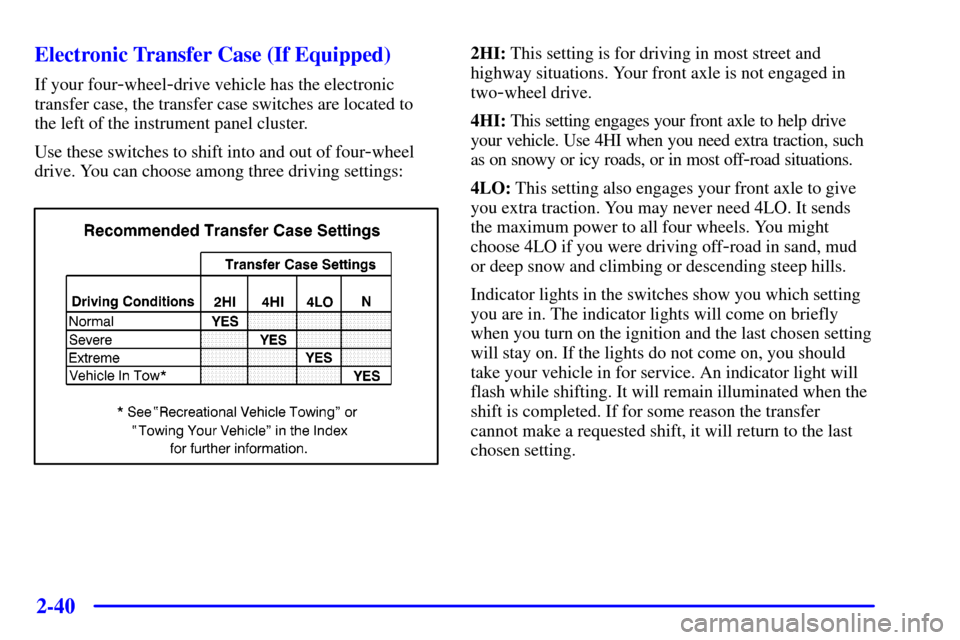
2HI: This setting is for driving in most street and
highway situations. Your front axle is not engaged in
two
-wheel drive.
4HI: This setting engages your front axle to help drive
your vehicle. Use 4HI when you need extra traction, such
as on snowy or icy roads, or in most off
-road situations.
4LO: This setting also engages your front axle to give
you extra traction. You may never need 4LO. It sends
the maximum power to all four wheels. You might
choose 4LO if you were driving off
-road in sand, mud
or deep snow and climbing or descending steep hills.
Indicator lights in the switches show you which setting
you are in. The indicator lights will come on briefly
when you turn on the ignition and the last chosen setting
will stay on. If the lights do not come on, you should
take your vehicle in for service. An indicator light will
flash while shifting. It will remain illuminated when the
shift is completed. If for some reason the transfer
cannot make a requested shift, it will return to the last
chosen setting.
Page 127 of 468
2-44
Shifting Into PARK (P)
(Automatic Transmission Only)
CAUTION:
It can be dangerous to get out of your vehicle if
the shift lever is not fully in PARK (P) with the
parking brake firmly set. Your vehicle can roll.
If you have left the engine running, the vehicle
can move suddenly. You or others could be
injured. To be sure your vehicle won't move, even
when you're on fairly level ground, use the steps
that follow. With four
-wheel drive if your
transfer case is in NEUTRAL, your vehicle will
be free to roll, even if your shift lever is in
PARK (P). So, be sure the transfer case is in a
drive gear
-- not in NEUTRAL. If you're pulling
a trailer, see ªTowing a Trailerº in the Index.
1. Hold the brake pedal down with your right foot and
set the parking brake.
2. Move the shift lever into PARK (P) position like this:
�Pull the shift lever toward you.
Page 128 of 468

2-45
�Move the lever up as far as it will go.
3. Be sure the transfer case is in a drive gear
-- not
in NEUTRAL (N).
4. Turn the ignition key to LOCK.
5. Remove the key and take it with you. If you can
leave your vehicle with the ignition key in your
hand, your vehicle is in PARK (P).
Leaving Your Vehicle With the Engine
Running (Automatic Transmission Only)
CAUTION:
It can be dangerous to leave your vehicle with
the engine running. Your vehicle could move
suddenly if the shift lever is not fully in PARK (P)
with the parking brake firmly set. If you have
four
-wheel drive with a manual transfer
case shift lever and your transfer case is in
NEUTRAL, your vehicle will be free to roll,
even if your shift lever is in PARK (P). So be
sure the transfer case is in a drive gear
-- not in
NEUTRAL. And, if you leave the vehicle with the
engine running, it could overheat and even catch
fire. You or others could be injured. Don't leave
your vehicle with the engine running unless
you have to.
Page 132 of 468
2-49
CAUTION:
It can be dangerous to get out of your vehicle if
the shift lever is not fully in PARK (P) with the
parking brake firmly set. Your vehicle can roll.
Don't leave your vehicle when the engine is
running unless you have to. If you've left the
engine running, the vehicle can move suddenly.
You or others could be injured. To be sure your
vehicle won't move, even when you're on fairly
level ground, always set your parking brake and
move the shift lever to PARK (P).
Four-wheel drive vehicles with the transfer case
in NEUTRAL will allow the vehicle to roll, even if
your shift lever is in PARK (P). So, be sure the
transfer case is in a drive gear
-- not in
NEUTRAL. Always set your parking brake.
Follow the proper steps to be sure your vehicle won't
move. See ªShifting Into PARK (P)º in the Index.
If you're pulling a trailer, see ªTowing a Trailerº in
the Index.
Manual Selectable Ride (If Equipped)
The main function of this system is to provide superior
ride comfort while trailering or fully loaded, as well as
for unloaded driving. This system also helps to provide:
�Improved trailering stability
�Improved handling response when trailering or
fully loaded
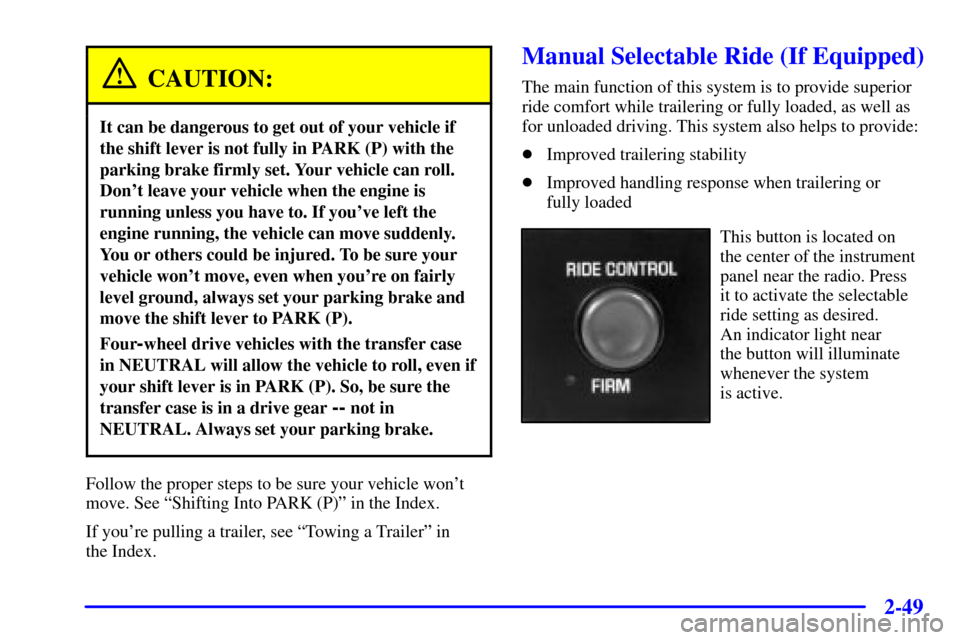
This button is located on
the center of the instrument
panel near the radio. Press
it to activate the selectable
ride setting as desired.
An indicator light near
the button will illuminate
whenever the system
is active.
Page 180 of 468
2-97
CAUTION:
Don't keep driving if the oil pressure is low.
If you do, your engine can become so hot that it
catches fire. You or others could be burned.
Check your oil as soon as possible and have your
vehicle serviced.
NOTICE:
Damage to your engine from neglected oil
problems can be costly and is not covered by
your warranty.
Cruise Light (If Equipped)
United States Canada
The CRUISE light comes on whenever you set your
cruise control. See ªCruise Controlº in the Index.
4WD Light (If Equipped)
The 4WD indicator will
light up when you shift a
manual transfer case into
four
-wheel drive and the
front axle engages.
Some delay between shifting and the indicator's lighting
is normal.
See ªFour
-Wheel Driveº in the Index for more information.
Page 223 of 468
4-
4-1
Section 4 Your Driving and the Road
Here you'll find information about driving on different kinds of roads and in varying weather conditions.
We've also included many other useful tips on driving.
4
-2 Defensive Driving
4
-3 Drunken Driving
4
-6 Control of a Vehicle
4
-6 Braking
4
-9 Traction Assist System (Option)
4
-12 Steering
4
-14 Off-Road Recovery
4
-14 Passing
4
-16 Loss of Control
4
-17 Off-Road Driving with Your
Four
-Wheel-Drive Vehicle
4
-32 Driving at Night4
-33 Driving in Rain and on Wet Roads
4
-36 City Driving
4
-37 Freeway Driving
4
-38 Before Leaving on a Long Trip
4
-39 Highway Hypnosis
4
-39 Hill and Mountain Roads
4
-41 Winter Driving
4
-45 Recreational Vehicle Towing
4
-47 Loading Your Vehicle
4
-49 Adding a Snow Plow or Similar Equipment
4
-55 Camper Wiring Harness (If Equipped)
4
-56 Pickup Conversion to Chassis Cab
4
-56 Towing a Trailer
Page 239 of 468

4-17
Off-Road Driving with Your
Four
-Wheel-Drive Vehicle
This off-road guide is for vehicles that have
four
-wheel drive.
Also, see ªAnti
-Lock Brakesº in the Index.
If your vehicle doesn't have four
-wheel drive, you
shouldn't drive off
-road unless you're on a level,
solid surface.
Off
-road driving can be great fun. But it does have
some definite hazards. The greatest of these is the
terrain itself.
ªOff
-roadingº means you've left the great North
American road system behind. Traffic lanes aren't
marked. Curves aren't banked. There are no road signs.
Surfaces can be slippery, rough, uphill or downhill.
In short, you've gone right back to nature.
Off
-road driving involves some new skills. And that's
why it's very important that you read this guide. You'll
find many driving tips and suggestions. These will help
make your off
-road driving safer and more enjoyable.If you think you will need some more ground clearance
at the front of your vehicle, you can easily remove the
front bumper lower air dam.
The front bumper lower air dam is held in place by a
series of push pins located around the lower edge of
the front bumper. The push
-pins are accessible from
underneath the front bumper.
Page 241 of 468
4-19
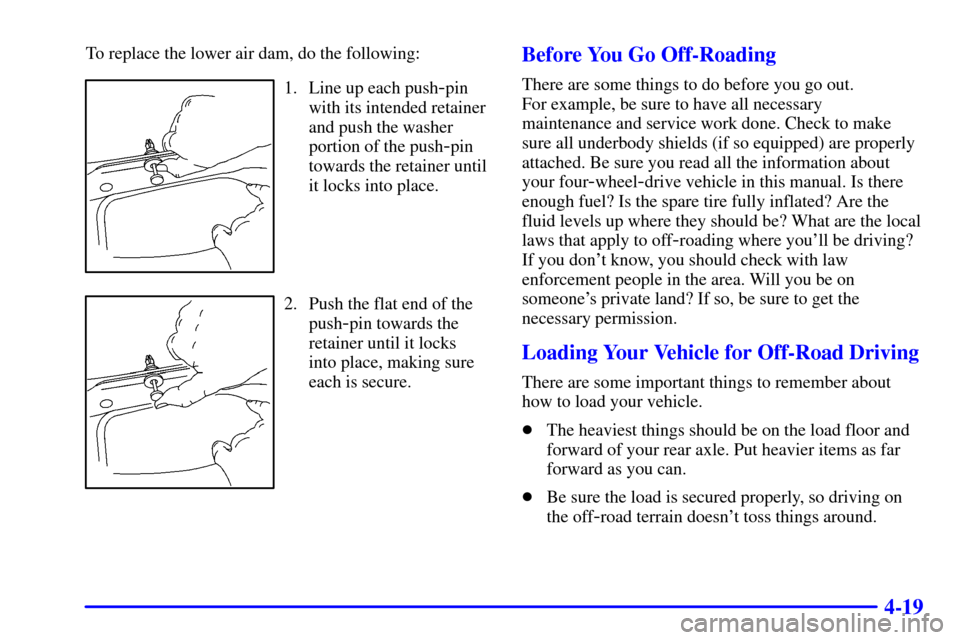
To replace the lower air dam, do the following:
1. Line up each push-pin
with its intended retainer
and push the washer
portion of the push
-pin
towards the retainer until
it locks into place.
2. Push the flat end of the
push
-pin towards the
retainer until it locks
into place, making sure
each is secure.
Before You Go Off-Roading
There are some things to do before you go out.
For example, be sure to have all necessary
maintenance and service work done. Check to make
sure all underbody shields (if so equipped) are properly
attached. Be sure you read all the information about
your four
-wheel-drive vehicle in this manual. Is there
enough fuel? Is the spare tire fully inflated? Are the
fluid levels up where they should be? What are the local
laws that apply to off
-roading where you'll be driving?
If you don't know, you should check with law
enforcement people in the area. Will you be on
someone's private land? If so, be sure to get the
necessary permission.
Loading Your Vehicle for Off-Road Driving
There are some important things to remember about
how to load your vehicle.
�The heaviest things should be on the load floor and
forward of your rear axle. Put heavier items as far
forward as you can.
�Be sure the load is secured properly, so driving on
the off
-road terrain doesn't toss things around.


