Page 16 of 383

xiv
For example,
these symbols
are used on an
original battery:
CAUTION
POSSIBLE
INJURY
PROTECT
EYES BY
SHIELDING
CAUSTIC
BATTERY
ACID COULD
CAUSE
BURNS
AVOID
SPARKS OR
FLAMES
SPARK OR
FLAME
COULD
EXPLODE
BATTERY
These symbols
are important for
you and your
passengers
whenever your
vehicle is driven:
CHILD
RESTRAINT
TOP STRAP
ANCHOR
DOOR LOCK
UNLOCK
FASTEN
SEAT
BELTS
POWER
WINDOW
AIR BAG
These symbols
have to do with
your lamps:
MASTER
LIGHTING
SWITCH
TURN
SIGNALS
PARKING
LAMPS
HAZARD
WARNING
FLASHER
DAYTIME
RUNNING
LAMPS
FOG LAMPS
These symbols
are on some of
your controls:
WINDSHIELD
WIPER
WINDSHIELD
WASHER
WINDSHIELD
DEFROSTER
REAR
WINDOW
DEFOGGER
VENTILATING
FAN
These symbols
are used on
warning and
indicator lights:
ENGINE
COOLANT
TEMP
BATTERY
CHARGING
SYSTEM
BRAKE
COOLANT
ENGINE OIL
PRESSURE
ANTI-LOCK
BRAKES
Here are some
other symbols
you may see:
FUSE
LIGHTER
HORN
FUEL
Vehicle Symbols
These are some of the symbols you may find on your vehicle. Also see ªWarning Lights and Gagesº in the Index.
Page 78 of 383
2-16
CAUTION:
It can be dangerous to drive with the hatch/trunk
lid open because carbon monoxide (CO) gas can
come into your vehicle. You can't see or smell
CO. It can cause unconsciousness and even death.
If you must drive with the hatch/trunk lid open
or if electrical wiring or other cable connections
must pass through the seal between the body and
the hatch/trunk lid:
�Make sure all other windows are shut.
�Turn the fan on your heating or cooling
system to its highest speed with the setting
on BI
-LEVEL or VENT. That will force
outside air into your vehicle. See ªComfort
Controlsº in the Index.
�If you have air outlets on or under the
instrument panel, open them all the way.
See ªEngine Exhaustº in the Index.
NOTICE:
If you put things in the hatch/trunk area, be sure
they won't break the glass when you close it.
Never slam the hatch/trunk lid down. You could
break the glass or damage the defogger grid.
When you close the hatch/trunk lid, make sure
you pull down from the center, not the sides. If
you pull the hatch/trunk lid down from the side
too often, the weatherstrip can be damaged.
NOTICE:
Do not store heavy or sharp objects in the rear
storage compartments located in the hatch/trunk
area. If you do, the objects could damage
the underbody.
Page 107 of 383

2-45
You can open the doors manually using the knob next to
the headlamp assembly. Turn the knob counterclockwise
until the doors are open. Turn the knob clockwise to
close the doors manually.
The headlamp doors should be open when driving in
icy or snowy conditions to prevent the doors from
freezing closed and when washing the vehicle to help
clean the headlamps.
NOTICE:
In order to avoid possible contact of the hood to
the headlamp doors, either take care in raising
the hood with the headlamps up, or turn off the
headlamps prior to opening the hood.
Headlamp High/Low-Beam Changer
To change the headlamps from low beam to high or high
to low, push the turn signal lever all the way forward.
When the high beams
are on, this light on the
instrument panel cluster
also will be on. To change
the headlamps from high to
low, pull the lever rearward.
Lamps on Reminder
If you turn the ignition off and leave the headlamps or
parking lamps on and open a door, you will hear a chime
reminding you to turn off the lamps.
Flash-to-Pass Feature
To use the flash-to-pass feature, momentarily pull the
turn signal lever toward you. The high
-beam indicator
will flash to indicate to the other driver that you intend
to pass. If the low
-beam headlamps are off and you have
the optional fog lamps on, the fog lamps will flash.
Page 113 of 383
2-51
Exterior Lamps
Daytime Running Lamps
Daytime Running Lamps (DRL) can make it easier for
others to see the front of your vehicle during the day.
DRL can be helpful in many different driving
conditions, but they can be especially helpful in the
short periods after dawn and before sunset. Fully
functional daytime running lights are required on all
vehicles first sold in Canada.
The DRL system will make the front turn signal lamps
come on when the following conditions are met:
�The ignition is on,
�the headlamp switch is off and
�the parking brake is released.
When the DRL are on, only the front turn signal lamps
will be on. The headlamps, taillamps, sidemarker and
other lamps won't be on. Your instrument panel won't
be lit up either.
To idle the vehicle with the DRL off, set the parking
brake while the ignition is in OFF. Then start the
vehicle. The DRL, headlamps and parking lamps will
stay off until you release the parking brake.
As with any vehicle, you should turn on the regular
headlamp system when you need it.
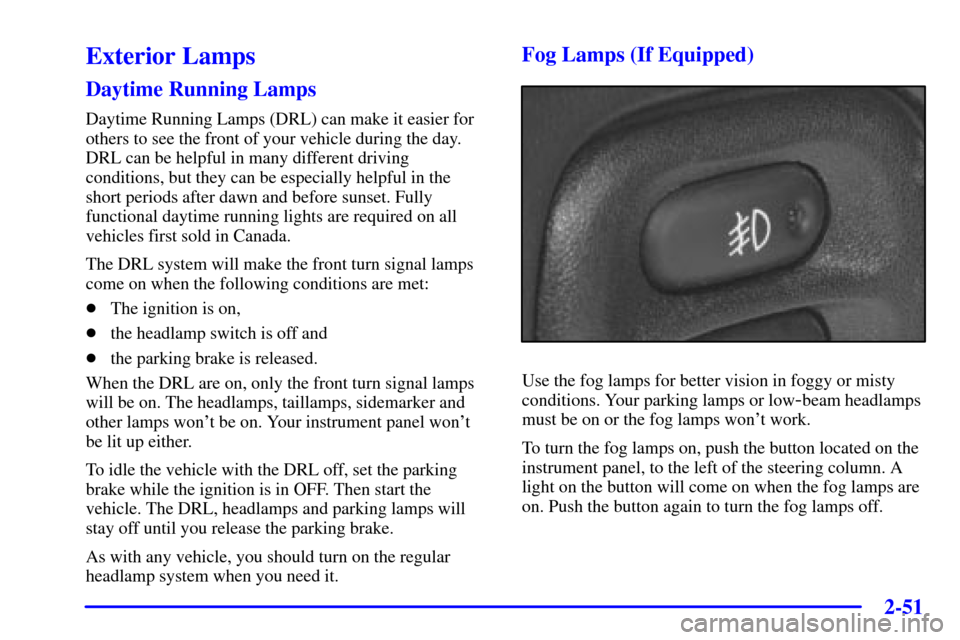
Fog Lamps (If Equipped)
Use the fog lamps for better vision in foggy or misty
conditions. Your parking lamps or low
-beam headlamps
must be on or the fog lamps won't work.
To turn the fog lamps on, push the button located on the
instrument panel, to the left of the steering column. A
light on the button will come on when the fog lamps are
on. Push the button again to turn the fog lamps off.
Page 118 of 383
2-56
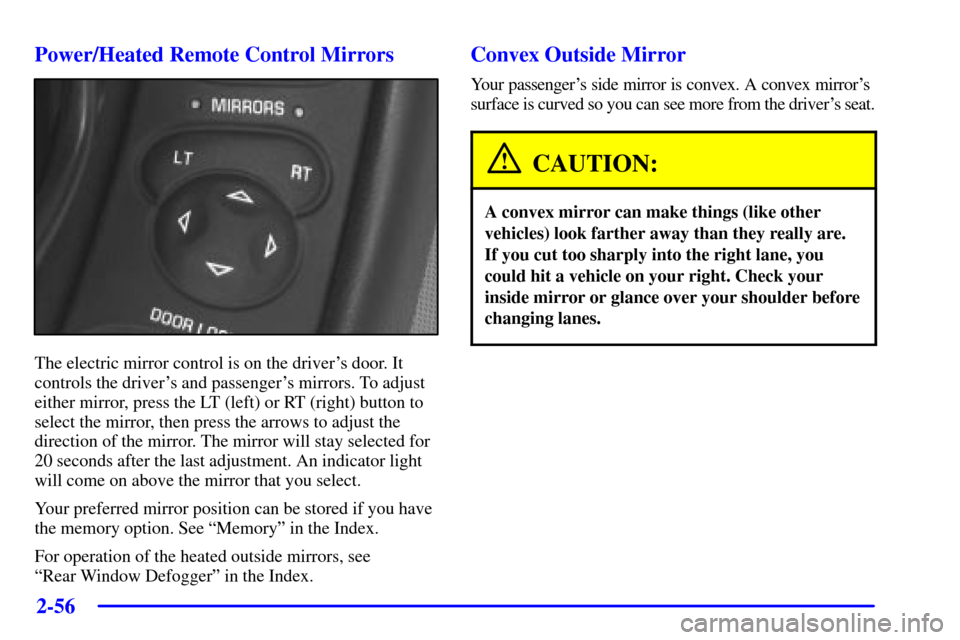
Power/Heated Remote Control Mirrors
The electric mirror control is on the driver's door. It
controls the driver's and passenger's mirrors. To adjust
either mirror, press the LT (left) or RT (right) button to
select the mirror, then press the arrows to adjust the
direction of the mirror. The mirror will stay selected for
20 seconds after the last adjustment. An indicator light
will come on above the mirror that you select.
Your preferred mirror position can be stored if you have
the memory option. See ªMemoryº in the Index.
For operation of the heated outside mirrors, see
ªRear Window Defoggerº in the Index.
Convex Outside Mirror
Your passenger's side mirror is convex. A convex mirror's
surface is curved so you can see more from the driver's seat.
CAUTION:
A convex mirror can make things (like other
vehicles) look farther away than they really are.
If you cut too sharply into the right lane, you
could hit a vehicle on your right. Check your
inside mirror or glance over your shoulder before
changing lanes.
Page 139 of 383

2-77
The main components of your instrument panel are the following:
A. Instrument Panel Brightness Control
B. Head
-Up Display Controls (Option)
C. Turn Signal/Multifunction Lever
D. Driver Information Center (DIC)
(Located in the Instrument Cluster)
E. Instrument Panel Cluster
F. Windshield Wiper/Washer Lever
G. Driver Information Center (DIC) Buttons
H. Hazard Warning Flasher Button
I. Center Air Vents
J. Audio System
K. Comfort Controls
L. Fog Lamp Button (If Equipped)
M. Remote Hatch Release Button (Coupe) or
Remote Trunk Release Button (Convertible/Hardtop)
N. Ignition SwitchO. Shift Lever (Automatic Shown)
P. Traction Control System (TCS) Switch/Active
Handling Switch
Q. Accessory Power Outlet
(Located in the Center Console)
R. Selective Real Time Damping (SRTD) (Option)
S. Air Bag Off Light
T. Instrument Panel Cupholder
U. Remote Fuel Door Release Button
(Located in the Center Console)
V. Ashtray and Cigarette Lighter
W. Parking Brake
X. Glove Box
Y. Instrument Panel Fuse Block
(Located behind the Toe
-Board)
Z. Air Bag Off Switch (Located in Glove Box)
Page 163 of 383

2-101
Approach Lights
Press the OPTIONS button until APPROACH LIGHTS
appears on the display, then use the RESET button to
page through the following choices:
�APPROACH LIGHTS ON
�APPROACH LIGHTS OFF
If you choose APPROACH LIGHTS ON, the fog lamps,
front turn signal, rear back
-up and courtesy lamps will
come on for 30 seconds when you press UNLOCK on
the remote keyless entry transmitter. This will occur
only when it is dark outside.
APPROACH LIGHTS OFF turns off this option.
See ªRemote Keyless Entry (RKE) Systemº in the Index
for more information.
Auto Lock
Press the OPTIONS button until AUTO LOCK appears
on the display, then use the RESET button to page
through the following choices:
�AUTO LOCK ON
�AUTO LOCK OFFIf you choose AUTO LOCK ON, both doors will
automatically lock when the vehicle exceeds 10 mph
(16 km/h) in a manual transmission. In a vehicle with an
automatic transmission, both doors will automatically
lock when you move the shift lever out of PARK (P).
Choose AUTO LOCK OFF to turn this option off.
Auto Unlock
The AUTO UNLOCK will be available only if AUTO
LOCK is set to ON as described previously.
Press the OPTIONS button until AUTO UNLOCK
appears on the display, then use the RESET button to
page through the following choices:
�AUTO UNLOCK DRIVER
�AUTO UNLOCK BOTH
�AUTO UNLOCK OFF
If you choose AUTO UNLOCK DRIVER, the driver's
door will automatically unlock when you turn the
vehicle off and pull the key out of the ignition.
Choose AUTO UNLOCK BOTH, and both doors will
automatically unlock when you turn the vehicle off and
pull the key out of the ignition.
AUTO UNLOCK OFF turns off this option.
Page 179 of 383
3-
3-1
Section 3 Comfort Controls and Audio Systems
In this section, you'll find out how to operate the comfort control and audio systems offered with your vehicle.
Be sure to read about the particular systems supplied with your vehicle.
3
-2 Comfort Controls
3
-2 Manual Comfort Controls
3
-4 Automatic Electronic Dual Climate
Control System (Option)
3
-9 Sensors
3
-10 Air Conditioning
3
-11 Heating
3
-11 Defogging and Defrosting
3
-11 Rear Window Defogger
3
-12 Audio Systems
3
-12 Setting the Clock
3
-13 AM-FM Stereo with Cassette Tape Player and
Automatic Tone Control3
-18 AM-FM Stereo with Compact Disc Player and
Automatic Tone Control (Option)
3
-22 Trunk-Mounted CD Changer (Option)
3
-27 Theft-Deterrent Feature
3
-29 Understanding Radio Reception
3
-29 Tips About Your Audio System
3
-30 Care of Your Cassette Tape Player
3
-31 Care of Your Compact Discs
3
-31 Care of Your Compact Disc Player
3
-31 Fixed Mast Antenna (Z06)
3
-32 Power Antenna Mast Care (Convertible)
3
-32 Integrated Windshield and Rear Window
Antennas (Coupe)