Page 118 of 448
2-50
Rear Window Washer/Wiper
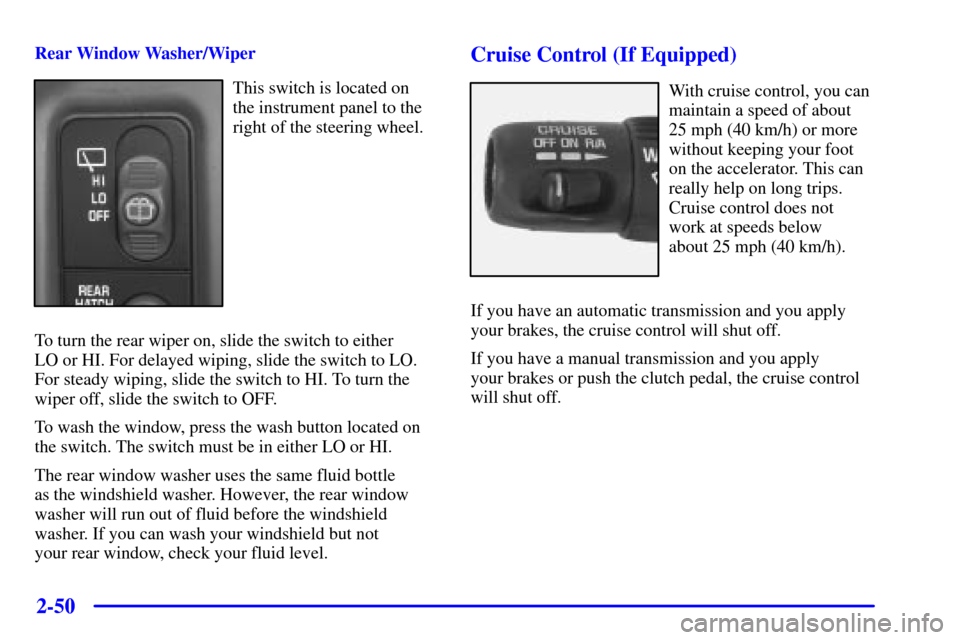
This switch is located on
the instrument panel to the
right of the steering wheel.
To turn the rear wiper on, slide the switch to either
LO or HI. For delayed wiping, slide the switch to LO.
For steady wiping, slide the switch to HI. To turn the
wiper off, slide the switch to OFF.
To wash the window, press the wash button located on
the switch. The switch must be in either LO or HI.
The rear window washer uses the same fluid bottle
as the windshield washer. However, the rear window
washer will run out of fluid before the windshield
washer. If you can wash your windshield but not
your rear window, check your fluid level.
Cruise Control (If Equipped)
With cruise control, you can
maintain a speed of about
25 mph (40 km/h) or more
without keeping your foot
on the accelerator. This can
really help on long trips.
Cruise control does not
work at speeds below
about 25 mph (40 km/h).
If you have an automatic transmission and you apply
your brakes, the cruise control will shut off.
If you have a manual transmission and you apply
your brakes or push the clutch pedal, the cruise control
will shut off.
Page 258 of 448

4-42 Two-Wheel Drive Vehicles and Vehicles
with the Electronic Shift Transfer Case
Tw o-wheel-drive vehicles and vehicles with the
Electronic Shift Transfer Case should not be towed
with all four wheels on the ground. These transmissions
have no provisions for internal lubrication while being
towed. To properly tow these vehicles, they should be
placed on a platform trailer with all four wheels off the
ground. Towing with all four wheels on the ground
should be avoided.
In rare cases when it's unavoidable and your vehicle
has to be towed with all four wheels on the ground,
the propeller shaft to axle yoke orientation should be
marked and the propeller shaft removed following
the applicable service manual removal/installation
procedure. See ªService and Owner Publicationsº in
the Index.
Dust or dirt can enter the back of the transmission
through the opening created by removing the propeller
shaft if proper protection is not provided. Also, check
the transmission fluid level before driving the vehicle.
Four-Wheel-Drive Vehicles
(Automatic Transfer Case)
Use the following procedure to correctly tow your
vehicle on all four wheels:
1. Firmly set the parking brake.
2. Place the transmission in PARK (P).
3. Securely attach the vehicle being towed to the
tow vehicle.
Page 273 of 448
4-57 When You Are Ready to Leave After
Parking on a Hill
1. Apply your regular brakes and hold the pedal down
while you:
�Start your engine;
�Shift into a gear; and
�Release the parking brake.
2. Let up on the brake pedal.
3. Drive slowly until the trailer is clear of the chocks.
4. Stop and have someone pick up and store the chocks.
Maintenance When Trailer Towing
Your vehicle will need service more often when you're
pulling a trailer. See the Maintenance Schedule for
more on this. Things that are especially important
in trailer operation are automatic transmission fluid
(don't overfill), engine oil, axle lubricant, belt, cooling
system and brake system. Each of these is covered in
this manual, and the Index will help you find them
quickly. If you're trailering, it's a good idea to review
these sections before you start your trip.
Check periodically to see that all hitch nuts and
bolts are tight.
Page 278 of 448
5-4
2. Get the vehicles close enough so the jumper cables
can reach, but be sure the vehicles aren't touching
each other. If they are, it could cause a ground
connection you don't want. You wouldn't be able
to start your vehicle, and the bad grounding could
damage the electrical systems.
To avoid the possibility of the vehicles rolling,
set the parking brake firmly on both vehicles
involved in the procedure. Put an automatic
transmission in PARK (P) and put a manual
transmission in NEUTRAL. Be sure the transfer
case is not in NEUTRAL.
3. Turn off the ignition on both vehicles. Unplug
unnecessary accessories plugged into the cigarette
lighter, or accessory power outlets (if equipped).
Turn off all lamps that aren't needed as well as
radios. This will avoid sparks and help to save both
batteries. In addition, it could save your radio!
NOTICE:
If you leave your radio on, it could be badly
damaged. The repair wouldn't be covered by
your warranty.
4. Open both hoods and locate the batteries.
(Your vehicle's battery is located towards the front
of the vehicle, on the passenger side of the engine
compartment. See ªEngine Compartment Overviewº in
the Index for more information on location.) Find the
positive (+) and negative (
-) terminals on each battery.
CAUTION:
Using a match near a battery can cause battery
gas to explode. People have been hurt doing this,
and some have been blinded. Use a flashlight if
you need more light.
Be sure the battery has enough water. You don't
need to add water to the ACDelco� battery
(or batteries) installed in every new GM vehicle.
But if a battery has filler caps, be sure the right
amount of fluid is there. If it is low, add water to
take care of that first. If you don't, explosive gas
could be present.
Battery fluid contains acid that can burn you.
Don't get it on you. If you accidentally get it in
your eyes or on your skin, flush the place with
water and get medical help immediately.
Page 308 of 448
6-
6-1
Section 6 Service and Appearance Care
Here you will find information about the care of your vehicle. This section begins with service and fuel information,
and then it shows how to check important fluid and lubricant levels. There is also technical information about your
vehicle, and a part devoted to its appearance care.
6
-2 Service
6
-3 Fuel
6
-5 Fuels in Foreign Countries
6
-6 Filling Your Tank
6
-8 Filling a Portable Fuel Container
6
-8 Checking Things Under the Hood
6
-11 Engine Oil
6
-16 Engine Air Cleaner/Filter
6
-17 Automatic Transmission Fluid
6
-20 Manual Transmission Fluid
6
-21 Hydraulic Clutch
6
-22 Rear Axle
6
-22 Four-Wheel Drive
6
-24 Engine Coolant
6
-27 Radiator Pressure Cap
6
-28 Power Steering Fluid
6
-28 Windshield Washer Fluid6
-30 Brakes
6
-34 Battery
6
-35 Bulb Replacement
6
-42 Windshield Wiper Blade Replacement
6
-44 Tires
6
-53 Appearance Care
6
-53 Cleaning the Inside of Your Vehicle
6
-56 Care of Safety Belts
6
-57 Cleaning the Outside of Your Vehicle
6
-61 GM Vehicle Care/Appearance Materials
6
-62 Vehicle Identification Number (VIN)
6
-62 Service Parts Identification Label
6
-63 Electrical System
6
-72 Replacement Bulbs
6
-72 Capacities and Specifications
6
-73 Normal Maintenance Replacement Parts
Page 317 of 448
6-10 Engine Compartment Overview
When you lift the hood, you'll see these items:
A. Battery
B. Coolant Recovery Tank
C. Engine Oil Dipstick
D. Engine Oil FillE. Automatic
Transmission Dipstick
F. Power Steering Reservoir
G. Brake Master CylinderH. Engine Air Cleaner/Filter
I. Fuse Block
J. Windshield Washer
Fluid Reservoir
Page 324 of 448
6-17
Automatic Transmission Fluid
When to Check and Change
A good time to check your automatic transmission fluid
level is when the engine oil is changed.
Change both the fluid and filter every 15,000 miles
(25 000 km) if the vehicle is mainly driven under one or
more of these conditions:
�In heavy city traffic where the outside temperature
regularly reaches 90�F (32�C) or higher.
�In hilly or mountainous terrain.
�When doing frequent trailer towing.
�Uses such as found in taxi, police or delivery service.
If you do not use your vehicle under any of
these conditions, change the fluid and filter every
50,000 miles (83 000 km).
See ªScheduled Maintenance Servicesº in the Index.
How to Check
Because this operation can be a little difficult, you may
choose to have this done at the dealership service department.
If you do it yourself, be sure to follow all the instructions
here, or you could get a false reading on the dipstick.
NOTICE:
Too much or too little fluid can damage your
transmission. Too much can mean that some of
the fluid could come out and fall on hot engine
parts or exhaust system parts, starting a fire.
Be sure to get an accurate reading if you check
your transmission fluid.
Wait at least 30 minutes before checking the
transmission fluid level if you have been driving:
�When outside temperatures are above 90�F (32�C).
�At high speed for quite a while.
�In heavy traffic
-- especially in hot weather.
�While pulling a trailer.
Page 325 of 448
6-18
To get the right reading, the fluid should be at
normal operating temperature, which is 180�F to 200�F
(82�C to 93�C).
Get the vehicle warmed up by driving about
15 miles (24 km) when outside temperatures are above
50�F (10�C). If it's colder than 50�F (10�C), drive
the vehicle in THIRD (3) until the engine temperature
gage moves and then remains steady for 10 minutes.
A cold fluid check can be made after the vehicle has
been sitting for eight hours or more with the engine off,
but this is used only as a reference. Let the engine run
at idle for five minutes if outside temperatures are
50�F (10�C) or more. If it's colder than 50�F (10�C),
you may have to idle the engine longer. Should the fluid
level be low during this cold check, you must check the
fluid hot before adding fluid. Checking the fluid hot will
give you a more accurate reading of the fluid level.
Checking the Fluid Level
Prepare your vehicle as follows:
�Park your vehicle on a level place. Keep the
engine running.
�With the parking brake applied, place the shift lever
in PARK (P).�With your foot on the brake pedal, move the shift
lever through each gear range, pausing for about
three seconds in each range. Then, position the shift
lever in PARK (P).
�Let the engine run at idle for three minutes or more.
Then, without shutting off the engine, follow these steps:
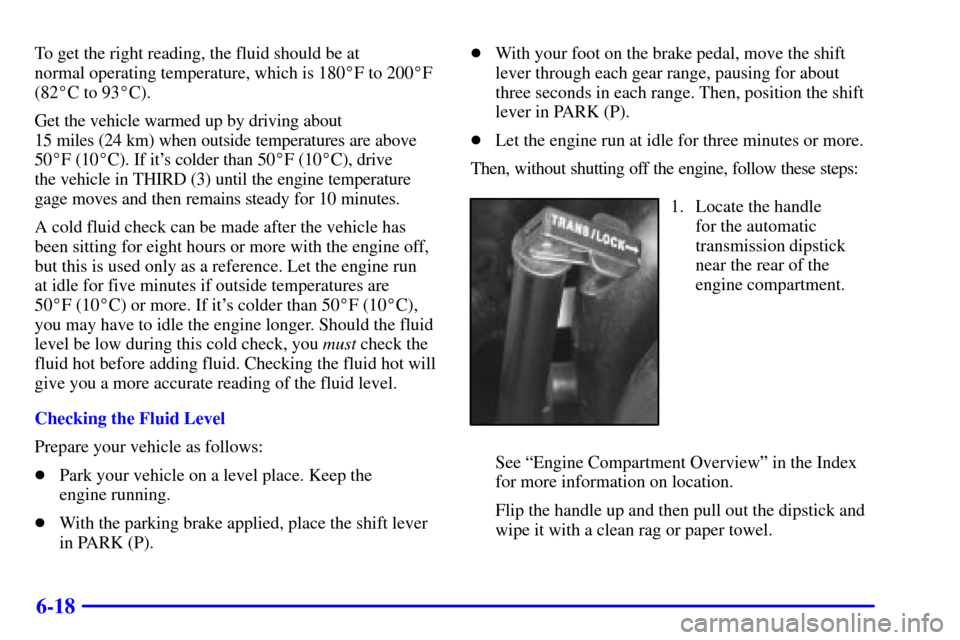
1. Locate the handle
for the automatic
transmission dipstick
near the rear of the
engine compartment.
See ªEngine Compartment Overviewº in the Index
for more information on location.
Flip the handle up and then pull out the dipstick and
wipe it with a clean rag or paper towel.